AnyDesk is the world’s most comfortable remote desktop application. Access all your programs, documents and files from anywhere, without having to entrust your data to a cloud service. You can say it’s an alternative of the TeamViewer, which is available free. Anydesk provides the faster remote connection than any other existing remote desktop application.
This article assumes you have at least basic knowledge of linux, know how to use the shell, and most importantly, you host your site on your own VPS. The installation is quite simple and assumes you are running in the root account, if not you may need to add ‘sudo’ to the commands to get root privileges. I will show you through the step by step installation AnyDesk on a Ubuntu 16.04 (Xenial Xerus) server.
Install AnyDesk on Ubuntu 16.04 LTS
Step 1. First make sure that all your system packages are up-to-date
sudo apt-get update
sudo apt-get upgrade
Step 2. Installing AnyDesk.
First, you can download it from its official website and install on Ubuntu:
### 32-Bit ###
https://download.anydesk.com/linux/anydesk_2.9.5-1_i386.deb
dpkg -i anydesk_2.9.5-1_i386.deb

### 64-Bit ###
https://download.anydesk.com/linux/anydesk_2.9.5-1_amd64.deb
dpkg -i anydesk_2.9.5-1_amd64.deb
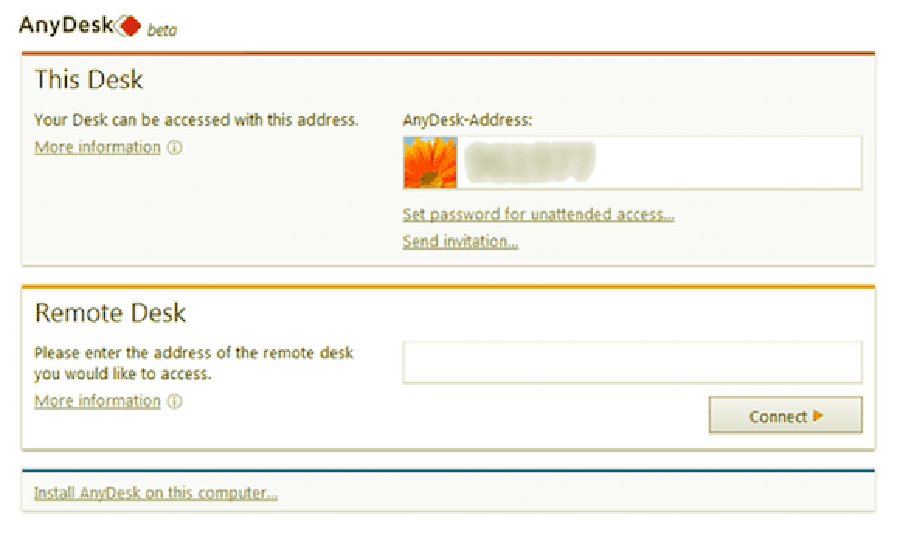
Once installation, Launch the AnyDesk on your system. You will get an AnyDesk ID for connecting from remote systems using AnyDesk. Now, You may need to set a password for unattended access. This will set a fixed password on your system, Which can be used anytime to connect.
Congratulation’s! You have successfully installed AnyDesk. Thanks for using this tutorial for installing latest stable version of AnyDesk on Ubuntu 16.04 LTS (Xenial Xerus) system. For additional help or useful information, we recommend you to check the official AnyDesk web site.