How To Install OpenEMR on Ubuntu 20.04 with a LAMP Stack (Apache, MySQL, PHP)

Introduction

OpenEMR is an open source electronic health records and medical practice management tool. It is used by physicians and healthcare facilities to manage electronic medical records, prescriptions, patient demographic tracking, scheduling, reports, and electronic billing. At the time of this publication, OpenEMR supports more than 30 languages.

In this tutorial, you will install OpenEMR on an Ubuntu 20.04 server running a LAMP environment (Linux, Apache, MySQL, PHP).

    • An Ubuntu 20.04 server with a non-root sudo-enabled user account and a basic firewall. This can be configured using our initial server setup guide for Ubuntu 20.04.
    • A fully installed LAMP stack, including Apache, MySQL, and PHP, with firewall settings adjusted to allow HTTP traffic. Instructions for installing a LAMP stack can be found in Steps 1 through 3 in our guide How To Install Linux, Apache, MySQL, PHP (LAMP) stack on Ubuntu 20.04. Note that Steps 4 through 6 of the LAMP guide are optional as they are for testing purposes and unnecessary for this tutorial.

Step 1 — Installing Additional PHP Extensions

When setting up our LAMP stack, a minimal set of extensions were required to get PHP to communicate with MySQL. OpenEMR requires two additional PHP extensions that you will need to install for it to work correctly. Use apt to update your server’s package list and install the php-xml and php-mbstring extensions:

 $ sudo apt update
 $sudo apt install php-xml php-mbstring

After both extensions have been installed, you’ll need to reload the Apache web server for changes to take effect:

 $ sudo systemctl reload apache2

When your webserver has reloaded, you should be ready to proceed to the next step.

Step 2 — Create a MySQL Database for OpenEMR
You will now create a database in MySQL for OpenEMR. First, log in to MySQL as the database root user:

 $ sudo mysql

Once you are logged into MySQL as the database root user, create a database named openemr with the following command:

mysql> CREATE DATABASE openemr;
Next, create a new user and assign them a password by replacing PASSWORD below with a strong password of your choosing:
mysql>CREATE USER 'openemr_user'@'localhost' IDENTIFIED BY 'PASSWORD';
Next, grant the new user permission to the openemr database:
mysql> GRANT ALL PRIVILEGES ON openemr.* TO 'openemr_user'@'localhost';
To enable these changes, enter the following command:
mysql> FLUSH PRIVILEGES;
Once you have flushed the privileges, you can now exit MySQL:
mysql> exit

You are now ready to proceed to the next step.

Step 3 — Configuring PHP for OpenEMR

In this step, you’ll make some changes to the php.ini file as recommended by OpenEMR documentation. If you followed all prerequisites within a fresh Ubuntu 20.04 server, the php.ini that applies to your Apache web server should be located at /etc/php/7.4/apache2/php.ini. In case you have a different PHP version, this path may be slightly different. Adjust as necessary and open the file with a text editor of your choice. Here, we’ll use nano:

 $ sudo nano /etc/php/7.4/apache2/php.ini

Once you are in the php.ini file, you will change the values of several options as recommended by OpenEMR. If you are using nano, you can search for these options using CTRL + W. If there is a semicolon ; in front of the option you are adjusting, make sure to delete it as a semicolon is used to comment out an option.

Values for the following options should be changed:

max_ input_vars
This option limits the number of variables your server can use in a single function. OpenEMR requires this option to have the value 3000:

/etc/php/7.4/apache2/php.ini
max_input_vars = 3000
max_execution_time
This option limits the amount of time (in seconds) a script is allowed to run before being terminated. OpenEMR requires this option to have the value 60:

/etc/php/7.4/apache2/php.ini


max_execution_time = 60
max_input_time
This option limits the time in seconds a script is allowed to parse input data. OpenEMR requires this option to have the value -1, which means that the max_execution_time is used instead:

/etc/php/7.4/apache2/php.ini

/etc/php/7.4/apache2/php.ini

post_max_size
This option limits the size of a post, including uploaded files. OpenEMR requires this option to have a value of 30M:

/etc/php/7.4/apache2/php.ini

post_max_size = 30M
memory_limit
This option limits the amount of memory a script is allowed to allocate. OpenEMR requires this option to have a value of 256M:

/etc/php/7.4/apache2/php.ini

memory_limit = 256M
mysqli.allow_local infile
This option enables access to local files with LOAD DATA statements. OpenEMR requires this option to be turned on:

/etc/php/7.4/apache2/php.ini

mysqli.allow_local_infile = On
When you are done adjusting the options, save and exit the file. If you are using nano, you can do that by pressing CTRL+X, then Y and ENTER to confirm.

Next, you’ll need to reload the Apache web server for changes to take effect:

 $ sudo systemctl reload apache2

When your webserver has reloaded, you should be ready to proceed to the next step.
Step 4 — Downloading OpenEMR
In this step, you will download OpenEMR and prepare its files for installation. To start, download OpenEMR using the command wget, which retrieves files from the internet:

 $ wget https://downloads.sourceforge.net/project/openemr/OpenEMR%20Current/5.0.2.1/openemr-5.0.2.tar.gz

Next, extract the files using the tar command. The xvzf argument is used to tell the shell to extract the files (x), name the files extracted (v), uncompress the files with gzip (z), and use the file named in the command (f).

 $ tar xvzf openemr*.tar.gz

When the files are done being extracted, you should have a directory named openemr-5.0.2. Change the directory name to openemr using the mv command:

 $ mv openemr-5.0.2 openemr

Next, move the directory to your HTML directory:

 $ sudo mv openemr /var/www/html/

You now need to change the ownership of the directory. Use the chown command and R flag to set the owner of all files and the group associated with openemr to www-data:

 $ sudo chown -R www-data:www-data /var/www/html/openemr

For the installation process, OpenEMR also requires you to change the permissions of the sqlconf.php file so that all users can read and write the file but cannot execute it. After the installation is finished, we’ll change these permissions once again to secure your setup. These permissions can be granted with the chmod command using 666 as argument:

 $ sudo chmod 666 /var/www/html/openemr/sites/default/sqlconf.php

After you change the permissions for the sqlconf.php file, you are ready to proceed to the next step.
Step 4 — Installing OpenEMR
In this step, you will install OpenEMR through a web browser and configure the Apache web server. Open a web browser and navigate to http://server_ip/openemr, replacing server_ip with the IP address of your server.

If everything is working correctly, the browser should display the OpenEMR Setup page:
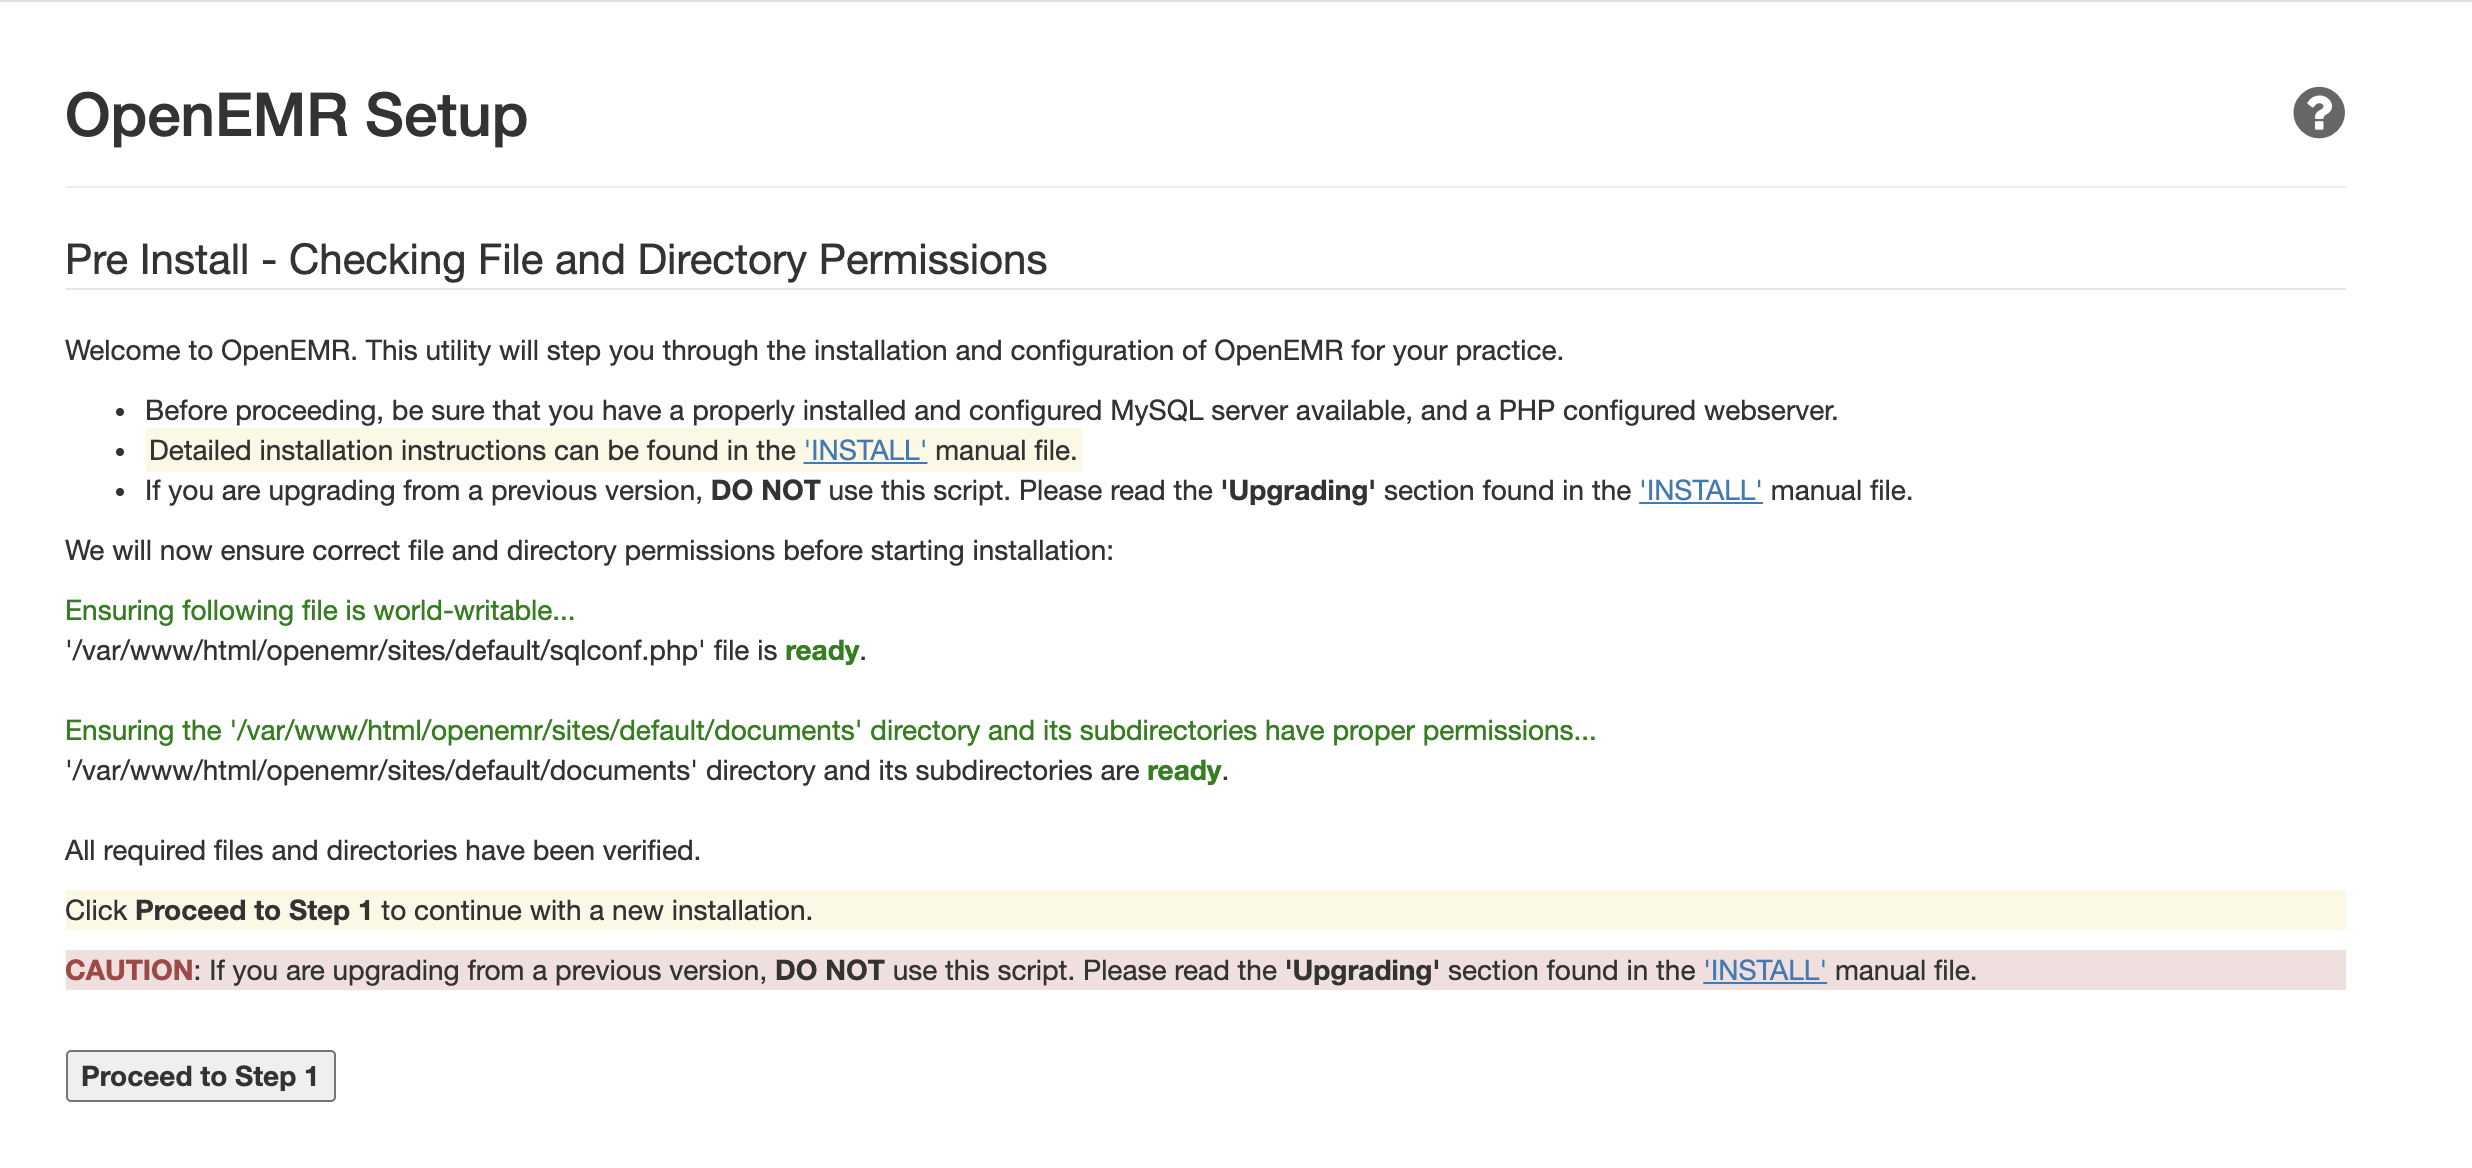
OpenEMR setup page
Click Proceed to Step 1. You should now be directed to a new OpenEMR Setup page for Step 1 of the installation process:
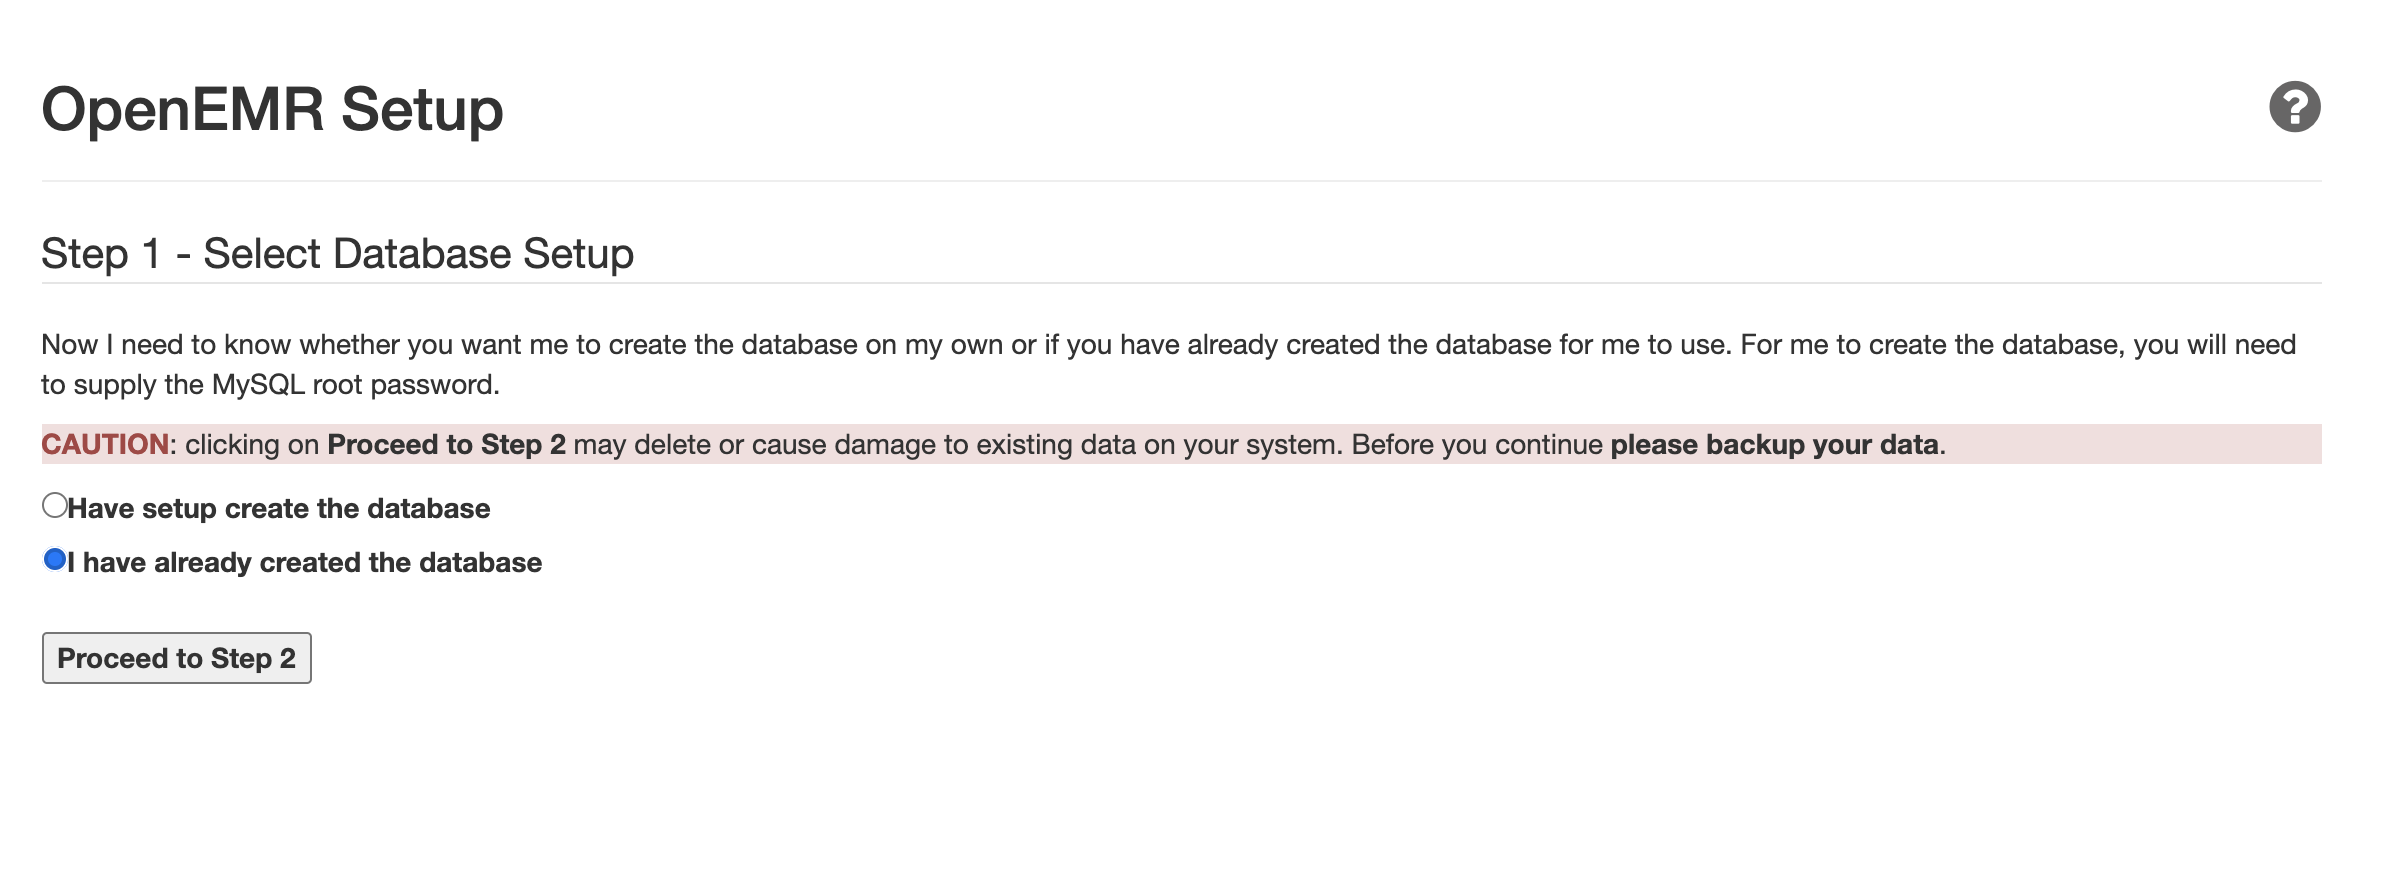
OpenEMR setup page — Step 1
On the new page, select I have already created a database as you already created an OpenEMR database in Step 3 of this tutorial. Then click Proceed to Step 2.

Your browser should now display Step 2 of the OpenEMR Setup:
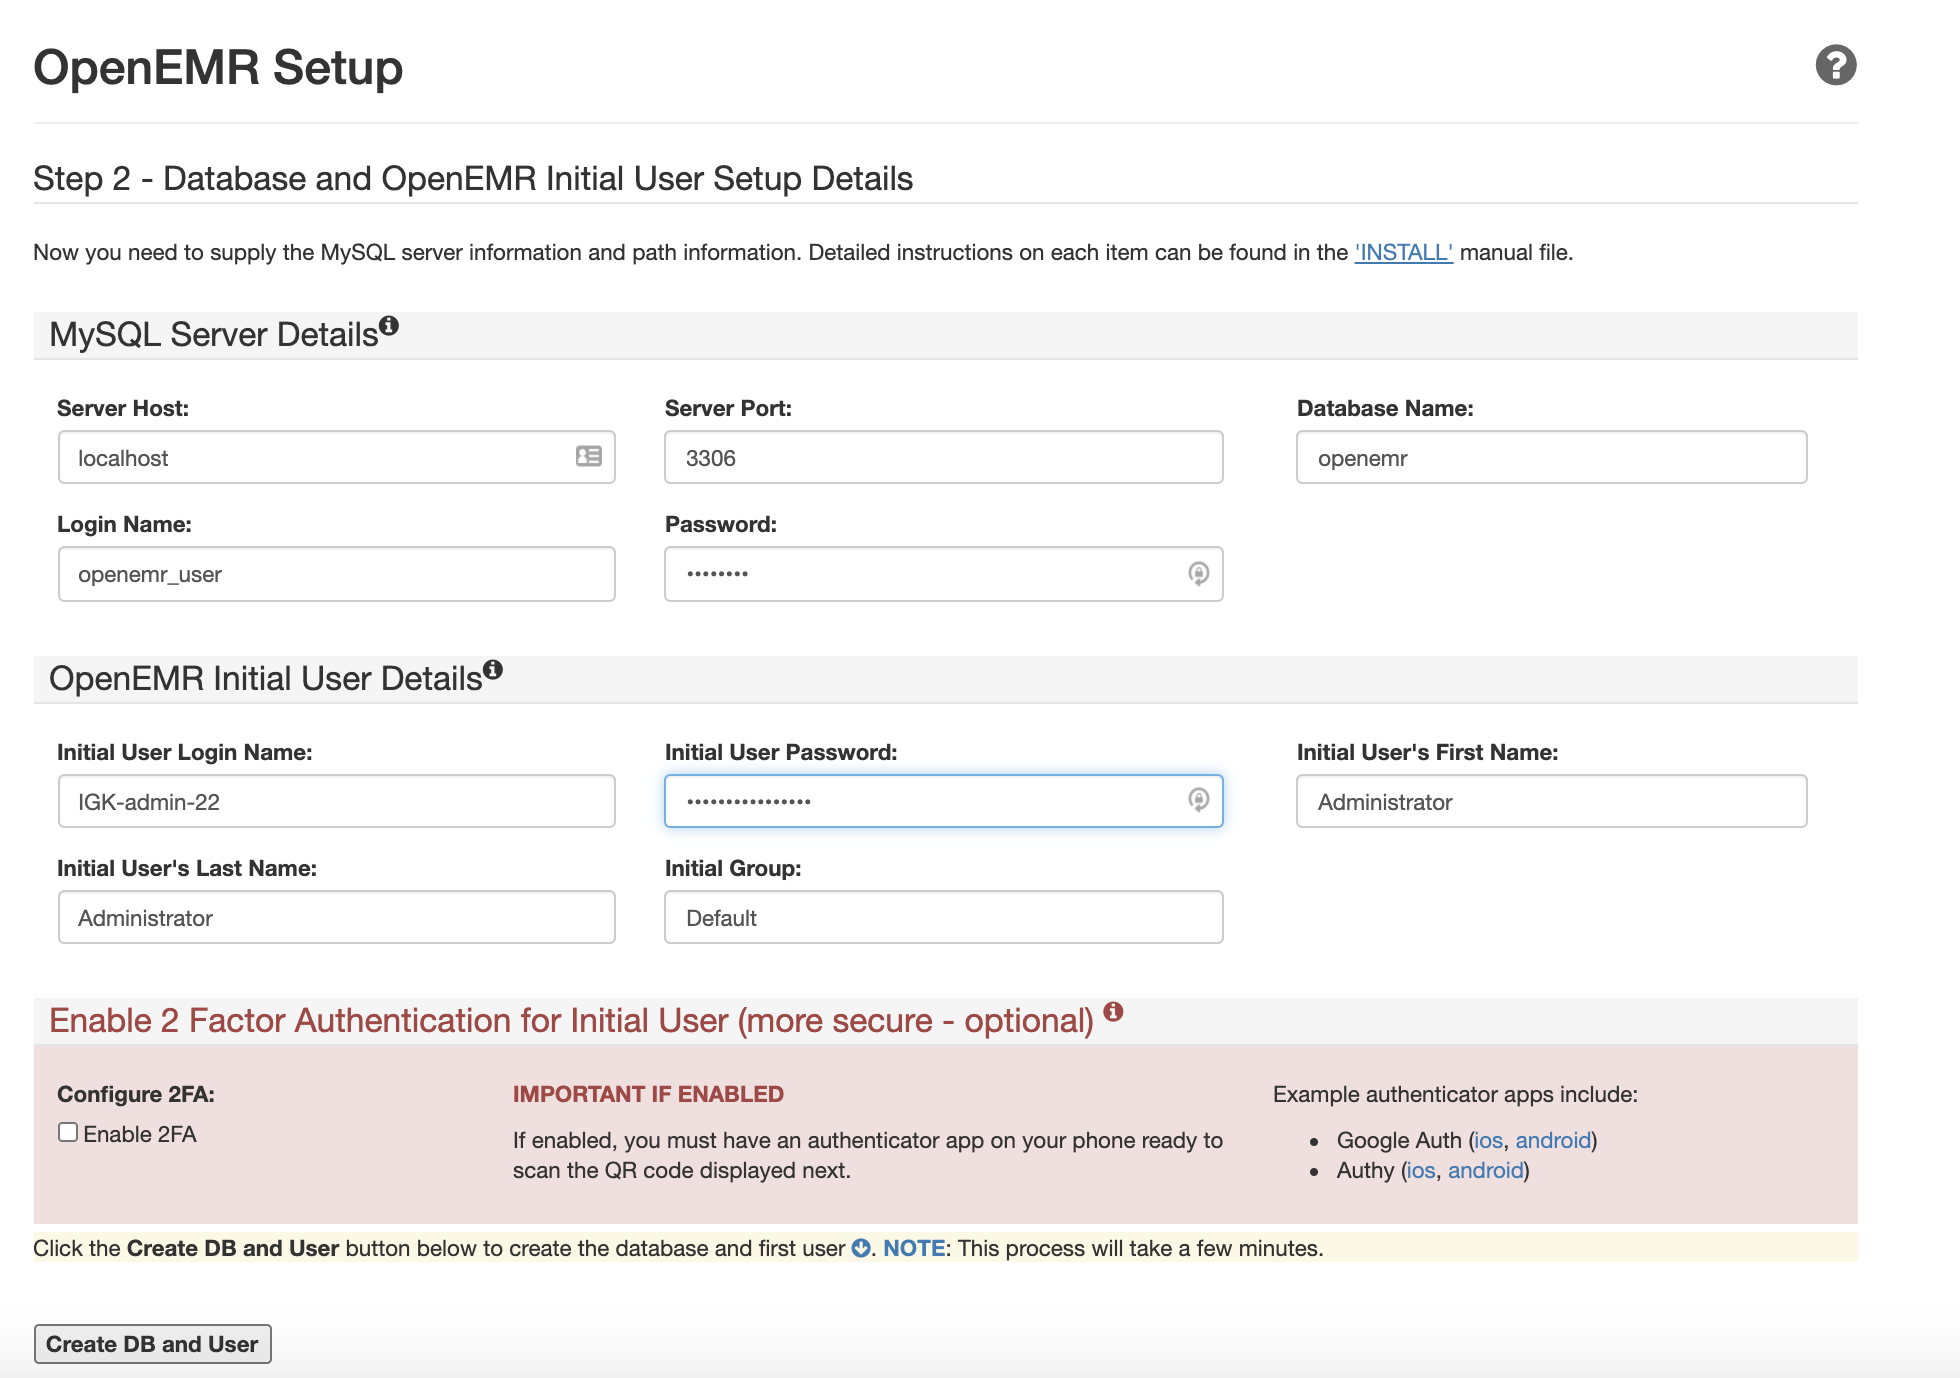
OpenEMR setup page — Step 2
In the Login and Password fields in the MySQL Server Details section, enter the username and password you picked in Step 3.

In the OpenEMR Initial User Details section, create an Initial User Login Name and password.

If you’d like to enable 2 Factor Authentication for the initial user, click the option Enable 2FA.

Then click Create DB and User. It may take a few minutes for the next page to load. This page will verify the successful creation of the user and database:
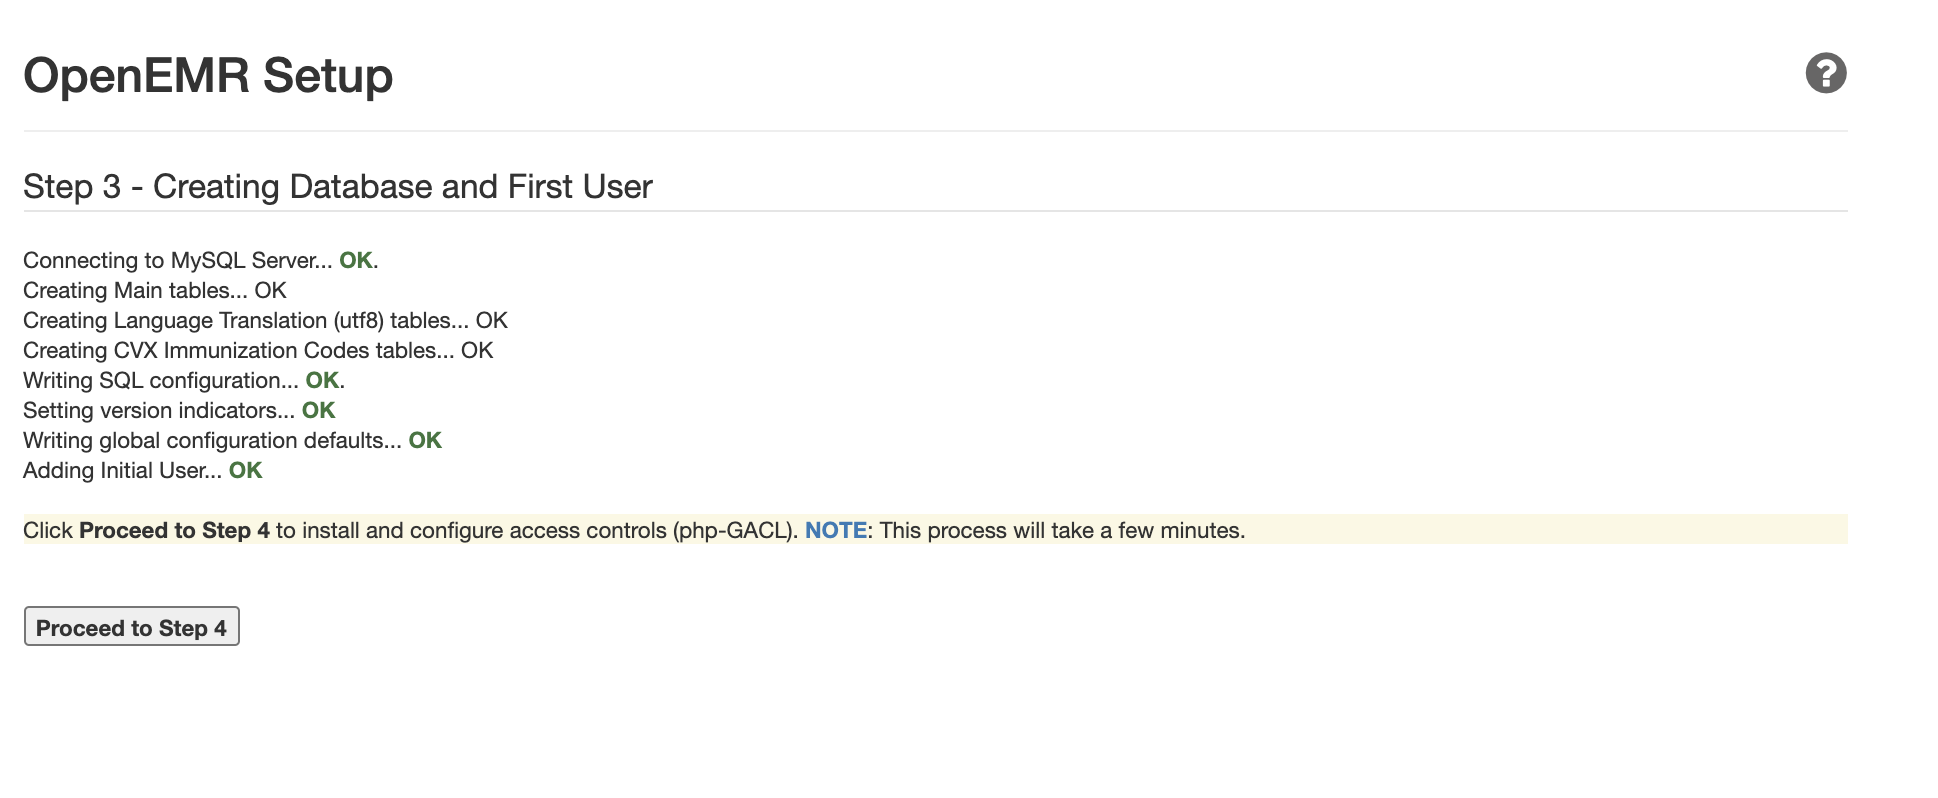
OpenEMR setup page — Step 3
Click Proceed to Step 4 to continue. The next page will confirm the creation and configuration of the Access Control List:
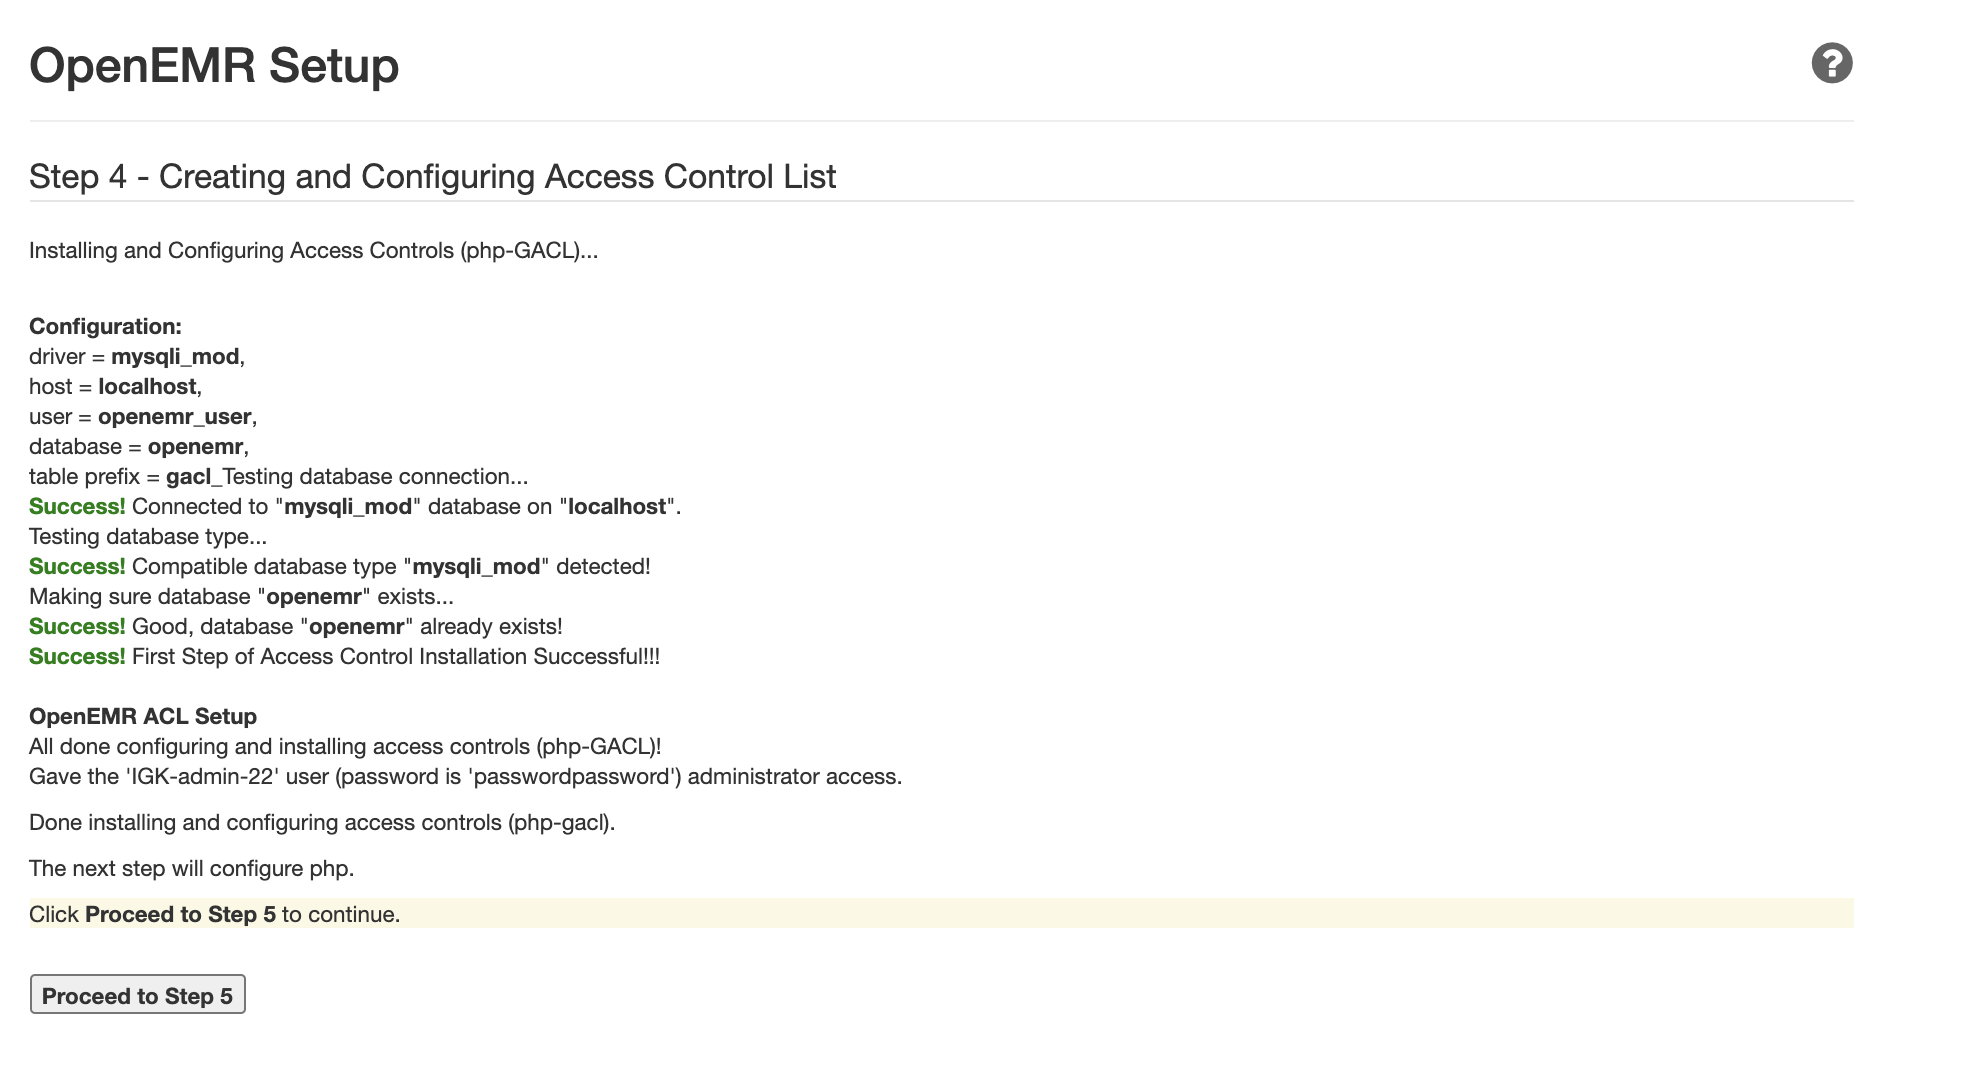
OpenEMR setup page — Step 4

Click Proceed to Step 5 to continue. The next page will show you the required PHP configurations for OpenEMR. Your current configuration should match their requirements as you already adjusted them in Step 4.
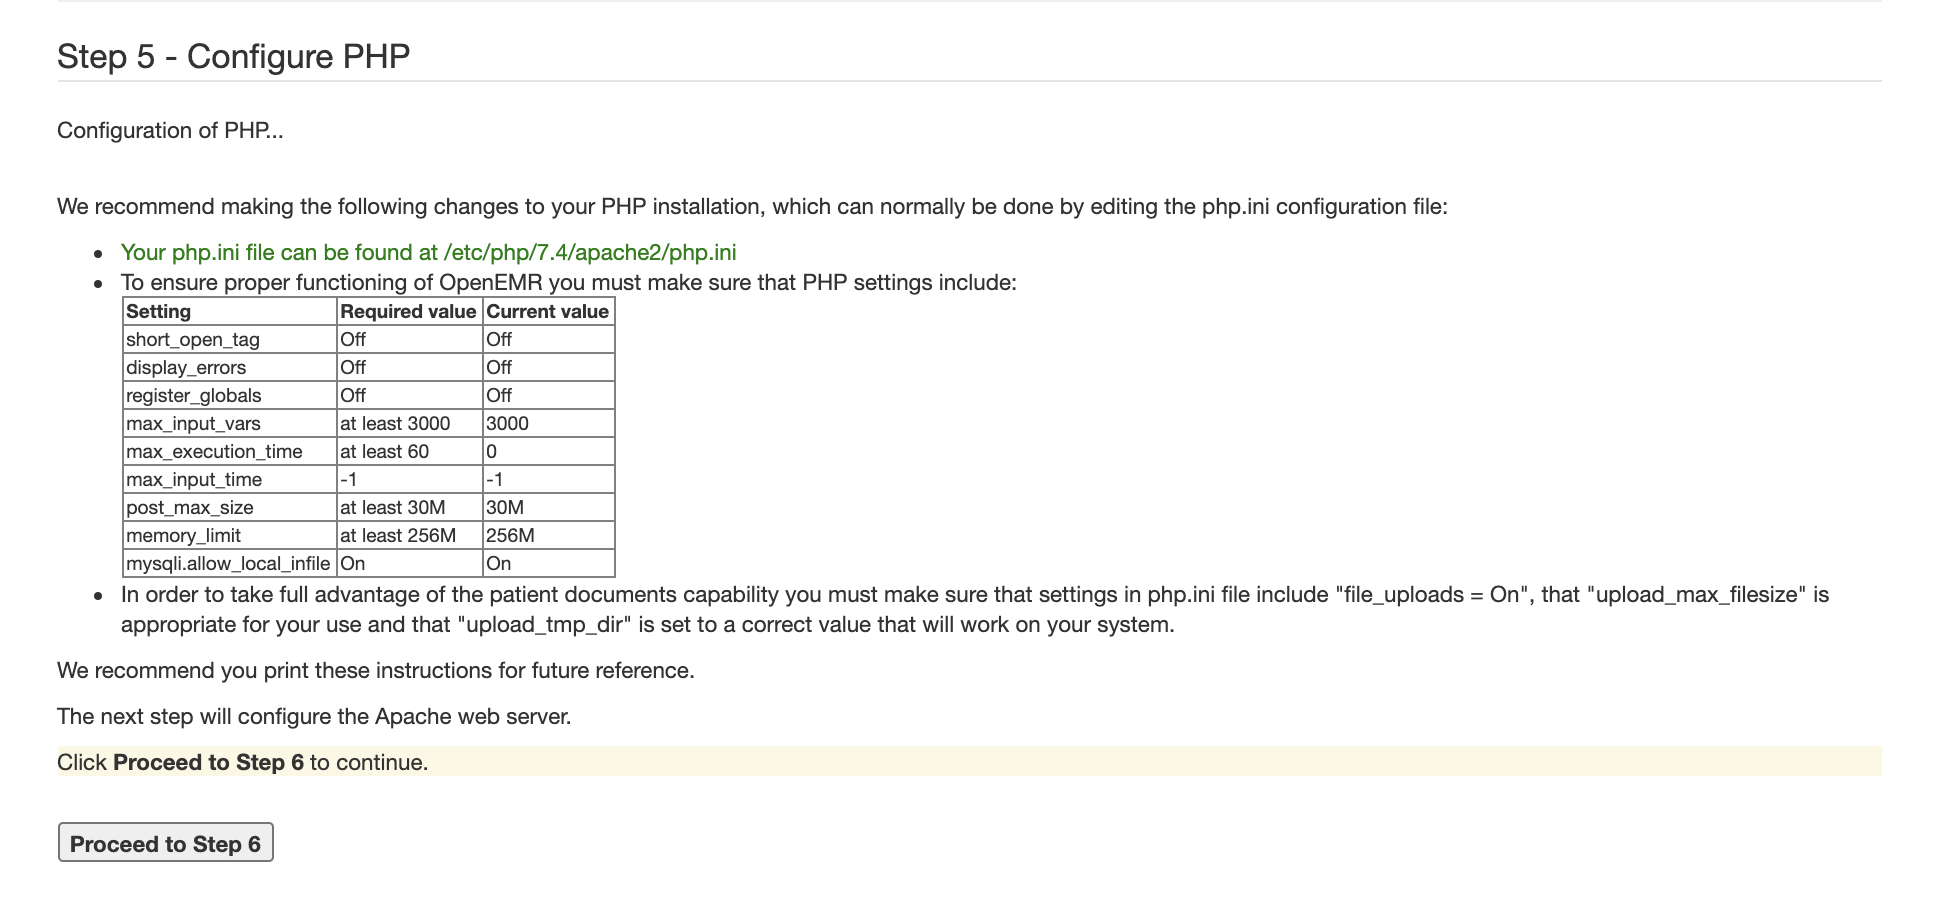
OpenEMR setup page — Step 5
Click Proceed to Step 6 to continue. The next page will show you how to configure your Apache Web Server for OpenEMR:
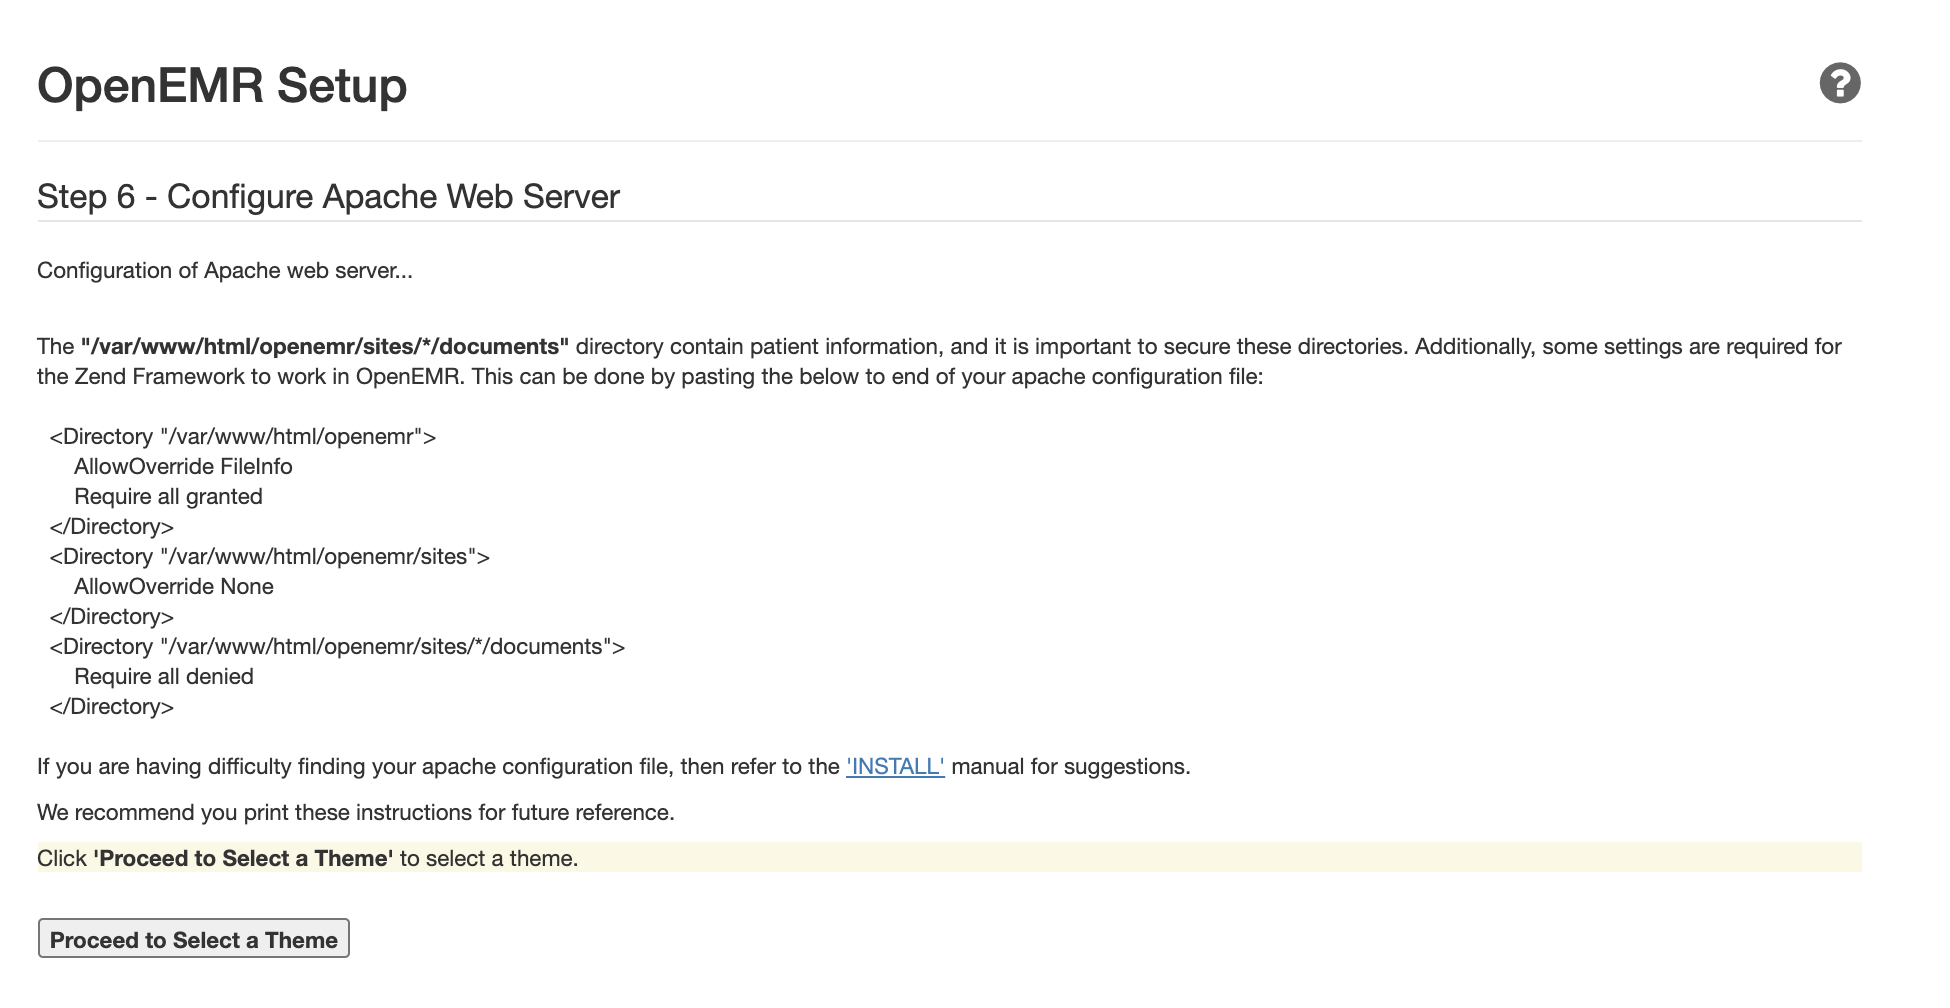
OpenEMR setup page — Step 6
To configure the Apache Web Server for OpenEMR, create a new configuration file named openemr.conf. You can do that from your terminal using the nano editor:

 $ sudo nano /etc/apache2/sites-available/openemr.conf

Inside the file, paste the following directives:

/etc/apache2/sites-available/openemr.conf
<Directory “/var/www/html/openemr”>
AllowOverride FileInfo
Require all granted

<Directory “/var/www/html/openemr/sites”>
AllowOverride None

<Directory “/var/www/html/openemr/sites/*/documents”>
Require all denied

Save and close the file. Then, restart Apache so that the changes are loaded:

 $ sudo systemctl restart apache2

Next, return to the browser and click Proceed to Select a Theme. On the next page, select a theme and click Proceed to Final Step:
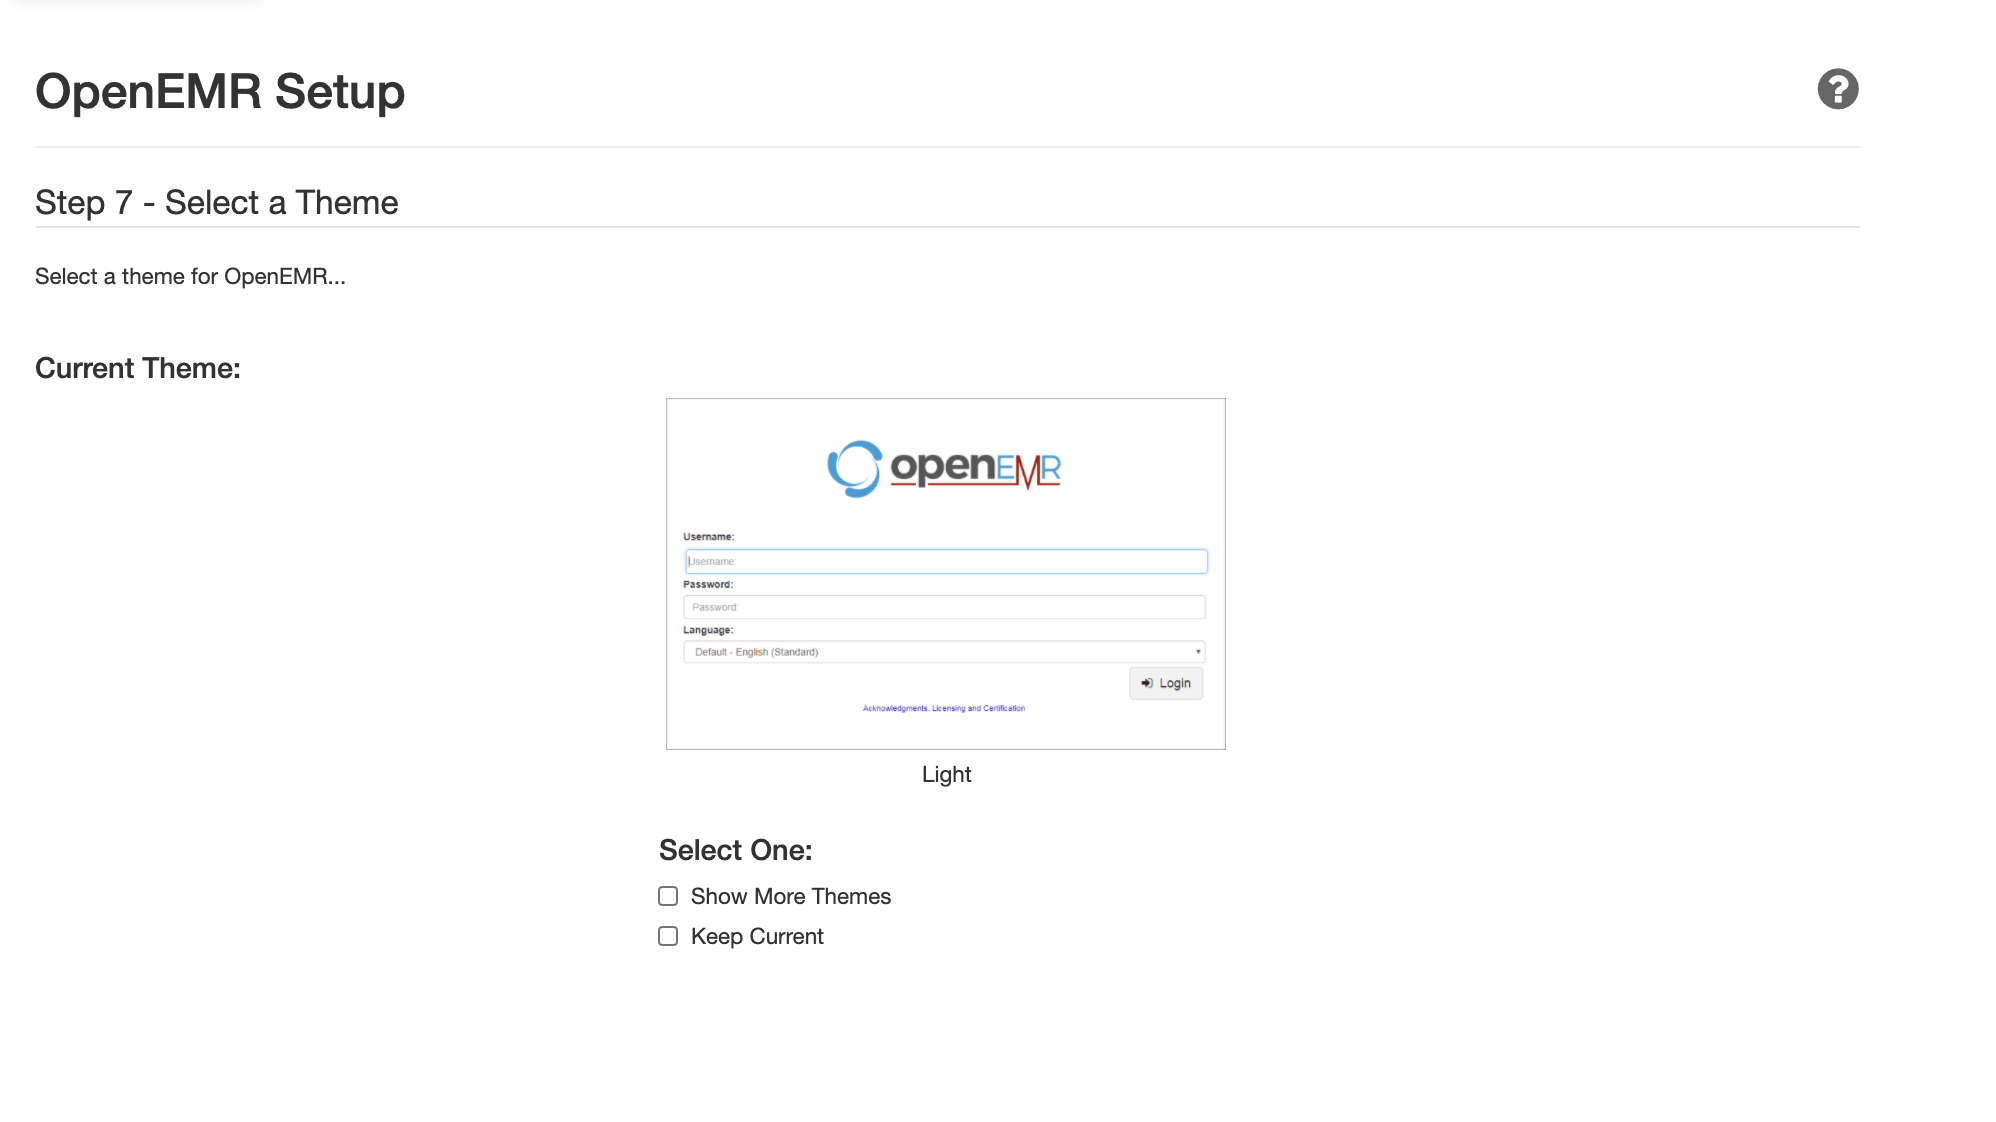
OpenEMR setup page — Step 7
You should now be directed to the final setup page with confirmation details regarding your installation:
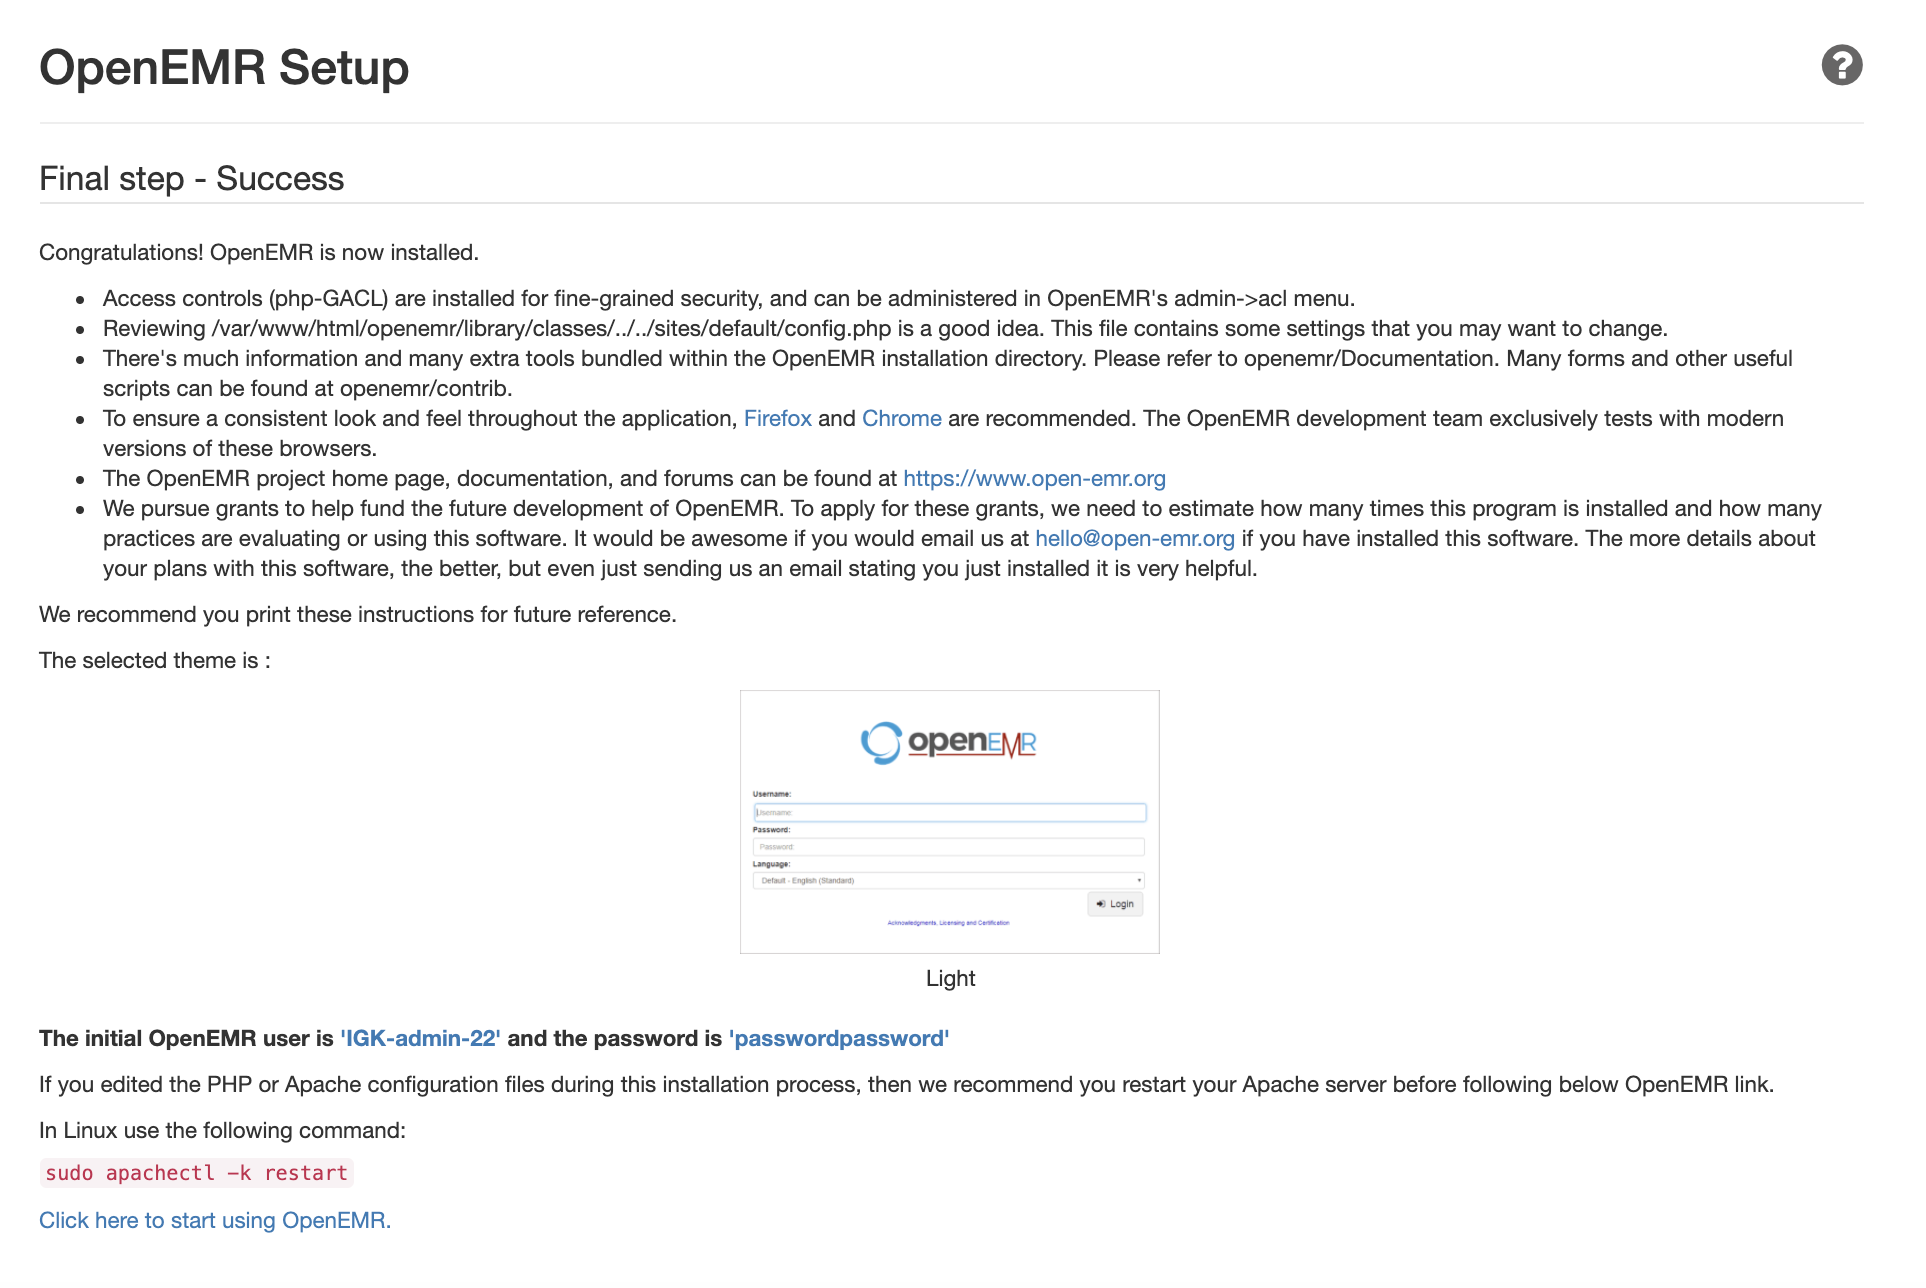
OpenEMR setup page — Final Step
This page will also give the user name and password details for your initial user. Make sure to have these details available before you leave the page. When you are ready, click the link at the bottom to start using OpenEMR.

A window will pop up asking whether you want to register your installation. After making your choice, log in to OpenEMR with your initial user credentials. Once you are logged in, your browser should display the OpenEMR dashboard:
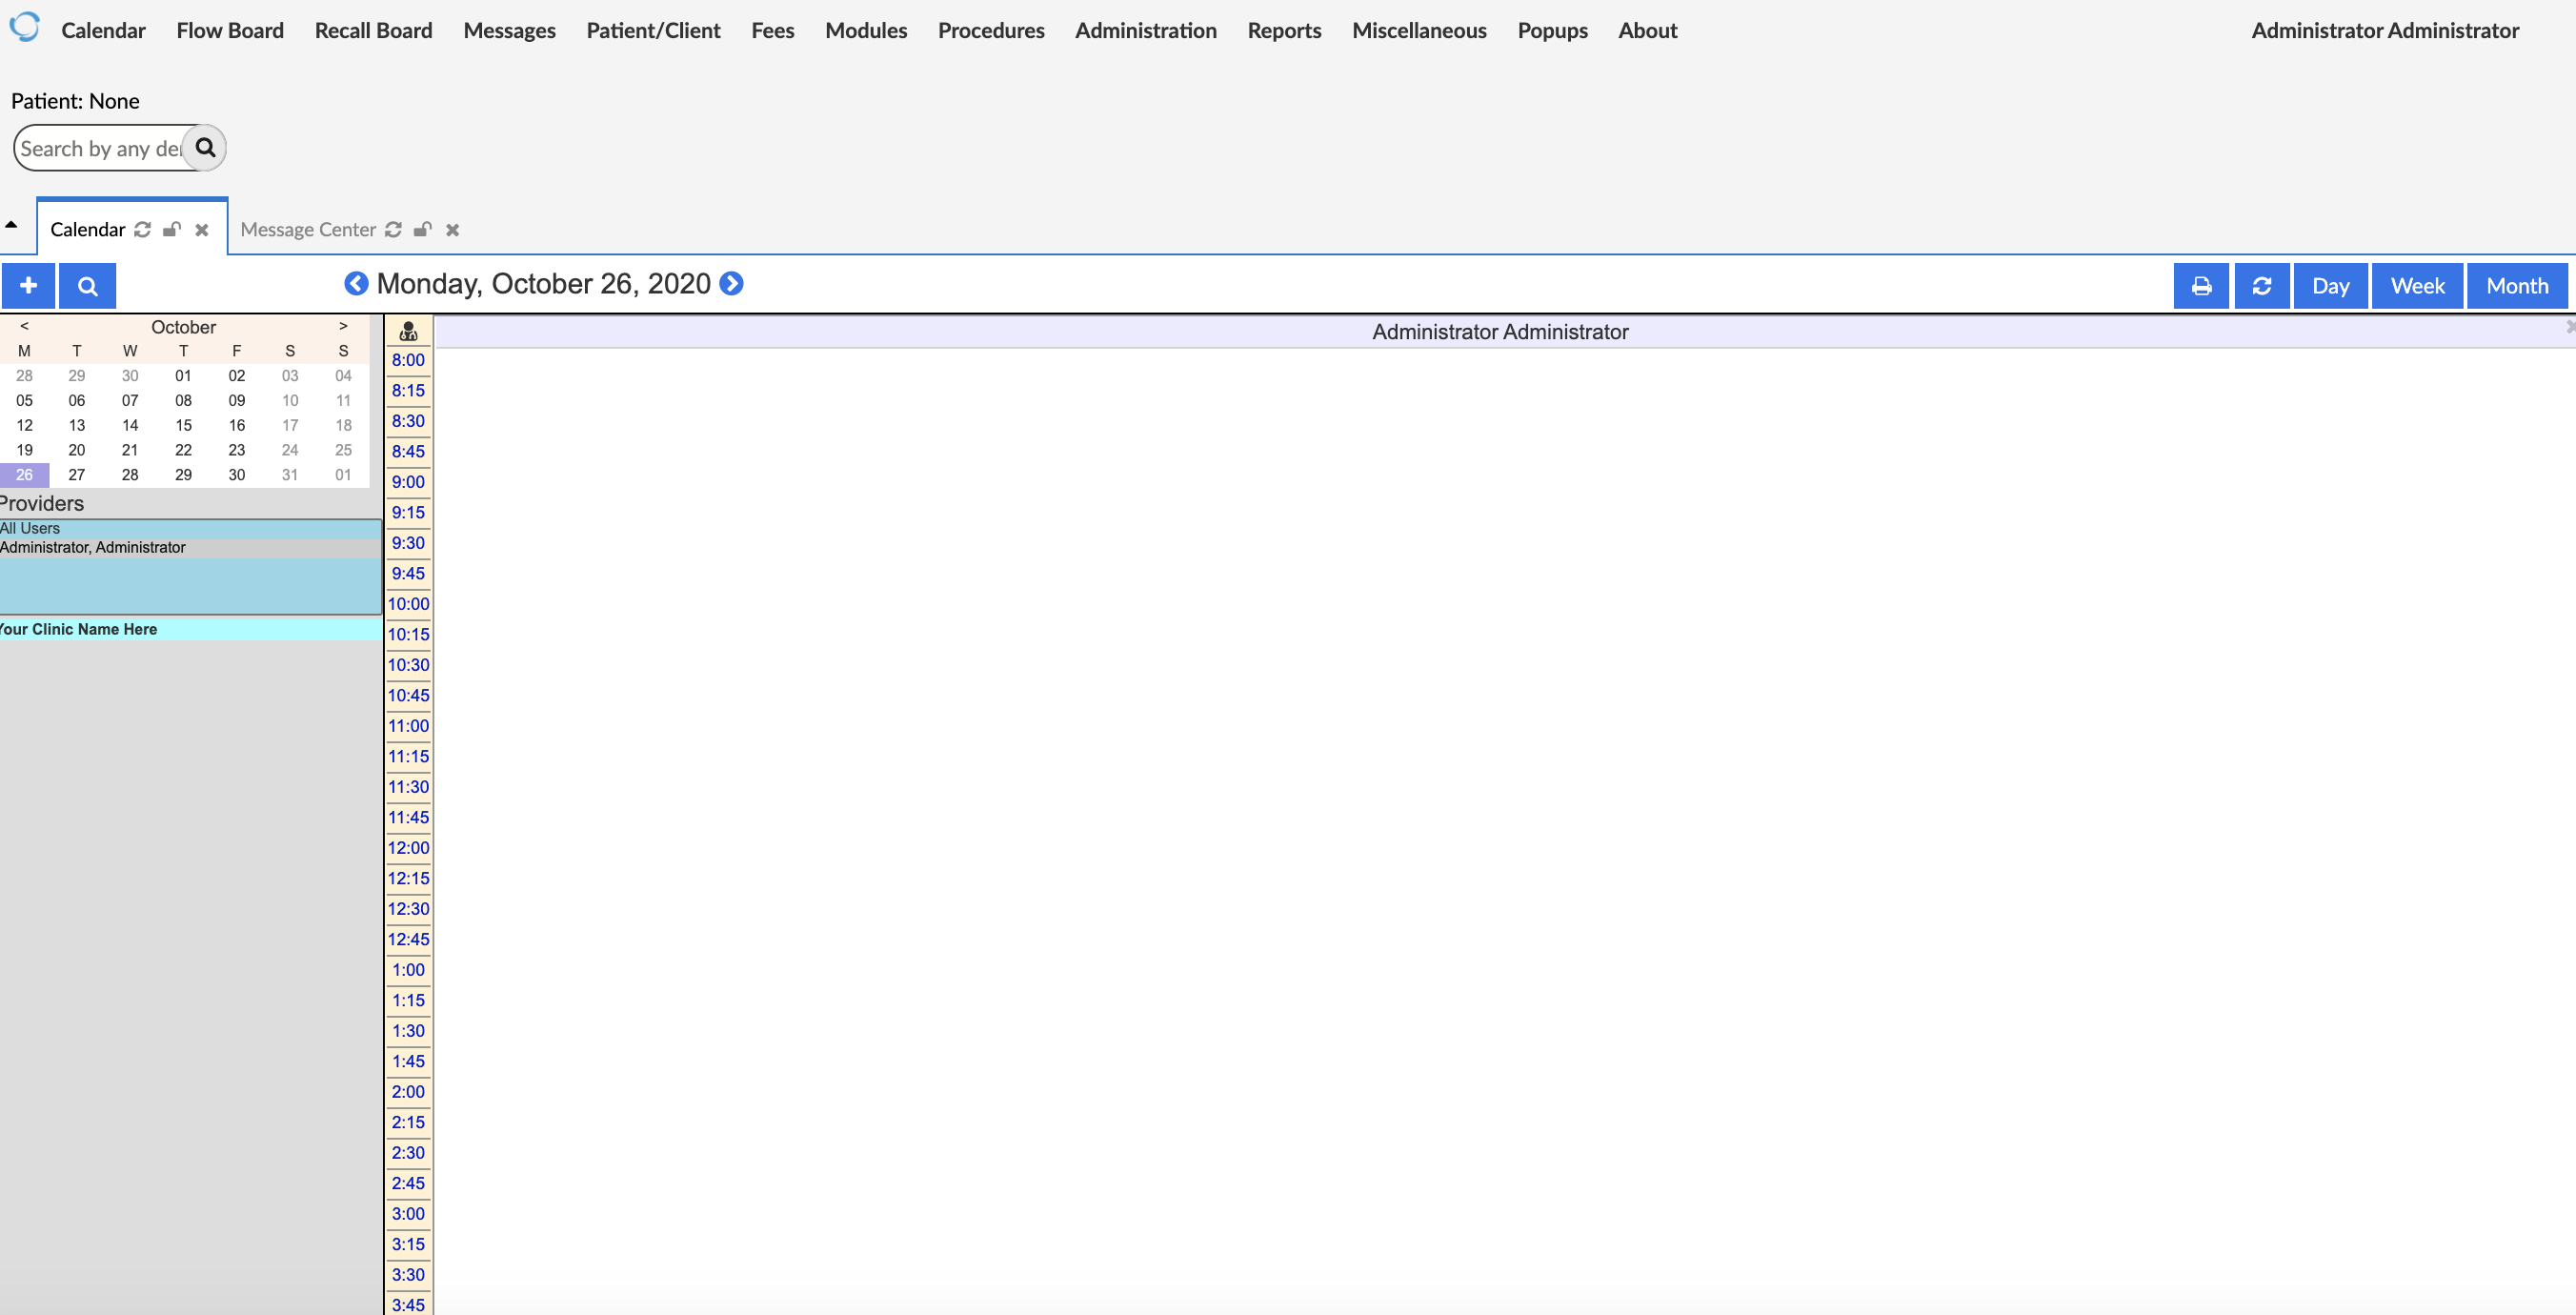
OpenEMR dashboard
Before going any further, make sure to change the file permissions as indicated in the next step.

Step 5 — Changing FileSystem Permissions
To improve the security of the system, OpenEMR advises users to change permissions of several files after installation. In this step, you will change the permissions of these files to further restrict read and write access.

First, you will change the permissions of the sqlconf.php file whose permissions you modified in Step 3 to give the owner read and write access and group members only read access.

These permissions can be granted with the chmod command using 644 as the argument:

 $ sudo chmod 644 openemr/library/sqlconf.php

Next, you will change the permissions of several other files to allow only the file owner to read and write the file.

Grant these permissions by using the chmod command with the 600 argument on the following files:

 $ sudo chmod 600 openemr/acl_setup.php
 $ sudo chmod 600 openemr/acl_upgrade.php
 $ sudo chmod 600 openemr/setup.php
 $ sudo chmod 600 openemr/sql_upgrade.php
 $ sudo chmod 600 openemr/gacl/setup.php
 $ sudo chmod 600 openemr/ippf_upgrade.php

Your files should now have more secure permission settings.

In addition to changing file permissions, OpenEMR’s documentation strongly advises additional steps for securing each of OpenEMR’s components. These steps include deleting scripts in OpenEMR after installation, enforcing strong passwords, enabling HTTPS-only traffic, adjusting the firewall, and hardening Apache. Make sure to visit OpenEMR’s security documentation to learn more about how you can best protect your OpenEMR installation.

Conclusion
You have now installed OpenEMR on an Ubuntu 20.04 server using Apache, MySQL, and PHP. For instructions on pointing a domain name to your server, you can follow our guide How To Point to DigitalOcean Nameservers From Common Domain Registrars. For OpenEMR documentation, you can visit the OpenEMR Wiki Page.
How To Install Shopware on CentOS 7 – Step by Step

Install Shopware on CentOS 7

Shopware is a free and open source e-commerce application written in PHP. It uses MySQL as the database server to store the data. Shopware is very easy to use and require no coding knowledge to work. It is secure and responsive. The application provides the interface for elements to drag and drop, it also supports design grids. It contains story telling, slide shows, and quick views. In this tutorial we will learn how to Install Shopware on CentOS 7.

This article assumes you have at least basic knowledge of Linux, know how to use the shell, and most importantly, you host your site on your own VPS. The installation is quite simple and assumes you are running in the root accge of Linount, if not you may need to add ‘sudo’ to the commands to get root privileges. I will show you through the step by step installation Shopware on a CentOS 7 server.

Install Shopware on CentOS 7

Step 1. First let’s start by ensuring your system is up-to-date.

yum clean all
yum -y update

Step 2. Install LAMP server.

A CentOS 7 LAMP stack server is required. If you do not have LAMP installed, you can follow our guide here. Also install required PHP modules:

yum -y install php-gd php-imap php-ldap php-odbc php-pear php-xml php-xmlrpc php-mbstring php-mcrypt php-mssql php-snmp php-soap php-tidy curl curl-devel

Step 3. Installing Shopware on CentOS.

Go to the root directory of your system and download the latest stable version of Shopware:

wget https://codeload.github.com/shopware/shopware/zip/5.5
unzip v5.5.zip -d /var/www/html
cd /var/www/html/shopware-5.5 cp -a * ..

We will need to change some folders permissions:

chown -R www-data:www-data /var/www/html/

Step 4. Configuring MariaDB for Shopware.

By default, MariaDB is not hardened. You can secure MariaDB using the mysql_secure_installation script. You should read and below each steps carefully which will set root password, remove anonymous users, disallow remote root login, and remove the test database and access to secure MariaDB.

mysql_secure_installation

Configure it like this:

- Set root password? [Y/n] y
- Remove anonymous users? [Y/n] y
- Disallow root login remotely? [Y/n] y
- Remove test database and access to it? [Y/n] y
- Reload privilege tables now? [Y/n] y

Next we will need to log in to the MariaDB console and create a database for the Shopware. Run the following command:

mysql -u root -p

This will prompt you for a password, so enter your MariaDB root password and hit Enter. Once you are logged in to your database server you need to create a database for Shopware installation:

CREATE DATABASE shopware;
GRANT ALL PRIVILEGES ON shopware.* TO 'shopware'@'localhost' IDENTIFIED BY 'strong_password';
FLUSH PRIVILEGES;
\q

Step 5. Configuring Apache for Shopware.

We will create Apache virtual host for your Shopware website. First create ‘/etc/httpd/conf.d/vhosts.conf’ file with using a text editor of your choice:

nano /etc/httpd/conf.d/vhosts.conf
IncludeOptional vhosts.d/*.conf

Next, create the virtual host:

mkdir /etc/httpd/vhosts.d/
nano /etc/httpd/vhosts.d/yourdomain.com.conf

Add the following lines:

<VirtualHost YOUR_SERVER_IP:80>
ServerAdmin [email protected]
DocumentRoot /var/www/html
ServerName yourdomain.com
ServerAlias www.yourdomain.com
ErrorLog "/var/log/httpd/yourdomain.com-error_log"
CustomLog "/var/log/httpd/yourdomain.com-access_log" combined

<Directory "/var/www/html/">
DirectoryIndex index.html index.php
Options FollowSymLinks
AllowOverride All
Require all granted
</Directory>
</VirtualHost>

Save and close the file. Restart the Apache service for the changes to take effects:

systemctl restart httpd.service

Step 6. Accessing Shopware e-commerce.

Shopware will be available on HTTP port 80 by default. Open your favorite browser and navigate to http://yourdomain.com or http://server-ip and complete the required the steps to finish the installation. If you are using a firewall, please open port 80 to enable access to the control panel.

Congratulation’s! You have successfully installed Shopware. Thanks for using this tutorial for installing Shopware community edition on CentOS 7 systems. For additional help or useful information, we recommend you to check the official Shopware website.

How To Install LAMP Stack on Ubuntu 18.04 LTS

Install LAMP Stack on Ubuntu 18

LAMP represents a full featured stack containing the most popular web server known as Apache, the most popular database server MySQL and the most popular open-source web programming language known as PHP. All components are free and open-source software, and the combination is suitable for building dynamic web pages.

This article assumes you have at least basic knowledge of linux, know how to use the shell, and most importantly, you host your site on your own VPS. The installation is quite simple. I will show you through the step by step installation LAMP (Linux Apache, MySQL and PHP) on Ubuntu 18.04 LTS Bionic Beaver server.

Install LAMP Stack on Ubuntu 18.04 LTS Bionic Beaver

Step 1. First make sure that all your system packages are up-to-date

apt-get update
apt-get upgrade

Step 2. Installing Apache web server on Ubuntu 18.04 LTS Bionic Beaver.

We will be installing Apache with apt-get, which is the default package manager for ubuntu:

apt-get install -y apache2 apache2-utils

After installing Apache2, the commands below can be used to stop, start and enable Apache2 service to always start up with the server boots:

systemctl enable apache2
systemctl start apache2
systemctl status apache2

Check Apache version:

apache2 -v

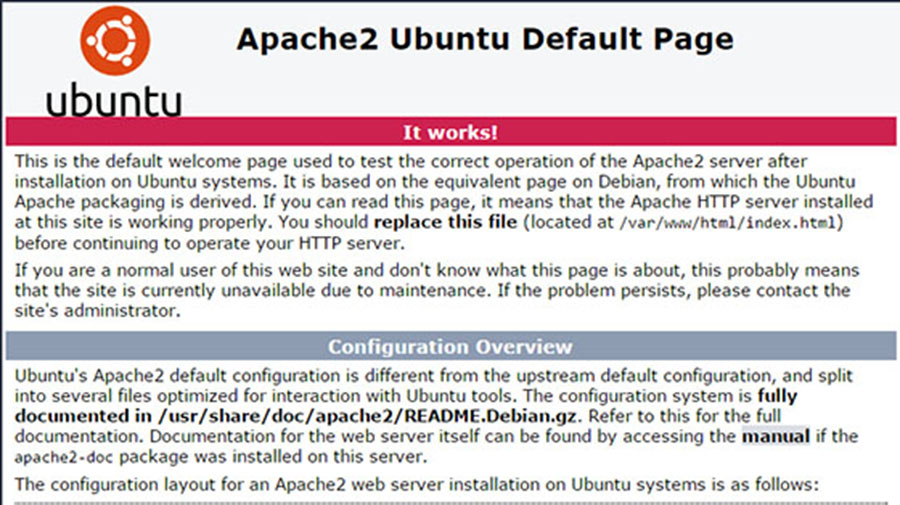
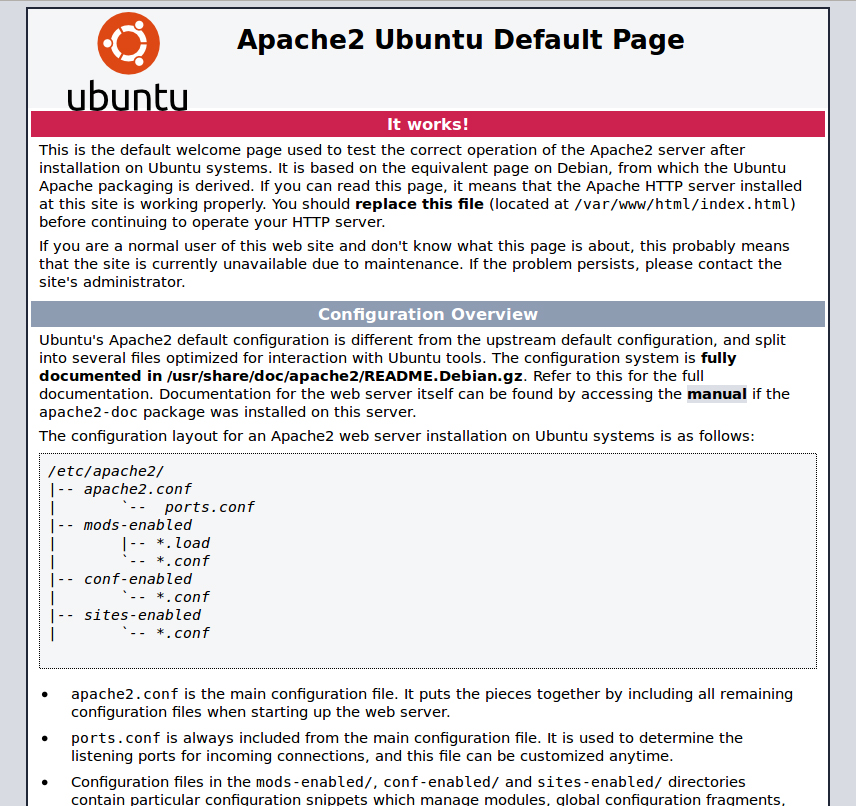
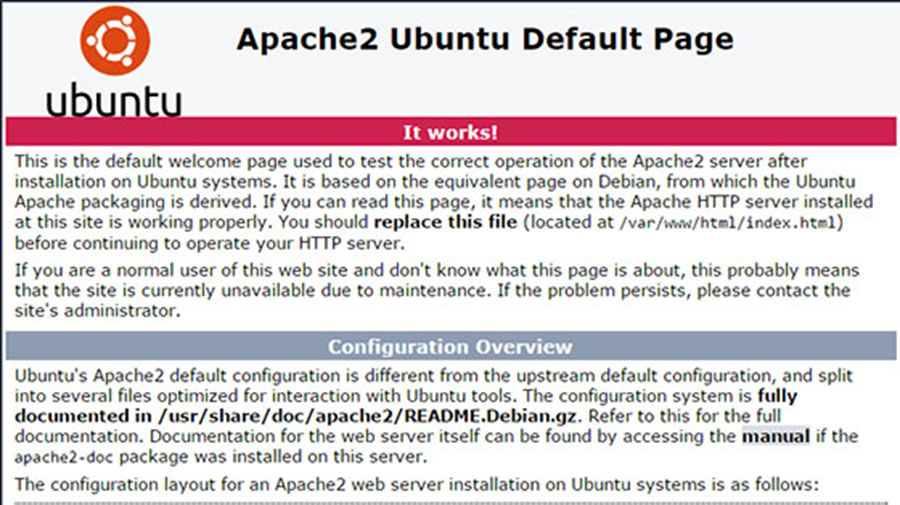
You can verify that Apache is really running by opening your favorite web browser and entering the URL http://your-server’s-address, if it is installed, then you will see this:

apache2-ubuntu-default-page

Step 3. Installing MariaDB on Ubuntu 18.04 LTS Bionic Beaver.

Now that we have our web server up and running, it is time to install MariaDB. MariaDB is a database management system. Basically, it will organize and provide access to databases where our site can store information:

apt-get install mariadb-server mariadb-client

After installing MariaDB, the commands below can be used to stop, start and enable MariaDB service to always start up when the server boots:

systemctl status mariadb
systemctl enable mariadb
systemctl start mariadb

By default, MariaDB is not hardened. You can secure MariaDB using the mysql_secure_installation script. you should read and below each steps carefully which will set root password, remove anonymous users, disallow remote root login, and remove the test database and access to secure MariaDB:

mysql_secure_installation

Configure it like this:

- Set root password? [Y/n] y
- Remove anonymous users? [Y/n] y
- Disallow root login remotely? [Y/n] y
- Remove test database and access to it? [Y/n] y
- Reload privilege tables

To log into MariaDB, use the following command (note that it’s the same command you would use to log into a MySQL database):

mysql -u root -p

Step 4. Installing PHP 7.2 on Ubuntu 18.04 Bionic Beaver.

At the the time of this writing, PHP7.2 is the latest stable version of PHP and has a minor performance edge over PHP7.0. Enter the following command to install PHP7.2:

apt-get install software-properties-common
add-apt-repository ppa:ondrej/php

Run the commands below to install PHP 7.2 FPM and related modules:

apt-get update
apt-get install php7.2 libapache2-mod-php7.2 php7.2-common php7.2-mbstring php7.2-xmlrpc php7.2-soap php7.2-gd php7.2-xml php7.2-intl php7.2-mysql php7.2-cli php7.2-zip php7.2-curl

After install PHP and related modules, all you have to do is restart Apache2 to reload PHP configurations:

systemctl restart apache2

To test PHP, create a test file named info.php with he content below. Save the file, then browse to it to see if PHP is working:

nano /var/www/html/info.php

In this file, paste the following code:

<?php
phpinfo();
?>
1
2
3
	
<?php
phpinfo();
?>

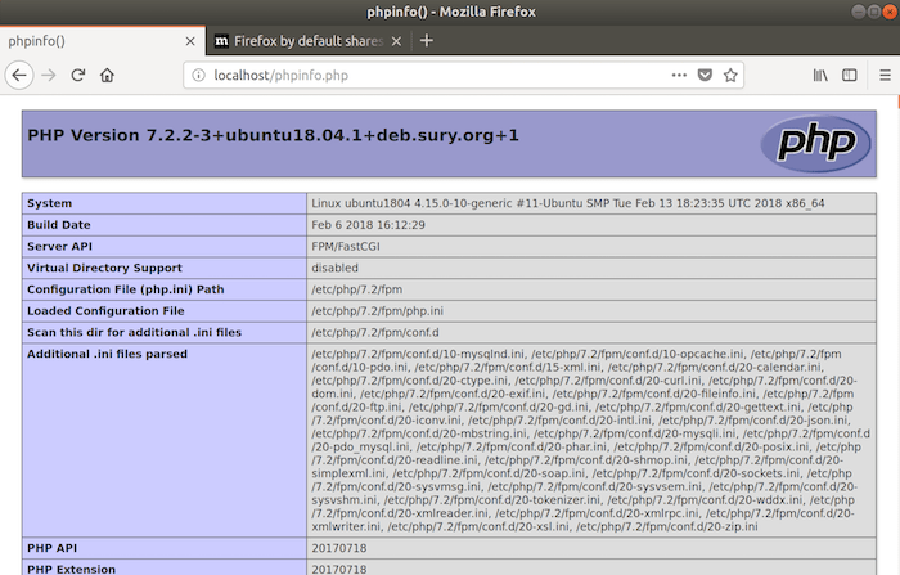
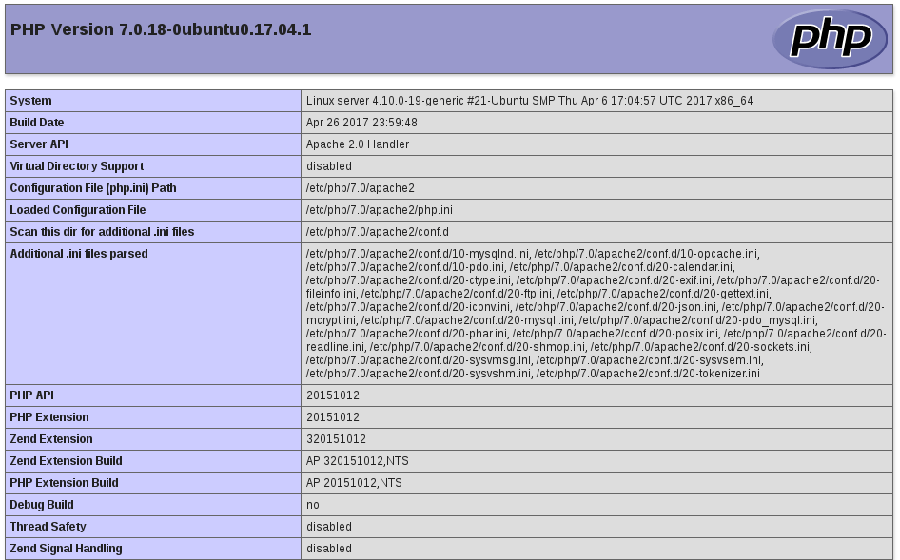
Try to access it at http://your_server_ip/info.php . If the PHP info page is rendered in your browser then everything looks good and you are ready to proceed further.

php_ubuntu_test_18.04_LTS

Congratulation’s! You have successfully installed LAMP stack. Thanks for using this tutorial for installing LAMP (Linux Apache, MySQL and PHP) in Ubuntu 18.04 LTS (Bionic Beaver) system. For additional help or useful information, we recommend you to check the official Apache, MySQL and PHP web site.

How To Install LAMP Stack on Ubuntu 17.10

Install LAMP Stack on Ubuntu 17

LAMP represents a full featured stack containing the most popular web server known as Apache, the most popular database server MySQL and the most popular open-source web programming language known as PHP. All components are free and open-source software, and the combination is suitable for building dynamic web pages.

This article assumes you have at least basic knowledge of linux, know how to use the shell, and most importantly, you host your site on your own VPS. The installation is quite simple. I will show you through the step by step installation LAMP (Linux Apache, MySQL and PHP) on Ubuntu 17.10 Artful Aardvark server.

Install LAMP Stack on Ubuntu 17.10 Artful Aardvark

Step 1. First make sure that all your system packages are up-to-date

apt-get update
apt-get upgrade

Step 2. Installing Apache web server on Ubuntu 17.10.

We will be installing Apache with apt-get, which is the default package manager for ubuntu:

apt-get install -y apache2 apache2-utils

After installing apache services on your system, start all required services:

systemctl enable apache2
systemctl start apache2
systemctl status apache2

Check Apache version:

### apache2 -v
Server version: Apache/2.4.27 (Ubuntu)
Server built: 2017-09-18T15:46:93

You can verify that Apache is really running by opening your favorite web browser and entering the URL http://your-server’s-address, if it is installed, then you will see this:

screenshot-from

Step 3. Installing MariaDB on Ubuntu 17.10.

Now that we have our web server up and running, it is time to install MariaDB. MariaDB is a database management system. Basically, it will organize and provide access to databases where our site can store information:

apt-get install mariadb-server mariadb-client

Once complete, you can verify MariaDB is installed by running the below command:

systemctl status mariadb
systemctl enable mariadb
systemctl start mariadb

By default, MariaDB is not hardened. You can secure MariaDB using the mysql_secure_installation script. you should read and below each steps carefully which will set root password, remove anonymous users, disallow remote root login, and remove the test database and access to secure MariaDB:

mysql_secure_installation

Configure it like this:

- Set root password? [Y/n] y
- Remove anonymous users? [Y/n] y
- Disallow root login remotely? [Y/n] y
- Remove test database and access to it? [Y/n] y
- Reload privilege tables now? [Y/n] y

To log into MariaDB, use the following command (note that it’s the same command you would use to log into a MySQL database):

mysql -u root -p

Step 4. Installing PHP 7.1 on Ubuntu 17.10.

At the the time of this writing, PHP7.1 is the latest stable version of PHP and has a minor performance edge over PHP7.0. Enter the following command to install PHP7.1:

apt-get install php7.1 libapache2-mod-php7.1 php7.1-mysql php-common php7.1-cli php7.1-common php7.1-json php7.1-opcache php7.1-readline

Enable the Apache php7.1 module then restart Apache web server:

a2enmod php7.1
systemctl restart apache2

Check PHP version:

### php --version
PHP 7.1.8-1ubuntu1 (cli) (built: Aug 18 2017 15:46:93) ( NTS )
Copyright (c) 1997-2017 The PHP Group
Zend Engine v3.1.0, Copyright (c) 1998-2017 Zend Technologies
 with Zend OPcache v7.1.8-1ubuntu1, Copyright (c) 1999-2017, by Zend Technologies

To test PHP, create a test file named info.php with he content below. Save the file, then browse to it to see if PHP is working:

nano /var/www/html/info.php

In this file, paste the following code:

<?php phpinfo(); ?>

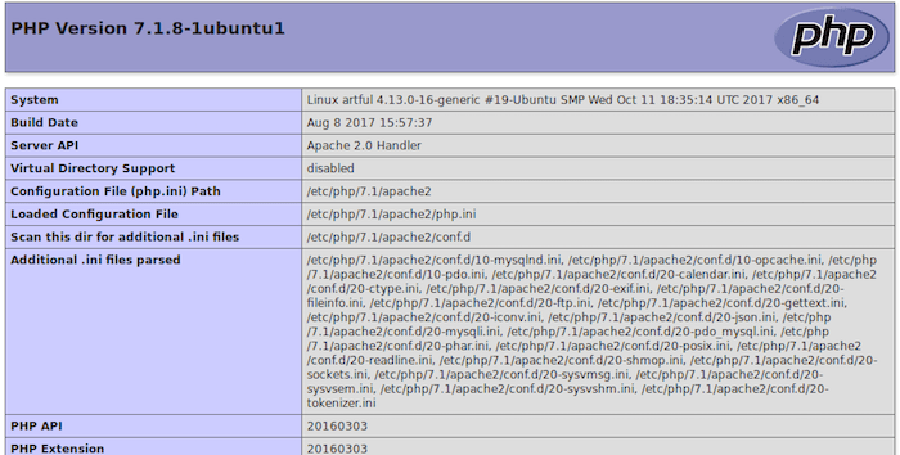
Try to access it at http://your_server_ip/info.php . If the PHP info page is rendered in your browser then everything looks good and you are ready to proceed further.

install-php7.1-on-ubuntu
ongratulation’s! You have successfully installed LAMP stack. Thanks for using this tutorial for installing LAMP (Linux Apache, MySQL and PHP) in Ubuntu 17.10 (Artful Aardvark) system. For additional help or useful information, we recommend you to check the official Apache, MySQL and PHP web site.

How To Install LAMP Stack on Ubuntu 16.04

Install LAMP Stack on Ubuntu 16

LAMP represents a full featured stack containing the most popular web server known as Apache, the most popular database server MySQL and the most popular open-source web programming language known as PHP. All components are free and open-source software, and the combination is suitable for building dynamic web pages.

This article assumes you have at least basic knowledge of linux, know how to use the shell, and most importantly, you host your site on your own VPS. The installation is quite simple. I will show you through the step by step installation LAMP (Linux Apache, MySQL and PHP) on Ubuntu 16.04 server.

Install LAMP Stack on Ubuntu 16.04

Step 1. First make sure that all your system packages are up-to-date by running these following apt-get commands in the terminal.

apt-get update
apt-get upgrade

Step 2. Installing Apache on Ubuntu 16.04.

We will be installing Apache with apt-get, which is the default package manager for ubuntu. Your also required to install libapache2-mod-php module to work PHP with Apache2:

apt-get install apache2 libapache2-mod-php

After installing apache services on your system, start all required services:

systemctl enable apache2
systemctl start apache2
systemctl status apache2

You can verify that Apache is really running by opening your favorite web browser and entering the URL http://your-server’s-address, if it is installed, then you will see this:
apache2-ubuntu-default-page
Step 3. Installing MySQL on Ubuntu 16.04

Now that we have our web server up and running, it is time to install MySQL. MySQL is a database management system. Basically, it will organize and provide access to databases where our site can store information:

apt-get install mysql-server php7.0-mysql

Once complete, you can verify MySQL is installed by running the below command:

systemctl status mysql
systemctl start mysql

By default, MySQL is not hardened. You can secure MySQL using the mysql_secure_installation script. you should read and below each steps carefully which will set root password, remove anonymous users, disallow remote root login, and remove the test database and access to secure MySQL:

mysql_secure_installation

Configure it like this:

- Set root password? [Y/n] y
- Remove anonymous users? [Y/n] y
- Disallow root login remotely? [Y/n] y
- Remove test database and access to it? [Y/n] y
- Reload privilege tables now? [Y/n] y

To log into MySQL, use the following command (note that it’s the same command you would use to log into a MySQL database):

mysql -u root -p

Step 4. Installing PHP 7 on Ubuntu 16.04

PHP 7.0 is now the default PHP package shipping in Ubuntu LTS 16.04 (Xenial Xerus), Now install PHP 7 with the following command:

sudo apt-get install php7.0 php7.0-mysql php7.0-curl php7.0-gd php7.0-json php7.0-opcache php7.0-xml mcrypt php7.0-mcrypt

If you like to search all the available PHP 7 modules you can use to command:

sudo apt-cache search php7-*

Your server should restart Apache automatically after the installation of both MySQL and PHP. If it doesn’t, execute this command:

sudo systemctl restart apache2
sudo systemctl restart mysql

To test PHP, create a test file named info.php with he content below. Save the file, then browse to it to see if PHP is working:

nano /var/www/html/info.php
<!--?php phpinfo(); ?-->

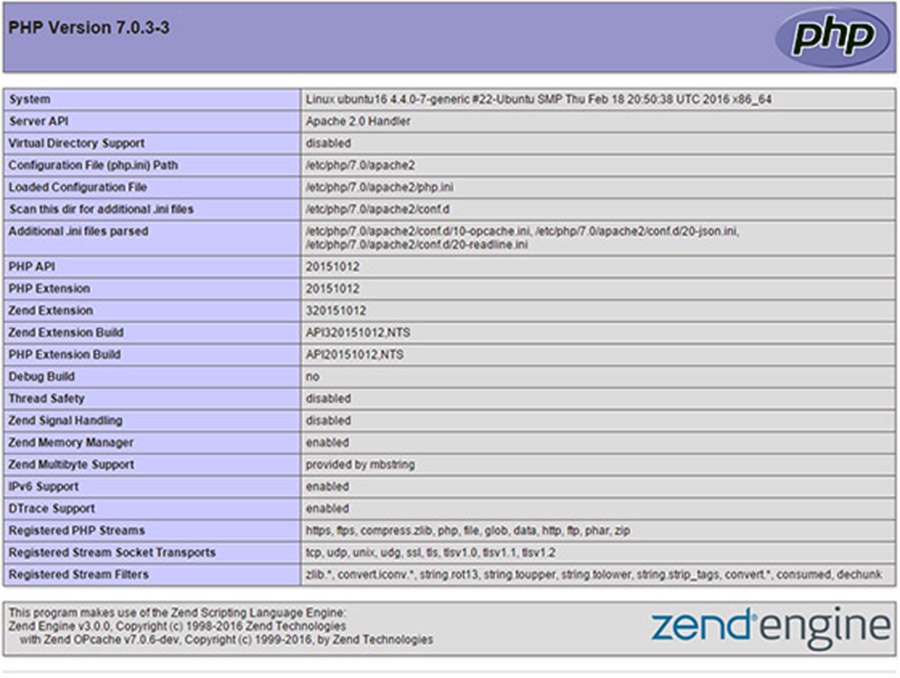
Try to access it at http://your_server_ip/info.php . If the PHP info page is rendered in your browser then everything looks good and you are ready to proceed further.
LAMP-ubuntu-16.04
Congratulation’s! You have successfully installed LAMP stack. Thanks for using this tutorial for installing LAMP (LinuxApache, MySQL andPHP) in Ubuntu 16.04 system. For additional help or useful information, we recommend you to check the official Apache, MySQL and PHP web site.

How To Install LAMP Stack on Ubuntu 17.04

Install LAMP Stack on Ubuntu 17

LAMP represents a full featured stack containing the most popular web server known as Apache, the most popular database server MySQL and the most popular open-source web programming language known as PHP. All components are free and open-source software, and the combination is suitable for building dynamic web pages.

This article assumes you have at least basic knowledge of linux, know how to use the shell, and most importantly, you host your site on your own VPS. The installation is quite simple. I will show you through the step by step installation LAMP (Linux Apache, MySQL and PHP) on Ubuntu 17.04 Zesty Zapus server.
Install LAMP Stack on Ubuntu 17.04

Step 1. First make sure that all your system packages are up-to-date by running these following apt-get commands in the terminal.

apt-get update
apt-get upgrade

Step 2. Installing Apache on Ubuntu 17.04.

We will be installing Apache with apt-get, which is the default package manager for ubuntu. Your also required to install libapache2-mod-php module to work PHP with Apache2:

apt-get install apache2 libapache2-mod-php

After installing apache services on your system, start all required services:

systemctl enable apache2
systemctl start apache2
systemctl status apache2

Check Apache version:

apache2 -v

You can verify that Apache is really running by opening your favorite web browser and entering the URL http://your-server’s-address, if it is installed, then you will see this:
apache2-ubuntu-default-page
Step 3. Installing MySQL on Ubuntu 17.04

Now that we have our web server up and running, it is time to install MySQL. MySQL is a database management system. Basically, it will organize and provide access to databases where our site can store information:

apt-get install mysql-server php7.1-mysql

Once complete, you can verify MySQL is installed by running the below command:

systemctl status mysql
systemctl enable mysql
systemctl start mysql

By default, MySQL is not hardened. You can secure MySQL using the mysql_secure_installation script. you should read and below each steps carefully which will set root password, remove anonymous users, disallow remote root login, and remove the test database and access to secure MySQL:

mysql_secure_installation

Configure it like this:

- Set root password? [Y/n] y
- Remove anonymous users? [Y/n] y
- Disallow root login remotely? [Y/n] y
- Remove test database and access to it? [Y/n] y
- Reload privilege tables now? [Y/n] y

To log into MySQL, use the following command (note that it’s the same command you would use to log into a MySQL database):

mysql -u root -p

Step 4. Installing PHP 7 on Ubuntu 17.04

PHP 7.1 is now the default PHP package shipping in Ubuntu LTS 17.04 (Zesty Zapus), Now install PHP 7 with the following command:

sudo apt-get install -y php7.1 php7.1-cgi php7.1-cli php7.1-fpm php7.1-mysql php7.1-mcrypt php7.1-mbstring php7.1-common php7.1-curl php7.1-pgsq

If you like to search all the available PHP 7 modules you can use to command:

sudo apt-cache search php- | less

Your server should restart Apache automatically after the installation of both MySQL and PHP. If it doesn’t, execute this command:

sudo systemctl restart apache2
sudo systemctl restart mysql

To test PHP, create a test file named info.php with he content below. Save the file, then browse to it to see if PHP is working:

nano /var/www/html/info.php

In this file, paste the following code:

<?php phpinfo(); ?>

Try to access it at http://your_server_ip/info.php . If the PHP info page is rendered in your browser then everything looks good and you are ready to proceed further.
install-php7-ubuntu-17.04

Congratulation’s! You have successfully installed LAMP stack. Thanks for using this tutorial for installing LAMP (LinuxApache, MySQLand PHP) in Ubuntu 17.04 (Zesty Zapus) system. For additional help or useful information, we recommend you to check the official Apache, MySQL and PHP web site.