In this tutorial, we will learn how to easily add Google Search in a WordPress site.
Why You Should Use Google Search in WordPress?
The default WordPress search feature is not very useful. It often fails to find the relevant results. This forces site owners to look for alternatives.
There are plenty of search plugins for WordPress like SearchWP, Swiftype, etc. The problem is that you still have to manage them, and they will have an impact on your server resources.
On the other hand, you can use Google’s reliable and powerful search feature instead. It is free, allows you to limit the search to your sites only, and can be run from your own site.
Other benefits of using Google search are speed, users already trust Google brand, and you will not have to maintain or update it.
Having said that, let’s see how you can easily add Google site search to your WordPress site.
To make it easy, we have created a video tutorial on how to add Google search that you can watch below.
However if you just want to follow text-instructions, then you can follow our step by step tutorial on how to add Google search in a WordPress site.
Method 1: Adding Google Search in WordPress with Plugin
This first method is easier and recommended for beginners. It allows you to add Google search to your WordPress site without modifying your theme files.
First thing you need to do is install and activate the WP Google Search plugin. For more details, see our step by step guide on how to install a WordPress plugin.
Upon activation, you need to visit Settings » WP Google Search to setup the plugin.
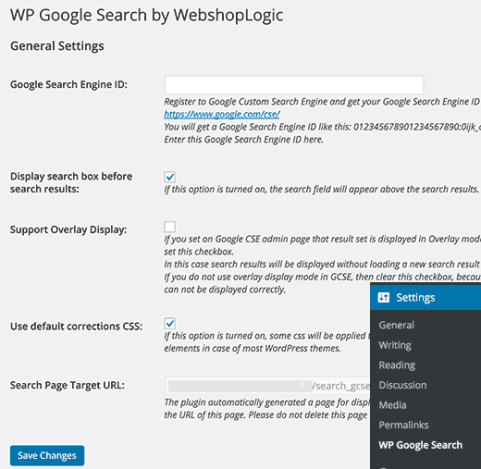
The plugin will ask you to provide a Google Search Engine id. Here is how you will get a search engine ID.
Visit Google Custom Search website and click on New Search Engine link on the left.
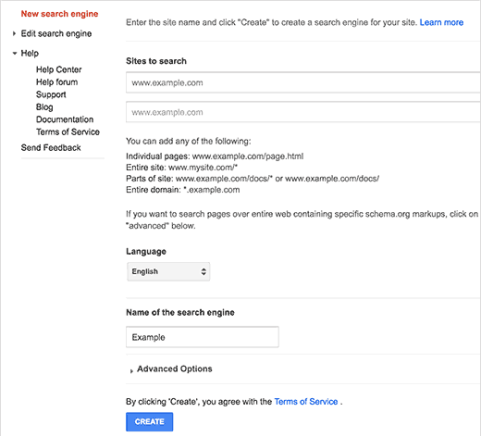
Simply provide your WordPress site’s URL in ‘Sites to Search’ field. Next, you need to choose the language of your website. Lastly, click on the create button to continue.
Google will now create your custom search engine and will show you a success message with links to further actions. You need to click on the control panel button to continue editing your search engine.
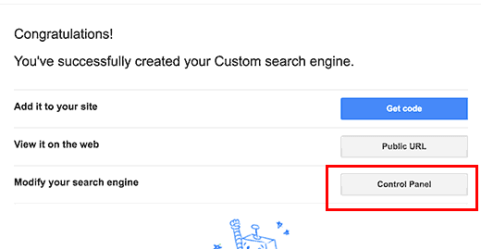
This will take you to the control panel for your custom search engine. First, you need to click on the ‘Search engine ID’ button and copy your search engine ID.
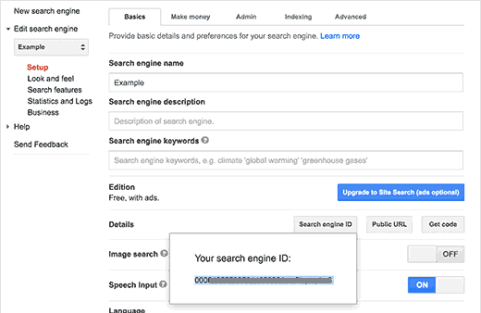
Next, you need to click on the ‘Look and Feel’ section. Under the layout tab, select results only.
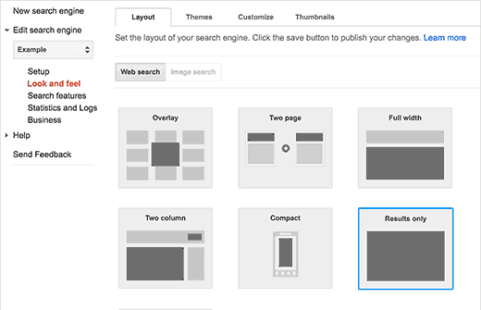
Once you are done, click on the save button at the bottom of the page to store your changes.
Now you can switch back to your WordPress site. Paste the search engine ID you copied earlier in the WP Google Search’s settings page and then click on the save changes button to store plugin settings.
After that you need to visit Appearance » Widgets page. There you will notice WP Google Search widget in the list of available widgets. Drag and drop the widget to a sidebar where you want to display the search form.
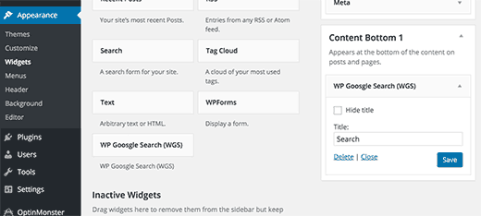
Click on the save button to store your widget settings.
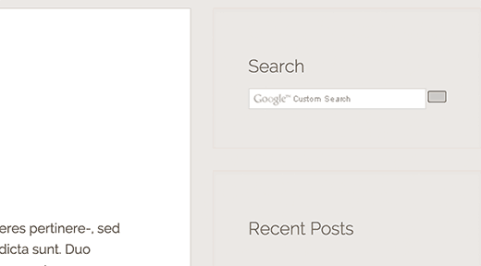
You can now visit your website to see the search form in action.
Method 2: Manually Adding Google Search in WordPress
This method requires making changes to your WordPress theme or child theme files. It is not recommended for beginners. Make sure to backup your WordPress site before making any changes to your theme files.
Visit Google Custom Search website and click on New Search Engine link on the left.
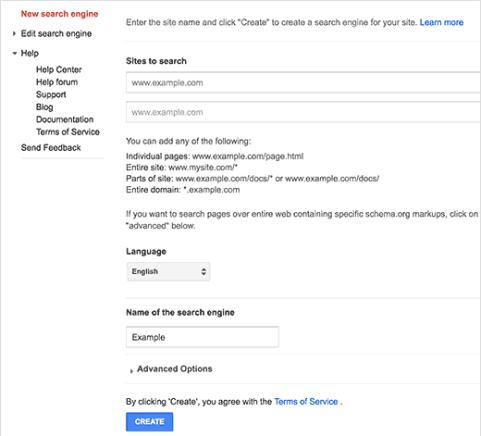
Simply provide your WordPress site’s URL in ‘Sites to Search’ field. Next, you need to choose the language of your website. Lastly, click on the create button to continue.
Google will now create your custom search engine and will show you a success message with links to further actions. You need to click on the Get Code button to continue.
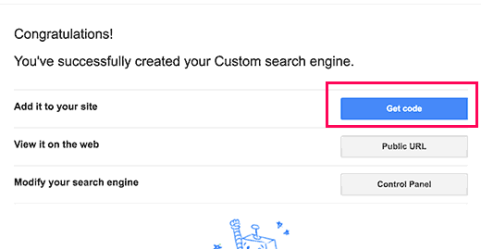
On the next screen, you will see some code in a textarea. You need to copy this code.
For this next step, you will need an FTP client. If you need help, then see our guide on how to use FTP to upload WordPress files.
Connect to your website using FTP and then go to /wp-content/themes/your-current-theme/ folder. Replace your current theme folder with the name of your current theme.
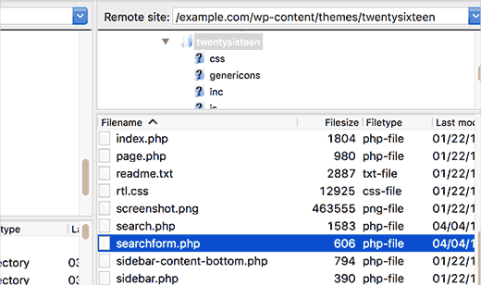
Locate the searchform.php file in your WordPress theme directory. Download this file to your computer and open it in a plain text editor like Notepad.
Delete all contents of the file and paste your Google custom search engine code. Save the file and then upload it to back to your WordPress site using FTP.
After pasting Google custom search code, go to Appearance » Widgets to drag and drop the Search widget into your sidebar.
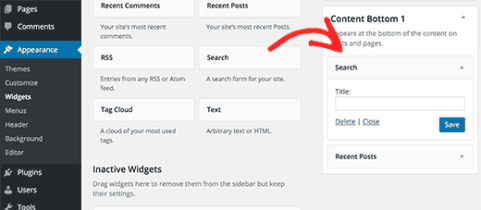
Click on the save button to store your widget settings.
You can now visit your website to see the Google search in action on your WordPress site.
Customizing Google Custom Search Engine Colors and Looks
Go to Google Custom Search website and edit your search engine. This will show settings for your custom search engine. Click on Look and Feel from sidebar.
Google custom search has some pre-made themes available to choose from. You can also click on customize tab and choose your own font, border, and background colors.
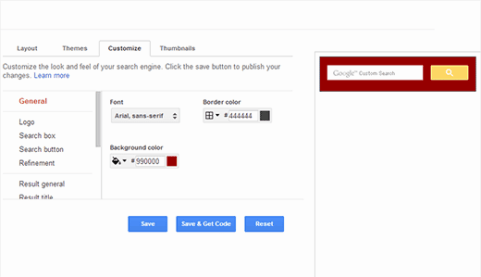
Once you are done customizing the look of your search box, simply save your changes. You don’t need to paste the code again, these changes will be automatically applied to your search form.
We hope this tutorial helped you learn how to add Google search in a WordPress site.
