In this tutorial, we will learn how to add title attribute in WordPress navigation menus.
Why Use Title Attribute in Menus?
Title attribute is an HTML attribute that can be added to any element, but it is most commonly used with links and images.
It allows you to provide additional information about the link or the image. See our guide on the difference between what’s the difference between image alt text vs title.

Typically web browsers display the title attribute on mouseover. This allows users to see where this link will take them before they click on it.
Screen readers may also read title attribute, but many screen readers will ignore it and will only read the anchor text.
Some SEO experts believe that it is not useful while others claim it is useful for SEO as it allows you to provide more context.
WordPress removed title attribute from insert link popup in version 4.2. However, you can easily add the title and rel=nofollow options in insert link popup.
Adding Title Attribute in WordPress Navigation Menu Items
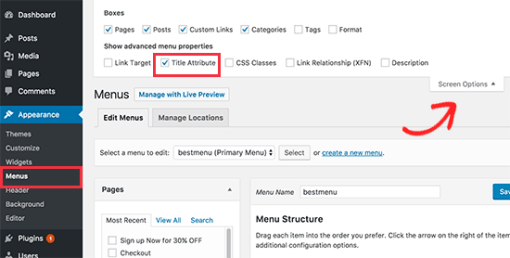
First you need to visit Appearance » Menus page and click on the ‘Screen Options‘ tab in the top right corner of the screen.

This will bring down a menu where you need to click on the check box next to Title Attribute option.
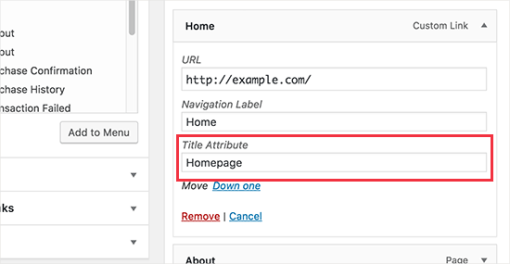
After that, simply scroll down and click on any menu item in your existing menu to expand it. You will now see the title attribute field.

You can now add the text you want to use as title and then repeat it for all menu items in your navigation menu.
Don’t forget to click on the save menu button to store your changes.
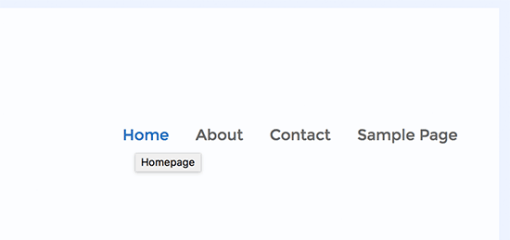
You can now visit your website and take your mouse to a link in navigation menu. You will see the title attribute displayed as tooltip.

You can take title attributes even further with jQuery by adding fancy tooltips on mouseover effect.
We hope this tutorial helped you learn how to add title attribute in WordPress navigation menus.
