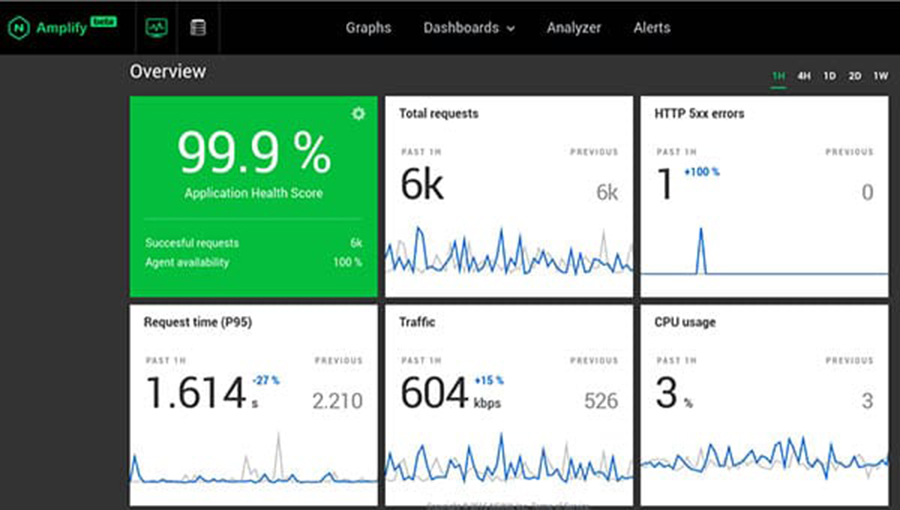
Nginx Amplify Agent is a Strong Nginx monitoring tool written in Python. Its function is to collect various metrics and metadata and send Them securely into the backend for storage and visualization. After appropriate Installation, it supplies you with NGINX Amplify web interface and also you Should observe real-time metrics to your monitored systems.
Table of Contents
Step 1. First let’s start by ensuring your system is up-to-date.
Step 2. Installing Nginx Amplify Agent.
Step 3. Configuring the Nginx Amplify Agent.
Prerequisites
This article assumes you have at least basic knowledge of Linux, know how to use the shell, and most importantly, you host your site on your own VPS. The installation is quite simple and assumes you are running in the root account, if not you may need to add ‘sudo’ to the commands to get root privileges. I will show you through the step by step installation the Nginx Amplify Agent monitoring tool on a CentOS 7 server.
Install Nginx Amplify Agent on CentOS 7
Step 1. First let’s start by ensuring your system is up-to-date.
yum clean all
yum -y update
Step 2. Installing Nginx Amplify Agent.
First, Create a repo file:
# cat >/etc/yum.repos.d/nginx-amplify.repo <
Install the Nginx Amplify Agent rpm package:
yum install nginx-amplify-agent
Verify the installtion by inspectivng the log file ‘/var/log/amplify-agent/agent.log‘
Once installed, These commands can be used to start/stop the agent:
systemctl enable amplify-agent
systemctl start amplify-agent
Step 3. Configuring the Nginx Amplify Agent.
Checklist:
    stub status
    extended access logging
    ‘warn’ level on error logging

server {
 listen [::]:80;
 server_name bmw.idroot.us localhost [::1] 127.0.0.1;
 keepalive_timeout 60;

location /nginx_status {
 stub_status;
 access_log off;

allow ::1;
 allow 127.0.0.1;
 deny all;
 }
}
The logging needs to be confiured to have extended information as per the documentation:
log_format  main      '$remote_addr - $remote_user [$time_local] "$request" '
                      ' $status $body_bytes_sent "$http_referer" '
                      '"$http_user_agent" "$http_x_forwarded_for" '
                      'rt=$request_time ua="$upstream_addr" '
                      'us="$upstream_status" ut="$upstream_response_time" '
                      'ul="$upstream_response_length" '
                      'cs=$upstream_cache_status' ;
Ensure warnings are logged to the error log:
error_log /var/log/nginx/error.log warn
Finally steps, You can overview the status of our monitored server in the Web interface logging to your Amplify Account as in the snapshot:

Congratulation’s! You have successfully installed Nginx Amplify. Thanks for using this tutorial for installing Nginx Amplify monitoring tool on CentOS 7 systems. For additional help or useful information, we recommend you to check the official Nginx Amplify Agent web site.
