How To Install Backdrop CMS on Ubuntu 16.04

Install Backdrop CMS on Ubuntu 16

Backdrop CMS is a full-featured content management system that allows non-technical users to manage a wide variety of content. It can be used to create all kinds of websites including blogs, image galleries, social networks, intranets, and more.

This article assumes you have at least basic knowledge of linux, know how to use the shell, and most importantly, you host your site on your own VPS. The installation is quite simple and assumes you are running in the root account, if not you may need to add ‘sudo’ to the commands to get root privileges. I will show you through the step by step installation Backdrop CMS on an Ubuntu 16.04 LTS (Xenial Xerus) server.

Install Backdrop CMS on Ubuntu 16.04

Step 1. First make sure that all your system packages are up-to-date by running these following apt-get commands in the terminal.

sudo apt-get update
sudo apt-get upgrade

Step 2. Install LAMP (Linux, Apache, MariaDB, PHP) server.

A Ubuntu 16.04 LAMP server is required. If you do not have LAMP installed, you can follow our guide here. Also install all required PHP modules:

apt-get install php7.0 php7.0-cli php7.0-mbstring php7.0-mysql php7.0-gd php7.0-mcrypt libgd-tools php-pear

Step 3. Installing Backdrop CMS.

First thing to do is to go to Backdrop CMS’s download page and download the latest stable version of Backdrop CMS, At the moment of writing this article it is version 1.4.3:

wget https://github.com/backdrop/backdrop/releases/download/1.4.3/backdrop.zip

Unpack the Backdrop archive to the document root directory on your server:

unzip backdrop.zip
mkdir -p /var/www/html
mv backdrop /var/www/html

We will need to change some folders permissions:

chown -R www-data:www-data /var/www/html/backdrop/

Step 4. Configuring MariaDB for Backdrop CMS.

By default, MariaDB is not hardened. You can secure MariaDB using the mysql_secure_installation script. You should read and below each steps carefully which will set root password, remove anonymous users, disallow remote root login, and remove the test database and access to secure MariaDB.

mysql_secure_installation

Configure it like this:

- Set root password? [Y/n] y
- Remove anonymous users? [Y/n] y
- Disallow root login remotely? [Y/n] y
- Remove test database and access to it? [Y/n] y
- Reload privilege tables now? [Y/n] y

Next we will need to log in to the MariaDB console and create a database for the Backdrop CMS. Run the following command:

mysql -u root -p

This will prompt you for a password, so enter your MariaDB root password and hit Enter. Once you are logged in to your database server you need to create a database for Backdrop CMS installation:

MariaDB [(none)]> CREATE DATABASE backdropdb character set UTF8;
MariaDB [(none)]> GRANT ALL PRIVILEGES ON mahara.* TO 'backdropuser'@'localhost' IDENTIFIED BY 'your-password';
MariaDB [(none)]> FLUSH PRIVILEGES;
MariaDB [(none)]> \q

Step 5. Configuring Apache web server for Backdrop CMS.

Create a new virtual host directive in Apache. For example, create a new Apache configuration file named ‘backdrop.conf’ on your virtual server:

sudo a2enmod rewrite
touch /etc/apache2/sites-available/backdrop.conf
ln -s /etc/apache2/sites-available/backdrop.conf /etc/apache2/sites-enabled/backdrop.conf
nano /etc/apache2/sites-available/backdrop.conf

Add the following lines:

<VirtualHost *:80>
ServerAdmin [email protected]
DocumentRoot "/var/www/html/backdrop/"
ServerName your-domain.com
ServerAlias www.your-domain.com
<Directory "/var/www/html/backdrop/">
Options FollowSymLinks
AllowOverride All
Order allow,deny
allow from all
</Directory>
ErrorLog /var/log/apache2/your-domain.com-error_log
CustomLog /var/log/apache2/your-domain.com-access_log common
</VirtualHost>

Now, we can restart Apache web server so that the changes take place:

systemctl restart apache2.service

Step 6. Accessing Backdrop content management system.

Backdrop CMS will be available on HTTP port 80 by default. Open your favorite browser and navigate to http://yourdomain.com or http://server-ip and complete the required the steps to finish the installation. If you are using a firewall, please open port 80 to enable access to the control panel.

Congratulation’s! You have successfully installed Backdrop CMS. Thanks for using this tutorial for installing Backdrop CMS (content management system) on your Ubuntu 16.04 LTS (Xenial Xerus) system. For additional help or useful information, we recommend you to check the official Backdrop CMS web site.

[youtube https://www.youtube.com/watch?v=aRgG1k8HKoU]

You Might Also Like: How To Install October CMS on Ubuntu 16.04

How To Install Pip on Ubuntu 16.04

Install Pip on Ubuntu 16

The Pip command is a tool for installing and managing Python packages, such as those found in the Python Package Index. With the help of pip you can also install the package of particular version. Most importantly pip has a feature to manage full lists of packages and corresponding version numbers, possible through a “requirements” file. It performs the same basic job as easy_install, but with some extra features.

Install Pip on Ubuntu 16.04

This article assumes you have at least basic knowledge of linux, know how to use the shell, and most importantly, you host your site on your own VPS. The installation is quite simple and assumes you are running in the root account, if not you may need to add ‘sudo’ to the commands to get root privileges. I will show you through the step by step installation Pip Python on a Ubuntu 16.04 LTS (Xenial Xerus) server.

Step 1. First make sure that all your system packages are up-to-date by running these following apt-get commands in the terminal.

sudo apt-get update
sudo apt-get upgrade

Step 2. Installing Pip.

Install the pip by using apt-get command:

apt-get install python-pip

Once the installation is completed you can verify that it was successful by using the following command:

pip -V

Step 3. How to use pip command.

After installing python-pip package, the pip command will be available on system. There are multiple options available with pip command:

To install new python package type:

pip install packageName

To uninstall python package installed by pip type:

pip uninstall packageName

To search python package type:

pip search packageName

For more Pip options and usage examples you can use the –help flag:

[[email protected] ~]# pip --help


Usage:
pip <command></command> [options]

Commands:
install Install packages.
uninstall Uninstall packages.
freeze Output installed packages in requirements format.
list List installed packages.
show Show information about installed packages.
search Search PyPI for packages.
wheel Build wheels from your requirements.
zip DEPRECATED. Zip individual packages.
unzip DEPRECATED. Unzip individual packages.
bundle DEPRECATED. Create pybundles.
help Show help for commands.

General Options:
-h, --help Show help.
-v, --verbose Give more output. Option is additive, and can be used up to 3 times.
-V, --version Show version and exit.
-q, --quiet Give less output.
--log-file Path to a verbose non-appending log, that only logs failures. This
log is active by default at /home/sharad/.pip/pip.log.
--log Path to a verbose appending log. This log is inactive by default.
--proxy Specify a proxy in the form [user:passwd@]proxy.server:port.
--timeout Set the socket timeout (default 15 seconds).
--exists-action Default action when a path already exists: (s)witch, (i)gnore,
(w)ipe, (b)ackup.
--cert Path to alternate CA bundle.
[[email protected] ~]#

Congratulation’s! You have successfully installed Pip. Thanks for using this tutorial for installing Pip Python on Ubuntu 14.04 system. For additional help or useful information, we recommend you to check the official Python web site.

How To Install Traq on Ubuntu 16.04

Install Traq on Ubuntu 16

Traq is a PHP powered project management and issue tracking system capable of handling multiple projects with per-project permissions, milestones, custom fields, email notifications and much more.

Install Traq on Ubuntu 16.04

This article assumes you have at least basic knowledge of linux, know how to use the shell, and most importantly, you host your site on your own VPS. The installation is quite simple and assumes you are running in the root account, if not you may need to add ‘sudo’ to the commands to get root privileges. I will show you through the step by step installation Traq on a Ubuntu 16.04 LTS (Xenial Xerus) server.
Traq features

Multiple Projects – Manage multiple projects easily and effecively with Traq’s multiple project features.
Milestones – Easily manage bugs and requests with project milestones.
Timeline – See what, and when, changes were made, tickets opened or closed with the project timeline.
Repository Browser – Browse your projects source repository with the built in repository browser.
Plugins – Extend with plugins, Traq has a powerful plugin system.
Filters – Filter tickets to find what you’re looking for.
Notifications – Receive email notifications when tickets are created or updated.
RSS Feeds – Subscribe to the timeline, or tickets RSS feed to get updates.

Step 1. First make sure that all your system packages are up-to-date by running these following apt-get commands in the terminal.

sudo apt-get update
sudo apt-get upgrade

Step 2. Install LAMP (Linux, Apache, MariaDB, PHP) server.

A Ubuntu 16.04 LAMP server is required. If you do not have LAMP installed, you can follow our guide here. Also install all required PHP modules:

apt-get install php5 php5-mysql php5-gd php5-curl libssh2-php php5-mcrypt

Step 3. Installing Traq.

First thing to do is to go to Traq’s download page and download the latest stable version of Traq, At the moment of writing this article it is version 3:

cd /var/www/html/
git clone --recursive https://github.com/nirix/traq

And checkout the latest version:

cd traq/
git checkout v3.6.0

Next, run Traq properly, create a new .htaccess file:

nano .htaccess

Add following content:

RewriteEngine On
RewriteCond %{REQUEST_FILENAME} !-d
RewriteCond %{REQUEST_FILENAME} !-f
RewriteRule ^(.*)$ index.php/$1 [L]

We will need to change some folders permissions:

chown -R www-data:www-data /var/www/html/traq/

Step 4. Configuring MariaDB for Traq.

By default, MariaDB is not hardened. You can secure MariaDB using the mysql_secure_installation script. You should read and below each steps carefully which will set root password, remove anonymous users, disallow remote root login, and remove the test database and access to secure MariaDB.

mysql_secure_installation

Configure it like this:

- Set root password? [Y/n] y
- Remove anonymous users? [Y/n] y
- Disallow root login remotely? [Y/n] y
- Remove test database and access to it? [Y/n] y
- Reload privilege tables now? [Y/n] y

Next we will need to log in to the MariaDB console and create a database for the Traq. Run the following command:

mysql -u root -p

This will prompt you for a password, so enter your MariaDB root password and hit Enter. Once you are logged in to your database server you need to create a database for Traq installation:

create database traqdb;
GRANT ALL PRIVILEGES ON traqdb.* TO 'traquser'@'localhost' IDENTIFIED BY 'Your_Password';
flush privileges;
quit

Step 5. Configuring Apache web server for Traq.

Create a new virtual host directive in Apache. For example, create a new Apache configuration file named ‘traq.conf’ on your virtual server:

sudo a2enmod rewrite
touch /etc/apache2/sites-available/traq.conf
ln -s /etc/apache2/sites-available/traq.conf /etc/apache2/sites-enabled/traq.conf
nano /etc/apache2/sites-available/traq.conf

Add the following lines:

ServerAdmin [email protected]
DocumentRoot "/var/www/html/traq/"
ServerName your-domain.com
ServerAlias www.your-domain.com
&lt;Directory "/var/www/html/traq/"&gt;
Options FollowSymLinks
AllowOverride All
Order allow,deny
allow from all

ErrorLog /var/log/apache2/your-domain.com-error_log
CustomLog /var/log/apache2/your-domain.com-access_log common

Now, we can restart Apache web server so that the changes take place:

systemctl restart apache2.service

Step 6. Accessing Traq.

Traq will be available on HTTP port 80 by default. Open your favorite browser and navigate to http://yourdomain.com or http://server-ip and complete the required the steps to finish the installation. If you are using a firewall, please open port 80 to enable access to the control panel.

Congratulation’s! You have successfully installed Traq. Thanks for using this tutorial for installing Traq on your Ubuntu 16.04 LTS (Xenial Xerus) system. For additional help or useful information, we recommend you to check the official Traq web site.

How To Install qBitTorrent on Ubuntu 16.04

Install qBitTorrent on Ubuntu 16

qBittorrent is a torrent client, similar to µTorrent, which was recently ported to the Linux systems. Among others, qBittorrent has built-in search engine for searching in the popular BitTorrent sites, has torrent queueing and prioritizing features, has IP Filtering options, provides a tool for creating torrents and bandwidth limitations. It is available for Linux,Microsoft Windows and macOS.

This article assumes you have at least basic knowledge of linux, know how to use the shell, and most importantly, you host your site on your own VPS. The installation is quite simple and assumes you are running in the root account, if not you may need to add ‘sudo’ to the commands to get root privileges. I will show you through the step by step installation qBitTorrent on a Ubuntu 16.04 (Xenial Xerus) server.
Install qBitTorrent on Ubuntu 16.04

Step 1. First make sure that all your system packages are up-to-date by running these following apt-get commands in the terminal.

sudo apt-get update
sudo apt-get upgrade

Step 2. Installing qBittorrent on Ubuntu.

To get the most recent qBittorrent, we need to add the official qBittorrent repository:

sudo add-apt-repository ppa:qbittorrent-team/qbittorrent-stable
sudo apt-get update
sudo apt-get install qbittorrent

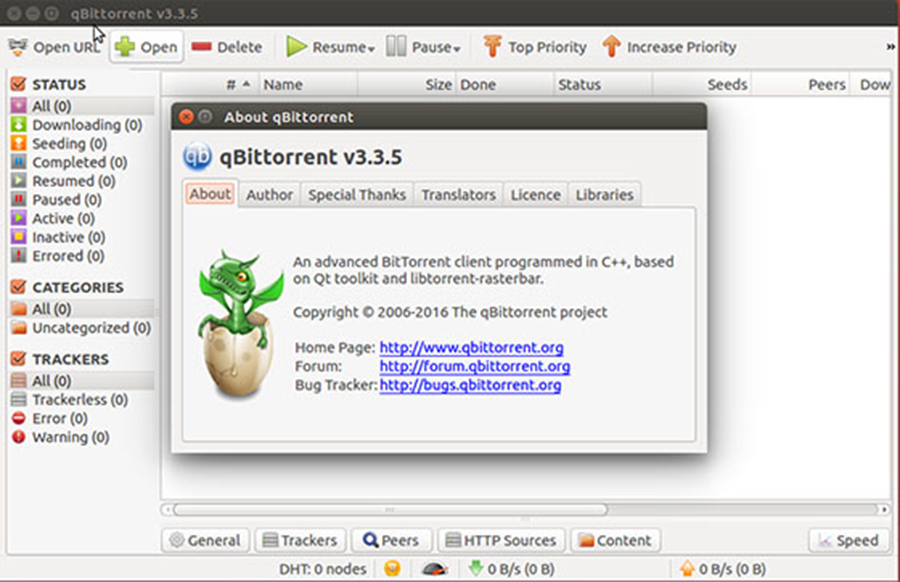
qBitTorrent-bitTorrent-client

Congratulations! You have successfully installed qBitTorrent. Thanks for using this tutorial for installing qBitTorrent bitTorrent client in Ubuntu 16.04 LTS (Xenial Xerus) system. For additional help or useful information, we recommend you to check the official qBitTorrent web site.

How To Install Nextcloud on Ubuntu 16.04

Install Nextcloud on Ubuntu 16

Nextcloud is open source self-hosted file sync and share application (Calendar, Contacts, Documents, Email, and more). The developers at Nextcloud are doing their best to give the users a more secure platform, fewer bugs and overall a better product.

Install Nextcloud on Ubuntu 16.04

This article assumes you have at least basic knowledge of linux, know how to use the shell, and most importantly, you host your site on your own VPS. The installation is quite simple and assumes you are running in the root account, if not you may need to add ‘sudo’ to the commands to get root privileges. I will show you through the step by step installation Nextcloud on a Ubuntu 16.04 LTS (Xenial Xerus) server.

Step 1. First make sure that all your system packages are up-to-date by running these following apt-get commands in the terminal.

sudo apt-get update
sudo apt-get upgrade

Step 2. Install LAMP (Linux, Apache, MariaDB, PHP) server.

A Ubuntu 16.04 LAMP server is required. If you do not have LAMP installed, you can follow our guide here. Also install all required PHP modules:

apt-get install php7.0 libapache2-mod-php7.0 php7.0-mbstring php7.0-curl php7.0-zip php7.0-gd php7.0-mysql php7.0-mcrypt

Step 3. Installing Nextcloud.

First thing to do is to go to Nextcloud’s download page and download the latest stable version of Nextcloud, At the moment of writing this article it is version 9.0.52:

wget https://download.nextcloud.com/server/releases/nextcloud-9.0.52.zip

Unpack the Nextcloud archive to the document root directory on your server:

unzip nextcloud-9.0.52.zip
mv nextcloud /var/www/html

We will need to change some folders permissions:

chown -R www-data:www-data /var/www/html/nextcloud

Step 4. Configuring MariaDB for Nextcloud.

By default, MariaDB is not hardened. You can secure MariaDB using the mysql_secure_installation script. You should read and below each steps carefully which will set root password, remove anonymous users, disallow remote root login, and remove the test database and access to secure MariaDB.

mysql_secure_installation

Configure it like this:

- Set root password? [Y/n] y
- Remove anonymous users? [Y/n] y
- Disallow root login remotely? [Y/n] y
- Remove test database and access to it? [Y/n] y
- Reload privilege tables now? [Y/n] y

Next we will need to log in to the MariaDB console and create a database for the Nextcloud. Run the following command:

mysql -u root -p

This will prompt you for a password, so enter your MariaDB root password and hit Enter. Once you are logged in to your database server you need to create a database for Nextcloud installation:

MariaDB [(none)]&gt; CREATE DATABASE nextcloud;
MariaDB [(none)]&gt; GRANT ALL PRIVILEGES ON nextcloud.* TO 'nextcloud'@'localhost' IDENTIFIED BY 'strong_password';
MariaDB [(none)]&gt; FLUSH PRIVILEGES;
MariaDB [(none)]&gt; \q

Disable MariaDB binary logging by commenting the following lines:

nano /etc/mysql/my.cnf

Add the following three lines in [mysqld] section:

log-bin = /var/log/mysql/mariadb-bin
log-bin-index = /var/log/mysql/mariadb-bin.index
binlog_format = mixed

Step 5. Configuring Apache web server for Nextcloud.

Create a new virtual host directive in Apache. For example, create a new Apache configuration file named ‘nextcloud.conf’ on your virtual server:

sudo a2enmod rewrite
touch /etc/apache2/sites-available/nextcloud.conf
ln -s /etc/apache2/sites-available/nextcloud.conf /etc/apache2/sites-enabled/nextcloud.conf
nano /etc/apache2/sites-available/nextcloud.conf

Add the following lines:

ServerAdmin [email protected]
DocumentRoot "/var/www/html/nextcloud/"
ServerName your-domain.com
ServerAlias www.your-domain.com
&lt;Directory "/var/www/html/nextcloud/"&gt;
Options FollowSymLinks
AllowOverride All
Order allow,deny
allow from all

ErrorLog /var/log/apache2/your-domain.com-error_log
CustomLog /var/log/apache2/your-domain.com-access_log common

Now, we can restart Apache web server so that the changes take place:

systemctl restart apache2.service

Step 6. Accessing Nextcloud.

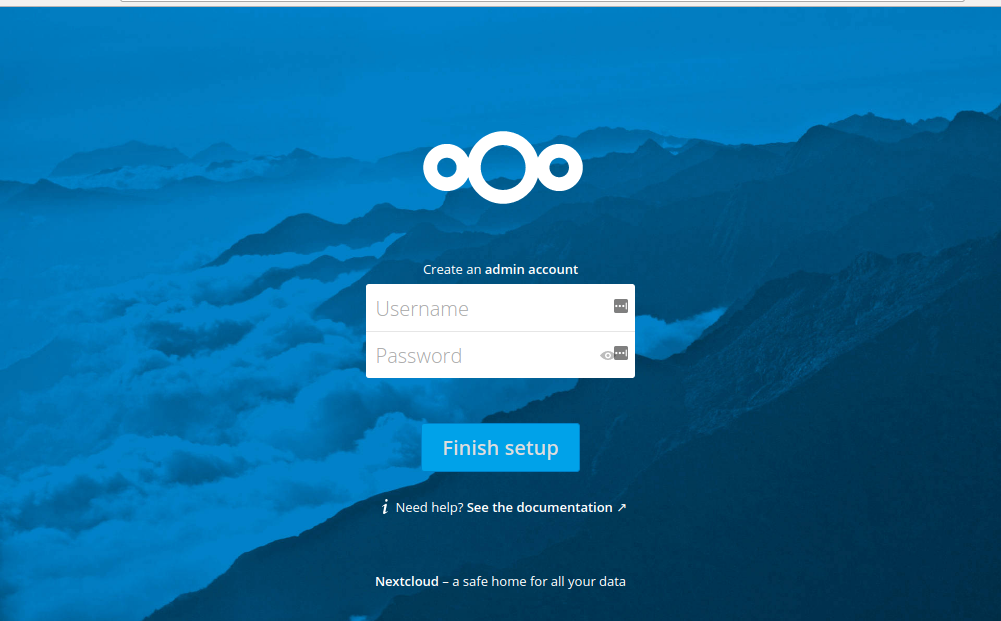
Nextcloud will be available on HTTP port 80 by default. Open your favorite browser and navigate to http://yourdomain.com/ or http://server-ip/ and complete the required the steps to finish the installation. If you are using a firewall, please open port 80 to enable access to the control panel. What you do with Nextcloud is up to you. You can add new modules or just use it as a cloud-based file sync and share. You can install the Android app and even make use of the ownCloud desktop clients (they’ll work fine with Nextcloud).

next cloud install on ubuntu 16 login page
Congratulation’s! You have successfully installed Nextcloud. Thanks for using this tutorial for installing Nextcloud personal cloud storage on your Ubuntu 16.04 LTS (Xenial Xerus) system. For additional help or useful information, we recommend you to check the official Nextcloud web site.

[youtube https://www.youtube.com/watch?v=wqRgeFXYUys]

How To Install GlassFish on Ubuntu 16.04

Install GlassFish on Ubuntu 16

GlassFish is a popular app server that can run java based web applications for you. GlassFish 4.1 release supports the latest Java Platform: Enterprise Edition 7. It supports Enterprise JavaBeans, JPA, JavaServer Faces, JMS, RMI, JavaServer Pages, servlets, etc.

Install GlassFish on Ubuntu 16.04

This article assumes you have at least basic knowledge of linux, know how to use the shell, and most importantly, you host your site on your own VPS. The installation is quite simple and assumes you are running in the root account, if not you may need to add ‘sudo’ to the commands to get root privileges. I will show you through the step by step installation GlassFish on a Ubuntu 16.04 (Xenial Xerus) server.

Step 1. First make sure that all your system packages are up-to-date by running these following apt-get commands in the terminal.

sudo apt-get update
sudo apt-get upgrade

Step 2. Installing Java (JRE or JDK).

Choose the type of Java installation that you want with one the following:

sudo apt-get install openjdk-7-jre
sudo apt-get install openjdk-7-jdk

Another alternative Java install is with Oracle JRE and JDK. However, we would need to install additional repositories for a proper installation:

sudo apt-get install python-software-properties
sudo add-apt-repository ppa:webupd8team/java

Then, you will need to fully update the system with the following command and install it:

sudo apt-get update
sudo apt-get install oracle-java8-installer

Verify Installed Java Version.

java -version

Result:

java version "1.8.0_74"
Java(TM) SE Runtime Environment (build 1.8.0_74-b02)
Java HotSpot(TM) 64-Bit Server VM (build 25.74-b02, mixed mode)

Step 3. Install GlassFish.

First thing to do is to go to GlassFish’s download page and download the latest stable version of GlassFish, At the moment of writing this article it is version 4.1.1:

wget http://download.java.net/glassfish/4.1.1/release/glassfish-4.1.1.zip

Once the Download completed successfully, extract the GlassFish archive to the document root directory on your server:

unzip glassfish-4.1.1.zip

Start the GlassFish server by using the following command as follows:

glassfish4/bin/asadmin start-domain

Step 4. Accessing GlassFish.

The default GlassFish Server’s port is 8080 and administration server’s port is 4848 with the administration user name as admin with no password. We can visit http://ip-address:8080/ to check the homepage of GlassFish Server and http://ip-address:4848/ to get the admin login page in our web browser and complete the required the steps to finish the installation. If you are using a firewall, please open port 4848 and 8080 to enable access to the control panel.

Congratulations! You have successfully installed GlassFish. Thanks for using this tutorial for installing GlassFish in Ubuntu 16.04 LTS (Xenial Xerus) system. For additional help or useful information, we recommend you to check the official GlassFish web site.

Easy Guide To Install Skype on Ubuntu 16.04

Install Skype on Ubuntu 16

Skype is a very popular communication software. Skype can be used for audio and video communication as well as text. You can also call land line with small cost via skype. Skype also offers some rich features like voice mail, video chat, instant messaging, call forwarding, conference calling and many more.

Install Skype on Ubuntu 16.04

This article assumes you have at least basic knowledge of linux, know how to use the shell, and most importantly, you host your site on your own VPS. The installation is quite simple and assumes you are running in the root account, if not you may need to add ‘sudo’ to the commands to get root privileges. I will show you through the step by step installation Skype on a Ubuntu 16.04 (Xenial Xerus) server.

Step 1. First, you need to enable Canonical partner repository on your system with the below command.

sudo add-apt-repository "deb http://archive.canonical.com/ $(lsb_release -sc) partner"
sudo dpkg --add-architecture i386
sudo apt-get update

Step 2. Installing Skype.

If you have the partner repositories enabled you can simply install with the below command:

sudo apt-get install skype

Step 3. Accessing Skype.

Skype should now be installed on you Ubuntu 16.04 system. Use Ubuntu’s application menu to start Skype or start Skype directly from your terminal:

skype

Congratulation’s! You have successfully installed Skype. Thanks for using this tutorial for installing Skype on your CentOS 7 system. For additional help or useful information, we recommend you to check the official Skype web site.