How To Install LimeSurveyCE(V3.17.1) on Ubuntu 18.04 LTS

Install LimeSurvey on Ubuntu 18

LimeSurvey (formerly PHPSurveyor) is an open source online survey application. It has been widely used by many big industries to create the survey tasks. It has many powerful features like creating dynamic fields for survey. Supports multilingual, defines userroles, user groups and the more it has been integrated into various CMS. The limesurvey team provides the commercial for those who are seeking. As well as community support for its users.

This article assumes you have at least basic knowledge of Linux, know how to use the shell, and most importantly, you host your site on your own VPS. The installation is quite simple and assumes you are running in the root account, if not you may need to add ‘sudo’ to the commands to get root privileges. I will show you through the step by step installation LimeSurvey on an Ubuntu 18.04 (Bionic Beaver) server.

Install LimeSurvey on Ubuntu 18.04 LTS

Step 1. First, make sure that all your system packages are up-to-date

sudo apt update
sudo apt upgrade

Step 2. Install LAMP (Linux, Apache, MariaDB and PHP) server.

A Ubuntu 18.04 LAMP server is required. If you do not have LAMP installed, you can follow our guide here. Also install all required PHP modules:

apt-get install php7.1-cli php7.1-mbstring php7.1-gd php7.1-opcache php7.1-mysql php7.1-json php7.1-mcrypt php7.1-xml php7.1-curl

Step 3. Download the latest LimeSurvey version

Download the latest stable version of LimeSurvey, At the moment of writing this article it is version 3.15.6:

wget https://www.limesurvey.org/stable-release?download=2519:limesurvey3156%20190108zip
unzip "stable-release?download=2519:limesurvey3156 20190108zip"
mv limesurvey/ /var/www/html/limesurvey/

We will need to change some folders permissions:

chown www-data:www-data -R /var/www/html/limesurvey
chmod -R 755 /var/www/html/limesurvey/

Step 4. Configuring MariaDB.

By default, MariaDB is not hardened. You can secure MariaDB using the mysql_secure_installation script. You should read and below each steps carefully which will set root password, remove anonymous users, disallow remote root login, and remove the test database and access to secure MariaDB.

mysql_secure_installation

Configure it like this:

- Set root password? [Y/n] y
- Remove anonymous users? [Y/n] y
- Disallow root login remotely? [Y/n] y
- Remove test database and access to it? [Y/n] y
- Reload privilege tables now? [Y/n] y

Next we will need to log in to the MariaDB console and create a database for the LimeSurvey. Run the following command:

mysql -u root -p

This will prompt you for a password, so enter your MariaDB root password and hit Enter. Once you are logged in to your database server you need to create a database for LimeSurvey installation:

CREATE DATABASE limesurvey;
GRANT ALL PRIVILEGES ON limesurvey.* TO 'limeuser'@'localhost' IDENTIFIED BY 'your-password';
FLUSH PRIVILEGES;
\q

Step 5. Configuring Apache web server for LimeSurvey.

Create a new virtual host directive in Apache. For example, create a new Apache configuration file named ‘limesurvey.conf’ on your virtual server:

touch /etc/apache2/sites-available/limesurvey.conf
ln -s /etc/apache2/sites-available/limesurvey.conf /etc/apache2/sites-enabled/limesurvey.conf
nano /etc/apache2/sites-available/limesurvey.conf

Add the following lines:

<VirtualHost *:80>
ServerAdmin [email protected]
DocumentRoot /var/www/html/limesurvey/
ServerName your-domain.com
ServerAlias www.your-domain.com
<Directory /var/www/html/limesurvey/>
Options FollowSymLinks
AllowOverride All
</Directory>
ErrorLog /var/log/apache2/your-domain.com-error_log
CustomLog /var/log/apache2/your-domain.com-access_log common
</VirtualHost>

Now, we can restart Apache web server so that the changes take place:

sudo a2ensite limesurvey.conf
sudo a2enmod rewrite
sudo systemctl restart apache2.service

LimeSurvey will be available on HTTP port 80 by default. Open your favorite browser and navigate to http://yourdomain.com/admin or http://server-ip/admin and complete the required the steps to finish the installation. If you are using a firewall, please open port 80 to enable access to the control panel.

Congratulation’s! You have successfully installed LimeSurvey. Thanks for using this tutorial for installing LimeSurvey online survey platform based PHP on Ubuntu 18.04 LTS (Bionic Beaver) system. For additional help or useful information, we recommend you to check the official LimeSurvey web site.

How To Install Redmine 4.0.3 on Ubuntu 18.04 LTS

Install Redmine on Ubuntu 18

Redmine is a project management web app that allows users to manage projects flexibly while offering robust monitoring tools and a broad library of plug-ins. This free and open source solution offers a substitute for paid job management tools and contains support for wikis, forums, calendars, and information visualization programs.

This article assumes you have at least basic knowledge of Linux, know how to use the shell, and most importantly, you host your site on your own VPS. The installation is quite simple and assumes you are running in the root account, if not you may need to add ‘sudo’ to the commands to get root privileges. I will show you through the step by step installation Wine on an Ubuntu 18.04 (Bionic Beaver) server.

Install Redmine on Ubuntu 18.04 LTS

Step 1. First, make sure that all your system packages are up-to-date

sudo apt update
sudo apt upgrade
sudo apt install build-essential libmysqlclient-dev imagemagick libmagickwand-dev
[php]

Step 2. Installing MySQL server.

[php]
MySQL needs to be configured so that Redmine can store data, so we will install MySQL server:
apt-get install mysql-server mysql-client

By default, MySQL is not hardened. You can secure MySQL using the mysql_secure_installation script. You should read and below each steps carefully which will set root password, remove anonymous users, disallow remote root login, and remove the test database and access to secure MySQL.

mysql_secure_installation

Configure it like this:

- Set root password? [Y/n] y
- Remove anonymous users? [Y/n] y
- Disallow root login remotely? [Y/n] y
- Remove test database and access to it? [Y/n] y
- Reload privilege tables now? [Y/n] y

Next we will need to log in to the MySQL console and create a database for the Redmine. Run the following command:

mysql -u root -p

This will prompt you for a password, so enter your MySQL root password and hit Enter. Once you are logged in to your database server you need to create a database for Redmine installation:

CREATE DATABASE redmin
GRANT ALL PRIVILEGES ON redmine.* TO 'redmine'@'localhost' IDENTIFIED BY 'PASSWORD';
FLUSH PRIVILEGES;
\q

Step 3. Installing Ruby.

Install Ruby using following command:

sudo apt install ruby-full

Step 4. Installing Passenger and Nginx.

Passenger is a fast and lightweight web application server for Ruby, Node.js and Python that can be integrated with Apache and Nginx. We will install Passenger as an Nginx module:

sudo apt install dirmngr gnupg apt-transport-https ca-certificates

Next, import the repository GPG key and enable the Phusionpassenger repository:

sudo apt-key adv --recv-keys --keyserver hkp://keyserver.ubuntu.com:80 561F9B9CAC40B2F7
sudo add-apt-repository 'deb https://oss-binaries.phusionpassenger.com/apt/passenger bionic main'

Once the repository is enabled, update the packages list and install the Passenger Nginx module with:

sudo apt update
sudo apt install libnginx-mod-http-passenger

Step 5. Installing Redmine on Ubuntu 18.04.

First, download the latest version of Redmine, at the moment of writing this article it is version 4:

sudo curl -L http://www.redmine.org/releases/redmine-4.0.1.tar.gz -o /tmp/redmine.tar.gz
sudo tar zxf /tmp/redmine.tar.gz
sudo mv /tmp/redmine-4.0.1 /opt/redmine

Make the following changes to the database.yml file:

sudo cp /opt/redmine/config/database.yml.example /opt/redmine/config/database.yml
sudo nano /opt/redmine/config/database.yml

Add following content:

production:
  adapter: mysql2
  database: redmine
  host: localhost
  username: redmine
  password: "change-with-strong-password"
  encoding: utf8

Install the Ruby dependencies and migrate the database:

cd /opt/redmine/
sudo gem install bundler --no-rdoc --no-ri
sudo bundle install --without development test postgresql sqlite

Generate the secret token using the following command:

cd /opt/redmine/
sudo bundle exec rake generate_secret_token
sudo RAILS_ENV=production bundle exec rake db:migrate

Then, Set the correct permissions by issuing following chown command:

sudo chown -R www-data: /opt/redmine/

Open your text editor and create the following Nginx vhost file:

sudo nano /etc/nginx/sites-available/example.com
# Redirect HTTP -> HTTPS
server {
    listen 80;
    server_name www.example.com example.com;

    include snippets/letsencrypt.conf;
    return 301 https://example.com$request_uri;
}

# Redirect WWW -> NON WWW
server {
    listen 443 ssl http2;
    server_name www.example.com;

    ssl_certificate /etc/letsencrypt/live/example.com/fullchain.pem;
    ssl_certificate_key /etc/letsencrypt/live/example.com/privkey.pem;
    ssl_trusted_certificate /etc/letsencrypt/live/example.com/chain.pem;
    include snippets/ssl.conf;

    return 301 https://example.com$request_uri;
}

server {
    listen 443 ssl http2;
    server_name example.com;

    root /opt/redmine/public;

    # SSL parameters
    ssl_certificate /etc/letsencrypt/live/example.com/fullchain.pem;
    ssl_certificate_key /etc/letsencrypt/live/example.com/privkey.pem;
    ssl_trusted_certificate /etc/letsencrypt/live/example.com/chain.pem;
    include snippets/ssl.conf;
    include snippets/letsencrypt.conf;

    # log files
    access_log /var/log/nginx/example.com.access.log;
    error_log /var/log/nginx/example.com.error.log;

    passenger_enabled on;
    passenger_min_instances 1;
    client_max_body_size 10m;
}

Enable the server block by creating a symbolic link to the sites-enabled directory:

sudo ln -s /etc/nginx/sites-available/example.com /etc/nginx/sites-enabled/

Restart the web server for the changes to take effect:

sudo systemctl restart nginx

Step 6. Accessing Redmine.

Redmine will be available on HTTPInstall Redmine on Ubuntu 18 port 80 by default. Open your favorite browser and navigate to http://mydomain.com and complete the required the steps to finish the installation using the default credentials (admin/admin). If you are using a firewall, please open port 80 to enable access to the control panel.

Congratulation’s! You have successfully installed Redmine. Thanks for using this tutorial for installing Redmine project management web app on Ubuntu 18.04 LTS (Bionic Beaver) system. For additional help or useful information, we recommend you to check the official Redmine web site.

How To Install Gradle 5.4. on Ubuntu 18.04 LTS

Install Gradle on Ubuntu 18

Gradle is a free and open source build automation toolset based on the concepts of Apache Ant and Apache Maven. Gradle provides a platform to support the entire development lifecycle of a software project.

This article assumes you have at least basic knowledge of Linux, know how to use the shell, and most importantly, you host your site on your own VPS. The installation is quite simple and assumes you are running in the root account, if not you may need to add ‘sudo’ to the commands to get root privileges. I will show you through the step by step installation Gradle on a 18.04 LTS (Bionic Beaver) server.

Install Gradle on Ubuntu 18.04 LTS

Step 1. First, make sure that all your system packages are up-to-date

sudo apt-get update
sudo apt-get upgrade

Step 2. Installing Java.

Gradle requires Java to be installed on your server. By default, Java is not available in Ubuntu’s repository. Add the Oracle Java PPA to Apt with the following command:

add-apt-repository ppa:webupd8team/java
apt-get update -y
apt-get install oracle-java8-installer

Verify the Java version by running the following command:

java -version

Step 3. Download Gradle

Run the commands below to download Gradle, At the time of this writing, the version is 4.10.2:

wget https://services.gradle.org/distributions/gradle-4.10.2-bin.zip -P /tmp

Now extract downloaded archive using the following command:

sudo unzip -d /opt/gradle /tmp/gradle-*.zip

Step 4. Configure Ubuntu Environment Variables.

You can do that by running the commands below to create a new file called gradle.sh in the /etc/profile.d directory:

sudo nano /etc/profile.d/gradle.sh

Paste the following configuration:

export GRADLE_HOME=/opt/gradle/gradle-4.10.2
export PATH=${GRADLE_HOME}/bin:${PATH}

When you’re done, run the commands below to make the file executable:

sudo chmod +x /etc/profile.d/gradle.sh
source /etc/profile.d/gradle.sh

Step 5. Verify the Gradle installation.

You can run the following command to check if the Gradle install was successful:

gradle -v

You should see the following output:

------------------------------------------------------------
Gradle 4.10.2
------------------------------------------------------------

Build time:   2018-11-11 18:46:15 UTC
Revision:     b4d8d5d170bb4ba5ramona88d7fe5647e2323d791dd

Kotlin DSL:   1.0-rc-8
Kotlin:       1.2.61
Groovy:       2.4.15
Ant:          Apache Ant(TM) version 1.9.11 compiled on May 18 2018
JVM:          1.8.0_181 (Oracle Corporation 25.181-b13)
OS:           Linux 4.15.0-46-generic amd64

Congratulation’s! You have successfully installed Gradle. Thanks for using this tutorial for installing Gradle on Ubuntu 18.04 LTS (Bionic Beaver) system. For additional help or useful information, we recommend you to check <a href="https://gradle.org/" target="_blank" rel="noopener">the official Gradle web site</a>.

Congratulation’s! You have successfully installed Gradle. Thanks for using this tutorial for installing Gradle on Ubuntu 18.04 LTS (Bionic Beaver) system. For additional help or useful information, we recommend you to check the official Gradle web site.

How To Install OroCRM 3.1 on Ubuntu 18.04 LTS

Install OroCRM on Ubuntu 18

OroCRM is an open-source and simple to utilize CRM with worked in advertising devices for eCommerce business. This product is completely focused on the internet business. OroCRM offers the best functionalities being adaptable and additionally intense. OroCRM can also be easily integrated with popular e-commerce platforms like Magento, MailChimp or Zendesk.

This article assumes you have at least basic knowledge of Linux, know how to use the shell, and most importantly, you host your site on your own VPS. The installation is quite simple and assumes you are running in the root account, if not you may need to add ‘sudo’ to the commands to get root privileges. I will show you through the step by step installation OroCRM open-source and simple to utilize CRM on an Ubuntu 18.04 Bionic Beaver server.

Install OroCRM on Ubuntu 18.04 LTS

Step 1. First make sure that all your system packages are up-to-date

sudo apt-get update
sudo apt-get upgrade

Step 2. Install LAMP (Linux, Apache, MariaDB and PHP) server.

A Ubuntu 18.04 LAMP server is required. If you do not have LAMP installed, you can follow our guide here. Also install all required PHP modules:

apt-get install php7.1-cli php7.1-mbstring php7.1-gd php7.1-opcache php7.1-mysql php7.1-json php7.1-mcrypt php7.1-xml php7.1-curl

Step 3. Installing Node.js and Composer.

OroCRM requires Node.js and Composer to be installed on the system. To install these packages, run the commands below:

curl -sS https://getcomposer.org/installer | sudo php -- --install-dir=/usr/local/bin --filename=composer

Next, run the commands below to install Node.js:

sudo curl --silent --location https://deb.nodesource.com/setup_8.x | sudo bash -
sudo apt install nodejs

Step 3. Download the stable version

First thing to do is to go to OroCRM’s download page and download the latest stable version of OroCRM:

cd /var/www/html/
sudo git clone -b 2.4 https://github.com/oroinc/crm-application.git orocrm
cd orocrm
sudo composer install --prefer-dist --no-dev

Next, run the commands below to complete the installation:


sudo php app/console oro:install --env=prod

We will need to change some folders permissions:

sudo chown -R www-data:www-data /var/www/html/orocrm/
sudo chmod -R 755 /var/www/html/orocrm/

Step 4. Configuring MariaDB for OroCRM.

By default, MariaDB is not hardened. You can secure MariaDB using the mysql_secure_installation script. You should read and below each steps carefully which will set root password, remove anonymous users, disallow remote root login, and remove the test database and access to secure MariaDB.

mysql_secure_installation

Configure it like this:

- Set root password? [Y/n] y
- Remove anonymous users? [Y/n] y
- Disallow root login remotely? [Y/n] y
- Remove test database and access to it? [Y/n] y
- Reload privilege tables now? [Y/n] y

Next we will need to log in to the MariaDB console and create a database for the OroCRM. Run the following command:

mysql -u root -p

This will prompt you for a password, so enter your MariaDB root password and hit Enter. Once you are logged in to your database server you need to create a database for OroCRM installation:

MariaDB [(none)]> CREATE DATABASE orocrm;
MariaDB [(none)]> CREATE USER 'orocrmuser'@'localhost' IDENTIFIED BY 'new_password_here';
MariaDB [(none)]> GRANT ALL ON orocrm.* TO 'orocrmuser'@'localhost' IDENTIFIED BY 'user_password_here' WITH GRANT OPTION;
MariaDB [(none)]> FLUSH PRIVILEGES;
MariaDB [(none)]> \q

Step 5. Configuring Apache web server for OroCRM.

Create a new virtual host directive in Apache. For example, create a new Apache configuration file named ‘orocrm.conf’ on your virtual server:

touch /etc/apache2/sites-available/orocrm.conf
ln -s /etc/apache2/sites-available/orocrm.conf /etc/apache2/sites-enabled/orocrm.conf
nano /etc/apache2/sites-available/orocrm.conf

Add the following lines:

<VirtualHost *:80>
ServerAdmin [email protected]
DocumentRoot "/var/www/html/orocrm/web"
ServerName your-domain.com
ServerAlias www.your-domain.com
<Directory "/var/www/html/orocrm/web">
Options FollowSymLinks
AllowOverride All
Order allow,deny
allow from all
</Directory>
ErrorLog /var/log/apache2/your-domain.com-error_log
CustomLog /var/log/apache2/your-domain.com-access_log common
</VirtualHost>

Now, we can restart Apache web server so that the changes take place:

sudo a2enmod rewrite
a2ensite orocrm.conf
systemctl restart apache2.service

Step 6. Accessing OroCRM.

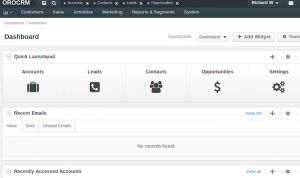
OroCRM will be available on HTTP port 80 by default. Open your favorite browser and navigate to http://yourdomain.com or http://server-ip and complete the required the steps to finish the installation. If you are using a firewall, please open port 80 to enable access to the control panel.

orocrm-install

Congratulation’s! You have successfully installed OroCRM. Thanks for using this tutorial for installing OroCRM open-source and simple to utilize CRM on your Ubuntu 18.04 LTS (Bionic Beaver) system. For additional help or useful information, we recommend you to check the official OroCRM web site.

How To Install Jupyter 4.1 on Ubuntu 18.04 LTS

Install Jupyter on Ubuntu 18

Jupyter Notebook is an open-source web application used for creating and sharing documents which have the live code, equations, visualizations and explanatory text. It includes data cleaning and transformation, numerical simulation, statistical modeling, machine learning, etc.

This article assumes you have at least basic knowledge of Linux, know how to use the shell, and most importantly, you host your site on your own VPS. The installation is quite simple and assumes you are running in the root account, if not you may need to add ‘sudo’ to the commands to get root privileges. I will show you through the step by step installation Jupyter notebook on an Ubuntu 18.04 Bionic Beaver server.

Install Jupyter on Ubuntu 18.04 LTS

Step 1. First, make sure that all your system packages are up-to-date

sudo apt-get update
sudo apt-get upgrade

Step 2. Installing Python 3 and Pip.

Before installing Jupyter is to add all the required dependency packages to your system:

apt install python3 python3-pip python3-dev

To verify that everything went well, let us check the Python & PIP version with these commands:

python3 --version
pip3 --version

Step 3. Installing IPython and Jupyter Notebook

Run the following commands to install IPython & Juptyr on our machine:

apt install ipython
pip3 install jupyter

Before we start the application, we will create a new user for Jupyter Notebook because it is not recommended to run the application as user root:

useradd -M jupyter

Finally, start Jupyter Notebook in the background as the newly created ‘jupyter’ using the following command:

su - jupyter -c 'jupyter notebook --ip IP_Address --no-browser' &

You will receive an output similar to the following:

Copy/paste this URL into your browser when you connect for the first time,
to login with a token:
    http://IP_Address:8888/?token=7f928e48351e58492d1bmwe4671ff846fd87b98godetb1171f6

Step 4. Accessing Jupyter.

Jupyter will be available on HTTP port 8000 by default. Open your favorite browser and navigate to http://your-domain.com:8000 or http://server-ip:8000/

Congratulation’s! You have successfully installed Jupyter. Thanks for using this tutorial for installing Jupyter notebook on your Ubuntu 18.04 LTS system. For additional help or useful information, we recommend you to check the official Jupyter web site.

How To Install Matomo 3.9.1 on Ubuntu 18.04 LTS

Install Matomo on Ubuntu 18

Matomo or formerly known as Piwik, is an open source web analytics application. It rivals Google Analytics and includes even more features and allows you to brand your brand and send out custom daily, weekly, and monthly reports to your clients.

This article assumes you have at least basic knowledge of Linux, know how to use the shell, and most importantly, you host your site on your own VPS. The installation is quite simple and assumes you are running in the root account, if not you may need to add ‘sudo’ to the commands to get root privileges. I will show you through the step by step installation Matomo open source web analytics on an Ubuntu 18.04 Bionic Beaver server.

Install Matomo on Ubuntu 18.04 LTS

Step 1. First make sure that all your system packages are up-to-date

sudo apt-get update
sudo apt-get upgrade

Step 2. Install LAMP (Linux, Apache, MariaDB and PHP) server.

A Ubuntu 18.04 LAMP server is required. If you do not have LAMP installed, you can follow our guide here. Also install all required PHP modules:

apt-get install php7.1-cli php7.1-mbstring php7.1-gd php7.1-opcache php7.1-mysql php7.1-json php7.1-mcrypt php7.1-xml php7.1-curl

Step 3. Download the latest version

First thing to do is to go to Matomo’s download page and download the latest stable version of Matomo:

cd /var/www/html/
wget https://builds.matomo.org/piwik.zip

Unzip the Matomo archive to the document root directory on your server:

unzip piwik.zip

We will need to change some folders permissions:

chown -R www-data:www-data /var/www/html/piwik
chmod -R 0755 /var/www/html/piwik/tmp

Step 4. Configuring MariaDB for Matomo.

By default, MariaDB is not hardened. You can secure MariaDB using the mysql_secure_installation script. you should read and below each steps carefully which will set root password, remove anonymous users, disallow remote root login, and remove the test database and access to secure MariaDB:

mysql_secure_installation

Configure it like this:

- Set root password? [Y/n] y
- Remove anonymous users? [Y/n] y
- Disallow root login remotely? [Y/n] y
- Remove test database and access to it? [Y/n] y
- Reload privilege tables now? [Y/n] y

Next we will need to log in to the MariaDB console and create a database for the Matomo. Run the following command:

mysql -u root -p

This will prompt you for a password, so enter your MariaDB root password and hit Enter. Once you are logged in to your database server you need to create a database for Matomo installation:

CREATE DATABASE db_name;
GRANT ALL ON db_name.* TO 'username' IDENTIFIED BY 'password';
FLUSH PRIVILEGES;
quit

Step 5. Accessing Matomo web analytics application.

Matomo will be available on HTTP port 80 by default. Open your favorite browser and navigate to http://yourdomain.com/piwik or http://server-ip/piwik and complete the required the steps to finish the installation. If you are using a firewall, please open port 80 to enable access to the control panel.

install-matomo

Congratulation’s! You have successfully installed Matomo. Thanks for using this tutorial for installing Matomo open source web analytics on your Ubuntu 18.04 LTS Bionic Beaver. For additional help or useful information, we recommend you to check the official Matomo web site.

How To Install Django on Ubuntu 18.04 LTS – Step by Step

Install Django on Ubuntu 18

Django is a popular Python framework for writing web applications. Web frameworks like Django provide a set of tools which helps the developer to write the application faster as the framework takes care of the internal structure, thus the developer needs to take care of the application development only. Django is free and open source software.

This article assumes you have at least basic knowledge of Linux, know how to use the shell, and most importantly, you host your site on your own VPS. The installation is quite simple and assumes you are running in the root account, if not you may need to add ‘sudo’ to the commands to get root privileges. I will show you through the step by step installation Django on an Ubuntu 18.04 (Bionic Beaver) server.

Install Django on Ubuntu 18.04

Step 1. First, make sure that all your system packages are up-to-date

sudo apt-get update
sudo apt-get upgrade

Step 2. Installing Python 3 and venv.

Now you can install pip using the following command:

sudo apt install python3-venv

Next, Creating Virtual Environment:

mkdir my_django_app
cd my_django_app

Once inside the directory, run the following command to create your new virtual environment:

python3 -m venv venv

To start using this virtual environment, you need to activate it by running the activate script:

source venv/bin/activate

Step 4. Installing Djanggo with pip install

Once the pip is installed, run the following command to install Django:

sudo pip install django

To verify the Django version, run:

python -m django --version

Step 5. Create a sample Django project.

Now that the Django framework has been installed, you can to give it a test drive by creating a sample project:

cd ~
django-admin startproject mysite

The command above will create a directory myproject in your working directory ~, and store all necessary files within.

Run the commands below in sequence to get your application started. Follow the instructions on screen to provide the superuser’s credentials:

cd myidproject/
python3 manage.py migrate
python3 manage.py createsuperuser
python3 manage.py runserver

Step 6. Accessing Django.

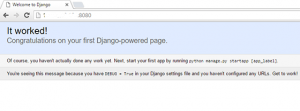
Django will be available on HTTP port 8080 by default. Open your favorite browser and navigate to http://yourdomain.com:8000 or http://server-ip:8000/admin
Django-installation

Congratulation’s! You have successfully installed Django. Thanks for using this tutorial for installing Django web framework on Ubuntu 18.04 Bionic Beaver server. For additional help or useful information, we recommend you to check the official Django web site.