How To Install Wine 4.6 on Ubuntu 18.04 LTS

Install Wine on Ubuntu 18

Wine (originally an acronym for “Wine Is Not an Emulator”) is a compatibility layer capable of running Windows applications on several POSIX-compliant operating systems, such as Linux, macOS, & BSD. Instead of simulating internal Windows logic like a virtual machine or emulator, Wine translates Windows API calls into POSIX calls on-the-fly, eliminating the performance and memory penalties of other methods and allowing you to cleanly integrate Windows applications into your desktop.

This article assumes you have at least basic knowledge of Linux, know how to use the shell, and most importantly, you host your site on your own VPS. The installation is quite simple and assumes you are running in the root account, if not you may need to add ‘sudo’ to the commands to get root privileges. I will show you through the step by step installation Wine on an Ubuntu 18.04 (Bionic Beaver) server.

Install Wine on Ubuntu 18.04 LTS

Step 1. First, make sure that all your system packages are up-to-date

sudo apt update
sudo apt upgrade

Step 2. Installing Wine on Ubuntu 18.04 LTS.

Install Wine from Ubuntu repository.

We recommend that you install Wine on your system through the standard Ubuntu repository, as this way you can have a more stable version on your system:

## 64bit ##
sudo apt install wine64

## 32bit ##
sudo apt install wine32

Installing Wine from the WineHQ repository.

The WineHQ repository has a set of standard Wine packages that you can download and install on your system:

sudo dpkg --add-architecture i386

Run the following in order to add the WineHQ signing key:

wget -qO- https://dl.winehq.org/wine-builds/Release.key | sudo apt-key add -

Next, run the following command in order to add the relevant repository from the WineHQ:

sudo apt-add-repository 'deb http://dl.winehq.org/wine-builds/ubuntu/ artful main'

This is the most recent and stable release of Wine available. Use the following command to install this version:

sudo apt-get install --install-recommends winehq-stable

Congratulation’s! You have successfully installed Wine. Thanks for using this tutorial for installing Wine on Ubuntu 18.04 LTS system. For additional help or useful information, we recommend you to check the official Wine web site.

How To Install Hashicorp Vault 1.1.1 on Ubuntu 18.04 LTS

Install Hashicorp Vault on Ubuntu 18

Secure, store and tightly control access to tokens, passwords, certificates, encryption keys for protecting secrets and other sensitive data using a UI, CLI, or HTTP API.

This article assumes you have at least basic knowledge of Linux, know how to use the shell, and most importantly, you host your site on your own VPS. The installation is quite simple and assumes you are running in the root account, if not you may need to add ‘sudo’ to the commands to get root privileges. I will show you through the step by step installation Hashicorp Vault on an Ubuntu 18.04 Bionic Beaver server.

Install Hashicorp Vault on Ubuntu 18.04 LTS

Step 1. First, make sure that all your system packages are up-to-date

sudo apt update
sudo apt upgrade

Step 2. Installing Consul.

First, go to the Consul downloads page. Right-click the link for Linux 64-bit and select ‘copy link address’ or whatever the similar option is for your browser:

wget https://releases.hashicorp.com/consul/1.3.0/consul_1.3.0_linux_amd64.zip
unzip consul_1.3.0_linux_amd64.zip
mv consul /usr/bin

Next, run Consul as a service so we need to configure a SystemD service for Consul:

nano /etc/systemd/system/consul.service
[Unit]
Description=Consul
Documentation=https://www.consul.io/

[Service]
ExecStart=/usr/bin/consul agent -server -ui -data-dir=/tmp/consul -bootstrap-expect=1 -node=vault -bind=192.168.1.28 -config-dir=/etc/consul.d/
ExecReload=/bin/kill -HUP $MAINPID
LimitNOFILE=65536

[Install]
WantedBy=multi-user.target


Next we need to add some configuration so that we can access the Consul GUI from our network:

mkdir /etc/consul.d/

Then, create a new file /etc/consul.d/ui.json and add the following file:

nano /etc/consul.d/ui.json
{
  "addresses": {
    "http": "0.0.0.0"
  }
}

Now we are ready to start the Consul Service:

systemctl daemon-reload
systemctl start consul
systemctl enable consul

Verify that our Consul Service:

root@ramona:~# consul members
Node   Address            Status  Type    Build  Protocol  DC   Segment
vault  192.168.1.28:8301  alive   server  1.3.0  2         dc1  <all>

Step 3. Installing Vault on Ubuntu 18.04.

First, go to the Vault Downloads page and copy the URL just like we did for Consul:

wget https://releases.hashicorp.com/vault/0.11.4/vault_0.11.4_linux_amd64.zip
unzip vault_0.11.4_linux_amd64.zip
mv vault /usr/bin

Next, Create a configuration directory /etc/vault:

mkdir /etc/vault

Then, Create a new file /etc/vault/config.hcl with the following contents:

storage "consul" {
  address = "127.0.0.1:8500"
  path    = "vault/"
}

listener "tcp" {
 address     = "192.168.1.28:8200"
 tls_disable = 1
}

ui = true

Now we need to create the SystemD Service for vault:

nano /etc/systemd/system/vault.service
[Unit]
Description=Vault
Documentation=https://www.vault.io/

[Service]
ExecStart=/usr/bin/vault server -config=/etc/vault/config.hcl
ExecReload=/bin/kill -HUP $MAINPID
LimitNOFILE=65536

[Install]
WantedBy=multi-user.target

Next, we need to start the Vault Service:

systemctl daemon-reload
systemctl start vault
systemctl enable vault

To enable the CLI to connect to our Vault service run this command:

export VAULT_ADDR=http://192.168.1.28:8200

After Vault starts we need to initialize it. This only has to be done once or when you change storage backends for some reason:

vault operator init

Congratulation’s! You have successfully installed Vault. Thanks for using this tutorial for installing Hashicorp Vault in Ubuntu 18.04 LTS system. For additional help or useful information, we recommend you to check the official Vault web site.

How To Install Android Studio 3.4 on Ubuntu 18.04 LTS

Install Android Studio on Ubuntu 18

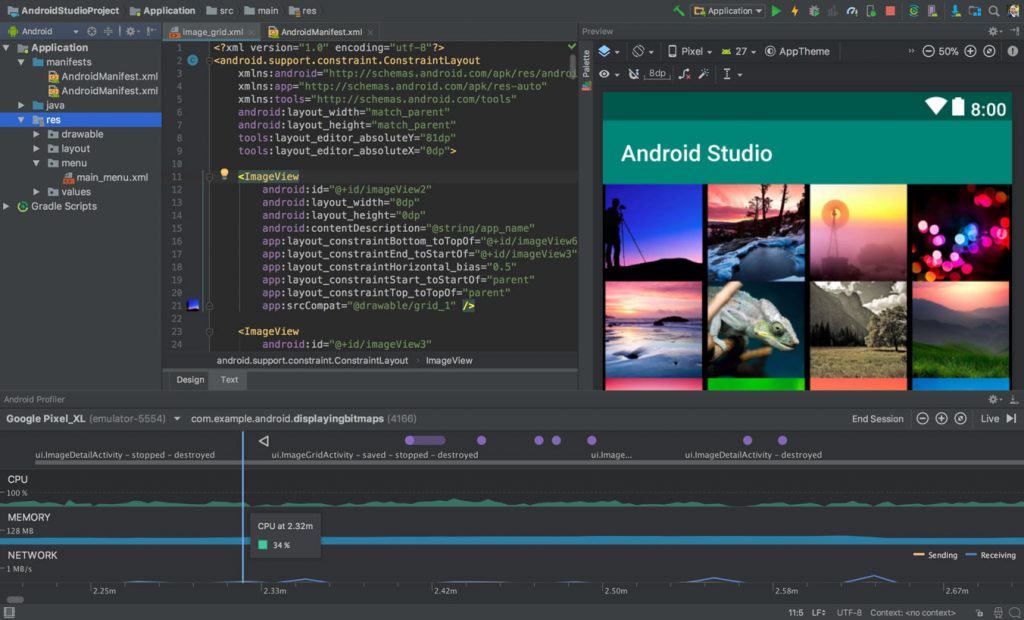
Android Studio is the official Integrated Development Environment (IDE) for Android app development, based on IntelliJ IDEA. On top of IntelliJ’s powerful code editor and developer tools, Android Studio offers even more features that enhance your productivity when building Android apps

This article assumes you have at least basic knowledge of Linux, know how to use the shell, and most importantly, you host your site on your own VPS. The installation is quite simple and assumes you are running in the root account, if not you may need to add ‘sudo’ to the commands to get root privileges. I will show you through the step by step installation Android Studio on an Ubuntu 18.04 (Bionic Beaver) server.

install android studio on ubuntu 18

Install Android Studio on Ubuntu 18.04 LTS

Step 1. First, make sure that all your system packages are up-to-date

sudo apt update
sudo apt upgrade

Step 2. Installing Java on Ubuntu.

You need to have Java installed in your system before installing Android Studio:

sudo apt install openjdk-9-jre openjdk-9-jdk

Step 3. Install Android Studio on Ubuntu 18.04.

Run the following commands to add Android Studio PPA and install:

sudo add-apt-repository ppa:maarten-fonville/android-studio
sudo apt update
sudo apt install android-studio

Once the installation is finished, You can access android studio from the dash or app launcher or use the following command to start:

/opt/android-studio/bin/studio.sh

Congratulation’s! You have successfully installed Android Studio. Thanks for using this tutorial for installing Android Studio on your Ubuntu 18.04 LTS. For additional help or useful information, we recommend you to check the official Android Studio web site.

How To Install Google Chrome on Ubuntu 18.10 Cosmic Cuttlefish

Install Google Chrome on Ubuntu

Google Chrome is a freeware web browser developed by Google, uses the WebKit layout engine. It is available for the Linux, Android, iOS, Microsoft Windows, and Mac OS X operating systems. But Google Chrome is more than a web browser, as it combines sophisticated open source technology, borrowed from the Chromium application, into a minimal design, all in order to help users surf the web much faster, a lot easier, and safer than ever before. In this tutorial we will learn how to install google chrome on ubuntu 18.10

This article assumes you have at least basic knowledge of Linux, know how to use the shell, and most importantly, you host your site on your own VPS. The installation is quite simple and assumes you are running in the root account, if not you may need to add ‘sudo’ to the commands to get root privileges. I will show you through the step by step installation Google Chrome on a Ubuntu 18.10 (Cosmic Cuttlefish).

Install Google Chrome on Ubuntu 18.10

Step 1. First, make sure that all your system packages are up-to-date

sudo apt-get update
sudo apt-get upgrade

Step 2. Installing Google Chrome on Ubuntu 18.04 LTS.


First, use the wget command to download the Google Chrome package:
wget -O ~/chrome.deb https://dl.google.com/linux/direct/google-chrome-stable_current_amd64.deb

Next, install the Google Chrome package, execute the following dpkg command:

sudo dpkg -i ~/chrome.deb

Step 3. Accessing Google Chrome.

Once installed, open Google Chrome from Ubuntu Dash or Terminal:

google-chrome

Congratulation’s! You have successfully installed Google Chrome. Thanks for using this tutorial for installing Google Chrome web browser in Ubuntu 18.10 Cosmic Cuttlefish system. For additional help or useful information, we recommend you to check the official Google Chrome web site.

How To Install Atom Text Editor on Ubuntu 18.04 LTS

Install Atom Text Editor on Ubuntu 18

Atom is an open source, cross-platform code editor developed by GitHub. It has a built-in package manager, embedded Git control, smart autocompletion, syntax highlighting and multiple panes. Under the hood Atom is a desktop application built on Electron using HTML, JavaScript, CSS, and Node.js.

Atom is a desktop application built using web technologies. Most of the extending packages have free software licenses and are community-built and maintained. Atom is based on Electron (formerly known as Atom Shell), a framework that enables cross-platform desktop applications using Chromium and Node.js. It is written in CoffeeScript and Less. It can also be used as an integrated development environment (IDE).

This article assumes you have at least basic knowledge of Linux, know how to use the shell, and most importantly, you host your site on your own VPS. The installation is quite simple and assumes you are running in the root account, if not you may need to add ‘sudo’ to the commands to get root privileges. I will show you through the step by step installation Atom Text Editor on Ubuntu 18.04 (Bionic Beaver) server.

Install Atom Text Editor on Ubuntu 18.04 LTS

Step 1. First, make sure that all your system packages are up-to-date

sudo apt update
sudo apt upgrade
sudo apt install software-properties-common apt-transport-https wget

Step 2. Installing Atom Text Editor on Ubuntu 18.04.

First, download its debian (64bit) package from its official site. Open the terminal and use following wget command:

wget https://github.com/atom/atom/releases/download/v1.32.2/atom-amd64.deb

Install downloaded debian package along with its required dependencies:

dpkg -i atom-amd64.deb
apt-get install -f

Now that Atom is installed on your Ubuntu system you can launch it either from the command line by typing code or by clicking on the Atom icon (Activities -> Atom).

Congratulations! You have successfully installed Atom. Thanks for using this tutorial for installing Atom Text Editor in Ubuntu 18.04 Bionic Beaver systems. For additional help or useful information, we recommend you to check the official Atom Text Editor web site.

How To Install Minecraft Server on Ubuntu 18.04 LTS

Install Minecraft Server on Ubuntu 18

Minecraft is a game about breaking and placing blocks. The creative and building aspects of Minecraft allow players to build constructions out of textured cubes in a 3D procedurally generated world. Minecraft servers allow players to play online or via a local area network with other people. They may either be run on a hosted server, on local dedicated server hardware, a Virtual Private server on a home machine, or on your local gaming computer.

This article assumes you have at least basic knowledge of Linux, know how to use the shell, and most importantly, you host your site on your own VPS. The installation is quite simple and assumes you are running in the root account, if not you may need to add ‘sudo’ to the commands to get root privileges. I will show you through the step by step installation Minecraft Server on an Ubuntu 18.04 Bionic Beaver server.
Install Minecraft Server on Ubuntu 18.04 LTS Bionic Beaver

Step 1. First make sure that all your system packages are up-to-date by running these following apt-get commands in the terminal.

sudo apt-get update
sudo apt-get upgrade

Step 2. Installing Java-JDK.

Minecraft server setup requires Java to be installed on your system. To do this, follow these steps:

sudo apt-get install openjdk-8-jdk screen

Step 3. Installing Minecraft Server on Ubuntu 18.04 LTS.

First, create a new user for Minecraft to run as:

sudo useradd -m -r -d /opt/minecraft minecraft

Create a Minecraft directory:

mkdir minecraft
cd minecraft

Now download the java Minecraft server and install your own Minecraft server:

wget -O minecraft_server.jar https://s3.amazonaws.com/Minecraft.Download/versions/1.12.2/minecraft_server.1.12.2.jar

Accept Minecraft’s terms and conditions:

echo "eula=true" > eula.txt

Get screen up and running, so that the server can run in the background:

screen -S "Minecraft server 1"

Step 4. Running Minecraft Server.

Now you only need to run the installed server (you can edit the 1024M value to match your server’s RAM):

java -Xmx1024M -Xms1024M -jar minecraft_server.jar nogui

To get back to the normal screen, press these keys: Control+A+D, To get back to the screen where Minecraft is running:

screen -r

Congratulation’s! You have successfully installed Minecraft. Thanks for using this tutorial for installing Minecraft server on your Ubuntu 18.04 LTS system. For additional help or useful information, we recommend you to check the official Minecraft web site.

How To Install HandBrake 1.2.2 on Ubuntu 18.04 LTS

Install HandBrake on Ubuntu 18

HandBrake is a popular video transcoding tool that will convert video files into numerous different video and audio formats so they can be used on a number of supported devices.

This article assumes you have at least basic knowledge of Linux, know how to use the shell, and most importantly, you host your site on your own VPS. The installation is quite simple and assumes you are running in the root account, if not you may need to add ‘sudo’ to the commands to get root privileges. I will show you through the step by step installation HandBrake open source video transcoder on Ubuntu 18.04 Bionic Beaver server.
HandBrake Features

Convert Video from any format.
Built-in device presets e.g. iPhone, iPad, AppleTV, Android etc.
Ability to process DVD and BlueRay sources.
File Containers: .MP4(.M4V) and .MKV.
Video Encoders: H.264(x264), H.265(x265) MPEG-4 and MPEG-2 (libav), VP8 (libvpx) and Theora.
Audio Encoders: AAC, CoreAudio AAC/HE-AAC (OS X Only), MP3, Flac, AC3, or Vorbis.
Audio Pass-thru: AC-3, DTS, DTS-HD, AAC and MP3 tracks.
Title / Chapter selection.
Subtitles (VobSub, Closed Captions CEA-608, SSA, SRT).
Video Filters: Deinterlacing, Decomb, Denoise, Detelecine, Deblock, Grayscale, Cropping and scaling.

Install HandBrake on Ubuntu 18.04 LTS Bionic Beaver

Step 1. First make sure that all your system packages are up-to-date by running these following apt-get commands in the terminal.

sudo apt-get update
sudo apt-get upgrade

Step 2. Installing HandBrake.

First, you’ll need to add Handbrake’s PPA (personal package archive) to your system:

sudo add-apt-repository ppa:stebbins/handbrake-releases

Then run the commands below to update Ubuntu and install HandBrake:

sudo apt update
sudo apt install handbrake-gtk handbrake-cli

Once installed, next you can start HandBrake by searching for it Unity Dash. If the app icon doesn’t show up, try logging out and logging back in.

If you decide that you don’t want HandBrake apps installed anymore, run the commands below to remove the package:

sudo apt-get remove --autoremove handbrake-gtk handbrake-cli
sudo add-apt-repository --remove ppa:stebbins/handbrake-releases

Congratulations! You have successfully installed HandBrake. Thanks for using this tutorial for installing HandBrake open source video transcoder in Ubuntu 18.04 Bionic Beaver systems. For additional help or useful information, we recommend you to check the official HandBrake web site.