How To Install Kodi on Ubuntu 18.04 LTS

Install Kodi on Ubuntu 18

Kodi (formerly XBMC Media Center) is an open source and very powerful project that provides all the necessary tools for transforming your regular PC into a bona fide HTPC, which if used in conjunction a big screen TV and a Hi-Fi audio system, will transform your living room into a veritable home theater. Currently Kodi can be used to play almost all popular audio and video formats around. It was designed for network playback, so you can stream your multimedia from anywhere in the house or directly from the internet using practically any protocol available. Use your media as-is: Kodi can play CDs and DVDs directly from the disk or image file, almost all popular archive formats from your hard drive, and even files inside ZIP and RAR archives. In this tutorial we will learn How To Install Kodi on Ubuntu 18.04 LTS.

This article assumes you have at least basic knowledge of linux, know how to use the shell, and most importantly, you host your site on your own VPS. The installation is quite simple and assumes you are running in the root account, if not you may need to add ‘sudo’ to the commands to get root privileges. I will show you through the step by step installation Kodi in Ubuntu 18.04 (Bionic Beaver) server.

Install Kodi on Ubuntu 18.04 LTS Bionic Beaver

Step 1. First, make sure that all your system packages are up-to-date

sudo apt-get update
sudo apt-get upgrade

Step 2. Installing Kodi on Ubuntu 18.04 LTS.

Method 1. Install Kodi from PPA.

Install Kodi on Ubuntu 18.04 directly from Kodi’s PPA repository:

sudo apt-get install software-properties-common
sudo add-apt-repository ppa:team-xbmc/ppa
sudo apt-get update
sudo apt-get install kodi

Method 2. Install Kodi from command line.

Run the following commands to install Kodi:

sudo apt install kodi

After installing the application you can verify the version of kodi media player using the following command:

kodi -v

You can start Kodi from command by entering executing the following linux command:

kodi

Or, log out and select log in with Kodi session. Or launch the media center from the Dash (may need restart).

Congratulation’s! You have successfully installed kodi. Thanks for using this tutorial for installing kodi media center on 18.04 LTS (Bionic Beaver) system. For additional help or useful information, we recommend you to check the official Kodi web site.

How To Install Adobe Flash Player on Ubuntu 18.04 LTS

Install Adobe Flash Player on Ubuntu 18

Adobe Flash player is important plugin that allows our web browsers to play multimedia contents like audio and videos streaming, flash based games and other rich media stuff. Adobe Flash player is supported by different web browsers like IE ( Internet Explorer) , Chrome, Firefox , Safari and Opera and can be installed on different operating system like Windows , Linux/ UNIX and Mac OS X and Android.

This article assumes you have at least basic knowledge of linux, know how to use the shell, and most importantly, you host your site on your own VPS. The installation is quite simple. I will show you through the step by step installation adobe flash player on Ubuntu 18.04 LTS Bionic Beaver.

Install Adobe Flash Player on Ubuntu

Step 1. First of all make sure that all packages are up to date.

apt-get update
apt-get upgrade

Step 2. Installing Adobe Flash on Ubuntu 18.04 LTS.

First, enable this repository before attempting to install flash plugin:

add-apt-repository "deb http://archive.canonical.com/ $(lsb_release -sc) partner"

After enabling the partner’s repository, run the commands to install Adobe flash plugin:

apt update
apt install adobe-flashplugin browser-plugin-freshplayer-pepperflash

Once installing, restart Firefox or any other web browser before using the flash plugin. To make some changes to the plugin, click the Activities from the top left corner, then on the Activities Overview, search for Flash Plugin.

Congratulation’s! You have successfully installed adobe flash player. Thanks for using this tutorial for installing adobe flash player on Ubuntu 18.04 LTS (Bionic Beaver) system. For additional help or useful information, we recommend you to check the official Adobe web site.

How To Install Ansible on Ubuntu 18.04 LTS

Install Ansible on Ubuntu 18

Ansible is a universal language, unraveling the mystery of how work gets done. Turn tough tasks into repeatable playbooks. Roll out enterprise-wide protocols with the push of a button. Give your team the tools to automate, solve, and share.

It is a radically simple IT automation engine that simplifies cloud computing, configuration management, program setup, intra-service orchestration, and several other IT needs. Ansible uses a very simple language (YAML, in the form of Ansible Playbooks) that allow you to spell out your automation jobs in a way that means plain English. Using Ansible you can control multi host or device simultaneously using single command. You don’t need install client in apparatus or each server.

This article assumes you have at least basic knowledge of Linux, know how to use the shell, and most importantly, you host your site on your own VPS. The installation is quite simple and assumes you are running in the root account, if not you may need to add ‘sudo’ to the commands to get root privileges. I will show you through the step by step installation VirtualBox on a Ubuntu 18.04 (Bionic Beaver) server.

Install Ansible on Ubuntu 18.04

Step 1. First, make sure that all your system packages are up-to-date

sudo apt-get update
sudo apt-get upgrade

Step 2. Installing Ansible on Ubuntu 18.04 LTS.

Method 1. Install Ansible from PPA repository.


sudo apt install software-properties-common
sudo apt-add-repository ppa:ansible/ansible
sudo apt update
sudo apt install ansible

Check installation was successfull by using these command:

ansible --version

Method 2. Install Ansible from Ubuntu repository.


sudo apt install ansible

When successful, check your installed Ansible version:

$ ansible --version
ansible 2.3.1.0
config file = /etc/ansible/ansible.cfg
configured module search path = Default w/o overrides
python version = 2.7.14+ (default, Feb 6 2018, 19:12:18) [GCC 7.3.0]

Method 3. Install Ansible from Source.

Execute the following linux command to perform the installation of all prerequisites:

sudo apt install make git make python-setuptools gcc python-dev libffi-dev libssl-dev python-packaging

Next, download Ansible source code using the git:

git clone git://github.com/ansible/ansible.git
cd ansible
git checkout stable-2.5

Then, perform the compilation followed by the Ansible installation:

make
make install

Congratulation’s! You have successfully installed Ansible. Thanks for using this tutorial for installing Ansible on Ubuntu 18.04 LTS (Bionic Beaver) server. For additional help or useful information, we recommend you to check the official Ansible web site.

How To Install VirtualBox on Ubuntu 18.04 LTS

Install VirtualBox on Ubuntu 18

VirtualBox is a free and open-source hypervisor software, allows you to create and run a guest operating systems (“virtual machines”) such as Linux and Windows on top of the host operating system. VirtualBox supports both software-based and Hardware-assisted virtualization. In this tutorial we will learn How To Install VirtualBox on Ubuntu 18.04 LTS.

This article assumes you have at least basic knowledge of Linux, know how to use the shell, and most importantly, you host your site on your own VPS. The installation is quite simple and assumes you are running in the root account, if not you may need to add ‘sudo’ to the commands to get root privileges. I will show you through the step by step installation VirtualBox on a Ubuntu 18.04 (Bionic Beaver) server.

Install VirtualBox on Ubuntu 18.04 LTS

Step 1. First, make sure that all your system packages are up-to-date

sudo apt-get update
sudo apt-get upgrade
sudo apt-get install gcc make linux-headers-$(uname -r) dkms

Step 2. Installing VirtualBox on Ubuntu 18.04 LTS.

First, run the commands below to add VirtualBox repository key:

sudo sh -c 'echo "deb http://download.virtualbox.org/virtualbox/debian $(lsb_release -sc) contrib" >> /etc/apt/sources.list.d/virtualbox.list'

Next, we need to download and import the Oracle GPG public key to Ubuntu system with the following command:

wget -q https://www.virtualbox.org/download/oracle_vbox_2016.asc -O- | sudo apt-key add -
wget -q https://www.virtualbox.org/download/oracle_vbox.asc -O- | sudo apt-key add -

Install the VirtualBox 5, command as follows:

apt-get update
apt-get install virtualbox-5.2

Step 4. Accessing VirtualBox.

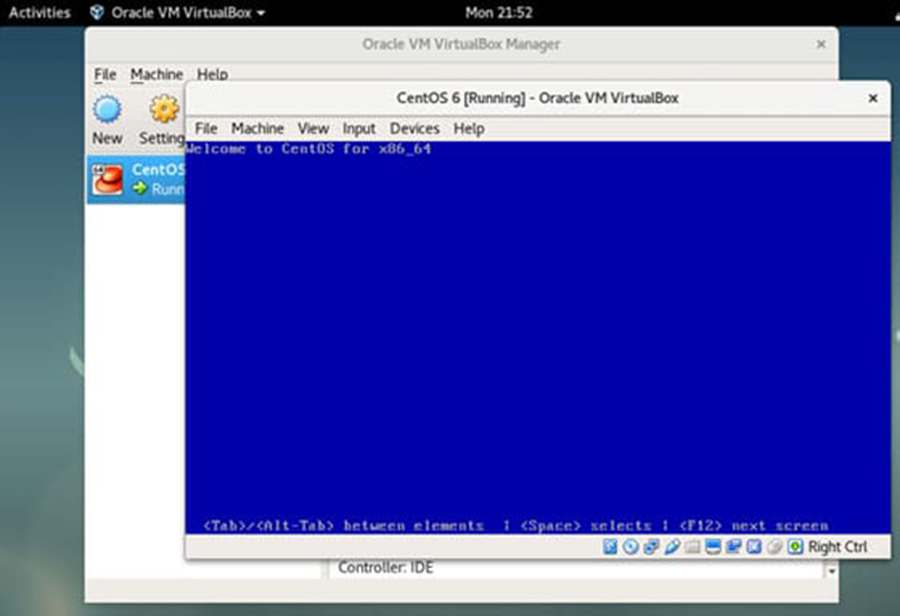
Once it’s installed, start it from your application menu, or run the command below to start VirtualBox from terminal or find the application on your ubuntu dash and launch it.:

virtualbox

Install-VirtualBox

Congratulation’s! You have successfully installed VirtualBox. Thanks for using this tutorial for installing VirtualBox on Ubuntu 18.04 LTS (Bionic Beaver) server. For additional help or useful information, we recommend you to check the official VirtualBox web site.

You Might Also Like: How To Install Vagrant on Ubuntu 18.04 LTS

How To Install qBittorrent on Ubuntu 18.04 LTS

qbittorrent-icon

qBittorrent is a torrent client, similar to µTorrent, which was recently ported to the Linux systems. Among others, qBittorrent has built-in search engine for searching in the popular BitTorrent sites, has torrent queueing and prioritizing features, has IP Filtering options, provides a tool for creating torrents and bandwidth limitations. It is available for Linux, Microsoft Windows and macOS. Continue reading “How To Install qBittorrent on Ubuntu 18.04 LTS”

How To Install Joomla 3.9.5 on Ubuntu 18.04 LTS

Install Joomla on Ubuntu 18

Joomla is a free and open source popular content management that uses a PHP and a backend database, such as MySQL. It offers a wide variety of features that make it an incredibly flexible content management system right out of the box. Furthermore, there are hundreds of free extensions written for that allows users to extend its functionality and customize it to their own objectives. Continue reading “How To Install Joomla 3.9.5 on Ubuntu 18.04 LTS”