How To Install SugarCRM on Ubuntu 16.04 LTS

Install SugarCRM on Ubuntu 16

SugarCRM is a popular customer relationship management system that has an open source version, SugarCRM Community Edition, with many devoted Linux users. It provides many functions such as activity management, contacts, accounts, campaigns, web-to-lead forms, dashboards, email clients and marketing, project management, bug tracking, shared calendars etc. that allow maximum management for business and client relationships.

Install SugarCRM on Ubuntu 16.04 LTS

This article assumes you have at least basic knowledge of linux, know how to use the shell, and most importantly, you host your site on your own VPS. The installation is quite simple and assumes you are running in the root account, if not you may need to add ‘sudo’ to the commands to get root privileges. I will show you through the step by step installation SugarCRM on a Ubuntu 16.04 (Xenial Xerus) server.

Step 1. First make sure that all your system packages are up-to-date by running these following apt-get commands in the terminal.

sudo apt-get update
sudo apt-get upgrade

Step 2. Install LAMP (Linux, Apache, MariaDB, PHP) server.

A Ubuntu 16.04 LAMP server is required. If you do not have LAMP installed, you can follow our guide here. Also install all required PHP modules:

apt-get install imagemagick php7.0-curl php7.0-gd php7.0-mbstring php7.0-mysql libapache2-mod-php7.0 php7.0-mcrypt php7.0-bz2 php7.0-zip php7.0-json

You’ll need to also adjust some settings in your php.ini. Open up the file and edit these two variables:

nano /etc/php/7.0/apache2/php.ini

Also, add/modify the following settings:

post_max_size = 32M
upload_max_filesize = 32M
memory_limit = 768M

The required php modules will need to be manually enabled:

phpenmod imap
phpenmod zip
phpenmod mbstring

Step 3. Installing SugarCRM.

First thing to do is to go to SugarCRM’s download page and download the latest stable version of SugarCRM, At the moment of writing this article it is version 6.5.24:

wget https://nchc.dl.sourceforge.net/project/sugarcrm/1 - SugarCRM 6.5.X/SugarCommunityEdition-6.5.X/SugarCE-6.5.24.zip

Unpack the SugarCRM archive to the document root directory on your server:

unzip SugarCE-6.5.24.zip
rm -rf /var/www/html/*
cd SugarCE-Full-6.5.24/
cp -R * /var/www/html/

We will need to change some folders permissions:

chown -R www-data:www-data /var/www/html/

Step 4. Configuring MariaDB for SugarCRM.

By default, MariaDB is not hardened. You can secure MariaDB using the mysql_secure_installation script. you should read and below each steps carefully which will set root password, remove anonymous users, disallow remote root login, and remove the test database and access to secure MariaDB:

mysql_secure_installation

Configure it like this:

- Set root password? [Y/n] y
- Remove anonymous users? [Y/n] y
- Disallow root login remotely? [Y/n] y
- Remove test database and access to it? [Y/n] y
- Reload privilege tables now? [Y/n] y

Next we will need to log in to the MariaDB console and create a database for the SugarCRM. Run the following command:

mysql -u root -p

This will prompt you for a password, so enter your MariaDB root password and hit Enter. Once you are logged in to your database server you need to create a database for SugarCRM installation:

CREATE USER sugar@localhost;
SET PASSWORD FOR 'sugar'@'localhost' = PASSWORD("sugar-password");
GRANT ALL PRIVILEGES ON sugarcrm.* TO 'sugar'@'localhost' IDENTIFIED BY 'sugar-password' WITH GRANT OPTION;
flush privileges;
exit

Step 5. Configuring Apache web server for SugarCRM.

Create a new virtual host directive in Apache. For example, create a new Apache configuration file named ‘sugarcrm.conf’ on your virtual server:

touch /etc/apache2/sites-available/sugarcrm.conf
ln -s /etc/apache2/sites-available/sugarcrm.conf /etc/apache2/sites-enabled/sugarcrm.conf
nano /etc/apache2/sites-available/sugarcrm.conf

Add the following lines:


ServerAdmin [email protected]
DocumentRoot /var/www/html/
ServerName your-domain.com
ServerAlias www.your-domain.com

Options FollowSymLinks
AllowOverride All

ErrorLog /var/log/apache2/your-domain.com-error_log
CustomLog /var/log/apache2/your-domain.com-access_log common

Save and close the file. Restart the apache service for the changes to take effects:

systemctl restart apache2

Step 6. Accessing SugarCRM.

SugarCRM will be available on HTTP port 80 by default. Open your favorite browser and navigate to http://yourdomain.com/ or http://server-ip and complete the required the steps to finish the installation. If you are using a firewall, please open port 80 to enable access to the control panel.

Congratulation’s! You have successfully installed SugarCRM. Thanks for using this tutorial for installing SugarCRM on Ubuntu 16.04 LTS (Xenial Xerus) system. For additional help or useful information, we recommend you to check the official SugarCRM web site.

How To Install TeamViewer on Ubuntu 16.04 LTS

Install TeamViewer on Ubuntu 16

TeamViewer is a proprietary computer software package for remote control, desktop sharing, online meetings, web conferencing and file transfer between computers. Versions are available for the Microsoft Windows, OS X, Desktop Linux, iOS, Android Linux, Windows RT and Windows Phone operating systems. It is also possible to access a machine running TeamViewer with a web browser. While the main focus of the application is remote control of computers, collaboration and presentation features are included.

TeamViewer features:

TeamViewer is available for Microsoft Windows, macOS, Linux, Chrome OS, iOS, Android, Windows RT, Windows Phone 8 and BlackBerry operating systems. It is also possible to access a machine running TeamViewer with a web browser. While the main focus of the application is remote control of computers, collaboration and presentation features are included.

Install TeamViewer on Ubuntu 16.04 LTS

This article assumes you have at least basic knowledge of linux, know how to use the shell, and most importantly, you host your site on your own VPS. The installation is quite simple and assumes you are running in the root account, if not you may need to add ‘sudo’ to the commands to get root privileges. I will show you through the step by step installation TeamViewer on a Ubuntu 16.04 (Xenial Xerus) server.

Step 1. First make sure that all your system packages are up-to-date by running these following apt-get commands in the terminal.

sudo apt-get update
sudo apt-get upgrade

Step 2. Installing TeamViewer.

First, Go to TeamViewer 12 beta download page and download the deb file via your Web browser:

wget https://downloadus2.teamviewer.com/download/version_12x/teamviewer_12.0.71510_i386.deb

Install gdebi command line package installer with the following command:

sudo apt install gdebi-core

Then install the TeamViewer 12 deb package with:

sudo gdebi teamviewer*.deb

Once installed, In order to use TeamViewer on Linux, the TeamViewer remote control daemon must be running. You can check out its status by executing the command below:

systemctl start teamviewerd
systemctl enable teamviewerd
systemctl status teamviewerd

Congratulation’s! You have successfully installed TeamViewer. Thanks for using this tutorial for installing TeamViewer on Ubuntu 16.04 LTS (Xenial Xerus) system. For additional help or useful information, we recommend you to check the official TeamViewer web site.

How To Install Moodle on Ubuntu 16.04 LTS

Install Moodle on Ubuntu 16

Moodle is an Open Source Course Management System (CMS), also known as a Learning Management System (LMS) or a Virtual Learning Environment (VLE). It has become very popular among educators around the world as a tool for creating online dynamic web sites for their students. Moodle brings features include assignment submission, online quizzes, wiki, grading, instant messages, discussion boards, and others. But since it’s a modular software, it can be extended via plugins to add extra functionality.

This article assumes you have at least basic knowledge of linux, know how to use the shell, and most importantly, you host your site on your own VPS. The installation is quite simple and assumes you are running in the root account, if not you may need to add ‘sudo’ to the commands to get root privileges. We will show you through the step by step installation Moodle on a Ubuntu 16.04 (Xenial Xerus) server.
Install Moodle on Ubuntu 16.04 LTS

Step 1. First make sure that all your system packages are up-to-date by running these following apt-get commands in the terminal.

sudo apt-get update
sudo apt-get upgrade
sudo apt-get install git-core

Step 2. Install LAMP (Linux, Apache, MariaDB, PHP) server.

A Ubuntu 16.04 LAMP server is required. If you do not have LAMP installed, you can follow our guide here. Also install all required PHP modules:

apt-get install imagemagick php7.0-curl php7.0-gd php7.0-mbstring php7.0-mysql libapache2-mod-php7.0 php7.0-mcrypt php7.0-bz2 php7.0-zip php7.0-json

Step 3. Installing Moodle.

First thing to do is to go to Moodle’s download page and download the latest stable version of Moodle, At the moment of writing this article it is version 3.2. You can also get the latest package of Moodle using Git. To do so we will be using the below command in ‘/opt’ directory:

cd /opt/
git clone git://git.moodle.org/moodle.git

Change to the newly created Moodle repository that will appear after the cloning process in the main directory /opt:

cd moodle

The different versions of Moodle are stored in branches within this Git repository. This means that multiple versions of the Moodle code exist, with each version being known as a Git “branch.” To retrieve a list of all branches that are available on the remote code source, use:

git branch -a

After fetching the branch list, setup your local repository to track the specific branch you want on the remote repository, in this case MOODLE_32_STABLE:

git branch --track MOODLE_32_STABLE origin/MOODLE_32_STABLE

Finally, Check out the Moodle version specified:

git checkout MOODLE_32_STABLE

Now we will have to place the contents into the document root directory of Apache web server and then give it the right permissions by using the below commands:

cp -R /opt/moodle /var/www/html/
mkdir /var/moodledata
chown -R www-data /var/moodledata
chmod -R 777 /var/moodledata
chmod -R 0755 /var/www/html/moodle

Step 4. Configuring MySQL for Moodle.

By default, MySQL is not hardened. You can secure MySQL using the mysql_secure_installation script. you should read and below each steps carefully which will set root password, remove anonymous users, disallow remote root login, and remove the test database and access to secure MySQL:

mysql_secure_installation

Configure it like this:

- Set root password? [Y/n] y
- Remove anonymous users? [Y/n] y
- Disallow root login remotely? [Y/n] y
- Remove test database and access to it? [Y/n] y
- Reload privilege tables now? [Y/n] y

Next we will need to log in to the MySQL console and create a database for the Moodle. Run the following command:

mysql -u root -p

This will prompt you for a password, so enter your MySQL root password and hit Enter. Once you are logged in to your database server you need to create a database for Moodle installation:

CREATE DATABASE moodle DEFAULT CHARACTER SET utf8 COLLATE utf8_unicode_ci;
GRANT SELECT,INSERT,UPDATE,DELETE,CREATE,CREATE TEMPORARY TABLES,DROP,INDEX,ALTER ON moodle.* TO moodle_user@localhost IDENTIFIED BY 'YoUrPaSsWoRd';
FLUSH PRIVILEGES;
q

In MySQL server setup first we will configure the default storage engine to innodb by opening the ‘my.cnf’ file:

nano /etc/mysql/my.cnf

With the file open, locate the [mysqld] section and find “Basic Settings.” Under the last statement, add the following lines before saving and closing the file:

default_storage_engine = innodb
innodb_file_per_table = 1
innodb_file_format = Barracuda

Now, we can restart MySQL web server so that the changes take place:

systemctl restart mysql.service

Step 5. Configuring Apache web server for Moodle.

Create a new virtual host directive in Apache. For example, create a new Apache configuration file named ‘moodle.conf’ on your virtual server:

sudo a2enmod rewrite
rm /etc/apache2/sites-enabled/000-default.conf
touch /etc/apache2/sites-available/moodle.conf
ln -s /etc/apache2/sites-available/moodle.conf /etc/apache2/sites-enabled/moodle.conf
nano /etc/apache2/sites-available/moodle.conf

Add the following lines:


ServerAdmin [email protected]
DocumentRoot /var/www/html/moodle
ServerName yourdomain.com
ServerAlias www.yourdomain.com

Options Indexes FollowSymLinks MultiViews
AllowOverride All
Order allow,deny
allow from all

ErrorLog /var/log/httpd/yourdomain.com-error_log
CustomLog /var/log/httpd/yourdomain.com-access_log common

Now, we can restart Apache web server so that the changes take place:

systemctl restart apache2.service

Step 6. Accessing Moodle.

Moodle will be available on HTTP port 80 by default. Open your favorite browser and navigate to http://yourdomain.com or http://server-ip.

Step 1: Select language
Step 2: Enter the “Data directory (moodledata) path, in our case it is /var/moodledata
Step 3: Choose database driver, MySQL.
Step 4: Enter the Database settings.

Once Moodle is completely installed on your Ubuntu 16.04, you will need to set up a cron job. Here is a typical cron entry:

* * * * * /usr/bin/php /var/www/html/moodle/admin/cli/cron.php >/dev/null

Congratulation’s! You have successfully installed Moodle. Thanks for using this tutorial for installing Moodle on Ubuntu 16.04 LTS (Xenial Xerus) system. For additional help or useful information, we recommend you to check the official Moodle web site.

You Might Also Like: How To Install LAMP Stack on Ubuntu

How To Install Cacti Monitoring on Ubuntu 16.04 LTS

Install Cacti Monitoring on Ubuntu 16

Cacti is an open-source, web-based network monitoring and graphing tool designed as a front-end application for the open-source, industry-standard data logging tool RRDtool. It is used by IT businesses and stores all of the necessary information about bandwidth, hard disk usage, CPU usage, load average, RAM statistics etc in a MySQL database. Cacti creates graphs and populates them with data. It offers SNMP support, 3rd party templates and plugins and has built in user authentications and user permission features.

Install Cacti Monitoring on Ubuntu 16.04 LTS

This article assumes you have at least basic knowledge of linux, know how to use the shell, and most importantly, you host your site on your own VPS. The installation is quite simple and assumes you are running in the root account, if not you may need to add ‘sudo’ to the commands to get root privileges. I will show you through the step by step installation Cacti Monitoring on a Ubuntu 16.04 (Xenial Xerus) server.

Step 1. First make sure that all your system packages are up-to-date by running these following apt-get commands in the terminal.

sudo apt-get update
sudo apt-get upgrade

Step 2. Install LAMP (Linux, Apache, MariaDB, PHP) server.

A Ubuntu 16.04 LAMP server is required. If you do not have LAMP installed, you can follow our guide here. Cacti only supports MySQL 5.6, whereas the current version in the Ubuntu default repository is MySQL 5.7. In order to install this older version of MYSQL, you will need to add this repository and grab it from there:

nano /etc/apt/sources.list
deb http://archive.ubuntu.com/ubuntu trusty universe
apt-get update

Now install the following packages for Cacti setup on your Ubuntu server with the help of given below command:

apt-get install apache2 mysql-server-5.6 php libapache2-mod-php -y

Start the web server and MySQL server. Set them to automatically start up on server boot:

systemctl start apache2.service
systemctl enable apache2.service
systemctl start mysql.service
systemctl enable mysql.service

Step 3. Installing the Cacti packages.

Install SNMP and SNMP and RRDtools:

apt-get install snmp snmpd rrdtool -y

Now use the following command to install Cacti:

apt-get install cacti cacti-spine -y

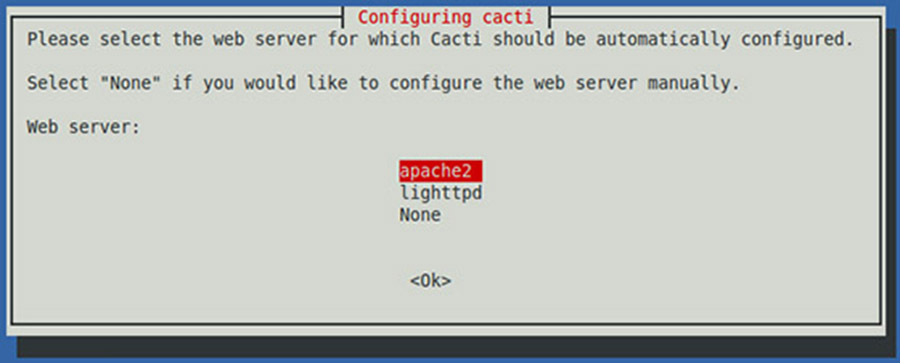
During the installation process you will be prompted to configure Cacti with few options to select from available options. First of all Choose the web server that you wish to use for configure with Cacti like we are using Apache and then press ‘OK’ key to continue:
Install Cacti Monitoring on Ubuntu 16
Now it will ask you for a webserver that you will use it, we choose Apache2 since that’s what we installed in the dependencies.
Install Cacti Monitoring on Ubuntu 16-2
Next it will ask to configure the Cacti database, select Yes
cacti-installation-ubunut-3
Now it will ask for your root password of MySQL/MariaDB database.
cacti-installation-ubunut-4
Once the installation process is complete, you will have to restart all services to reflect the changes made:

systemctl restart apache2.service
systemctl restart mysql.service
systemctl restart snmpd.service

Step 3. Accessing cacti.

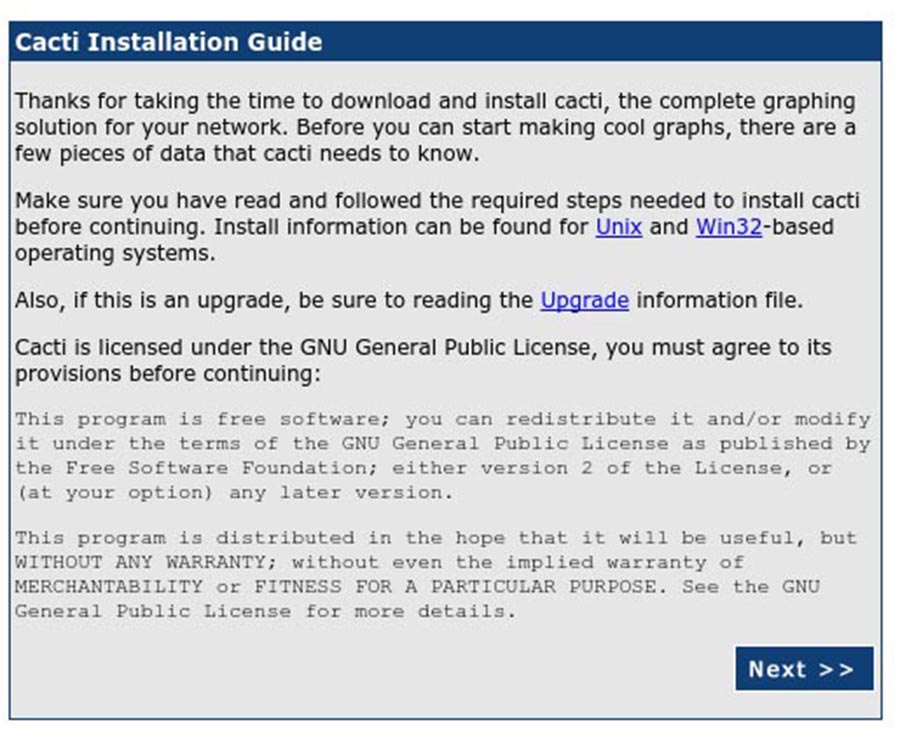
Cacti will be available on HTTP port 80 by default. Open your favorite browser and navigate to http://yourdomain.com/cacti or http://server-ip/cacti and complete the required the steps to finish the installation. You will get the “Cacti Installation Guide” on screen. Click on ‘Next’ button.
Cacti-installing-1
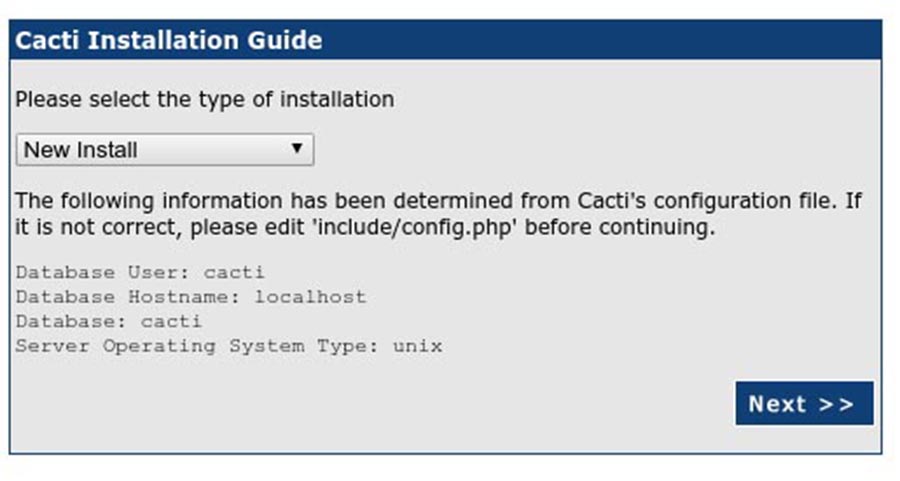
In next screen, you will get drop down button. Because this fresh installation select ‘New Install’ and click ‘Next’ button.
Cacti_installing-2
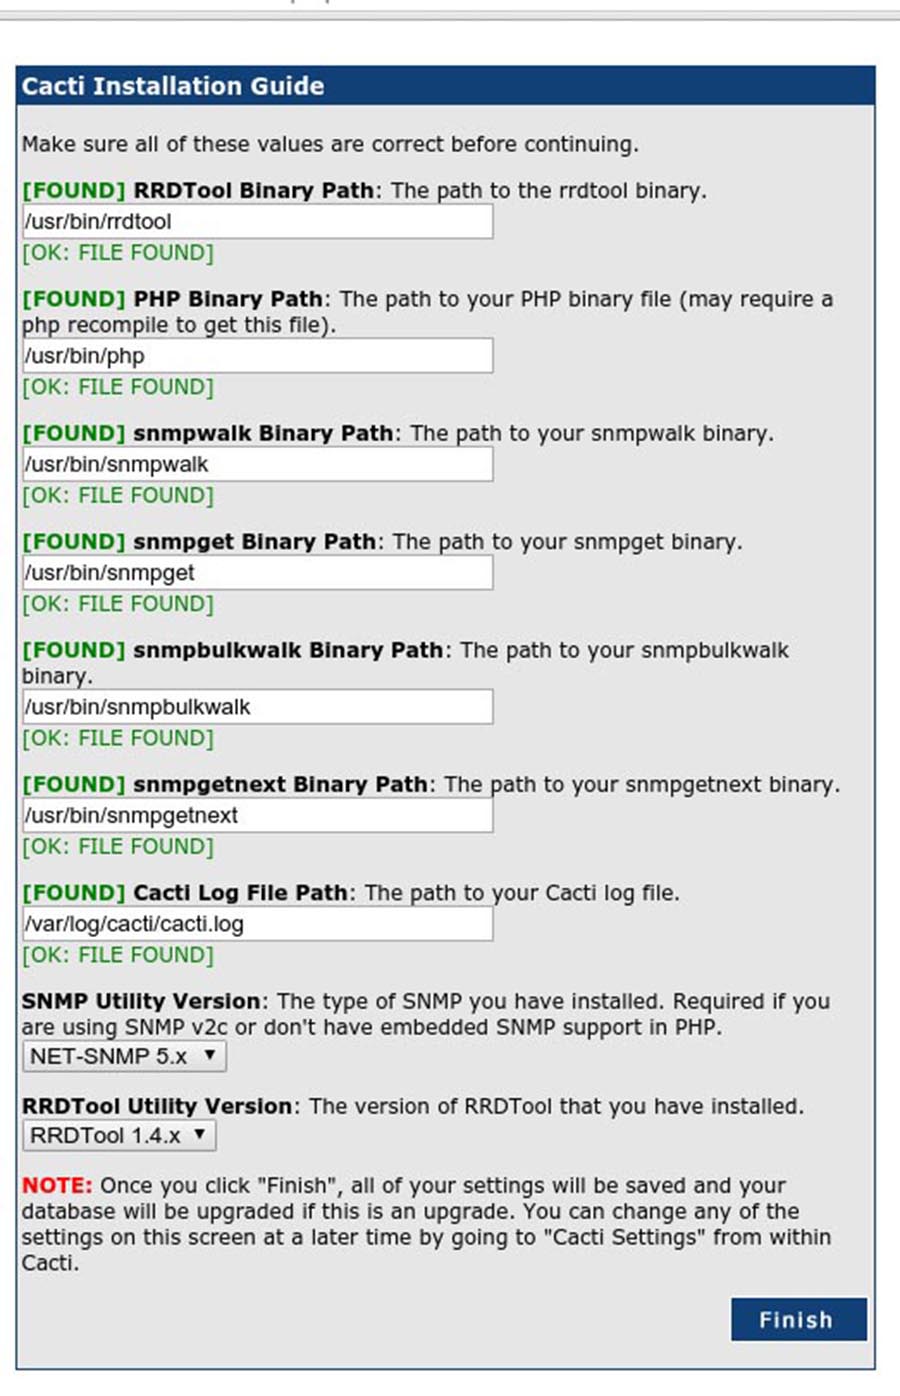
acti will now check for the packages it needs to run properly. Make sure all the checks appear with an “OK” status, and then click Finish.
Cacti_installing-3
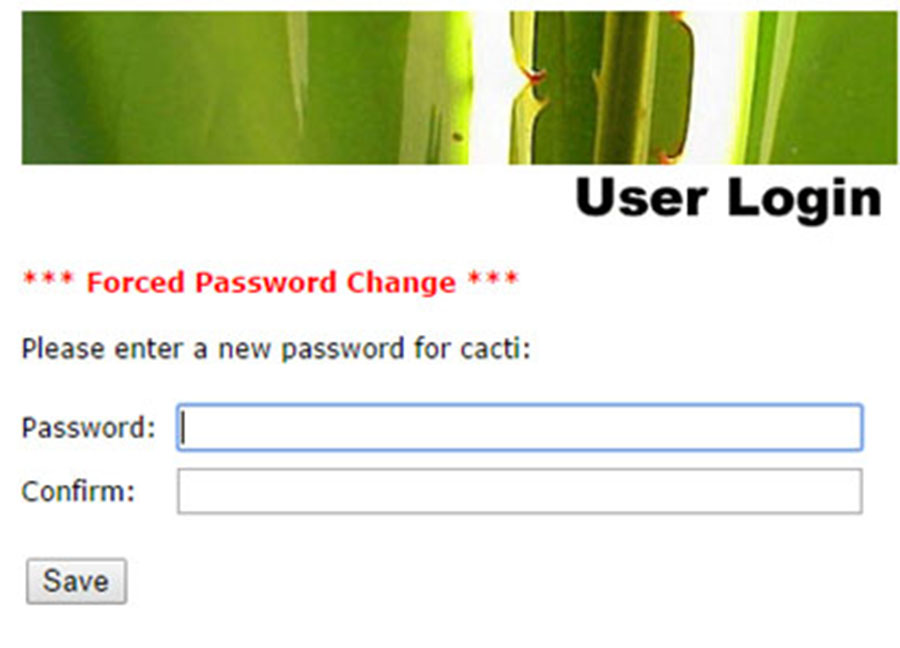
The next page is the login page. The first time you log into Cacti, use admin as username and password
Cacti-installing-4
Congratulation’s! You have successfully installed Cacti. Thanks for using this tutorial for installing Apache Cassandra on Ubuntu 16.04 LTS (Xenial Xerus) system. For additional help or useful information, we recommend you to check the official Cacti Monitoring web site.

How To Install Cassandra on Ubuntu 16.04 LTS

Install Cassandra on Ubuntu 16

Apache Cassandra is a NoSQL database intended for storing large amounts of data in a decentralized, highly available cluster. NoSQL refers to a database with a data model other than the tabular relations used in relational databases such as MySQL, PostgreSQL, and Microsoft SQL. The Apache Cassandra database is the right choice when you need scalability and high availability without compromising performance.

This article assumes you have at least basic knowledge of linux, know how to use the shell, and most importantly, you host your site on your own VPS. The installation is quite simple and assumes you are running in the root account, if not you may need to add ‘sudo’ to the commands to get root privileges. We will show you through the step by step installation Apache Cassandra on a Ubuntu 16.04 (Xenial Xerus) server.
Install Cassandra on Ubuntu 16.04 LTS

Step 1. First make sure that all your system packages are up-to-date by running these following apt-get commands in the terminal.

sudo apt-get update
sudo apt-get upgrade

Step 2. Installing Java.

Cassandra needs Java application to be running on your server, make sure you have installed latest Java version:

add-apt-repository ppa:webupd8team/java

After added the PPA, run commands below one by one to install Java:

apt-get update
apt-get install oracle-java8-set-default

Verify Installed Java Version:

# java -version
java version "1.8.0_101"
Java(TM) SE Runtime Environment (build 1.8.0_101-b13)
Java HotSpot(TM) 64-Bit Server VM (build 25.101-b13, mixed mode)

Step 2. Installing Cassandra.

We will install Cassandra using official package available on Apache Software Foundation, so add Cassandra repository to make the package available to your system:

echo "deb http://www.apache.org/dist/cassandra/debian 36x main" | sudo tee -a /etc/apt/sources.list.d/cassandra.list

Add the public key for Cassandra repo so that you won’t encounter GPG error:

gpg --keyserver pgp.mit.edu --recv-keys 749D6EEC0353B12C
gpg --export --armor 749D6EEC0353B12C | sudo apt-key add -

Install Cassandra:

apt-get update
apt-get install cassandra -y

Start Cassandra up and configure it to your liking. You’ll most likely want to enable it to start on boot. In case of a power outage or maintenance, you won’t forget to start it back up after a reboot:

systemctl start cassandra
systemctl enable cassandra

Cassandra uses a separate command line to be controlled, so we need to make sure to activate that:

[[email protected] ~]# cqlsh
Connected to Test Cluster at 127.0.0.1:9042.
[cqlsh 5.0.1 | Cassandra 3.0.9 | CQL spec 3.4.0 | Native protocol v4]
Use HELP for help.
cqlsh>

You may want to check information about the node and cluster to get an idea of how to fix various issues or update information:

[[email protected] ~] nodetool status
Datacenter: datacenter1
=======================
Status=Up/Down
|/ State=Normal/Leaving/Joining/Moving
-- Address Load Tokens Owns (effective) Host ID Rack
UN 127.0.0.1 216.14 KB 256 100.0% 2a0b7fa9-23c6-e46-83a4-e6c06e2f5736 rack1

Congratulation’s! You have successfully installed Cassandra. Thanks for using this tutorial for installing Apache Cassandra on Ubuntu 16.04 LTS (Xenial Xerus) system. For additional help or useful information, we recommend you to check the official Apache Cassandra web site.

How To Install Plank on Ubuntu 16.04 LTS

Install Plank on Ubuntu

Plank is the default dock app on Elementary OS used for launching applications. It is easy to edit and rearrange the applications present on it without the need to edit its configuration file. It can be easily installed on other Ubuntu based systems.

This article assumes you have at least basic knowledge of linux, know how to use the shell, and most importantly, you host your site on your own VPS. The installation is quite simple and assumes you are running in the root account, if not you may need to add ‘sudo’ to the commands to get root privileges. I will show you through the step by step installation Plank dock on a Ubuntu 16.04 (Xenial Xerus) server.
Install Plank on Ubuntu 16.04 LTS

Step 1. First make sure that all your system packages are up-to-date by running these following apt-get commands in the terminal.

sudo apt-get update
sudo apt-get upgrade

Step 2. Installing Plank.

First, add the Plank PPA to Ubuntu 16.04:

add-apt-repository ppa:ricotz/docky
apt-get update

Finally, install Plank:

apt-get install plank

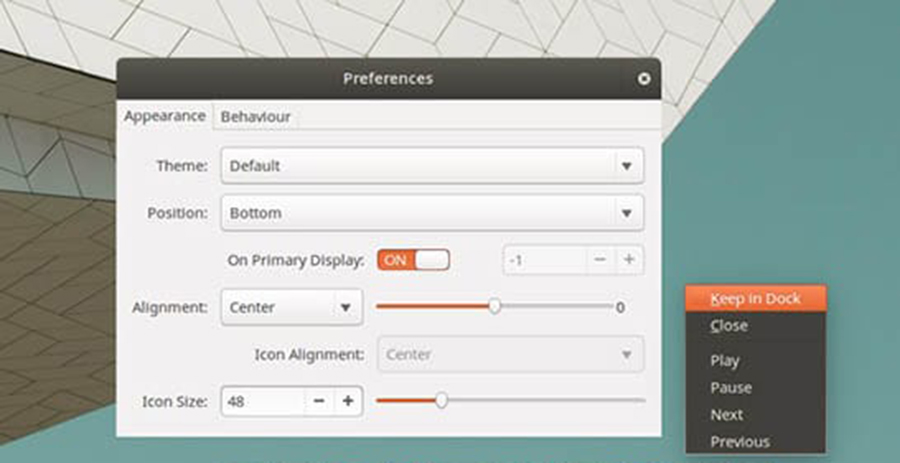
After installation is done, open the ‘Plank’ app from the Unity Dash (or equivalent App Menu in the desktop environment you’re using) and you’re away:
plank-dock

Or run “plank” command in Terminal. (without quotes):

plank

Congratulation’s! You have successfully installed Plank. Thanks for using this tutorial for installing Plank on Ubuntu 16.04 LTS (Xenial Xerus) system. For additional help or useful information, we recommend you to check the official Plank web site.

How To Install Plesk on Linux System

Install Plesk on Linux

Plesk is one of the widely used web hosting control panels in the web hosting business. It offers simple server and website management solutions with single-click mechanisms. Plesk consists of webserver suite (LAMP), Mail server, FTP Server, Name Server applications etc.

Plesk supports a wide range of Linux releases, including all of the commonly used distributions like CentOS, Ubuntu, Debian and Cloudlinux. Plesk is a an enterprise hosting control panel and it requires license to work effectively. They also offers 15 day trial license which is intended for testing purposes.

This article assumes you have at least basic knowledge of linux, know how to use the shell, and most importantly, you host your site on your own VPS. The installation is quite simple and assumes you are running in the root account, if not you may need to add ‘sudo’ to the commands to get root privileges. I will show you through the step by step installation Plesk web hosting control panels on a Linux system server.

Install Plesk on Linux System

Step 1. Download the autoinstaller from Plesk website:


wget http://autoinstall.plesk.com/plesk-installer

Add execute permissions to the autoinstaller:

chmod +x plesk-installer

Launch the autoinstaller:

./plesk-installer

Follow the script prompts and pick the options that best suits your use case.

Step 2. Accessing Plesk.

Once this is complete, you’ll be able to access your Plesk server via the web management interface. To do this, open a browser and point it to https://yourserverip:8443 and login to the control panel as root user.

Congratulation’s! You have successfully installed Plesk. Thanks for using this tutorial for installing Plesk web hosting control panels on a Linux system. For additional help or useful information, we recommend you to check the official Plesk web site.