How To Enable HTTP/2.0 Support on Nginx Ubuntu

How To Enable HTTP2.0 Support on Nginx

HTTP/2 is the new updated HTTP protocol, and its supposed to be much more efficient than the now outdated http/1.1 version. Its goal is to reduce the latency as well as to make the web applications faster by allowing multiple concurrent requests between the web browser and the server across a single TCP connection. If you are looking to speed up the loading time of your website or blog then you should enable http/2.0 in your web server.

This article assumes you have at least basic knowledge of linux, know how to use the shell, and most importantly, you host your site on your own VPS. The installation is quite simple and assumes you are running in the root account, if not you may need to add ‘sudo’ to the commands to get root privileges. I will show you through the step by step enable HTTP/2.0 support in Apache running Ubuntu 16.04 (Xenial Xerus) server.
Enable HTTP/2.0 Support on Nginx

Step 1. First make sure that all your system packages are up-to-date by running these following apt-get commands in the terminal.

sudo apt-get update
sudo apt-get upgrade

Step 2. Enable HTTP/2.0 Nginx web server.

So make sure that your Nginx version supporting HTTP/2 protocol. If you have not installed Nginx or using older version upgrade it first:

apt-get install nginx

To verify Nginx version we can use the following:

nginx -v 
# nginx version: nginx/1.10.1

To enable HTTP/2 in Nginx on an Ubuntu VPS you should edit the default Nginx server block:

nano /etc/nginx/sites-available/default

Add the http2 keywords to your virtualhost/server block configuration:

server {  
        server_name wpcademy.com www.wpcademy.com;
        listen 443 ssl http2 default_server;
        root /var/www/html;
        index index.html;

        location / {
                try_files $uri $uri/ =404;
        }

        ssl_certificate /etc/nginx/ssl/domain.com.crt;
        ssl_certificate_key /etc/nginx/ssl/domain.com.key;
}

server {
       listen         80;
       server_name    domain.com www.domain.com;
       return         301 https://$server_name$request_uri;
}

Enabling really is this simple, just change your current ssl-line from this:

server {
  listen        443 ssl;
  ...
}

to this:

server {
  listen        443 ssl http2;
  ...
}

Once you finish with editing the server block, save and close the file. Check if there are errors in the Nginx configuration using the command:

nginx -t

And then restart Nginx for the changes to take effect:

systemctl restart nginx.service

Step 3. Verify HTTP/2.

Go to https://tools.keycdn.com/http2-test and test if http/2.0 is detected in your domain:

https://tools.keycdn.com/http2-test

Congratulation’s! You have successfully enable HTTP/2.0 web server. Thanks for using this tutorial for enable HTTP/2.0 support on Nginx running Ubuntu 16.04 LTS (Xenial Xerus) system. For additional help or useful information, we recommend you to check the official Nginx web site.

How To Install Subsonic Media Server on Ubuntu 16.04 LTS

Install Subsonic Media Server on Ubuntu 16

Subsonic is a free, web-based media streamer written in Java, available for Linux, MacOS and Windows. With Subsonic, you can stream your music from home computer or any public-facing computer and listen to your music from anywhere with a web browser.

This article assumes you have at least basic knowledge of linux, know how to use the shell, and most importantly, you host your site on your own VPS. The installation is quite simple and assumes you are running in the root account, if not you may need to add ‘sudo’ to the commands to get root privileges. I will show you through the step by step installation Subsonic Media Server on a Ubuntu 16.04 (Xenial Xerus) server.
Install Subsonic Media Server on Ubuntu 16.04 LTS

Step 1. First make sure that all your system packages are up-to-date by running these following apt-get commands in the terminal.

sudo apt-get update
sudo apt-get upgrade

Step 2. Installing Java.

First we need to install Java by running the following three commands in sequence:

add-apt-repository ppa:webupd8team/java
apt-get update
apt-get install oracle-java8-installer

Step 2. Installing Subsonic Media Server.

Run the following commands to install Subsonic Media Server on Ubuntu systems:

wget https://s3-eu-west-1.amazonaws.com/subsonic-public/download/subsonic-6.0.deb

Next, install the downloaded Subsonic package by running the following command:

sudo dpkg -i subsonic-6.0.deb

Once it’s installed, the Subsonic daemon will automatically start:

systemctl start subsonic
systemctl enable subsonic

Step 3. Accessing Subsonic Media Server.

Subsonic Media Server will be available on HTTP port 80 by default. Open your favorite browser and navigate to http://yourdomain.com:4040 or http://server-ip:4040 and complete the required the steps to finish the installation. If you are using a firewall, please open port 4040 to enable access to the control panel.

Congratulation’s! You have successfully installed Subsonic. Thanks for using this tutorial for installing Subsonic Media Server on Ubuntu 16.04 LTS (Xenial Xerus) system. For additional help or useful information, we recommend you to check the official Subsonic Media Server web site.

How To Install Master PDF Editor on Ubuntu 16.04 LTS

Install Master PDF Editor on Ubuntu 16

Master PDF editor is a pdf editing tool through which we can edit or add text, images and password to a pdf file.Using this tool we can also split, merge and remove pages from a pdf file. It’s developed by Code Industry Ltd and available for Linux, Mac OS X and Windows.

This article assumes you have at least basic knowledge of linux, know how to use the shell, and most importantly, you host your site on your own VPS. The installation is quite simple and assumes you are running in the root account, if not you may need to add ‘sudo’ to the commands to get root privileges. I will show you through the step by step installation Master PDF Editor pdf editing tool on a Ubuntu 16.04 (Xenial Xerus) server.
Master PDF Editor Features

Edit PDF text, images and pages with full editing features
Create new PDF or edit existing ones.
Add and/or edit bookmarks in PDF files.
Encrypt and/or protect PDF files using 128 bit encryption.
Convert XPS files into PDF.
Add PDF controls (like buttons, checkboxes, lists, etc.) into your PDFs.
Import/export PDF pages into common graphical formats including BMP, JPG, PNG, and TIFF.
Split and merge PDF files.
JavaScript support.
Dynamic XFA form support.
Validation Forms and Calculate Values.
Adding a digital signature and Signing PDF Documents.
Fast and simple PDF forms fill out.
Changing font attributes (size, family, color etc).

Install Master PDF Editor on Ubuntu 16.04 LTS

Step 1. First make sure that all your system packages are up-to-date by running these following apt-get commands in the terminal.

sudo apt-get update
sudo apt-get upgrade

Step 2. Installing Master PDF Editor.

Run the following commands to install Master PDF Editor 4 on Ubuntu systems:

wget http://get.code-industry.net/public/master-pdf-editor-4.1.30_qt5.amd64.deb
sudo dpkg -i master-pdf-editor-4.1.30_qt5.amd64.deb
sudo apt install -f

Once installed, master PDF editor can be started from Unity Dash or your preferred app launcher.

Congratulation’s! You have successfully installed Master PDF Editor. Thanks for using this tutorial for installing Master PDF Editor pdf editing tool on Ubuntu 16.04 LTS (Xenial Xerus) system. For additional help or useful information, we recommend you to check the official Master PDF Editor web site.

How To Install Firefox Developer Edition on Ubuntu 16.04 LTS

Install Firefox Developer Edition on Ubuntu 16

Firefox developer edition, which is a browser built specifically for web developers, was first introduced by Mozilla back in November 2014. It streamlines the development workflow so developers don’t need to bounce between different platforms and browsers. This browser comes preloaded with many web developer tools such as WebIDE and Valence which allows developers to debug other browsers and apps directly from within Firefox developer. This edition of Firefox is available for most of operating systems like Windows, Linux, and MAC OS.

This article assumes you have at least basic knowledge of linux, know how to use the shell, and most importantly, you host your site on your own VPS. The installation is quite simple and assumes you are running in the root account, if not you may need to add ‘sudo’ to the commands to get root privileges. I will show you through the step by step installation Firefox Developer Edition web browser on a Ubuntu 16.04 (Xenial Xerus) server.
Firefox Developer Edition Features

Visual Editing Tools – Visually edit CSS and HTML animations playing on the page from the Inspector panel. Verify alignment, dimensions and padding of any element using the Ruler and Measurement tools.
DevTools Challenger – Use Developer Edition’s visual animation and CSS editing tools to explore the depths of the ocean and interact with the strangest of creatures.
Performance Tools – Examine your web content’s frame rate, memory consumption and JS profile in a consolidated timeline view to help easily identify and troubleshoot performance bottlenecks.
Page Inspector – Examine the HTML and CSS of any Web page and easily modify the structure and layout of a page.
Web Audio Editor – Inspect and interact with Web Audio API in real time to ensure that all audio nodes are connected in the way you expect.
Web Console – See logged information associated with a Web page and use Web Console to interact with Web pages using JavaScript.
JavaScript Debugger – Step through JavaScript code and examine or modify its state to help track down bugs.
Network Monitor – See all the network requests your browser makes, how long each request takes and details of each request.
Style Editor – View and edit CSS styles associated with a Web page, create new ones and apply existing CSS stylesheets to any page.
Responsive Design View – See how your Website or Web app will look on different screen sizes without changing the size of your browser window.

Install Firefox Developer Edition on Ubuntu 16.04 LTS

Step 1. First make sure that all your system packages are up-to-date by running these following apt-get commands in the terminal.

sudo apt-get update
sudo apt-get upgrade

Step 2. Installing Firefox Developer Edition.

First, add a repository for download Mozilla Firefox developer edition. Just follow this command:

sudo add-apt-repository ppa:ubuntu-mozilla-daily/firefox-aurora
sudo apt-get update
sudo apt-get install firefox

Once installed, open the Firefox Developer Edition from Ubuntu Dash.

Congratulation’s! You have successfully installed Firefox Developer Edition. Thanks for using this tutorial for installing Firefox Developer Edition web browser on Ubuntu 16.04 LTS (Xenial Xerus) system. For additional help or useful information, we recommend you to check the official Firefox Developer Edition web site.

How To Install Wireshark on Ubuntu 16.04 LTS

Install Wireshark on Ubuntu 16

Wireshark is a free and open-source packet analyzer. It is used for network troubleshooting, monitoring, analysis, software and communications protocol development. Wireshark offers graphical interface to view and analyze network results so it’s easy to use. It can capture network traffic to specific devices and network interfaces and can save the captured traffic to various formats for analysis and troubleshoot of network releted problems.

This article assumes you have at least basic knowledge of linux, know how to use the shell, and most importantly, you host your site on your own VPS. The installation is quite simple and assumes you are running in the root account, if not you may need to add ‘sudo’ to the commands to get root privileges. I will show you through the step by step installation wireshark network analyzer on a Ubuntu 16.04 (Xenial Xerus) server.
Install Wireshark on Ubuntu 16.04 LTS

Step 1. First make sure that all your system packages are up-to-date by running these following apt-get commands in the terminal.

sudo apt-get update
sudo apt-get upgrade

Step 2. Installing Wireshark.

Run the commands below in terminal to install wireshark:

apt-get install wireshark

During the installation,it will require to confirm security about allowing non-superuser to execute Wireshark. Just confirm YES if you want to. If you check on NO, you must run Wireshark with sudo. Later, if you want to change this:

sudo dpkg-reconfigure wireshark-common

Step 3. Start Capturing Packet.

Once installed, new group named wireshark will be created when installing wireshark. You can verify this by looking at the end of /etc/group file:

tail /etc/group

Running Wireshark as root is insecure. To run wireshark as normal user you have to add yourself into wireshark group:

sudo gpasswd -a <YourUserName> wireshark

Wireshark will be the user’s secondary group. To temporarily set wireshark as the user’s primary group, run the following command:

newgrp wireshark

Finally, Start the wireshark program from the terminal:

wireshark

Note: If you want to start wireshark in application menu, you have to log out of the current session and log back in.

Congratulation’s! You have successfully installed wireshark. Thanks for using this tutorial for installing wireshark network analyzer on Ubuntu 16.04 LTS (Xenial Xerus) system. For additional help or useful information, we recommend you to check the official wireshark web site.

How To Install Foxit Reader on Ubuntu 16.04

Install Foxit Reader on Ubuntu 16

Foxit PDF Reader can be used to view, create, edit, organize, sign, scan, and OCR. It can easily export PDF files to office, PDF/A/E/X, and more. Users can collaborate, share, sign, protect, and secure documents using Foxit Reader.

This article assumes you have at least basic knowledge of linux, know how to use the shell, and most importantly, you host your site on your own VPS. The installation is quite simple and assumes you are running in the root account, if not you may need to add ‘sudo’ to the commands to get root privileges. I will show you through the step by step installation Foxit PDF Reader on a Ubuntu 16.04 (Xenial Xerus) server.
Foxit PDF Reader features

Open multiple PDFs at the same time in tabs.
Open password protected PDF files.
View PDF files in single page, continuous, facing, or facing continuous mode.
Support page rotation, text search.
Print PDF documents to physical printers.
Microsoft RMS support.
Annotate PDF support.
Many more.

Install Foxit Reader on Ubuntu 16.04

Step 1. First make sure that all your system packages are up-to-date by running these following apt-get commands in the terminal.

sudo apt-get update
sudo apt-get upgrade

Step 2. Installing Foxit PDF Reader.

You need to download the last stable release of Foxit Reader, choose 64 bits or 32 bits according to your OS architecture:

### 32-Bit ###
wget http://cdn01.foxitsoftware.com/pub/foxit/reader/desktop/linux/2.x/2.1/en_us/FoxitReader2.1.0805_Server_x86_enu_Setup.run.tar.gz
### 64-Bit ###
wget http://cdn01.foxitsoftware.com/pub/foxit/reader/desktop/linux/2.x/2.1/en_us/FoxitReader2.1.0805_Server_x64_enu_Setup.run.tar.gz

Extract the tarball into the current directory:

tar xzvf FoxitReader*.tar.gz

Next, run the following command to make script executable:

sudo chmod a+x FoxitReader*.run

Now is the time to run the script file to install Foxit Reader and wait until fully installed:

./FoxitReader.*.run

To install it in system-wide mode, execute the .run file with root privileges:

sudo ./FoxitReader.*.run

Congratulation’s! You have successfully installed Foxit Reader. Thanks for using this tutorial for installing Foxit PDF Reader on Ubuntu 16.04 LTS (Xenial Xerus) system. For additional help or useful information, we recommend you to check the official Foxit Reader web site.

How To Install Seafile on Ubuntu 16.04 LTS

Install Seafile on Ubuntu 16

Seafile is a open source cloud storage software. It offers file sharing and syncing for individual users and groups, it provides client side encryption and easy access from mobile devices. Also easily integrated with local services such as LDAP and WebDAV or can be deployed using advanced network services and databases like MySQL, SQLite, PostgreSQL, Memcached, Nginx or Apache Web Server.

This article assumes you have at least basic knowledge of linux, know how to use the shell, and most importantly, you host your site on your own VPS. The installation is quite simple and assumes you are running in the root account, if not you may need to add ‘sudo’ to the commands to get root privileges. I will show you through the step by step installation Seafile open source secure cloud storage on a Ubuntu 16.04 (Xenial Xerus) server.
Install Seafile on Ubuntu 16.04 LTS Xenial Xerus

Step 1. First make sure that all your system packages are up-to-date by running these following apt-get commands in the terminal.

sudo apt-get update
sudo apt-get upgrade

Step 2. Install LEMP (Linux, Nginx, MariaDB, PHP) server.

A Ubuntu 16.04 LAMP server is required. If you do not have LEMP installed, you can follow our guide here. Also install all required PHP modules:

apt-get install php7.0-curl php7.0-gd php7.0-mbstring php7.0-mysql libapache2-mod-php7.0 php7.0-mcrypt php7.0-zip

Installing Python modules:

apt-get install python2.7 libpython2.7 python-setuptools python-imaging python-ldap python-mysqldb python-memcache python-urllib3

Step 3. Configure the MariaDB database for Seafile.

By default, MariaDB is not hardened. You can secure MariaDB using the mysql_secure_installation script. You should read and below each steps carefully which will set root password, remove anonymous users, disallow remote root login, and remove the test database and access to secure MariaDB.

mysql_secure_installation

Configure it like this:

- Set root password? [Y/n] y
- Remove anonymous users? [Y/n] y
- Disallow root login remotely? [Y/n] y
- Remove test database and access to it? [Y/n] y
- Reload privilege tables now? [Y/n] y

Next we will need to log in to the MariaDB console and create a database for the Seafile. Run the following command:

mysql -u root -p

This will prompt you for a password, so enter your MariaDB root password and hit Enter. Once you are logged in to your database server you need to create a database for Seafile installation:

MariaDB [(none)]> create database ccnet_db character set = 'utf8'; MariaDB [(none)]> create database seafile_db character set = 'utf8'; MariaDB [(none)]> create database seahub_db character set = 'utf8';
MariaDB [(none)]> create user seacloud@localhost identified by 'password';
MariaDB [(none)]> grant all privileges on ccnet_db.* to seacloud@localhost identified by 'password'; MariaDB [(none)]> grant all privileges on seafile_db.* to seacloud@localhost identified by 'password'; MariaDB [(none)]> grant all privileges on seahub_db.* to seacloud@localhost identified by 'password';
MariaDB [(none)]> flush privileges; MariaDB [(none)]> exit

Step 4. Installing Seafile on Server.

You need to download the last stable release of Seafile:

wget https://bintray.com/artifact/download/seafile-org/seafile/seafile-server_6.0.6_x86-64.tar.gz

Extract the tarball into the current directory:

tar -xvzf seafile-server_6.0.6_x86-64.tar.gz
mv seafile-server_6.0.6 seafile-server

Install Seafile:

Run this script which will create the required databases and directories for the Seafile server and and answer all questions using the following configuration options, after the script verifies the existence of all Python required modules:

./setup-seafile-mysql.sh

After Seafile server successfully installs, it will generate some useful information such as what ports needs to be open on your Firewall to allow external connection and what scripts to handle in order to start the server.

Step 5. Starting the Seafile services.

Create startup script for the Seafile server like this:

nano /lib/systemd/system/seafile.service

Add the following lines:

[Unit]
Description=Seafile Server
After=network.target mariadb.service[Service]
Type=oneshot
ExecStart=/home/seafile/seafile-server/seafile.sh start
ExecStop=/home/seafile/seafile-server/seafile.sh stop
RemainAfterExit=yes
User=seafile
Group=seafile[Install]
WantedBy=multi-user.target

Save the file and create a new service file for seahub:

[Unit]
Description=Seafile Hub
After=network.target seafile.target[Service]
Type=oneshot
ExecStart=/home/seafile/seafile-server/seahub.sh start-fastcgi
ExecStop=/home/seafile/seafile-server/seahub.sh stop
RemainAfterExit=yes
User=seafile
Group=seafile[Install]
WantedBy=multi-user.target

Now try using the service and command to start a new Seafile server instance:

systemctl daemon-reload 
systemctl start seafile
systemctl start seahub

Step 6. Configuring Nginx web server for Seafile.

*Note: A static IP address 192.168.77.21 configure on your server.

First, create a new virtual host file with name seafile.conf:

nano /etc/nginx/sites-available/seafile.conf

Add the following lines:

server {
    listen 80;
    server_name 192.168.77.21;proxy_set_header X-Forwarded-For $remote_addr;# Reverse proxy for seafile
    location / {
        fastcgi_pass    127.0.0.1:8000;
        fastcgi_param   SCRIPT_FILENAME     $document_root$fastcgi_script_name;
        fastcgi_param   PATH_INFO           $fastcgi_script_name;fastcgi_param    SERVER_PROTOCOL        $server_protocol;
        fastcgi_param   QUERY_STRING        $query_string;
        fastcgi_param   REQUEST_METHOD      $request_method;
        fastcgi_param   CONTENT_TYPE        $content_type;
        fastcgi_param   CONTENT_LENGTH      $content_length;
        fastcgi_param   SERVER_ADDR         $server_addr;
        fastcgi_param   SERVER_PORT         $server_port;
        fastcgi_param   SERVER_NAME         $server_name;
        fastcgi_param   REMOTE_ADDR         $remote_addr;access_log      /var/log/nginx/seahub.access.log;
        error_log       /var/log/nginx/seahub.error.log;
        fastcgi_read_timeout 36000;
    }# Reverse Proxy for seahub
    location /seafhttp {
        rewrite ^/seafhttp(.*)$ $1 break;
        proxy_pass http://127.0.0.1:8082;
        client_max_body_size 0;
        proxy_connect_timeout  36000s;
        proxy_read_timeout  36000s;
        proxy_send_timeout  36000s;
        send_timeout  36000s;
    }#CHANGE THIS PATH WITH YOUR OWN DIRECTORY
    location /media {
        root /home/seafile/seafile-server/seahub;
    }
}

Save the file and restart nginx:

systemctl restart nginx

Step 7. Accessing Seafile.

Seafile cloud storage will be available on HTTP port 80 by default. Open your favorite browser and navigate to http://yourdomain.com or http://192.168.77.21. Enter the admin email id and password to login which you have created at the time of installation. If you are using a firewall, please open port 8000 to enable access to the control panel.
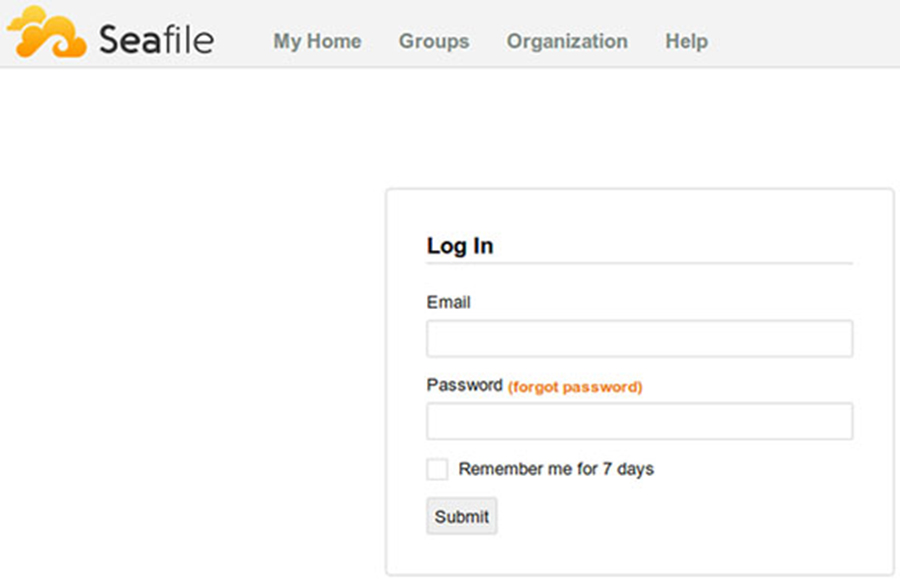
seafile-web-interface-login

Congratulation’s! You have successfully installed Seafile. Thanks for using this tutorial for installing Seafile open source secure cloud storage on Ubuntu 16.04 LTS (Xenial Xerus) system. For additional help or useful information, we recommend you to check the official Seafile web site.