Orangescrum is a free, open source, flexible project management web application written using CakePHP. It helps you to manage projects, teams, documents, and tasks, all in one place. Orangescrum provides various features like agile project management, collaboration, issue tracking, notifications, reporting, task management, and traditional project management functionality for small/medium businesses. Continue reading “How To Install Orangescrum on Ubuntu 18.04 LTS”
How to fix Potential for Information Disclosure in CakePHP
The default application skeleton contained a beforeRender() method on the AppController that could potentially lead to unwanted information disclosure in your application. The unsafe default code was present between 3.1.0 and 3.5.0 of the application skeleton.
Risks
The default beforeRender hook would automatically serialize all view variables into JSON/XML if the _serialize view variable was not defined by the controller action. Controller methods that define the _serialize variable would behave correctly and only expose the named variables.
This behavior is triggered by the AppController and ErrorController loading RequestHandlerComponent, which configures the View class to be used based on the client’s Accept header. Then code in AppController::beforeRender() would enable all view variables to be serialized if no variables were explicitly listed.
The default controllers generated by bake set the _serialize view variable. This helps limit the impact, but could still lead to unwanted information exposure if entity classes are not correctly configured.
How to fix
You can fix the potential for information disclosure by modifying your application code. Unfortunately we cannot resolve this problem for you through a patch release of CakePHP or its appplication skeleton.
If you don’t have ErrorController in your src/Controller directory (CakePHP <= 3.3)
If you are using CakePHP 3.3.0 or greater and do not have an ErrorController in your application, you should download an ErrorController and put it into your src/Controller directory.
If you don’t use JSON/XML response based on client requests
- Remove $this->loadComponent(‘RequestHandler’) from the initialize() method of your AppController and ErrorController.
- Remove $this->set(‘_serialize’, true); from the beforeRender() of your AppController.
If you use JSON/XML response based on client requests
- Remove $this->set(‘_serialize’, true); from the beforeRender() of your AppController.
- Remove $this->set(‘_serialize’, [ (variable names) ]) from all controller actions, that should not return JSON/XML.
- Add $this->set(‘_serialize’, [ (variable names) ]) explicitly to some actions of your controllers, which you want to return JSON/XML.
While we have no reports of information disclosure in the wild, this issue was found by Kurita Takashi and we felt this was important to disclose.
How to View Elements in CakePHP
Certain parts of the web pages are repeated on multiple web pages but at different locations. CakePHP can help us reuse these repeated parts. These reusable parts are called Elements − help box, extra menu etc. An element is basically a mini-view. We can also pass variables in elements.
Cake\View\View::element(string $elementPath, array $data, array $options =[])
There are three arguments to the above function −
- The first argument is the name of the template file in the /src/Template/Element/ folder.
- The second argument is the array of data to be made available to the rendered view.
- The third argument is for the array of options. e.g. cache.
Out of the 3 arguments, the first one is compulsory while, the rest are optional.
Example
Create an element file at src/Template/Element directory called helloworld.ctp. Copy the following code in that file.
src/Template/Element/helloworld.ctp
<p>Hello World</p>
Create a folder Elems at src/Template and under that directory create a View file called index.ctp. Copy the following code in that file.
src/Template/Elems/index.ctp
Element Example: <?php echo $this→element('helloworld'); ?>
Make Changes in the config/routes.php file as shown in the following program.
config/routes.php
<?php
   use Cake\Core\Plugin;
   use Cake\Routing\RouteBuilder;
   use Cake\Routing\Router;

   Router::defaultRouteClass('DashedRoute');
   Router::scope('/', function (RouteBuilder $routes) {
      $routes->connect('/elementexample',['controller'=>'Elems','action'=>'index']);
      $routes->fallbacks('DashedRoute');
   });
   Plugin::routes();
Create an ElemsController.php file at src/Controller/ElemsController.php. Copy the following code in the controller file.
src/Controller/ElemsController.php
<?php
   namespace App\Controller;
   use App\Controller\AppController;
   use Cake\ORM\TableRegistry;
   use Cake\Datasource\ConnectionManager;

   class ElemsController extends AppController{
      public function index(){
      }
   }
?>
Execute the above example by visiting the following URL.
http://localhost:85/CakePHP/element-example
Output
Upon execution, the above URL will give you the following output.
How to View Events, Callbacks in CakePHP
There are several callbacks/events that we can use with View Events. These events are helpful to perform several tasks before something happens or after something happens. The following is a list of callbacks that can be used with CakePHP.
| S.No | Event Function & Description |
|---|---|
| 1 | Helper::beforeRender(Event $event, $viewFile)
The beforeRender method is called after the controller’s beforeRender method but before the controller renders view and layout. This receives the file being rendered as an argument. |
| 2 | Helper::beforeRenderFile(Event $event, $viewFile)
This method is called before each view file is rendered. This includes elements, views, parent views and layouts. |
| 3 | Helper::afterRenderFile(Event $event, $viewFile, $content)
This method is called after each View file is rendered. This includes elements, views,parent views and layouts. A callback can modify and return $content to change how the rendered content will be displayed in the browser. |
| 4 | Helper::afterRender(Event $event, $viewFile)
This method is called after the view has been rendered but before the layout rendering has started. |
| 5 | Helper::beforeLayout(Event $event, $layoutFile)
This method is called before the layout rendering starts. This receives the layout filename as an argument. |
| 6 | Helper::afterLayout(Event $event, $layoutFile)
This method is called after the layout rendering is complete. This receives the layout filename as an argument. |
How to Working with Views in CakePHP
The letter “V” in the MVC is for Views. Views are responsible for sending output to user based on request. View Classes is a powerful way to speed up the development process.
View Templates
The View Templates file of CakePHP has default extension .ctp (CakePHP Template). These templates get data from controller and then render the output so that it can be displayed properly to the user. We can use variables, various control structures in template.
Template files are stored in src/Template/, in a directory named after the controller that uses the files, and named after the action it corresponds to. For example, the View file for the Products controller’s “view()” action, would normally be found in src/Template/Products/view.ctp.
In short, the name of the controller (ProductsController) is same as the name of the folder (Products) but without the word Controller and name of action/method (view()) of the controller (ProductsController) is same as the name of the View file(view.ctp).
View Variables
View variables are variables which get the value from controller. We can use as many variables in view templates as we want. We can use the set() method to pass values to variables in views. These set variables will be available in both the view and the layout your action renders. The following is the syntax of the set() method.
Syntax
Cake\View\View::set(string $var, mixed $value)
This method takes two arguments − the name of the variable and its value.
Example
Make Changes in the config/routes.php file as shown in the following program.
config/routes.php
<?php
   use Cake\Core\Plugin;
   use Cake\Routing\RouteBuilder;
   use Cake\Routing\Router;

   Router::defaultRouteClass('DashedRoute');
   Router::scope('/', function (RouteBuilder $routes) {
      $routes->connect('template',['controller'=>'Products','action'=>'view']);
      $routes->fallbacks('DashedRoute');
   });
   Plugin::routes();
Create a ProductsController.php file at src/Controller/ProductsController.php. Copy the following code in the controller file.
src/Controller/ProductsController.php
<?php
   namespace App\Controller;
   use App\Controller\AppController;

   class ProductsController extends AppController{
      public function view(){
         $this->set('Product_Name','XYZ');
      }
   }
?>
Create a directory Products at src/Template and under that folder create a View file called view.ctp. Copy the following code in that file.
src/Template/Products/view.ctp
Value of variable is: <?php echo $Product_Name; ?>
Execute the above example by visiting the following URL.
http://localhost:85/CakePHP/template
Output
The above URL will produce the following output.

How to Learn Tutorial in CakePHP
CakePHP is an open-source framework for PHP. It is intended to make developing, deploying and maintaining applications much easier. CakePHP is based on an MVC-like architecture that is both powerful and easy to grasp. Models, Views, and Controllers guarantee a strict but natural separation of business logic from data and presentation layers.
Audience
This tutorial is meant for web developers and students who would like to learn how to develop websites using CakePHP. It will provide a good understanding of how to use this framework.
Prerequisites
Before you proceed with this tutorial, we assume that you have knowledge of HTML, Core PHP, and Advance PHP. We have used CakePHP version 3.2.7 in all the examples.
Tutorials on How to Install CakePHP
Installing CakePHP is simple and easy. You can install it from composer or you can download it from github − https://github.com/cakephp/cakephp/releases. We will further understand how to install CakePHP in WampServer. After downloading it from github, extract all the files in a folder called “CakePHP” in WampServer. You can give custom name to folder but we have used “CakePHP”.
CakePHP has a few system requirements:
- HTTP Server. For example: Apache. Having mod_rewrite is preferred, but by no means required. You can also use nginx, or Microsoft IIS if you prefer.
- PHP 5.6.0 or greater (including PHP 7.3).
- mbstring PHP extension
- intl PHP extension
- simplexml PHP extension
- PDO PHP extension
While a database engine isn’t required, we imagine that most applications will utilize one. CakePHP supports a variety of database storage engines:
- MySQL (5.5.3 or greater)
- MariaDB (5.5 or greater)
- PostgreSQL
- Microsoft SQL Server (2008 or higher)
- SQLite 3
Installing CakePHP
Before starting you should make sure that your PHP version is up to date:
php -v
You should have PHP 5.6.0 (CLI) or higher. Your webserver’s PHP version must also be of 5.6.0 or higher, and should be the same version your command line interface (CLI) uses.
Installing Composer
CakePHP uses Composer, a dependency management tool, as the officially supported method for installation.
-
Installing Composer on Linux and macOS
-
Run the installer script as described in the official Composer documentation and follow the instructions to install Composer.
-
Execute the following command to move the composer.phar to a directory that is in your path:
mv composer.phar /usr/local/bin/composer
-
-
Installing Composer on Windows
For Windows systems, you can download Composer’s Windows installer here. Further instructions for Composer’s Windows installer can be found within the README here.
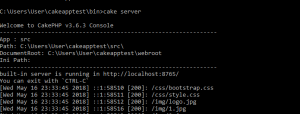
After a successful installation of cakephp run the server to see the setting information about the application
Read the official CakePHP Installation Document
