How To Install GoAccess on CentOS 7

GoAccess on CentOS 7

GoAccess is a real time web log analyzer and a visualizer for Both Linux and Unix operating systems. It functions as an interactive app from the Terminal, and after models also supplies an HTML report, which can be Conveniently viewed in the browser.

Table of Contents

Step 1. First let’s start by ensuring your system is up-to-date.

Step 2. Installing GoAccess.

Step 3. Using GoAccess.


Prerequisites

This article assumes you have at least basic knowledge of Linux, know how to use the shell, and most importantly, you host your site on your own VPS. The installation is quite simple and assumes you are running in the root account, if not you may need to add ‘sudo’ to the commands to get root privileges. I will show you through the step by step installation GoAccess open source real-time web log analyzer on a CentOS 7 server.
Install GoAccess on CentOS 7

Step 1. First let’s start by ensuring your system is up-to-date.

yum clean all
yum -y update

Step 2. Installing GoAccess.

Method 1.

Execute the following command to install GoAccess:

yum -y install goaccess

Method 2.

If using another operating system, you can search for pre-compiled binaries at the official website:

wget http://tar.goaccess.io/goaccess-1.2.tar.gz
tar xvzf goaccess-1.2.tar.gz
cd goaccess-1.2
./configure --enable-utf8 --enable-geoip=legacy
make && make install

Step 3. Using GoAccess.

GoAccess has many options to analys your log files, the most simple way you can use to see your log file with GoAccess is below:

goaccess /var/log/boot.log

You can see the whole flags and capabilities of GoAccess with the command below:

goaccess --help

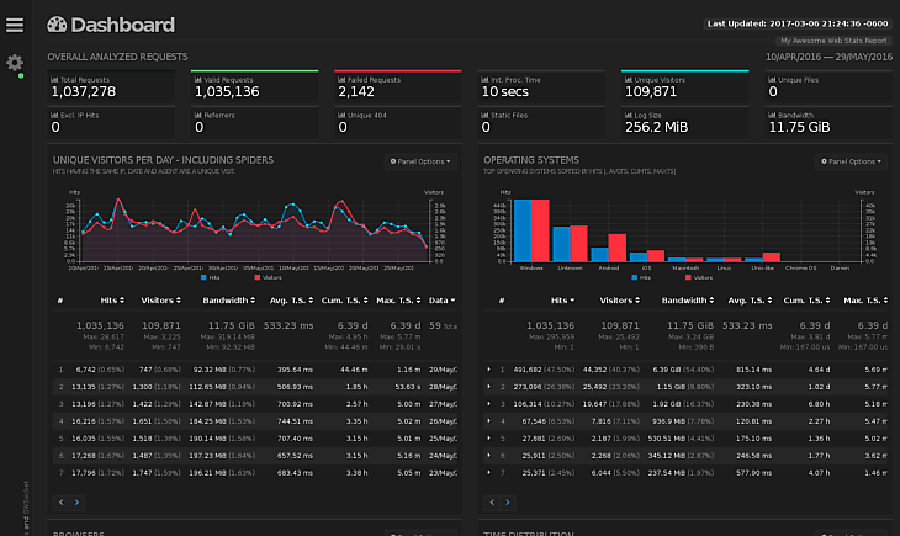
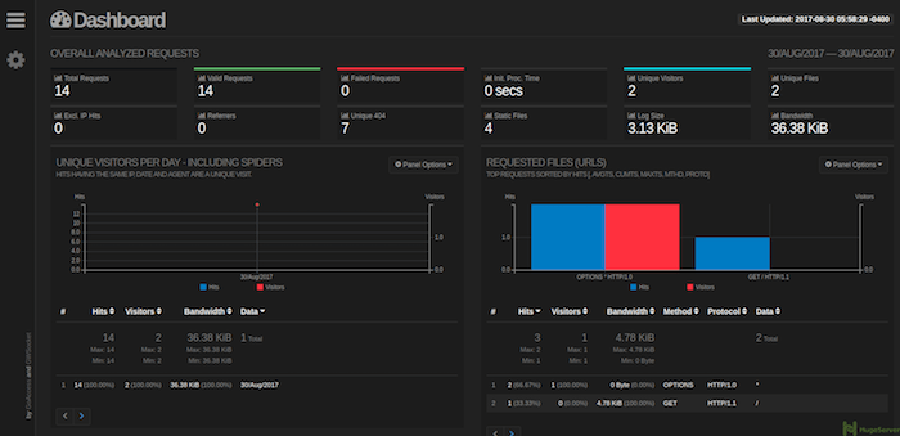
GoAccess live reporting in HTML format:

First, install Apache as our web server:

yum install httpd

After the installation process is finished, execute the following commands to start your Apache service:

systemctl start httpd
systemctl enable httpd

For example, using the following command will create an analyzed HTML file from the Apache access log and place it in Apache’s default document root:

goaccess /var/log/httpd/access_log --log-format=COMBINED -a -o /var/www/html/report.html

Now you can open your browser, Enter your IP address or your Domain name and add “/report.html” in the end to see your HTML output:
goaccess-dashboard
Congratulation’s! You have successfully installed GoAccess. Thanks for using this tutorial for installing GoAccess open source real-time web log analyzer on CentOS 7 systems. For additional help or useful information, we recommend you to check the official GoAccess web site.

How To Install GoAccess on Ubuntu 16.04 LTS

How To Install GoAccess on Ubuntu 16.04 LTS

GoAccess was designed to be a fast, terminal-based log analyzer. Its core idea is to quickly analyze and view web server statistics in real time without needing to use your browser (great if you want to do a quick analysis of your access log via SSH, or if you simply love working in the terminal).

Key Features — See Full List

  • Fast, real-time, millisecond/second updates, written in C
  • Only ncurses as a dependency
  • Nearly all web log formats (Apache, Nginx, Amazon S3, Elastic Load Balancing, CloudFront, etc)
  • Simply set the log format and run it against your log
  • Beautiful terminal and bootstrap dashboards (Tailor GoAccess to suit your own color taste/schemes)
  • and of course, Valgrind tested.

This article assumes you have at least basic knowledge of linux, know how to use the shell, and most importantly, you host your site on your own VPS. The installation is quite simple and assumes you are running in the root account, if not you may need to add ‘sudo’ to the commands to get root privileges. I will show you through the step by step installation GoAccess real time web log analyzer on a Ubuntu 16.04 (Xenial Xerus) server.

Install GoAccess on Ubuntu 16.04 LTS

Step 1. First make sure that all your system packages are up-to-date

sudo apt-get update
sudo apt-get upgrade

Step 2. Installing dependency packages.

Install the ncurses and gcc, run following command:

apt-get install libncursesw5-dev libglib2.0-dev libgeoip-dev libtokyocabinet-dev

Step 2. Installing GoAccess.

Run the following command to install GoAccess software:

wget http://tar.goaccess.io/goaccess-1.2.tar.gz
tar xvzf goaccess-1.2.tar.gz
cd goaccess-1.2
./configure --enable-utf8 --enable-geoip=legacy
make && make install

Create a soft link of goaccess in the /usr/bin directory by running:

ln -s /usr/local/bin/goaccess /usr/bin/goaccess

Step 3. Using GoAccess.

First, install Apache as our web server:

apt-get install apache2

After the installation process is finished, execute the following commands to start your Apache service:

systemctl start apache2
systemctl enable apache2

Allow the required HTTP port through the system firewall:

firewall-cmd --add-service=http --permanent
firewall-cmd --reload

For example, using the following command will create an analyzed HTML file from the Apache access log and place it in Apache’s default document root:

goaccess /var/log/apache2/access.log --log-format=COMBINED -a -o /var/www/html/report.html

Now you can open your browser, Enter your IP address or your Domain name and add “/report.html” in the end to see your HTML output:

goaccess dashboard
Congratulation’s! You have successfully installed GoAccess. Thanks for using this tutorial for installing GoAccess real time web log analyzer on Ubuntu 16.04 LTS (Xenial Xerus) system. For additional help or useful information, we recommend you to check the official GoAccess web site.