Kernel-based Virtual Machine (KVM) is free and open source virtualisation software. You can create multiple VM (virtual machines) , each VM has its own private virtualised hardware like disk, CPU, RAM etc.
This article assumes you have at least basic knowledge of linux, know how to use the shell, and most importantly, you host your site on your own VPS. The installation is quite simple and assumes you are running in the root account, if not you may need to add ‘sudo’ to the commands to get root privileges. I will show you through the step by step installation KVM and Create Virtual Machines on a Ubuntu 16.04 (Xenial Xerus) server.
Install KVM and Create Virtual Machines on Ubuntu 16.04 LTS
Step 1. First make sure that all your system packages are up-to-date by running these following apt-get commands in the terminal.
sudo apt-get update
sudo apt-get upgrade
Step 2. Installing KVM.
First, let us check if your system supports hardware virtualization. To do so, run the following command:
egrep -c ‘(svm|vmx)’ /proc/cpuinfo
A 0 indicates that your CPU doesn’t support hardware virtualization, while a 1 or more indicates that it does. You may still have to enable hardware virtualization support in your computer’s BIOS, even if this command returns a 1 or more.
Install KVM and other required packages to setup a virtualization environment in Linux:
apt-get install qemu-kvm libvirt-bin bridge-utils virt-manager virtinst virt-viewer
The bridge-utils is used to create bridge networking so other devices on your network can see your virtual machine.
Verify the KVM installation:
virsh -c qemu:///system list
After running this command, log out and log back in. Run this command after logging back in and you should see an empty list of virtual machines. This indicates that everything is working correctly.
Step 3. Create Virtual Machines.
You can open the Virtual Machine Manager by typing the same in Dash Home.Click the icon , it will open the application.

In the virtual machine manager window, click the first icon in the toolbar

Next, Choose the location of your installation media.
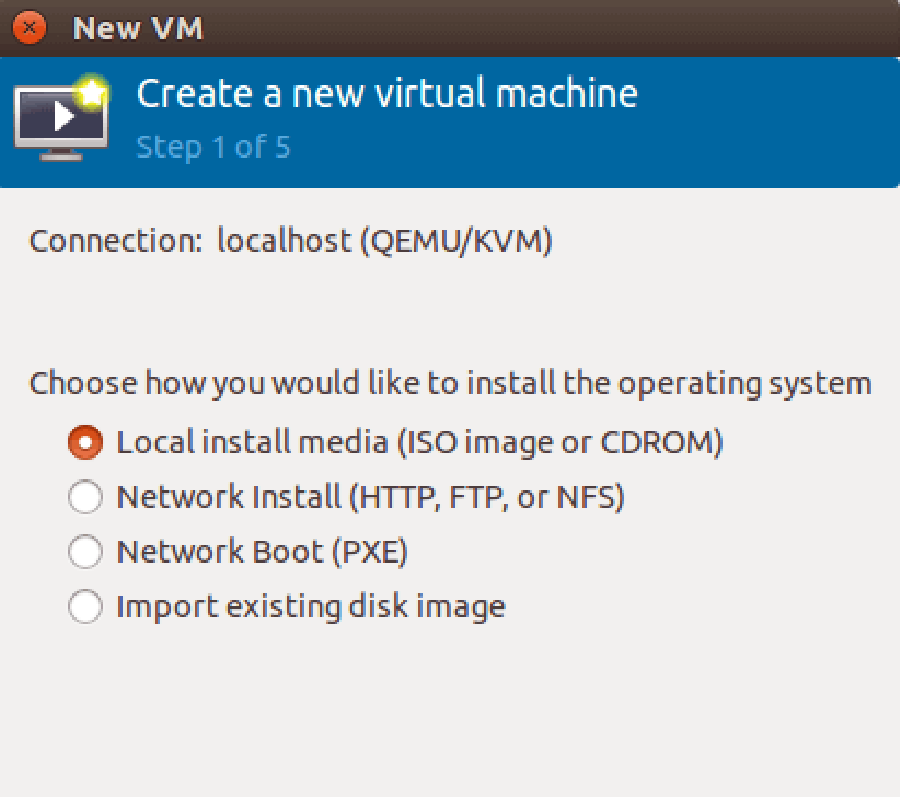
You can install from a disc, ISO image, or even a network location.
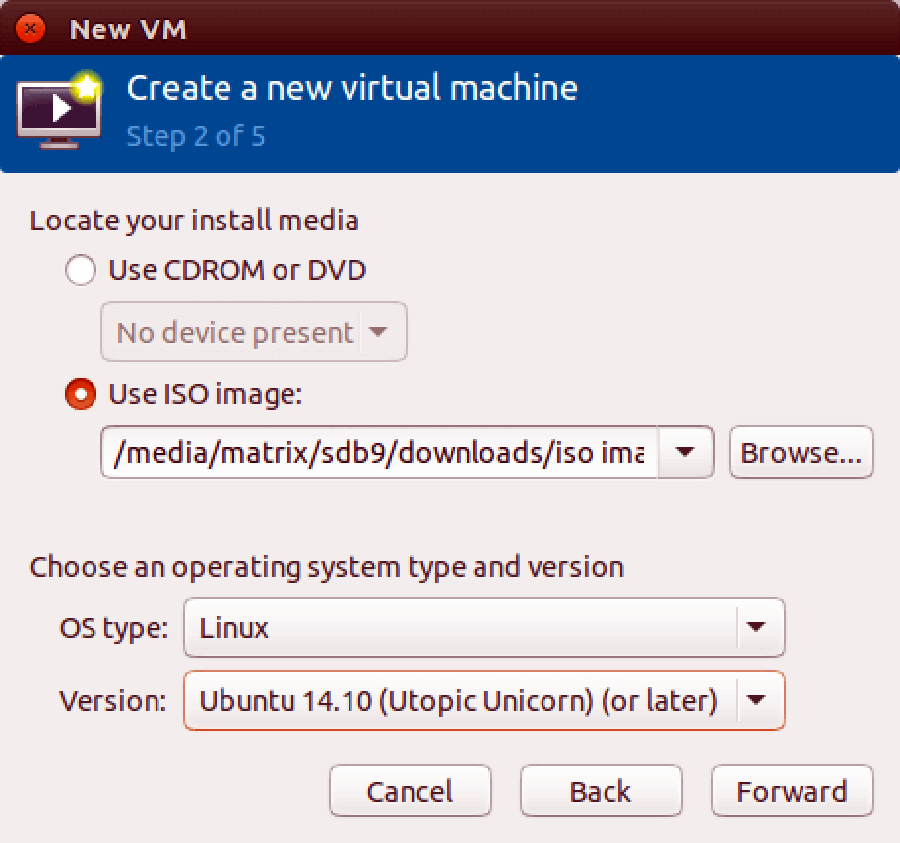
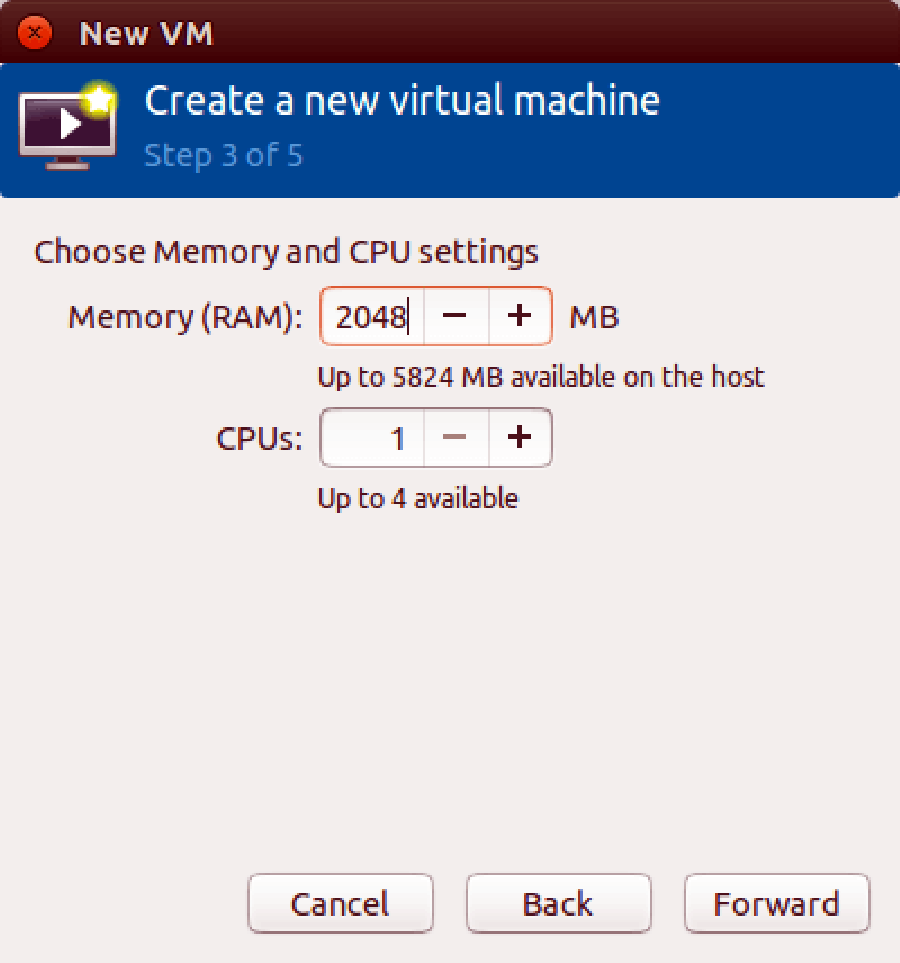
Next, allocate memory and CPU to your virtual machine
After that, specify the size of your virtual disk. If you check the box before allocate entire disk now, then the disk size is fixed.

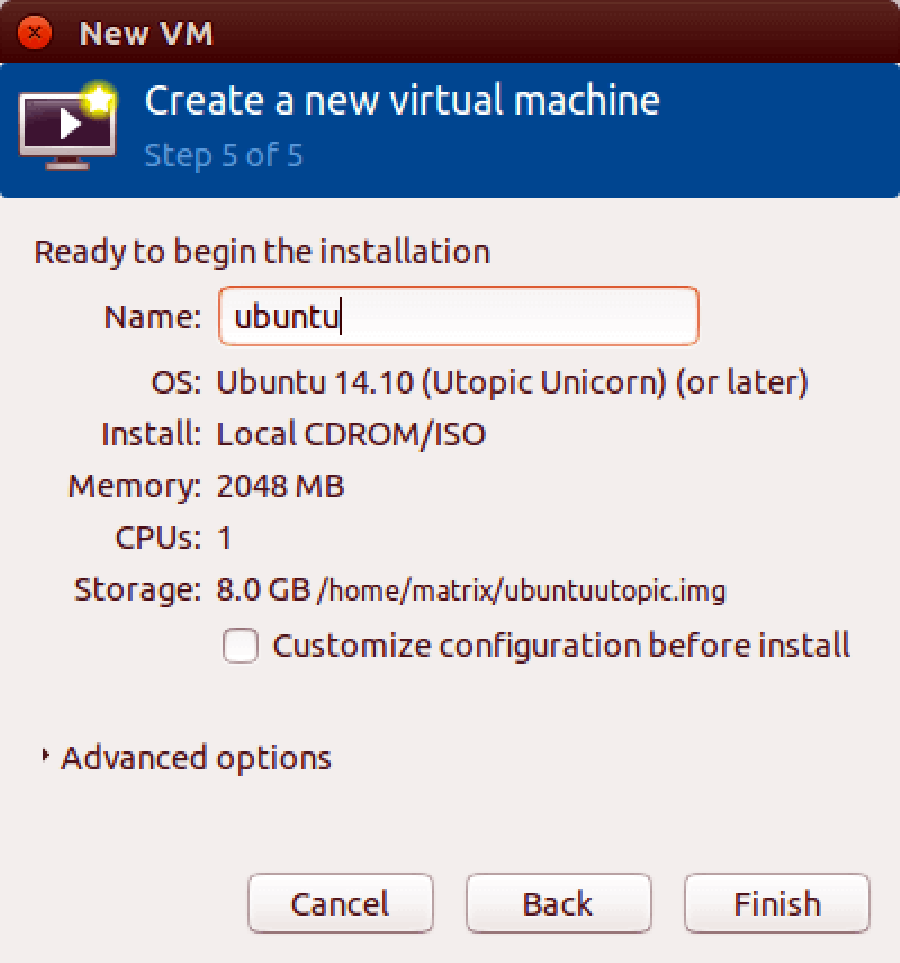
In the next window, you can give your virtual machine a name. Then click finish to begin installing OS to your virtual machine.
Here’s a screenshot of ubuntu virtual machine running in virt-manager window.
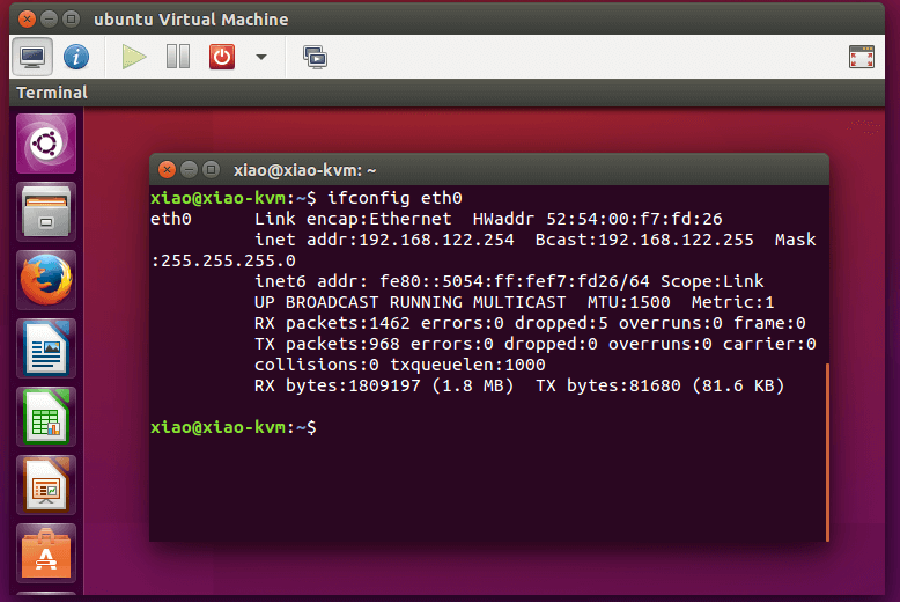
Congratulation’s! You have successfully installed KVM. Thanks for using this tutorial for installing KVM and Create Virtual Machines on Ubuntu 16.04 LTS (Xenial Xerus) system. For additional help or useful information, we recommend you to check the official KVM web site.
