How To Install Gogs on Ubuntu 16.04 LTS

Install Gogs on Ubuntu 16

Gogs is a free and open source self-hosted Git service written in the Go programming language. It is very similar to GitLab and aims to be the easiest and most painless way to set up self-hosted Git service in your development environment.

This article assumes you have at least basic knowledge of Linux, know how to use the shell, and most importantly, you host your site on your own VPS. The installation is quite simple and assumes you are running in the root account, if not you may need to add ‘sudo’ to the commands to get root privileges. I will show you through the step by step installation Gogs on Ubuntu 16.04 Xenial Xerus server.
Install Gogs on Ubuntu 16.04 LTS

Step 1. First make sure that all your system packages are up-to-date by running these following apt-get commands in the terminal.

sudo apt-get update
sudo apt-get upgrade

Step 2. Install LAMP (Linux, Apache, MariaDB and PHP) server.

A Ubuntu 16.04 LAMP server is required. If you do not have LAMP installed, you can follow our guide here. Also install all required PHP modules:

apt-get install php7.0-curl php7.0-gd php7.0-mbstring php7.0-mysql libapache2-mod-php7.0 php7.0-mcrypt php7.0-zip

Step 3. Installing Gogs.

First thing to do is to go to Gogs’s download page and download the latest stable version of Gogs, At the moment of writing this article it is version 0.11.4:

cd /opt && wget https://dl.gogs.io/0.11.4/linux_amd64.zip

Unpack the Gogs archive to the document root directory on your server:

unzip linux_amd64.zip
mv gogs/ /var/www/html/gogs

Next, change the directory to the gogs and run the following command to start gogs:

cd /var/www/html/gogs
./gogs web &

Step 4. Configuring MariaDB for Gogs.

By default, MariaDB is not hardened. You can secure MariaDB using the mysql_secure_installation script. you should read and below each steps carefully which will set root password, remove anonymous users, disallow remote root login, and remove the test database and access to secure MariaDB:

mysql_secure_installation

Configure it like this:

- Set root password? [Y/n] y
- Remove anonymous users? [Y/n] y
- Disallow root login remotely? [Y/n] y
- Remove test database and access to it? [Y/n] y
- Reload privilege tables now? [Y/n] y

Next we will need to log in to the MariaDB console and create a database for the Gogs. Run the following command:

mysql -u root -p

This will prompt you for a password, so enter your MariaDB root password and hit Enter. Once you are logged in to your database server you need to create a database for Gogs installation:

MariaDB [(none)]> CREATE DATABASE gogs;
MariaDB [(none)]> GRANT ALL PRIVILEGES ON gogs.* TO 'gogs'@'localhost' IDENTIFIED BY 'your_gogs_password';
MariaDB [(none)]> FLUSH PRIVILEGES;
MariaDB [(none)]> \q

Step 5. Configuring Apache web server for Gogs.

Create a new virtual host directive in Apache. For example, create a new Apache configuration file named ‘gogs.conf’ on your virtual server:

sudo a2enmod rewrite
touch /etc/apache2/sites-available/gogs.conf
ln -s /etc/apache2/sites-available/gogs.conf /etc/apache2/sites-enabled/gogs.conf
nano /etc/apache2/sites-available/gogs.conf

Add the following lines:

<VirtualHost *:80>
ServerAdmin [email protected]
DocumentRoot /var/www/html/gogs/
ServerName your-domain.com
ServerAlias www.your-domain.com
<Directory /var/www/html/gogs/>
Options FollowSymLinks
AllowOverride All
Order allow,deny
allow from all
</Directory>
ProxyRequests Off
ProxyPass / http://192.168.77.20:3000/
ProxyPassReverse / http://192.168.77.20:3000/
ErrorLog /var/log/apache2/your-domain.com-error_log
CustomLog /var/log/apache2/your-domain.com-access_log common
</VirtualHost>

Now, we can restart Apache web server so that the changes take place:

systemctl restart apache2.service

Step 6. Accessing Gogs.

Gogs will be available on HTTP port 80 and 3000 by default. Open your favorite browser and navigate to http://yourdomain.com or http://server-ip and complete the required the steps to finish the installation. If you are using a firewall, please open port 80 to enable access to the control panel.

Congratulations! You have successfully installed Gogs. Thanks for using this tutorial for installing Gogs in Ubuntu 16.04 Xenial Xerus systems. For additional help or useful information, we recommend you to check the official Gogs web site.

How To Install Zabbix on Ubuntu 16.04 LTS

Install Zabbix on Ubuntu 16

Zabbix is an open source monitoring tool that is ideal for monitoring your cloud servers. Zabbix is very flexible, information can be retrieved using HTTP/SNMP or by installing a Zabbix agent on the machines to monitor, and allows a lot of customization.

This article assumes you have at least basic knowledge of Linux, know how to use the shell, and most importantly, you host your site on your own VPS. The installation is quite simple and assumes you are running in the root account, if not you may need to add ‘sudo’ to the commands to get root privileges. I will show you through the step by step installation Zabbix in Ubuntu 16.04 LTS Xenial Xerus.
Install Zabbix on Ubuntu 16.04 LTS Xenial Xerus

Step 1. First make sure that all your system packages are up-to-date by running these following apt-get commands in the terminal.

sudo apt-get update
sudo apt-get upgrade

Step 2. Install LAMP (Linux, Apache, MariaDB and PHP) server.

A Ubuntu 16.04 LAMP server is required. If you do not have LAMP installed, you can follow our guide here. Also install all required PHP modules:

apt-get install php7.0-readline php7.0-curl php7.0-gd php7.0-mbstring libapache2-mod-php7.0 php7.0-mcrypt php7.0-bz2 php7.0-zip

Step 3. Installing Zabbix on Ubuntu 16.04.

First thing to do is download and add the repository as shown below:

wget http://repo.zabbix.com/zabbix/3.2/ubuntu/pool/main/z/zabbix-release/zabbix-release_3.2-1+xenial_all.deb
dpkg -i zabbix-release_3.2-1+xenial_all.deb

After adding zabbix apt repository in your system, Now update package lists and install Zabbix using commands:

apt-get update
apt-get install zabbix-server-mysql zabbix-frontend-php

Step 4. Zabbix Configuration.

sudo nano /etc/zabbix/zabbix_server.conf

Adjust the following values and make a note of the password you’ve chosen. You’ll need it later too.

DBName=zabbixdb
DBUser=zabbix
DBPassword=your_chosen_password_here

Step 5. Configure MariaDB Database for Zabbix.

By default, MariaDB is not hardened. You can secure MariaDB using the mysql_secure_installation script. you should read and below each steps carefully which will set root password, remove anonymous users, disallow remote root login, and remove the test database and access to secure MySQL.

mysql_secure_installation

Configure it like this:

- Set root password? [Y/n] y
- Remove anonymous users? [Y/n] y
- Disallow root login remotely? [Y/n] y
- Remove test database and access to it? [Y/n] y
- Reload privilege tables now? [Y/n] y

Next we will need to log in to the MariaDB console and create a database for Zabbix. Run the following command:

mysql -u root -p

This will prompt you for a password, so enter your MariaDB root password and hit Enter. Once you are logged in to your database server you need to create a database for the Zabbix software:

create user 'zabbix'@'localhost' identified by 'your_chosen_password_here';
create database zabbixdb;
grant all privileges on zabbixdb.* to 'zabbix'@'localhost';
flush privileges;
exit;

After creating the zabbix database and user we need to import the zabbix initial database using the below commands:

cd /usr/share/doc/zabbix-server-mysql
zcat create.sql.gz | mysql -u root -p zabbixdb

Step 6. Configure Apache web server for Zabbix.

First, we’ll move the Zabbix apache file from the package directory:

sudo cp /usr/share/doc/zabbix-frontend-php/examples/apache.conf /etc/apache2/conf-available/zabbix.conf
sudo a2enconf zabbix.conf
sudo a2enmod alias

We should adjust php timezone as per zabbix recommended settings:

###nano /etc/zabbix/apache.conf
    php_value max_execution_time 300
    php_value memory_limit 128M
    php_value post_max_size 16M
    php_value upload_max_filesize 2M
    php_value max_input_time 300
    php_value always_populate_raw_post_data -1
    php_value date.timezone Europe/Rome

Restart the Apache and zabbix service for the changes to take effect:

systemctl restart apache2
systemctl start zabbix-server

Step 7. Accessing Zabbix.

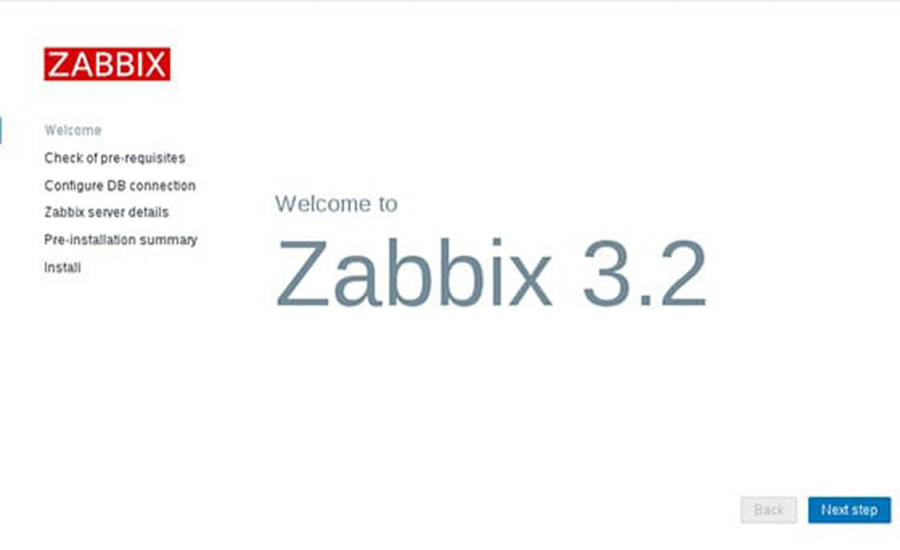
will be available on HTTP port 80 by default. Open your favorite browser and navigate to http://yourdomain.com/zabbix or http://server-ip/zabbix and complete the required the steps to finish the installation. If you are using a firewall, please open port 80 to enable access to the control panel.

zabbix-v3-install

Congratulation’s! You have successfully installed Zabbix. Thanks for using this tutorial for installing Zabbix Monitoring Tool on your Ubuntu 16.04 LTS system. For additional help or useful information, we recommend you to check the official Zabbix web site.

How To Install Open Eshop on Ubuntu 16.04 LTS

Install Open Eshop on Ubuntu 16

Open eShop is an open source ecommerce software written in PHP which allows you to sell software, music, ebooks or anything else you may want.

This article assumes you have at least basic knowledge of Linux, know how to use the shell, and most importantly, you host your site on your own VPS. The installation is quite simple and assumes you are running in the root account, if not you may need to add ‘sudo’ to the commands to get root privileges. I will show you through the step by step installation Open eShop in Ubuntu 16.04 LTS Xenial Xerus.

Install Open Eshop on Ubuntu 16.04 LTS

Step 1. First make sure that all your system packages are up-to-date by running these following apt-get commands in the terminal.

sudo apt-get update
sudo apt-get upgrade

Step 2. Installing LAMP (Linux, Apache, MariaDB and PHP) server.

A Ubuntu 16.04 LAMP server is required. If you do not have LAMP installed, you can follow our guide here. Also install all required PHP modules:

apt-get install php7.0-readline php7.0-curl php7.0-gd php7.0-mbstring libapache2-mod-php7.0 php7.0-mcrypt php7.0-bz2 php7.0-zip

Step 3. Installing Open eShop Lite.

First, download the latest stable version of the Open Eshop installation file from their official website with the following command:

mkdir /var/www/html/openeshop
cd /var/www/html/openeshop
wget https://raw.githubusercontent.com/open-classifieds/open-eshop/master/install-eshop.php

Change the owner of the script with the following command:

chown -R www-data:www-data install-eshop.php

Step 4. Configure MariaDB Database for Open eShop.

By default, MariaDB is not hardened. You can secure MariaDB using the mysql_secure_installation script. you should read and below each steps carefully which will set root password, remove anonymous users, disallow remote root login, and remove the test database and access to secure MySQL.

mysql_secure_installation

Configure it like this:

- Set root password? [Y/n] y
- Remove anonymous users? [Y/n] y
- Disallow root login remotely? [Y/n] y
- Remove test database and access to it? [Y/n] y
- Reload privilege tables now? [Y/n] y

Next we will need to log in to the MariaDB console and create a database for Open eShop. Run the following command:

mysql -u root -p

This will prompt you for a password, so enter your MariaDB root password and hit Enter. Once you are logged in to your database server you need to create a database for the Open eShop software:

CREATE DATABASE openeshop_db;
CREATE USER 'openeshop'@'localhost' IDENTIFIED BY 'usr_strong_pwd';
GRANT ALL PRIVILEGES ON openeshop_db.* TO 'openeshop'@'localhost';
FLUSH PRIVILEGES;
EXIT;

Step 5. Configuring Apache web server for Open eShop.

Create a new virtual host directive in Apache. For example, create a new Apache configuration file named ‘openshop.conf’ on your virtual server:

sudo a2enmod rewrite
touch /etc/apache2/sites-available/openshop.conf
ln -s /etc/apache2/sites-available/openshop.conf /etc/apache2/sites-enabled/openshop.conf
nano /etc/apache2/sites-available/openshop.conf

Add the following lines:

<VirtualHost *:80>
ServerAdmin [email protected]
DocumentRoot /var/www/html/openeshop/
ServerName your-domain.com
ServerAlias www.your-domain.com
<Directory /var/www/html/openeshop/>
Options FollowSymLinks
AllowOverride All
Order allow,deny
allow from all
</Directory>
ErrorLog /var/log/apache2/your-domain.com-error_log
CustomLog /var/log/apache2/your-domain.com-access_log common
</VirtualHost>

Next step we will need to adjust the some some values in the PHP configuration files as follow:

nano /etc/php/7.0/apache2/php.ini

Update the values for post_max_size, upload_max_filesize, and short_open_tag as follows:

post_max_size = 64M
upload_max_filesize = 64M
short_open_tag = On

Now, we can restart Apache web server so that the changes take place:

systemctl restart apache2.service

Step 6. Accessing Open eShop.

Open eShop will be available on HTTP port 80 by default. Open your favorite browser and navigate to http://yourdomain.com or http://server-ip and complete the required the steps to finish the installation. If you are using a firewall, please open port 80 to enable access to the control panel.

Congratulation’s! You have successfully installed Open eShop. Thanks for using this tutorial for installing Open eShop open source software for eCommerce platforms on your Ubuntu 16.04 LTS system. For additional help or useful information, we recommend you to check the official Open eShop web site.

How To Install WordPress on Ubuntu 17.04

Install WordPress on Ubuntu 17

WordPress is an online, open source website creation tool written in PHP. But in non-geek speak, it’s probably the easiest and most powerful blogging and website content management system (or CMS) in existence today.

This article assumes you have at least basic knowledge of Linux, know how to use the shell, and most importantly, you host your site on your own VPS. The installation is quite simple and assumes you are running in the root account, if not you may need to add ‘sudo’ to the commands to get root privileges. I will show you through the step by step installation WordPress content management systems on an Ubuntu 17.04 Zesty Zapus server.
Install WordPress on Ubuntu 17.04 Zesty Zapus

Step 1. First make sure that all your system packages are up-to-date by running these following apt-get commands in the terminal.

sudo apt-get update
sudo apt-get upgrade

Step 2. Install LAMP (Linux, Apache, MariaDB, PHP) server.

A Ubuntu 17.04 LAMP server is required. If you do not have LAMP installed, you can follow our guide here. Also install all required PHP modules:

apt-get install php7.0-mysql php7.0-curl php7.0-json php7.0-cgi php7.0 libapache2-mod-php7.0 php7.0-mcrypt php7.0-xmlrpc php7.0-gd

Step 3. Installing WordPress on Ubuntu 17.04.

First thing to do is to go to WordPress’s download page and download the latest stable version of WordPress, At the moment of writing this article it is version 4.8:

wget http://wordpress.org/latest.zip

Unpack the WordPress archive to the document root directory on your server:

unzip -q latest.zip -d /var/www/html/
cd wordpress
cp -a * ..

We will need to change some folders permissions:

chown www-data:www-data -R /var/www/html/

We need to create the upload directory manually:

mkdir -p /var/www/html/wp-content/uploads

Allow the Apache web server to write to the uploads directory. Do this by assigning group ownership of this directory to your web server which will allow Apache to create files and directories. Issue the following command:

chown www-data:www-data -R /var/www/html/wp-content/uploads

Step 4. Configuring MariaDB for WordPress.

By default, MariaDB is not hardened. You can secure MariaDB using the mysql_secure_installation script. you should read and below each steps carefully which will set root password, remove anonymous users, disallow remote root login, and remove the test database and access to secure MariaDB:

mysql_secure_installation

Configure it like this:

- Set root password? [Y/n] y
- Remove anonymous users? [Y/n] y
- Disallow root login remotely? [Y/n] y
- Remove test database and access to it? [Y/n] y
- Reload privilege tables now? [Y/n] y

Next we will need to log in to the MariaDB console and create a database for the WordPress. Run the following command:

mysql -u root -p

This will prompt you for a password, so enter your MariaDB root password and hit Enter. Once you are logged in to your database server you need to create a database for WordPress installation:

CREATE DATABASE wordpress character set utf8 collate utf8_bin;
GRANT ALL PRIVILEGES on wordpress.* to 'wpuser'@'localhost' identified by 'your_password';
FLUSH PRIVILEGES;
exit

Step 5. Configuring WordPress

In this step we will configure the main configuration file of WordPress, where we need to configure it’s basic parameters so that it can be connected with the database and user:

mv wp-config-sample.php wp-config.php

Now open it using any of your favourite editor, to make any changes in the WordPress configuration file:

nano wp-config.php

Here are the values that we need to update according to our previous database and user’s setup:

// ** MySQL settings - You can get this info from your web host ** //
/** The name of the database for WordPress */
define('DB_NAME', 'wordpress');

/** MySQL database username */
define('DB_USER', 'wpuser');

/** MySQL database password */
define('DB_PASSWORD', 'your_password');

/** MySQL hostname */
define('DB_HOST', 'localhost');

Step 6. Configuring Apache web server for WordPress.

Create a new virtual host directive in Apache. For example, create a new Apache configuration file named ‘wordpress.conf’ on your virtual server:

sudo a2enmod rewrite
touch /etc/apache2/sites-available/wordpress.conf
ln -s /etc/apache2/sites-available/wordpress.conf /etc/apache2/sites-enabled/wordpress.conf
nano /etc/apache2/sites-available/wordpress.conf

Add the following lines:

<VirtualHost *:80>
ServerAdmin [email protected]
DocumentRoot /var/www/html/
ServerName your-domain.com
ServerAlias www.your-domain.com
<Directory /var/www/html/>
Options FollowSymLinks
AllowOverride All
Order allow,deny
allow from all
</Directory>
ErrorLog /var/log/apache2/your-domain.com-error_log
CustomLog /var/log/apache2/your-domain.com-access_log common
</VirtualHost>

Next step we will need to adjust the some some values in the PHP configuration files as follow:

nano /etc/php/7.0/apache2/php.ini

Add/modify the following settings:

max_execution_time = 300
max_input_time = 600
memory_limit = 256M
post_max_size = 64M
upload_max_filesize = 64M

Now, we can restart Apache web server so that the changes take place:

systemctl restart apache2.service

Step 7. Accessing WordPress.

WordPress will be available on HTTP port 80 by default. Open your favorite browser and navigate to http://yourdomain.com or http://server-ip/ and complete the required the steps to finish the installation. If you are using a firewall, please open port 80 to enable access to the control panel.

Congratulation’s! You have successfully installed WordPress. Thanks for using this tutorial for installing WordPress CMS (Content Management Systems) on your Ubuntu 17.04. For additional help or useful information, we recommend you to check the official WordPress web site.

How To Install Lighttpd With PHP And MariaDB on Ubuntu 16.04 LTS

Install Lighttpd With PHP And MariaDB on Ubuntu 16

Lighttpd is a fast and secure web-server which has been optimized for high-performance environments. With a small memory footprint compared to other web-servers, effective management of the cpu-load, and advanced feature set (FastCGI, SCGI, Auth, Output-Compression, URL-Rewriting and many more) lighttpd is the perfect solution for every server that is suffering load problems.

This article assumes you have at least basic knowledge of Linux, know how to use the shell, and most importantly, you host your site on your own VPS. The installation is quite simple and assumes you are running in the root account, if not you may need to add ‘sudo’ to the commands to get root privileges. I will show you through the step by step installation Lighttpd With PHP FPM And MariaDB on Ubuntu 16.04 Xenial Xerus server.

Install Lighttpd With PHP and MariaDB on Ubuntu 16.04 LTS

Step 1. First make sure that all your system packages are up-to-date by running these following apt-get commands in the terminal.

apt-get update
apt-get upgrade

Step 2. Installing Lighttpd on Ubuntu 16.04.

Lighttpd is available to install from the official Ubuntu repositories, So if you want to install Lighttpd, you only have to run this command:

apt-get install lighttpd

To start up Lighttpd webserver, run the commands below and You can test the status of the server by accessing the IP address of your VPS in a web browser. Upon success, you will see the Lighttp welcome page:

systemctl start lighttpd.service

Step 3. Installing MariaDB.

To install MariaDB in Ubuntu run the following command:

apt-get install mariadb-server

By default, MariaDB is not hardened. You can secure MariaDB using the mysql_secure_installation script. you should read and below each steps carefully which will set root password, remove anonymous users, disallow remote root login, and remove the test database and access to secure MariaDB:

mysql_secure_installation

To log into MariaDB, use the following command (note that it’s the same command you would use to log into a MySQL database):

mysql -u root -p

To start the database, run the commands below:

systemctl start mariadb.service

Step 4. Installing PHP and other PHP7 modules.

Next, run the commands below to install PHP5 and other PHP modules:

apt-get -y install php-fpm php-mysql

Enable PHP CGI modules in Lighttpd with the following commands:

sudo lighty-enable-mod fastcgi 
sudo lighty-enable-mod fastcgi-php

After enabling the modules, you need to restart the Lighttpd service by running the following command:

systemctl restart lighttpd

Testing if PHP is working:

nano /srv/www/htdocs/info.php

Then, we’ll simply add the following line into the file:

<?php phpinfo(); ?>

Step 5. Configure firewall for LLMP.

Run following commands to allow HTTP (80) and HTPPS (443) request through the firewall.

ufw allow 80/tcp
ufw allow 443/tcp
ufw reload

Congratulations! You have successfully installed LLMP. Thanks for using this tutorial for installing Lighttpd With PHP FPM and MariaDB in Ubuntu 16.04 Xenial Xerus systems. For additional help or useful information, we recommend you to check the official Lighttpd web site.

How To Install phpBB on Ubuntu 16.04 LTS

Install phpBB on Ubuntu 16

phpBB is an open source bulletin board forum software that provides a virtual space for discussion among the members of your website. It has a huge variety of features like flat topic structure, sub-forums, forum-specific styles, user groups, group-based permissions, database query and template caching, support for PHP 7, multiple database engines and much more.

This article assumes you have at least basic knowledge of Linux, know how to use the shell, and most importantly, you host your site on your own VPS. The installation is quite simple and assumes you are running in the root account, if not you may need to add ‘sudo’ to the commands to get root privileges. I will show you through the step by step installation phpBB open source bulletin board forum on an Ubuntu 16.04 Xenial Xerus server.

Install phpBB on Ubuntu 16.04 LTS

Step 1. First make sure that all your system packages are up-to-date by running these following apt-get commands in the terminal.

sudo apt-get update
sudo apt-get upgrade

Step 2. Install LAMP (Linux, Apache, MariaDB, PHP) server.

A Ubuntu 16.04 LAMP server is required. If you do not have LAMP installed, you can follow our guide here. Also install all required PHP modules:

apt-get install php7.0-mysql php7.0-curl php7.0-json php7.0-cgi php7.0 libapache2-mod-php7.0 php7.0-mcrypt php7.0-xmlrpc php7.0-gd

Step 3. Installing phpBB.

First thing to do is to go to phpBB’s download page and download the latest stable version of phpBB, At the moment of writing this article it is version 3.2.1:

wget https://www.phpbb.com/files/release/phpBB-3.2.1.zip

Unpack the phpBB archive to the document root directory on your server:

unzip -q phpBB-3.2.1.zip -d /var/www/html/
cd phpBB3
cp -a * ..

We will need to change some folders permissions:

cd /var/www/html/
chown www-data:www-data -R /var/www/html/
chmod 660 images/avatars/upload/ config.php
chmod 770 store/ cache/ files/

Step 4. Configuring MariaDB for phpBB.

By default, MariaDB is not hardened. You can secure MariaDB using the mysql_secure_installation script. you should read and below each steps carefully which will set root password, remove anonymous users, disallow remote root login, and remove the test database and access to secure MariaDB:

mysql_secure_installation

Configure it like this:

- Set root password? [Y/n] y
- Remove anonymous users? [Y/n] y
- Disallow root login remotely? [Y/n] y
- Remove test database and access to it? [Y/n] y
- Reload privilege tables now? [Y/n] y

Next we will need to log in to the MariaDB console and create a database for the phpBB. Run the following command:

mysql -u root -p

This will prompt you for a password, so enter your MariaDB root password and hit Enter. Once you are logged in to your database server you need to create a database for phpBB installation:

create database phpBB;
create user 'phpBB_dbuser'@'localhost' identified by 'randomgeneratedpassword';
grant all privileges on phpBB.* to 'phpBB_dbuser'@'localhost';
flush privileges;
exit

Step 5. Configuring Apache web server for phpBB.

Create a new virtual host directive in Apache. For example, create a new Apache configuration file named ‘phpbb.conf’ on your virtual server:

sudo a2enmod rewrite
touch /etc/apache2/sites-available/phpbb.conf
ln -s /etc/apache2/sites-available/phpbb.conf /etc/apache2/sites-enabled/phpbb.conf
nano /etc/apache2/sites-available/phpbb.conf

Add the following lines:

<VirtualHost *:80>
ServerAdmin [email protected]
DocumentRoot /var/www/html/
ServerName your-domain.com
ServerAlias www.your-domain.com
<Directory /var/www/html/>
Options FollowSymLinks
AllowOverride All
Order allow,deny
allow from all
</Directory>
ErrorLog /var/log/apache2/your-domain.com-error_log
CustomLog /var/log/apache2/your-domain.com-access_log common
</VirtualHost>

Now, we can restart Apache web server so that the changes take place:

systemctl restart apache2.service

Step 6. Accessing phpBB.

phpBB will be available on HTTP port 80 by default. Open your favorite browser and navigate to http://yourdomain.com/install or http://server-ip/install and complete the required the steps to finish the installation. If you are using a firewall, please open port 80 to enable access to the control panel.

Congratulation’s! You have successfully installed phpBB. Thanks for using this tutorial for installing phpBB on your Ubuntu 16.04. For additional help or useful information, we recommend you to check the official phpBB web site.

How To Increase PHP Memory Limit

Increase PHP Memory Limit

If you have seen an error like ”Fatal Error: PHP Allowed Memory Size Exhausted” in webserver logs or your browser, this means that PHP has exhausted the maximum memory limit. This tutorial we will show two different ways on how you can increase the php memory limit in your server.

Check PHP Memory Limit

You can check by creating a file called info.php in /var/www/html/ with the following content:

<?php phpinfo(); ?>

php-memory-limit

Increase PHP Memory Limit

Method 1. Changing memory limit from php.ini

First find locate the php.ini file used by your web server.

 #nano /etc/php.ini

Search “memory_limit” in your php.ini, and change it. If no “memory_limit” found, add the following line at the end of php.ini

 #memory_limit = 64M ;Maximum amount of memory a script may consume (64MB)

Restart webserver

#service httpd restart
or
#service nginx restart

Method 2. Changing memory limit using .htaccess

Find the “.htaccess” in your root directory of the specified domain, edit the .htaccess file in the web root directory. Look for the section:

 #php_value memory_limit 64M; Maximum amount of memory a script may consume (64MB)

Edit your wp-config.php file, if you are using WordPress

define('WP_MEMORY_LIMIT', '256M');

Congratulation’s! You have successfully increase PHP memory limit. Thanks for using this tutorial for increase PHP memory limit linux system. For additional help or useful information, we recommend you to check the official PHP web site

You Might Also Like: How To Install PHP 5.5 on CentOS