How To Install LibreNMS on Ubuntu 16.04 LTS

Install LibreNMS on Ubuntu 16

LibreNMS is an open source auto-discovering network monitoring tool for servers and network hardware. It supports a wide range of network hardware like Cisco, Juniper, Brocade, Foundry, HP and operating systems including Linux and Windows. LibraNMS is a community-based fork of Network monitoring tool “Observium“, released under GPLv3.

This article assumes you have at least basic knowledge of Linux, know how to use the shell, and most importantly, you host your site on your own VPS. The installation is quite simple and assumes you are running in the root account, if not you may need to add ‘sudo’ to the commands to get root privileges. I will show you through the step by step installation LibreNMS network monitoring tool on an Ubuntu 16.04 Xenial Xerus server.

LibreNMS Features

Automatic discovery
Customisable alerting
API Access
Billing system
Automatic Updates
Distributed Polling
iOS and Android App
Unix Agent
And many more

Install LibreNMS on Ubuntu 16.04 LTS

Step 1. First make sure that all your system packages are up-to-date

sudo apt-get update
sudo apt-get upgrade

Step 2. Install LAMP (Linux, Apache, MariaDB, PHP) server.

A Ubuntu 16.04 LAMP server is required. If you do not have LAMP installed, you can follow our guide here. Also install all required PHP modules:

apt-get install php7.0-mysql php7.0-curl php7.0-json php7.0-cgi php7.0 libapache2-mod-php7.0 php7.0-mcrypt php7.0-xmlrpc php7.0-gd

Step 3. Installing LibreNMS.

First, install required packages by LibreNMS:

apt-get install composer fping git graphviz imagemagick mtr-tiny nmap python-memcache python-mysqldb rrdtool snmp whois

Next, Add LibreNMS user:

useradd librenms -d /opt/librenms -M -r
usermod -a -G librenms www-data

Then, clone the LibreNMS source code through Git:

cd /opt/
git clone https://github.com/librenms/librenms.git librenms

Set the permission:

chown -R librenms:librenms /opt/librenms

Step 4. Configuring MariaDB for LibreNMS.

By default, MariaDB is not hardened. You can secure MariaDB using the mysql_secure_installation script. you should read and below each steps carefully which will set root password, remove anonymous users, disallow remote root login, and remove the test database and access to secure MariaDB:

mysql_secure_installation

Configure it like this:

- Set root password? [Y/n] y
- Remove anonymous users? [Y/n] y
- Disallow root login remotely? [Y/n] y
- Remove test database and access to it? [Y/n] y
- Reload privilege tables now? [Y/n] y

Next we will need to log in to the MariaDB console and create a database for the LibreNMS. Run the following command:

mysql -u root -p

This will prompt you for a password, so enter your MariaDB root password and hit Enter. Once you are logged in to your database server you need to create a database for LibreNMS installation:

MariaDB [(none)]> CREATE DATABASE librenms CHARACTER SET utf8 COLLATE utf8_unicode_ci;
MariaDB [(none)]> CREATE USER 'librenms'@'localhost' IDENTIFIED BY 'PASSWORD';
MariaDB [(none)]> GRANT ALL PRIVILEGES ON librenms.* TO 'librenms'@'localhost';
MariaDB [(none)]> FLUSH PRIVILEGES;
MariaDB [(none)]> exit

Next, open the MariaDB configuration file and add the following lines under [mysqld] section:

### nano /etc/mysql/mariadb.conf.d/50-server.cnf

innodb_file_per_table=1
sql-mode=""
lower_case_table_names=0

Restart MariaDB for the changes to take effect:

systemctl restart mariadb

Step 5. Configuring Apache web server for LibreNMS.

Create a new virtual host directive in Apache. For example, create a new Apache configuration file named ‘librenms.conf’ on your virtual server:

sudo a2enmod rewrite
touch /etc/apache2/sites-available/librenms.conf
ln -s /etc/apache2/sites-available/librenms.conf /etc/apache2/sites-enabled/librenms.conf
nano /etc/apache2/sites-available/librenms.conf

Add the following lines:

<VirtualHost *:80>
ServerAdmin [email protected]
DocumentRoot /opt/librenms/html/
ServerName your-domain.com
ServerAlias www.your-domain.com
AllowEncodedSlashes NoDecode
<Directory "/opt/librenms/html/">
Options FollowSymLinks
AllowOverride All
Order allow,deny
allow from all
</Directory>
ErrorLog /var/log/apache2/your-domain.com-error_log
CustomLog /var/log/apache2/your-domain.com-access_log common
</VirtualHost>

Now, we can restart Apache web server so that the changes take place:

a2ensite librenms.conf
a2enmod rewrite
systemctl restart apache2.service

Step 6. Configure Firewall.

Allow apache through the firewall so that user can able to access LibreNMS portal from an external machine:

ufw allow 80/tcp
ufw reload

Step 7. Accessing LibreNMS.

LibreNMS will be available on HTTP port 80 by default. Open your favorite browser and navigate to http://yourdomain.com/ or http://server-ip/ and complete the required the steps to finish the installation. If you are using a firewall, please open port 80 to enable access to the control panel.

Congratulation’s! You have successfully installed LibreNMS. Thanks for using this tutorial for installing LibreNMS network monitoring tool on your Ubuntu 16.04 LTS. For additional help or useful information, we recommend you to check the official LibreNMS web site.

How To Install Kanboard on Ubuntu 16.04 LTS

Install Kanboard on Ubuntu 16

Kanboard is a free and open source project management tool that uses the Kanban methodology. It focuses on minimalism and simplicity, it is mainly designed for small teams. It also helps you to manage your projects and visualize your workflow.

This article assumes you have at least basic knowledge of Linux, know how to use the shell, and most importantly, you host your site on your own VPS. The installation is quite simple and assumes you are running in the root account, if not you may need to add ‘sudo’ to the commands to get root privileges. I will show you through the step by step installation Kanboard open source project management on an Ubuntu 16.04 Xenial Xerus server.

Install Kanboard on Ubuntu 16.04 LTS

Step 1. First make sure that all your system packages are up-to-date

sudo apt-get update
sudo apt-get upgrade

Step 2. Install LAMP (Linux, Apache, MariaDB, PHP) server.

A Ubuntu 16.04 LAMP server is required. If you do not have LAMP installed, you can follow our guide here. Also install all required PHP modules:

apt-get install php7.0-mysql php7.0-curl php7.0-json php7.0-cgi php7.0 libapache2-mod-php7.0 php7.0-mcrypt php7.0-xmlrpc php7.0-gd

Step 3. Installing Kanboard.

First, Download and unzip the latest version of Kanboard:

cd /var/www/html/
wget https://kanboard.net/kanboard-latest.zip
unzip kanboard-latest.zip

We will need to change some folders permissions:

chown -R www-data:www-data /var/www/html/kanboard/

Next, copy the included config.default.php to config.php and change the database information by using these commands:

cd /var/www/html/kanboard
mv config.default.php config.php

Create a configuration file named config.php using nano editor and enter the following contents into the file:

### nano /etc/config.php

// Database driver: sqlite, mysql or postgres (sqlite by default)
define('DB_DRIVER', 'mysql');

// Mysql/Postgres username
define('DB_USERNAME', 'kanboard');

// Mysql/Postgres password
define('DB_PASSWORD', 'kanboarduser_passwd');

// Mysql/Postgres hostname
define('DB_HOSTNAME', 'localhost');

// Mysql/Postgres database name
define('DB_NAME', 'kanboarduser');

Step 4. Configuring MariaDB for Kanboard.

By default, MariaDB is not hardened. You can secure MariaDB using the mysql_secure_installation script. you should read and below each steps carefully which will set root password, remove anonymous users, disallow remote root login, and remove the test database and access to secure MariaDB:

mysql_secure_installation

Configure it like this:

- Set root password? [Y/n] y
- Remove anonymous users? [Y/n] y
- Disallow root login remotely? [Y/n] y
- Remove test database and access to it? [Y/n] y
- Reload privilege tables now? [Y/n] y

Next we will need to log in to the MariaDB console and create a database for the Kanboard. Run the following command:

mysql -u root -p

This will prompt you for a password, so enter your MariaDB root password and hit Enter. Once you are logged in to your database server you need to create a database for Kanboard installation:

MariaDB [(none)]&gt;CREATE USER 'kanboarduser'@'localhost' IDENTIFIED BY 'password';
MariaDB [(none)]&gt;GRANT ALL PRIVILEGES ON kanboarduser.* TO 'kanboard'@'localhost' IDENTIFIED BY 'password' WITH GRANT OPTION;
MariaDB [(none)]&gt;FLUSH PRIVILEGES;
MariaDB [(none)]&gt;exit;

Import the Kanboard Database Schema:

cd /var/www/html/kanboard
mysql -u kanboard -p kanboard &lt; app/Schema/Sql/mysql.sql

Step 5. Configuring Apache web server for Kanboard.

Create a new virtual host directive in Apache. For example, create a new Apache configuration file named ‘kanboard.conf’ on your virtual server:

sudo a2enmod rewrite
touch /etc/apache2/sites-available/kanboard.conf
ln -s /etc/apache2/sites-available/kanboard.conf /etc/apache2/sites-enabled/kanboard.conf
nano /etc/apache2/sites-available/kanboard.conf

Add the following lines:

&lt;VirtualHost *:80&gt;
ServerAdmin [email protected]
DocumentRoot /var/www/html/kanboard
ServerName your-domain.com
ServerAlias www.your-domain.com
&lt;Directory /var/www/html/kanboard&gt;
Options FollowSymLinks
AllowOverride All
Order allow,deny
allow from all
&lt;/Directory&gt;
ErrorLog /var/log/apache2/your-domain.com-error_log
CustomLog /var/log/apache2/your-domain.com-access_log common
&lt;/VirtualHost&gt;

Now, we can restart Apache web server so that the changes take place:

sudo a2ensite kanboard
systemctl restart apache2.service

Step 5. Accessing Bolt Kanboard.

Kanboard will be available on HTTP port 80 by default. Open your favorite browser and navigate to http://yourdomain.com/kanboard or http://server-ip/kanboard.

Congratulation’s! You have successfully installed Kanboard. Thanks for using this tutorial for installing Kanboard open source project management on your Ubuntu 16.04 LTS. For additional help or useful information, we recommend you to check the official Kanboard web site.

How To Install osTicket on Ubuntu 16.04 LTS

Install osTicket on Ubuntu 16

os-Ticket is a widely-used and trusted open source support ticket system. It seamlessly routes inquiries created via email, web-forms and phone calls into a simple, easy-to-use, multi-user, web-based customer support platform. Generally Used for Help Desk services.

This article assumes you have at least basic knowledge of Linux, know how to use the shell, and most importantly, you host your site on your own VPS. The installation is quite simple and assumes you are running in the root account, if not you may need to add ‘sudo’ to the commands to get root privileges. I will show you through the step by step installation osTicket open source support ticket system on an Ubuntu 16.04 Xenial Xerus server.

Install osTicket on Ubuntu 16.04 LTS

Step 1. First make sure that all your system packages are up-to-date

sudo apt-get update
sudo apt-get upgrade

Step 2. Install LAMP (Linux, Apache, MariaDB, PHP) server.

A Ubuntu 16.04 LAMP server is required. If you do not have LAMP installed, you can follow our guide here. Also install all required PHP modules:

apt-get install php7.0-mysql php7.0-curl php7.0-json php7.0-cgi php7.0 libapache2-mod-php7.0 php7.0-mcrypt php7.0-xmlrpc php7.0-gd

Step 3. Installing osTicket.

Download the latest stable version of osTicket, At the moment of writing this article it is version 1.10.1:

sudo mkdir /var/www/html/osticket
cd /var/www/html/osticket
wget http://osticket.com/sites/default/files/download/osTicket-v1.10.1.zip
sudo unzip osTicket-v1.10.1.zip

Next, copy the sample config file:

cp upload/include/ost-sampleconfig.php upload/include/ost-config.php

We will need to change some folders permissions:

chown -R www-data:www-data /var/www/html/osticket

Step 4. Configuring MariaDB for osTicket.

By default, MariaDB is not hardened. You can secure MariaDB using the mysql_secure_installation script. you should read and below each steps carefully which will set root password, remove anonymous users, disallow remote root login, and remove the test database and access to secure MariaDB:

mysql_secure_installation

Configure it like this:

- Set root password? [Y/n] y
- Remove anonymous users? [Y/n] y
- Disallow root login remotely? [Y/n] y
- Remove test database and access to it? [Y/n] y
- Reload privilege tables now? [Y/n] y

Next we will need to log in to the MariaDB console and create a database for the osTicket. Run the following command:

mysql -u root -p

This will prompt you for a password, so enter your MariaDB root password and hit Enter. Once you are logged in to your database server you need to create a database for osTicket installation:

CREATE DATABASE osticket;
GRANT ALL PRIVILEGES ON osticket.* TO 'osticketuser'@'localhost' IDENTIFIED BY 'PASSWORD';
FLUSH PRIVILEGES;
exit;

Step 5. Configuring Apache web server for osTicket.

Create a new virtual host directive in Apache. For example, create a new Apache configuration file named ‘osticket.conf’ on your virtual server:

sudo a2enmod rewrite
touch /etc/apache2/sites-available/osticket.conf
ln -s /etc/apache2/sites-available/osticket.conf /etc/apache2/sites-enabled/osticket.conf
nano /etc/apache2/sites-available/osticket.conf

Add the following lines:

<VirtualHost *:80>
ServerAdmin [email protected]
DocumentRoot /var/www/html/osticket/upload/
ServerName your-domain.com
ServerAlias www.your-domain.com
<Directory /var/www/html/osticket/upload>
Options FollowSymLinks
AllowOverride All
Order allow,deny
allow from all
</Directory>
ErrorLog /var/log/apache2/your-domain.com-error_log
CustomLog /var/log/apache2/your-domain.com-access_log common
</VirtualHost>

Now, we can restart Apache web server so that the changes take place:

systemctl restart apache2.service

Step 6. Accessing osTicket.

osTicket will be available on HTTP port 80 by default. Open your favorite browser and navigate to http://yourdomain.com or http://server-ip and complete the required the steps to finish the installation.

Once the installation has completed, remove the setup directory and change the permission of the osTicket config file:

sudo rm -rf /var/www/html/osticket/upload/setup
sudo chmod 0644 /var/www/html/osticket/include/ost-config.php

Congratulation’s! You have successfully installed osTicket. Thanks for using this tutorial for installing osTicket open source support ticket system on your Ubuntu 16.04 LTS. For additional help or useful information, we recommend you to check the official osTicket web site.

How To Install LEMP on Ubuntu 17.10

Install LEMP on Ubuntu 17

A LEMP software stack is a group of open source software that is typically installed together to enable a server to host dynamic websites and web apps. This term is actually an acronym which represents the Linux operating system, with the Nginx web server (which replaces the Apache component of a LAMP stack). The site data is stored in a MySQL database (using MariaDB), and dynamic content is processed by PHP. In this tutorial we will show you how to install LEMP on Ubuntu 17.10 Artful Aardvark.

This article assumes you have at least basic knowledge of Linux, know how to use the shell, and most importantly, you host your site on your own VPS. The installation is quite simple and assumes you are running in the root account, if not you may need to add ‘sudo’ to the commands to get root privileges. I will show you through the step by step installation LEMP Stack on an Ubuntu Ubuntu 17.10 Artful Aardvark server.

Install LEMP on Ubuntu 17.10 Artful Aardvark

Step 1. First make sure that all your system packages are up-to-date

sudo apt-get update
sudo apt-get upgrade

Step 2. Installing Nginx on Ubuntu 17.10.

Install Nginx with apt-get, which is the default package manager for Ubuntu:

sudo apt-get install nginx

Start Nginx service using the following command:

sudo systemctl start nginx

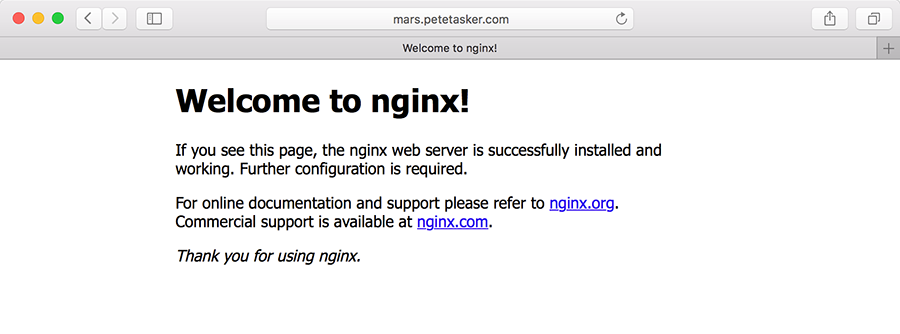
You can verify that Nginx is really running by opening your favorite web browser and entering the URL http://your-server’s-address, if it is installed, then you will see this:
Welcome_to_nginx_cropped

Step 3 Configure Nginx web server.

To get Nginx to work with PHP correctly, we need to make changes to the Nginx configuration file. This guide we will be using a simple Nginx config file:

sudo nano /etc/nginx/sites-available/default

Copy the following into your text editor:

    server {
            listen       80;
            server_name  your_domain_name.com;
            root /usr/share/nginx/html;
            index index.php index.html;
            location / {
                    try_files $uri $uri/ =404;
            }
            error_page 404 /404.html;
            error_page 500 502 503 504 /50x.html;
            location = /50x.html {
                    root /var/www/html;
            }
            location ~ \.php$ {
                    try_files $uri =404;
                    fastcgi_pass unix:/var/run/php5-fpm.sock;
                    fastcgi_index index.php;
                    fastcgi_param SCRIPT_FILENAME $document_root$fastcgi_script_name;
                    include fastcgi_params;
            }
    }

Once you have finished editing the file restart Nginx with:

sudo nginx -t
sudo systemctl restart nginx

Step 4. Installing MySQL on Ubuntu 17.10.

To install MySQL in Ubuntu 17.10 run the following command:

sudo apt-get install mysql-server php7.0-mysql

Once complete, you can verify MySQL is installed by running the below command:

systemctl status mysql

By default, MySQL is not hardened. You can secure MySQL using the mysql_secure_installation script. you should read and below each steps carefully which will set root password, remove anonymous users, disallow remote root login, and remove the test database and access to secure MySQL:

mysql_secure_installation

Configure it like this:

- Set root password? [Y/n] y
- Remove anonymous users? [Y/n] y
- Disallow root login remotely? [Y/n] y
- Remove test database and access to it? [Y/n] y
- Reload privilege tables now? [Y/n] y

To log into MySQL, use the following command (note that it’s the same command you would use to log into a MySQL database):

mysql -u root -p

Step 5. Installing and Configuring PHP on Ubuntu 17.10

Install PHP on the Ubuntu 17.10 with the following command to begin the install:

sudo apt-get install php php-fpm php7.0-mysql

Once the installation is finished, edit the server php.ini file and change the cgi.fix_pathinfo parameter value to 0. By default it will be commented out with a semi-colon and the value set to 1 which practically ensures that PHP will attempt to execute the closest file available when a requested PHP file can’t be found. This is a bad security practice, so let’s change it. Execute the below command:

nano /etc/php/7.0/fpm/php.ini

Now find the cgi.fix_pathinfo line, uncomment it and set the value to 0. Save and close the file.

Your server should restart Nginx automatically after the installation of both MySQL and PHP. If it doesn’t, execute this command:

sudo systemctl restart nginx

To test PHP, create a test file named info.php with he content below. Save the file, then browse to it to see if PHP is working:

nano /usr/share/nginx/html/info.php

Copy the following into your text editor:

<?php phpinfo(); ?>

Try to access it at http://your_server_ip/info.php . If the PHP info page is rendered in your browser then everything looks good and you are ready to proceed further.

Congratulation’s! You have successfully installed LEMP stack. Thanks for using this tutorial for installing LAMP (Linux, Nginx, MySQL and PHP) in Ubuntu 17.10 Artful Aardvark system. For additional help or useful information, we recommend you to check the official Nginx, MySQL and PHP web site.

How to Install WordPress on Ubuntu 17.10

Install WordPress on Ubuntu 17

WordPress is an online, open source website creation tool written in PHP. But in non-geek speak, it’s probably the easiest and most powerful blogging and website content management system (or CMS) in existence today. In this tutorial we will show you how to install WordPress on Ubuntu 17.10.

This article assumes you have at least basic knowledge of Linux, know how to use the shell, and most importantly, you host your site on your own VPS. The installation is quite simple and assumes you are running in the root account, if not you may need to add ‘sudo’ to the commands to get root privileges. I will show you through the step by step installation WordPress content management systems on an Ubuntu 17.10 Artful Aardvark server.

Install WordPress on Ubuntu 17.10 Artful Aardvark

Step 1. First make sure that all your system packages are up-to-date

sudo apt-get update
sudo apt-get upgrade

Step 2. Install LAMP (Linux, Apache, MariaDB, PHP) server.

A Ubuntu 17.10 LAMP server is required. If you do not have LAMP installed, you can follow our guide here. Also install all required PHP modules:

apt-get install php7.0-mysql php7.0-curl php7.0-json php7.0-cgi php7.0 libapache2-mod-php7.0 php7.0-mcrypt php7.0-xmlrpc php7.0-gd

Step 3. Installing WordPress on Ubuntu 17.10 Artful Aardvark.

First thing to do is to go to WordPress’s download page and download the latest stable version of WordPress, At the moment of writing this article it is version 4.8.2:

wget http://wordpress.org/latest.zip

Unpack the WordPress archive to the document root directory on your server:

unzip -q latest.zip -d /var/www/html/
cd wordpress
cp -a * ..

We will need to change some folders permissions:

chown www-data:www-data -R /var/www/html/

We need to create the upload directory manually:

mkdir -p /var/www/html/wp-content/uploads

Allow the Apache web server to write to the uploads directory. Do this by assigning group ownership of this directory to your web server which will allow Apache to create files and directories. Issue the following command:

chown www-data:www-data -R /var/www/html/wp-content/uploads

Step 4. Configuring MariaDB for WordPress.

By default, MariaDB is not hardened. You can secure MariaDB using the mysql_secure_installation script. you should read and below each steps carefully which will set root password, remove anonymous users, disallow remote root login, and remove the test database and access to secure MariaDB:

mysql_secure_installation

Configure it like this:

- Set root password? [Y/n] y
- Remove anonymous users? [Y/n] y
- Disallow root login remotely? [Y/n] y
- Remove test database and access to it? [Y/n] y
- Reload privilege tables now? [Y/n] y

Next we will need to log in to the MariaDB console and create a database for the WordPress. Run the following command:

mysql -u root -p

This will prompt you for a password, so enter your MariaDB root password and hit Enter. Once you are logged in to your database server you need to create a database for WordPress installation:

create database wordpress;
grant all privileges on wordpress.* to wpuser@localhost identified by 'your-password';
flush privileges;
exit;

Step 5. Configuring WordPress

In this step we will configure the main configuration file of WordPress, where we need to configure it’s basic parameters so that it can be connected with the database and user:

mv wp-config-sample.php wp-config.php

Now open it using any of your favourite editor, to make any changes in the WordPress configuration file:

nano wp-config.php

Here are the values that we need to update according to our previous database and user’s setup:

// ** MySQL settings - You can get this info from your web host ** //
/** The name of the database for WordPress */
define('DB_NAME', 'wordpress');

/** MySQL database username */
define('DB_USER', 'wpuser');

/** MySQL database password */
define('DB_PASSWORD', 'your_password');

/** MySQL hostname */
define('DB_HOST', 'localhost');

Step 6. Configuring Apache web server for WordPress.

Create a new virtual host directive in Apache. For example, create a new Apache configuration file named ‘wordpress.conf’ on your virtual server:

sudo a2enmod rewrite
touch /etc/apache2/sites-available/wordpress.conf
ln -s /etc/apache2/sites-available/wordpress.conf /etc/apache2/sites-enabled/wordpress.conf
nano /etc/apache2/sites-available/wordpress.conf

Add the following lines:

<VirtualHost *:80>
ServerAdmin [email protected]
DocumentRoot /var/www/html/
ServerName your-domain.com
ServerAlias www.your-domain.com
<Directory /var/www/html/>
Options FollowSymLinks
AllowOverride All
Order allow,deny
allow from all
</Directory>
ErrorLog /var/log/apache2/your-domain.com-error_log
CustomLog /var/log/apache2/your-domain.com-access_log common
</VirtualHost>

Next step we will need to adjust the some some values in the PHP configuration files as follow:

nano /etc/php/7.0/apache2/php.ini

Add/modify the following settings:

max_execution_time = 300
max_input_time = 600
memory_limit = 256M
post_max_size = 64M
upload_max_filesize = 64M

Now, we can restart Apache web server so that the changes take place:

systemctl restart apache2.service

Step 7. Accessing WordPress.

WordPress will be available on HTTP port 80 by default. Open your favorite browser and navigate to http://yourdomain.com or http://server-ip/ and complete the required the steps to finish the installation. If you are using a firewall, please open port 80 to enable access to the control panel.

Congratulation’s! You have successfully installed WordPress. Thanks for using this tutorial for installing WordPress CMS (Content Management Systems) on your Ubuntu 17.10 Artful Aardvark. For additional help or useful information, we recommend you to check the official WordPress web site.

How To Install LAMP Stack on Ubuntu 17.10

Install LAMP Stack on Ubuntu 17

LAMP represents a full featured stack containing the most popular web server known as Apache, the most popular database server MySQL and the most popular open-source web programming language known as PHP. All components are free and open-source software, and the combination is suitable for building dynamic web pages.

This article assumes you have at least basic knowledge of linux, know how to use the shell, and most importantly, you host your site on your own VPS. The installation is quite simple. I will show you through the step by step installation LAMP (Linux Apache, MySQL and PHP) on Ubuntu 17.10 Artful Aardvark server.

Install LAMP Stack on Ubuntu 17.10 Artful Aardvark

Step 1. First make sure that all your system packages are up-to-date

apt-get update
apt-get upgrade

Step 2. Installing Apache web server on Ubuntu 17.10.

We will be installing Apache with apt-get, which is the default package manager for ubuntu:

apt-get install -y apache2 apache2-utils

After installing apache services on your system, start all required services:

systemctl enable apache2
systemctl start apache2
systemctl status apache2

Check Apache version:

### apache2 -v
Server version: Apache/2.4.27 (Ubuntu)
Server built: 2017-09-18T15:46:93

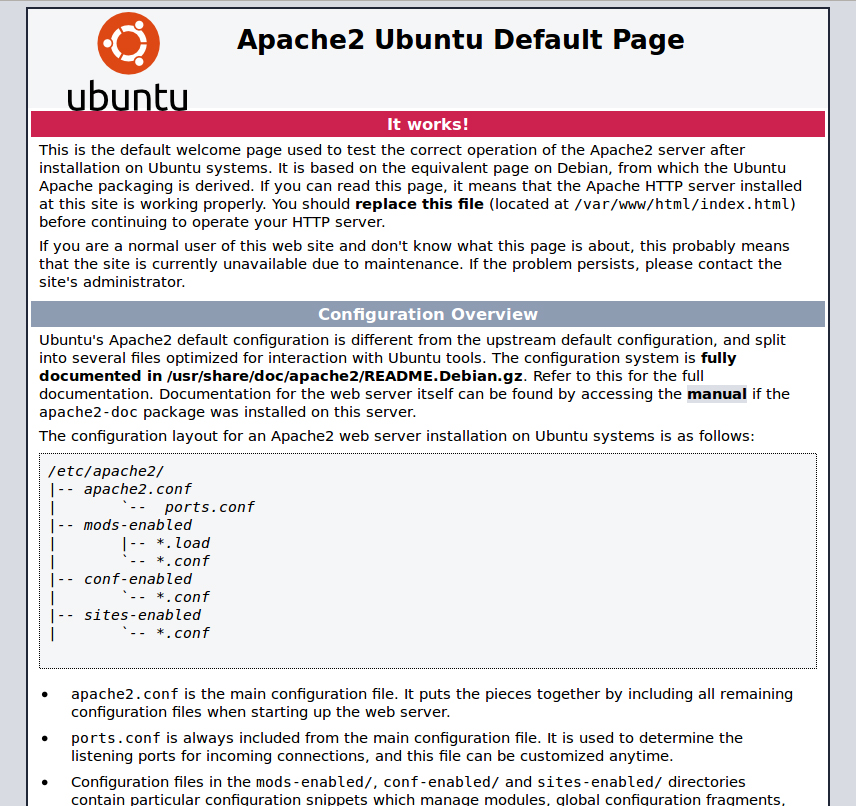
You can verify that Apache is really running by opening your favorite web browser and entering the URL http://your-server’s-address, if it is installed, then you will see this:

screenshot-from

Step 3. Installing MariaDB on Ubuntu 17.10.

Now that we have our web server up and running, it is time to install MariaDB. MariaDB is a database management system. Basically, it will organize and provide access to databases where our site can store information:

apt-get install mariadb-server mariadb-client

Once complete, you can verify MariaDB is installed by running the below command:

systemctl status mariadb
systemctl enable mariadb
systemctl start mariadb

By default, MariaDB is not hardened. You can secure MariaDB using the mysql_secure_installation script. you should read and below each steps carefully which will set root password, remove anonymous users, disallow remote root login, and remove the test database and access to secure MariaDB:

mysql_secure_installation

Configure it like this:

- Set root password? [Y/n] y
- Remove anonymous users? [Y/n] y
- Disallow root login remotely? [Y/n] y
- Remove test database and access to it? [Y/n] y
- Reload privilege tables now? [Y/n] y

To log into MariaDB, use the following command (note that it’s the same command you would use to log into a MySQL database):

mysql -u root -p

Step 4. Installing PHP 7.1 on Ubuntu 17.10.

At the the time of this writing, PHP7.1 is the latest stable version of PHP and has a minor performance edge over PHP7.0. Enter the following command to install PHP7.1:

apt-get install php7.1 libapache2-mod-php7.1 php7.1-mysql php-common php7.1-cli php7.1-common php7.1-json php7.1-opcache php7.1-readline

Enable the Apache php7.1 module then restart Apache web server:

a2enmod php7.1
systemctl restart apache2

Check PHP version:

### php --version
PHP 7.1.8-1ubuntu1 (cli) (built: Aug 18 2017 15:46:93) ( NTS )
Copyright (c) 1997-2017 The PHP Group
Zend Engine v3.1.0, Copyright (c) 1998-2017 Zend Technologies
 with Zend OPcache v7.1.8-1ubuntu1, Copyright (c) 1999-2017, by Zend Technologies

To test PHP, create a test file named info.php with he content below. Save the file, then browse to it to see if PHP is working:

nano /var/www/html/info.php

In this file, paste the following code:

<?php phpinfo(); ?>

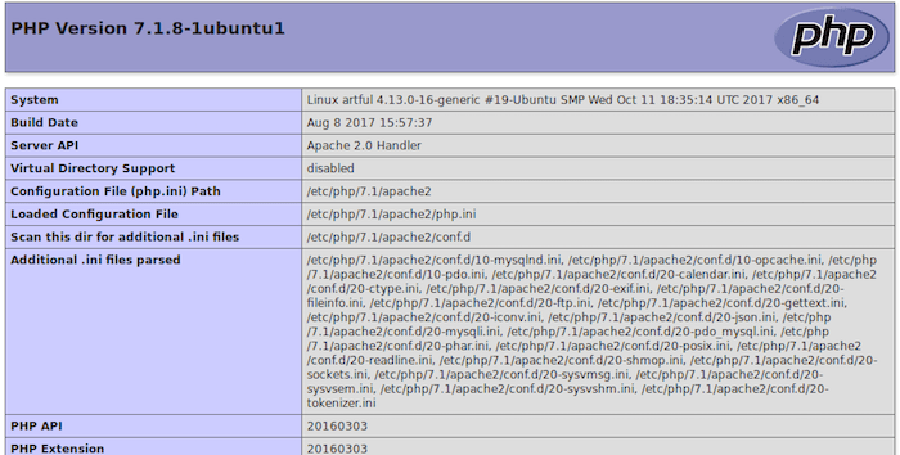
Try to access it at http://your_server_ip/info.php . If the PHP info page is rendered in your browser then everything looks good and you are ready to proceed further.

install-php7.1-on-ubuntu
ongratulation’s! You have successfully installed LAMP stack. Thanks for using this tutorial for installing LAMP (Linux Apache, MySQL and PHP) in Ubuntu 17.10 (Artful Aardvark) system. For additional help or useful information, we recommend you to check the official Apache, MySQL and PHP web site.

How To Install vTiger CRM on Ubuntu 16.04 LTS

Install vTiger CRM on Ubuntu 16

vTiger CRM is an all-in-one open source CRM software used by thousands of businesses. It has a modern interface with multiple dashboards and what is more important, it offers plenty of features which can help you to run your business successfully. Some of the features include lead management, account and contact management, campaign management, project management, customer support and service, emails etc.. The core functionality can be easily extended by using 3rd-party plugins, available through the extension marketplace.

This article assumes you have at least basic knowledge of Linux, know how to use the shell, and most importantly, you host your site on your own VPS. The installation is quite simple and assumes you are running in the root account, if not you may need to add ‘sudo’ to the commands to get root privileges. I will show you through the step by step installation vTiger open-source Customer Relationship Management on an Ubuntu 16.04 Xenial Xerus server.

Install vTiger CRM on Ubuntu 16.04 LTS

Step 1. First make sure that all your system packages are up-to-date

sudo apt-get update
sudo apt-get upgrade

Step 2. Install LAMP (Linux, Apache, MariaDB, PHP) server.

A Ubuntu 16.04 LAMP server is required. If you do not have LAMP installed, you can follow our guide here. Also install all required PHP modules:

apt-get install php7.0-mysql php7.0-curl php7.0-json php7.0-cgi php7.0 libapache2-mod-php7.0 php7.0-mcrypt php7.0-xmlrpc php7.0-gd

Step 3. Installing vTiger CRM.

Download the latest stable version of Vtiger CRM, At the moment of writing this article it is version 7.0.1:

wget https://ncu.dl.sourceforge.net/project/vtigercrm/vtiger%20CRM%207.0.1/Core%20Product/vtigercrm7.0.1.tar.gz
tar -xzvf vtigercrm7.0.1.tar.gz
mv vtigercrm /var/www/html/

We will need to change some folders permissions:

chown www-data:www-data -R /var/www/html/

Step 4. Configuring MariaDB.

By default, MariaDB is not hardened. You can secure MySQL using the mysql_secure_installation script. you should read and below each steps carefully which will set root password, remove anonymous users, disallow remote root login, and remove the test database and access to secure MariaDB.

mysql_secure_installation

Next we will need to log in to the MariaDB console and create a database for the vTiger. Run the following command:

mysql -u root -p

This will prompt you for a password, so enter your MariaDB root password and hit Enter. Once you are logged in to your database server you need to create a database for vTiger installation:

MariaDB > CREATE DATABASE vtiger;
MariaDB > CREATE USER 'vtiger_user'@'localhost' IDENTIFIED BY 'PaSsWoRd';
MariaDB > GRANT ALL PRIVILEGES ON `vtiger`.* TO 'vtiger_user'@'localhost';
MariaDB > FLUSH PRIVILEGES;
MariaDB > \q

Now, let’s tweak some of your PHP settings so you can later complete the VTiger installation:

nano /etc/php/7.0/apache2/php.ini

Make the below changes:

display_errors = Off
change to
display_errors = On

max_execution_time = 30
change to
max_execution_time = 600

error_reporting = E_ALL & ~E_DEPRECATED
change to
error_reporting = E_WARNING & ~E_NOTICE & ~E_DEPRECATED

log_errors = On
change to
log_errors = Off

short_open_tag = Off
change to
short_open_tag = On

Save and close the file. Restart the apache service for the changes to take effects:

systemctl restart apache2.service

Step 5. Accessing Vtiger CRM.

Vtiger CRM will be available on HTTP port 80 by default. Open your favorite browser and navigate to http://yourdomain.com/vtigercrm or http://server-ip/vtigercrm and complete the required the steps to finish the installation. If you are using a firewall, please open port 80 to enable access to the control panel.

Congratulation’s! You have successfully installed vTiger. Thanks for using this tutorial for installing vTiger Customer Relationship Management on your Ubuntu 16.04 system. For additional help or useful information, we recommend you to check the official vTiger web site.