How To Install VirtualBox on Ubuntu 18.04 LTS

Install VirtualBox on Ubuntu 18

VirtualBox is a free and open-source hypervisor software, allows you to create and run a guest operating systems (“virtual machines”) such as Linux and Windows on top of the host operating system. VirtualBox supports both software-based and Hardware-assisted virtualization. In this tutorial we will learn How To Install VirtualBox on Ubuntu 18.04 LTS.

This article assumes you have at least basic knowledge of Linux, know how to use the shell, and most importantly, you host your site on your own VPS. The installation is quite simple and assumes you are running in the root account, if not you may need to add ‘sudo’ to the commands to get root privileges. I will show you through the step by step installation VirtualBox on a Ubuntu 18.04 (Bionic Beaver) server.

Install VirtualBox on Ubuntu 18.04 LTS

Step 1. First, make sure that all your system packages are up-to-date

sudo apt-get update
sudo apt-get upgrade
sudo apt-get install gcc make linux-headers-$(uname -r) dkms

Step 2. Installing VirtualBox on Ubuntu 18.04 LTS.

First, run the commands below to add VirtualBox repository key:

sudo sh -c 'echo "deb http://download.virtualbox.org/virtualbox/debian $(lsb_release -sc) contrib" >> /etc/apt/sources.list.d/virtualbox.list'

Next, we need to download and import the Oracle GPG public key to Ubuntu system with the following command:

wget -q https://www.virtualbox.org/download/oracle_vbox_2016.asc -O- | sudo apt-key add -
wget -q https://www.virtualbox.org/download/oracle_vbox.asc -O- | sudo apt-key add -

Install the VirtualBox 5, command as follows:

apt-get update
apt-get install virtualbox-5.2

Step 4. Accessing VirtualBox.

Once it’s installed, start it from your application menu, or run the command below to start VirtualBox from terminal or find the application on your ubuntu dash and launch it.:

virtualbox
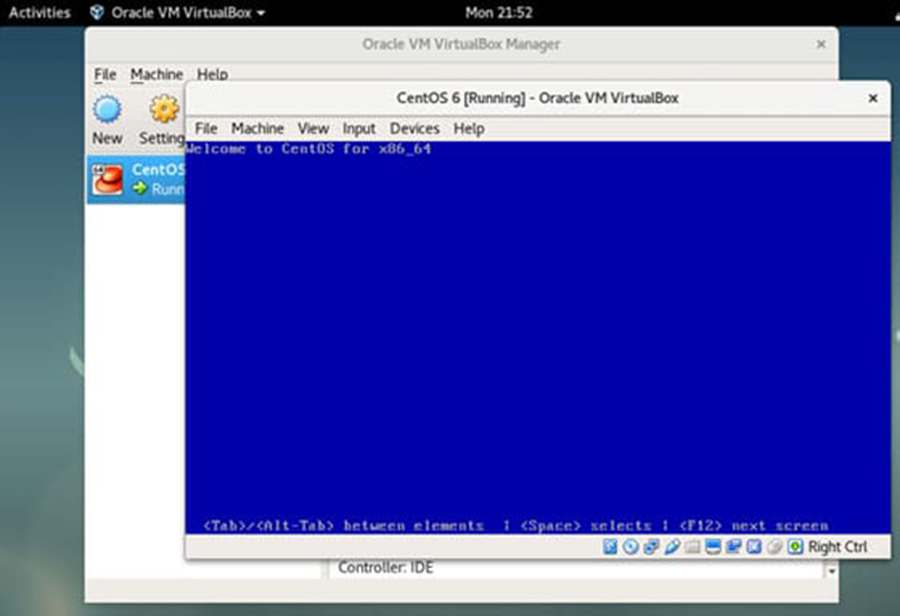
Install-VirtualBox

Congratulation’s! You have successfully installed VirtualBox. Thanks for using this tutorial for installing VirtualBox on Ubuntu 18.04 LTS (Bionic Beaver) server. For additional help or useful information, we recommend you to check the official VirtualBox web site.

You Might Also Like: How To Install Vagrant on Ubuntu 18.04 LTS
How To Install Joomla 3.9.5 on Ubuntu 18.04 LTS

Install Joomla on Ubuntu 18

Joomla is a free and open source popular content management that uses a PHP and a backend database, such as MySQL. It offers a wide variety of features that make it an incredibly flexible content management system right out of the box. Furthermore, there are hundreds of free extensions written for that allows users to extend its functionality and customize it to their own objectives. Continue reading “How To Install Joomla 3.9.5 on Ubuntu 18.04 LTS”

How To Install Webmin (V1.900.tar.gz )on Ubuntu 18.04 LTS

Install Webmin on Ubuntu 18

Webmin is a free control Panel for managing VPS. Webmin is a web based interface which is used to manage VPS web hosting server. With the help of webmin you can setup user account, apache, dns and file sharing and other actions. Webmin very suitable for beginners who do not know much about the unix or linux command line. In this tutorial we will show you how to install Webmin on Ubuntu 18.04 LTS. Continue reading “How To Install Webmin (V1.900.tar.gz )on Ubuntu 18.04 LTS”

How To Install Docker on Ubuntu 18.04 LTS

Install Docker on Ubuntu 18

Docker is an open-source project that automates the deployment of application inside the software container. The container allows the developer to package up all project resources such as libraries, dependencies, assets etc. Docker is written in Go Programming language and is developed by Dotcloud. It is basically a container engine which uses the Linux Kernel features like namespaces and control groups to create containers on top of an operating system and automates the application deployment on the container. Continue reading “How To Install Docker on Ubuntu 18.04 LTS”

How To Install uTorrent on Ubuntu 18.04 LTS

Install uTorrent on Ubuntu 18

uTorrent is a freeware and a closed source BitTorrent Client. One of the most used lightweight BitTorrent Client, Now it is available for Linux as uTorrent server. The µTorrent is designed to use minimal computer resources while offering functionality comparable to larger BitTorrent clients such as Vuze or BitComet and also it provides performance, stability, and support for older hardware and versions of operating system. It is available for Microsoft Windows and Mac OS X. Continue reading “How To Install uTorrent on Ubuntu 18.04 LTS”