In this tutorial, we will learn how to clone a WordPress site in 7 easy steps.
What Is Cloning, and Why Use It?
The idea behind cloning a WordPress site is simple: you make an exact copy or duplicate of one WordPress site and apply it to another site.
One practical scenario is when you are moving a WordPress site to a new web host or a new domain name. Cloning a site will save you hours of work.
Another possible use is when you are developing a site for a client. Once the project is done you can clone the WordPress site to the client site.
Lastly, you can clone a live WordPress site to your local server for testing and development purposes.
Cloning a WordPress site is not that difficult at all, here is how you can do it with these simple steps.
Using BackupBuddy To Clone A WordPress Website
For this article, we will be using BackupBuddy plugin. BackupBuddy is a WordPress backup plugin which allows you to not only just backup your WordPress site, it also allows you to easily restore your site from a backup. We will show you how to use this site restoration tool to easily clone any WordPress site.
1. Installing and Setting up BackupBuddy
First thing you need to install and activate the BackupBuddy plugin. Upon activation, the plugin will add a new menu item labeled ‘BackupBuddy’ in your WordPress admin bar. Clicking on it will take you to BackupBuddy setup wizard.
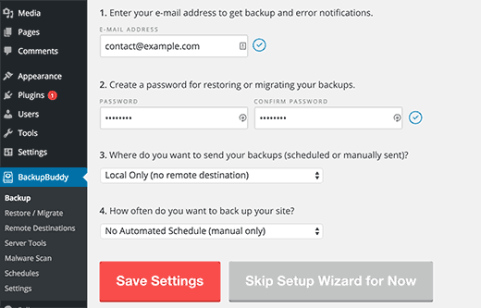
The setup wizard is very straight forward. First you need to provide an email address. After that you need to enter a password.
This password will be used when you restore your site. The next option is to choose a location where you want to store your WordPress backups. The last option allows you to set up automatic backups.
BackupBuddy allows you to store your backups on cloud services like Stash, Amazon, Rackspace, and Dropbox. You can also store your backups on your own server or email them to yourself.
Once you are done with the setup wizard, click on save settings button to continue.
2. Backup Your WordPress Site
BackupBuddy will automatically initiate the backup process when you finish the setup wizard. Upon completion it will show you the option to download your backup or send the backup to a remote destination.
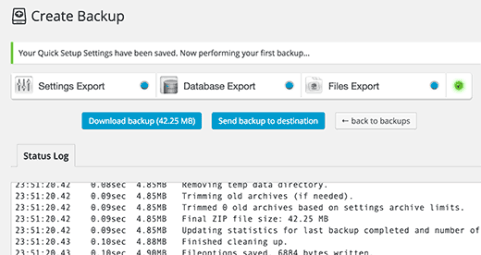
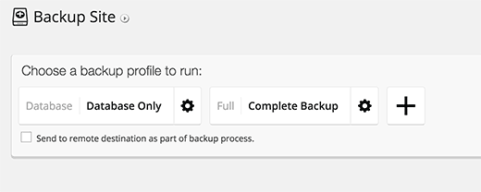
You can always create a fresh backup by visiting the BackupBuddy » Backup page.
3. Preparing To Clone Your WordPress Site
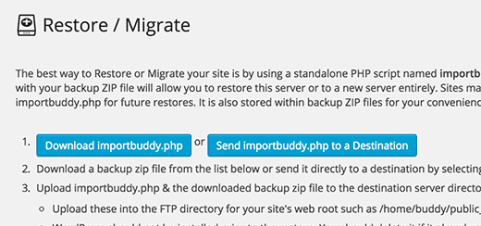
BackupBuddy provides a very easy site cloning / migration tool. Simply visit the BackupBuddy » Restore/Migrate page to begin the cloning process.
First you need to download the importbuddy.php file to your computer.
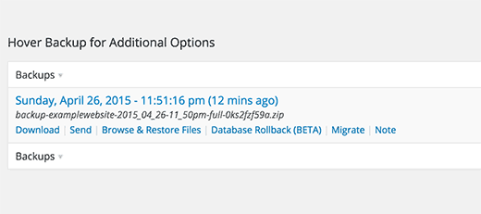
After that, you need to download the backup zip file from your existing backups shown on the same page.
4. Upload Backup and Importbuddy to New Location
Now that you have a complete backup of your site in a zip format and your importbuddy.php file, the next step is to upload them to the new location.
This new location can be a live website, or a site on your local server. If it is a site on your local server, then you just need to copy and paste the files into a subfolder inside your htdocs or www folder, like this:
C:\wamp\www\mynewsite\
If it is a live site, then you need to upload these files to the root directory using an FTP client.
No matter where you are copying the files, you need to make sure that the folder is completely empty and has no other files or folders inside it except importbuddy.php file and your backup zip file.
5. Running The Import Script
After uploading both files, you need to visit the importbuddy.php file in a web browser. It will be located at a URL like this:
http://www.example.com/importbuddy.php
Replace example.com with your own domain name.
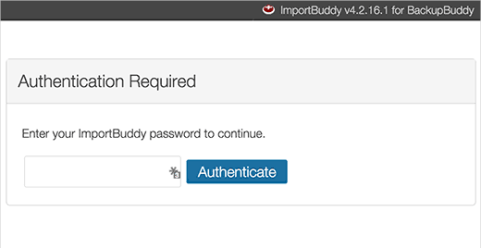
You will be asked to enter your importbuddy password. This the password you created during step 1 or the password you entered when downloading importbuddy file during step 3.
After entering your password, you will notice that importbuddy has already found your backup zip file. Simply click on the Next Step button to continue.
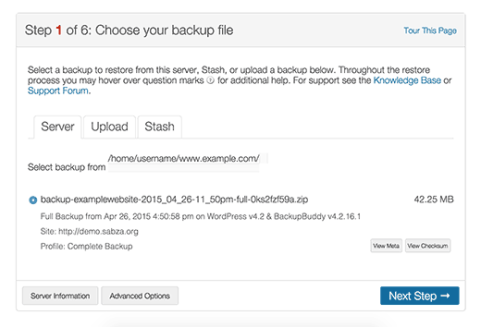
Importbuddy will now extract your backup file when it is done, you need to click on the next button.
You will now reach the URL and database settings section.
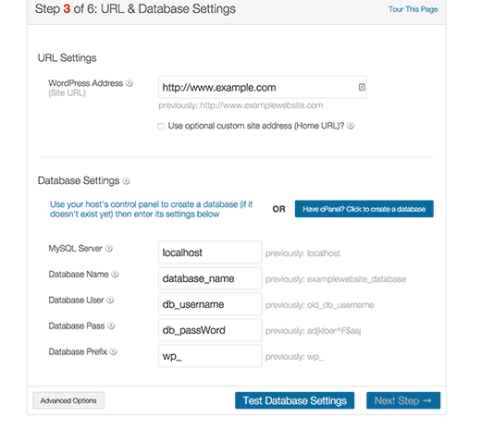
Importbuddy will automatically guess your new URL. It will also show your previous URL. Below that, you need to enter the new database settings. Enter the new database name, database username and password.
If you have not created a new database yet, then you can always login to your hosting account and create a database using cPanel. If you are moving the site to local server then you can create a new database using phpmyAdmin.
After entering your database information, click on the test database settings button. If you entered all information correctly, then you will see test results like this:
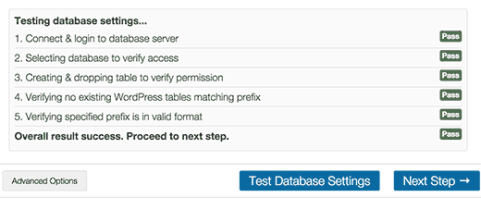
Click on the next step button to continue. Importbuddy will now import your WordPress database and show you the success message. After that you can click on the next step button.
Importbuddy will run some tests and show your new cloned site’s URL to verify that everything is working fine.
6. Test Your Cloned Site
Test your new site by visiting the link shown on the last step of importbuddy process. Check that your single posts links are working fine. Visit the WordPress admin area to see if you can perform all administration tasks.
If you run into any issues check out our guide on how to fix common WordPress errors.
7. Delete Temporary Files
On the import buddy screen, click on the cleanup and remove temporary files button. This will delete import buddy and all temporary files it created during the cloning process.
That’s all, you have successfully cloned your WordPress site.
