How To Install Zabbix 4.2 on Ubuntu 18.04 LTS

Install Zabbix on Ubuntu 18

Zabbix is an open source monitoring tool that is ideal for monitoring your cloud servers. Zabbix is very flexible, information can be retrieved using HTTP/SNMP or by installing a Zabbix agent on the machines to monitor, and allows a lot of customization.

This article assumes you have at least basic knowledge of Linux, know how to use the shell, and most importantly, you host your site on your own VPS. The installation is quite simple and assumes you are running in the root account, if not you may need to add ‘sudo’ to the commands to get root privileges. I will show you through the step by step installation Zabbix in Ubuntu 18.04 LTS Bionic Beaver.

Install Zabbix on Ubuntu 18.04 LTS

Step 1. First make sure that all your system packages are up-to-date

sudo apt-get update
sudo apt-get upgrade

Step 2. Install LAMP (Linux, Apache, MariaDB and PHP) server.

A Ubuntu 18.04 LAMP server is required. If you do not have LAMP installed, you can follow our guide here. Also install all required PHP modules:

apt-get install php7.1-cli php7.1-gd php7.1-opcache php7.1-mysql php7.1-json php7.1-mcrypt php7.1-xml php7.1-curl

Step 3. Installing Zabbix on Ubuntu 18.04 LTS.

The latest version of Zabbix Server is 3.4 but the version available on Ubuntu repositories is 3.0. To install version 3.4, you need to add Zabbix repositories for this version:

wget http://repo.zabbix.com/zabbix/3.4/ubuntu/pool/main/z/zabbix-release/zabbix-release_3.4-1+bionic_all.deb
dpkg -i zabbix-release_3.4-1+bionic_all.deb

After adding zabbix apt repository in your system, Now update package lists and install Zabbix using commands:

apt update
apt install -y zabbix-server-mysql zabbix-frontend-php zabbix-agent

Step 4. Zabbix Configuration.

sudo nano /etc/zabbix/zabbix_server.conf

Adjust the following values and make a note of the password you’ve chosen. You’ll need it later too.

DBName=zabbixdb
DBUser=zabbix
DBPassword=your_password_here

Step 5. Configure MariaDB Database for Zabbix.

By default, MariaDB is not hardened. You can secure MariaDB using the mysql_secure_installation script. you should read and below each steps carefully which will set root password, remove anonymous users, disallow remote root login, and remove the test database and access to secure MySQL.

mysql_secure_installation

Configure it like this:

- Set root password? [Y/n] y
- Remove anonymous users? [Y/n] y
- Disallow root login remotely? [Y/n] y
- Remove test database and access to it? [Y/n] y
- Reload privilege tables now? [Y/n] y

Next we will need to log in to the MariaDB console and create a database for Zabbix. Run the following command:

mysql -u root -p

This will prompt you for a password, so enter your MariaDB root password and hit Enter. Once you are logged in to your database server you need to create a database for the Zabbix software:

create user 'zabbix'@'localhost' identified by 'your_chosen_password_here';
create database zabbixdb;
grant all privileges on zabbixdb.* to 'zabbix'@'localhost';
flush privileges;
exit;

After creating the zabbix database and user we need to import the zabbix initial database using the below commands:

cd /usr/share/doc/zabbix-server-mysql
zcat create.sql.gz | mysql -u root -p zabbixdb

Step 6. Configure Apache web server for Zabbix.

First, we’ll move the Zabbix apache file from the package directory:

sudo cp /usr/share/doc/zabbix-frontend-php/examples/apache.conf /etc/apache2/conf-available/zabbix.conf
sudo a2enconf zabbix.conf
sudo a2enmod alias

We should adjust php timezone as per zabbix recommended settings:

### nano /etc/zabbix/apache.conf
    php_value max_execution_time 300
    php_value memory_limit 128M
    php_value post_max_size 16M
    php_value upload_max_filesize 2M
    php_value max_input_time 300
    php_value always_populate_raw_post_data -1
    php_value date.timezone Europe/Rome

Restart the Apache and zabbix service for the changes to take effect:

systemctl restart zabbix-server zabbix-agent apache2

Step 7. Accessing Zabbix.

will be available on HTTP port 80 by default. Open your favorite browser and navigate to http://your-domain.com/zabbix or http://server-ip/zabbix and complete the required the steps to finish the installation. If you are using a firewall, please open port 80 to enable access to the control panel.
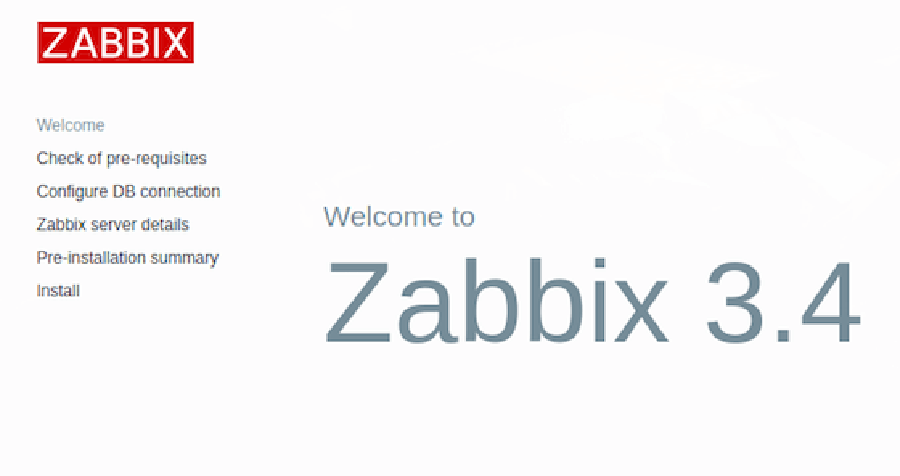
zabbix-3.4-setup

Congratulation’s! You have successfully installed Zabbix. Thanks for using this tutorial for installing Zabbix Monitoring Tool on your Ubuntu 18.04 Bionic Beaver LTS system. For additional help or useful information, we recommend you to check the official Zabbix web site.

How To Install Zabbix on Ubuntu 16.04 LTS

Install Zabbix on Ubuntu 16

Zabbix is an open source monitoring tool that is ideal for monitoring your cloud servers. Zabbix is very flexible, information can be retrieved using HTTP/SNMP or by installing a Zabbix agent on the machines to monitor, and allows a lot of customization.

This article assumes you have at least basic knowledge of Linux, know how to use the shell, and most importantly, you host your site on your own VPS. The installation is quite simple and assumes you are running in the root account, if not you may need to add ‘sudo’ to the commands to get root privileges. I will show you through the step by step installation Zabbix in Ubuntu 16.04 LTS Xenial Xerus.
Install Zabbix on Ubuntu 16.04 LTS Xenial Xerus

Step 1. First make sure that all your system packages are up-to-date by running these following apt-get commands in the terminal.

sudo apt-get update
sudo apt-get upgrade

Step 2. Install LAMP (Linux, Apache, MariaDB and PHP) server.

A Ubuntu 16.04 LAMP server is required. If you do not have LAMP installed, you can follow our guide here. Also install all required PHP modules:

apt-get install php7.0-readline php7.0-curl php7.0-gd php7.0-mbstring libapache2-mod-php7.0 php7.0-mcrypt php7.0-bz2 php7.0-zip

Step 3. Installing Zabbix on Ubuntu 16.04.

First thing to do is download and add the repository as shown below:

wget http://repo.zabbix.com/zabbix/3.2/ubuntu/pool/main/z/zabbix-release/zabbix-release_3.2-1+xenial_all.deb
dpkg -i zabbix-release_3.2-1+xenial_all.deb

After adding zabbix apt repository in your system, Now update package lists and install Zabbix using commands:

apt-get update
apt-get install zabbix-server-mysql zabbix-frontend-php

Step 4. Zabbix Configuration.

sudo nano /etc/zabbix/zabbix_server.conf

Adjust the following values and make a note of the password you’ve chosen. You’ll need it later too.

DBName=zabbixdb
DBUser=zabbix
DBPassword=your_chosen_password_here

Step 5. Configure MariaDB Database for Zabbix.

By default, MariaDB is not hardened. You can secure MariaDB using the mysql_secure_installation script. you should read and below each steps carefully which will set root password, remove anonymous users, disallow remote root login, and remove the test database and access to secure MySQL.

mysql_secure_installation

Configure it like this:

- Set root password? [Y/n] y
- Remove anonymous users? [Y/n] y
- Disallow root login remotely? [Y/n] y
- Remove test database and access to it? [Y/n] y
- Reload privilege tables now? [Y/n] y

Next we will need to log in to the MariaDB console and create a database for Zabbix. Run the following command:

mysql -u root -p

This will prompt you for a password, so enter your MariaDB root password and hit Enter. Once you are logged in to your database server you need to create a database for the Zabbix software:

create user 'zabbix'@'localhost' identified by 'your_chosen_password_here';
create database zabbixdb;
grant all privileges on zabbixdb.* to 'zabbix'@'localhost';
flush privileges;
exit;

After creating the zabbix database and user we need to import the zabbix initial database using the below commands:

cd /usr/share/doc/zabbix-server-mysql
zcat create.sql.gz | mysql -u root -p zabbixdb

Step 6. Configure Apache web server for Zabbix.

First, we’ll move the Zabbix apache file from the package directory:

sudo cp /usr/share/doc/zabbix-frontend-php/examples/apache.conf /etc/apache2/conf-available/zabbix.conf
sudo a2enconf zabbix.conf
sudo a2enmod alias

We should adjust php timezone as per zabbix recommended settings:

###nano /etc/zabbix/apache.conf
    php_value max_execution_time 300
    php_value memory_limit 128M
    php_value post_max_size 16M
    php_value upload_max_filesize 2M
    php_value max_input_time 300
    php_value always_populate_raw_post_data -1
    php_value date.timezone Europe/Rome

Restart the Apache and zabbix service for the changes to take effect:

systemctl restart apache2
systemctl start zabbix-server

Step 7. Accessing Zabbix.

will be available on HTTP port 80 by default. Open your favorite browser and navigate to http://yourdomain.com/zabbix or http://server-ip/zabbix and complete the required the steps to finish the installation. If you are using a firewall, please open port 80 to enable access to the control panel.

zabbix-v3-install

Congratulation’s! You have successfully installed Zabbix. Thanks for using this tutorial for installing Zabbix Monitoring Tool on your Ubuntu 16.04 LTS system. For additional help or useful information, we recommend you to check the official Zabbix web site.