Easy Guide to Disable JSON REST API in WordPress

In this tutorial, we will learn how to easily disable the JSON REST API in WordPress.

Why You Need to Disable JSON REST API in WordPress?

There is no denying that the API will bring lots of benefits for WordPress developers. The API makes it super easy to retrieve data using GET requests, which is useful for those building apps with WordPress.

However, most site owners may not be needing those features at all.

Having that said, this could potentially open your website to a new front of DDoS attacks. It can be resource intensive and slow down your website.

It is similar to disabling XML-RPC, which many site admins disable on their WordPress sites just to be on the safe side.

Disabling JSON REST API in WordPress

First thing you need to do is install and activate the Disable REST API plugin. For more details, see our step by step guide on how to install a WordPress plugin.

The plugin works out of the box and there are no settings for you to configure.

It will now forcibly return an authentication error to any API requests from sources who are not logged into your website.

This will effectively prevent unauthorized requests from using the REST API to get information from your website.

You can test this by visiting http://example.com/wp-json page. Make sure you logout of WordPress admin area first or switch your browser to incognito mode.

Don’t forget to replace example.com with your own domain name. You will see this message, indicating that REST API requests are blocked.

REST API Disabled

That’s all, you have successfully disabled unauthorized REST API requests on your WordPress site.

We hope this tutorial helped you learn how to Disable JSON API in WordPress.

Easy Guide to Create a WordPress TinyMCE Plugin

In this tutorial, we will learn how to create a TinyMCE plugin in WordPress.

Requirements

This tutorial is intended for advanced users. If you are a beginner level user who just wants to extend visual editor, then please check out TinyMCE Advanced plugin or take a look at these tips on using WordPress visual editor.

For this tutorial, you will need basic coding skills, access to a WordPress installwhere you can test it out.

It is a bad practice to develop plugins on a live website. A minor mistake in the code can make your site inaccessible. But if you must do it on a live site, then at least backup WordPress first.

Creating Your First TinyMCE Plugin

We will begin by creating a WordPress plugin to register our custom TinyMCE toolbar button. When clicked, this button will allow user to add a link with a custom CSS class.

The source code will be provided in full at the end of this article, but until then, let’s create the plugin step-by-step.

First, you need to create a directory in wp-content/plugins folder of your WordPress install. Name this folder tinymce-custom-link-class.

From here, we’ll begin adding our plugin code.

The Plugin Header

Create a new file in the plugin directory we just created and name this file tinymce-custom-link-class.php. Add this code to the file and save it.

/**
 * Plugin Name: TinyMCE Custom Link Class
 * Plugin URI: http://wpbeginner.com
 * Version: 1.0
 * Author: WPBeginner
 * Author URI: http://www.wpbeginner.com
 * Description: A simple TinyMCE Plugin to add a custom link class in the Visual Editor
 * License: GPL2
 */

This is just a PHP comment, which tells WordPress the name of the plugin, as well as the author and a description.

In the WordPress admin area, activate your new plugin by going to Plugins > Installed Plugins, and then clicking Activate beside the TinyMCE Custom Link Class plugin:
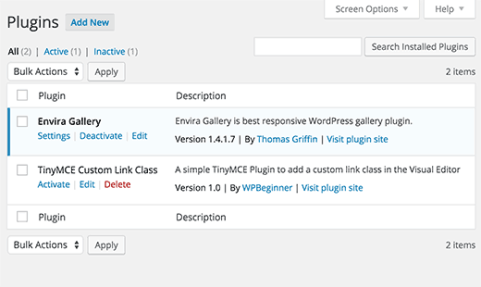
Installed plugin

Setting Up Our Plugin Class

If two WordPress plugins have functions with the same name, then this would cause an error. We will avoid this problem by having our functions wrapped in a class.

class TinyMCE_Custom_Link_Class {
     
    /**
    * Constructor. Called when the plugin is initialised.
    */
    function __construct() {
         
    }
 
}
 
$tinymce_custom_link_class = new TinyMCE_Custom_Link_Class;

This creates our PHP class, along with a construct, which is called when we reach the line $tinymce_custom_link_class = new TinyMCE_Custom_Link_Class;.

Any functions we add inside this class shouldn’t conflict with other WordPress plugins.

Start Setting Up Our TinyMCE Plugin

Next, we need to tell TinyMCE that we might want to add our custom button to the Visual Editor‘s toolbar. To do this, we can use WordPress’ actions – specifically, the init action.

Add the following code inside your plugin’s __construct() function:

if ( is_admin() ) {
    add_action( 'init', array(  $this, 'setup_tinymce_plugin' ) );
}

This checks if we are in the WordPress Administration interface. If we are, then it asks WordPress to run the setup_tinymce_plugin function inside our class when WordPress has finished its initial loading routine.

Next, add the setup_tinymce_plugin function:

/**
* Check if the current user can edit Posts or Pages, and is using the Visual Editor
* If so, add some filters so we can register our plugin
*/
function setup_tinymce_plugin() {
 
// Check if the logged in WordPress User can edit Posts or Pages
// If not, don't register our TinyMCE plugin
     
if ( ! current_user_can( 'edit_posts' ) && ! current_user_can( 'edit_pages' ) ) {
            return;
}
 
// Check if the logged in WordPress User has the Visual Editor enabled
// If not, don't register our TinyMCE plugin
if ( get_user_option( 'rich_editing' ) !== 'true' ) {
return;
}
 
// Setup some filters
add_filter( 'mce_external_plugins', array( &$this, 'add_tinymce_plugin' ) );
add_filter( 'mce_buttons', array( &$this, 'add_tinymce_toolbar_button' ) );
         
    }

This checks if the current logged in WordPress user can edit Posts or Pages. If they can’t, there’s no point in registering our TinyMCE Plugin for that User, as they’ll never see the Visual Editor.

We then check if the user is using the Visual Editor, as some WordPress users turn this off via Users > Your Profile. Again, if the user is not using the Visual Editor, we return (exit) the function, as we don’t need to do anything else.

Finally, we add two WordPress Filters – mce_external_plugins and mce_buttons, to call our functions which will load the required Javascript file for TinyMCE, and add a button to the TinyMCE toolbar.

Registering the Javascript File and Button to the Visual Editor

Let’s go ahead and add the add_tinymce_plugin function:

/**
* Adds a TinyMCE plugin compatible JS file to the TinyMCE / Visual Editor instance
*
* @param array $plugin_array Array of registered TinyMCE Plugins
* @return array Modified array of registered TinyMCE Plugins
*/
function add_tinymce_plugin( $plugin_array ) {
 
$plugin_array['custom_link_class'] = plugin_dir_url( __FILE__ ) . 'tinymce-custom-link-class.js';
return $plugin_array;
 
}
    

This function tells TinyMCE that it needs to load the Javascript files stored in the $plugin_array array. These Javascript files will tell TinyMCE what to do.

We also need to add some code to the add_tinymce_toolbar_buttonfunction, to tell TinyMCE about the button we’d like to add to the toolbar:

/**
* Adds a button to the TinyMCE / Visual Editor which the user can click
* to insert a link with a custom CSS class.
*
* @param array $buttons Array of registered TinyMCE Buttons
* @return array Modified array of registered TinyMCE Buttons
*/
function add_tinymce_toolbar_button( $buttons ) {
 
array_push( $buttons, '|', 'custom_link_class' );
return $buttons;
}

This pushes two items onto the array of TinyMCE buttons: a separator (|), and our button’s programmatic name (custom_link_class).

Save your plugin, and then edit a Page or Post to view the Visual Editor. Chances are, the toolbar isn’t displaying right now:

wordpress-tinymce-plugin-missing-toolbar

Don’t worry – if we use our web browser’s inspector console, we’ll see that a 404 error and notice have been generated by TinyMCE, telling us that it can’t find our Javascript file.

wordpress-tinymce-plugin-js-404

That’s good – it means we’ve successfully registered our TinyMCE custom plugin, and now need to create the Javascript file to tell TinyMCE what to do.

Creating the Javascript Plugin

Create a new file in your wp-content/plugins/tinymce-custom-link-class folder, and name it tinymce-custom-link-class.js. Add this code in your js file:

(function() {
    tinymce.PluginManager.add( 'custom_link_class', function( editor, url ) {
         
    });
})();

This calls the TinyMCE Plugin Manager class, which we can use to perform a number of TinyMCE plugin related actions. Specifically, we’re adding our plugin to TinyMCE using the add function.

This accepts two items; the name of the plugin (custom_link_class) and an anonymous function.

If you’re familiar with the concept of functions in coding, an anonymous function is simply a function with no name. For example, function foobar() { ... } is a function that we could call somewhere else in our code by using foobar().

With an anonymous function, we can’t call that function somewhere else in our code – it’s only being called at the point the add() function is invoked.

Save your Javascript file, and then edit a Page or Post to view the Visual Editor. If everything worked, you’ll see the toolbar:

wordpress-tinymce-plugin-visual-editor-toolbar

Right now, our button hasn’t been added to that toolbar. That’s because we’ve only told TinyMCE that we are a custom plugin. We now need to tell TinyMCE what to do – that is, add a button to the toolbar.

Update your Javascript file, replacing your existing code with the following:

(function() {
    tinymce.PluginManager.add( 'custom_link_class', function( editor, url ) {
        // Add Button to Visual Editor Toolbar
        editor.addButton('custom_link_class', {
            title: 'Insert Button Link',
            cmd: 'custom_link_class',
        }); 
    });
})();

Notice our anonymous function has two arguments. The first is the editorinstance – this is the TinyMCE Visual Editor. In the same way we can call various functions on the PluginManager, we can also call various functions on the editor. In this case, we’re calling the addButton function, to add a button to the toolbar.

Save your Javascript file, and go back to your Visual Editor. At a first look, nothing seems to have changed. However, if you hover your mouse cursor over to the right of the top row’s rightmost icon, you should see a tooltip appear:

wordpress-tinymce-plugin-button-noicon

We’ve successfully added a button to the toolbar, but it needs an image. Add the following parameter to the addButton function, below the title: line:

image: url + '/icon.png',

url is the URL to our plugin. This is handy if we want to reference an image file within our plugin folder, as we can append the image file name to the URL. In this case, we’ll need an image called icon.png in our plugin’s folder. Use the below icon:
icon

Reload our Visual Editor, and you’ll now see your button with the icon:
wordpress-tinymce-plugin-button-icon

Defining a Command to Run

Right now, if you click the button, nothing will happen. Let’s add a command to TinyMCE telling it what to do when our button is clicked.

In our Javascript file, add the following code below the end of the editor.addButton section:

// Add Command when Button Clicked
editor.addCommand('custom_link_class', function() {
    alert('Button clicked!');
});

Reload our Visual Editor, click the button and an alert will appear confirming we just clicked the button:
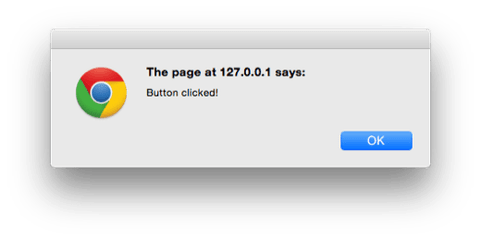
wordpress-tinymce-plugin-alert-button-clicked

Let’s replace the alert with a prompt, asking the user for the link they want to wrap around the selected text in the Visual Editor:

// Add Command when Button Clicked
editor.addCommand('custom_link_class', function() {
    // Check we have selected some text that we want to link
    var text = editor.selection.getContent({
        'format': 'html'
    });
    if ( text.length === 0 ) {
        alert( 'Please select some text to link.' );
        return;
    }
 
    // Ask the user to enter a URL
    var result = prompt('Enter the link');
    if ( !result ) {
        // User cancelled - exit
        return;
    }
    if (result.length === 0) {
        // User didn't enter a URL - exit
        return;
    }
 
    // Insert selected text back into editor, wrapping it in an anchor tag
    editor.execCommand('mceReplaceContent', false, '' + text + '');
});

This block of code performs a few actions.

First, we check if the user selected some text to be linked in the Visual Editor. If not, they’ll see an alert telling them to select some text to link.
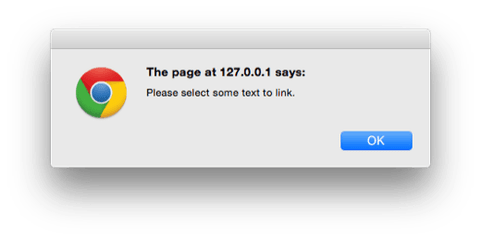
wordpress-tinymce-plugin-alert-select-text

Next, we ask them to enter a link, again checking if they did. If they cancelled, or didn’t enter anything, we don’t do anything else.


Finally, we run the execCommand function on the TinyMCE editor, specifically running the mceReplaceContent action. This replaces the selected text with our HTML code, which comprises of an anchor link with class=”button”, using the text the user selected.

If everything worked, you’ll see your selected text is now linked in the Visual Editor and Text views, with the class set to button:

wordpress-tinymce-plugin-link-visual

Summary

We’ve successfully created a WordPress plugin which adds a button to the TinyMCE visual editor in WordPress. This tutorial has also covered some of the basics of the TinyMCE API and WordPress filters available for TinyMCE integrations.

We added code so that when a user clicks our custom button, they’re prompted to select some text in the Visual Editor, which they can then link to a URL of their choice. Finally, our plugin then replaces the selected text with a linked version that contains a custom CSS class called button.

We hope this tutorial helped you learn how to create a WordPress TinyMCE plugin.

Easy Guide to Move from LiveJournal to WordPress

In this tutorial, we will learn how to move your blog from LiveJorunal to WordPress.

Issues in Moving LiveJournal to WordPress

Unlike other platforms, LiveJournal does not allow you to setup redirects. This means that users visiting your old LiveJournal site will not be automatically redirected to your self hosted WordPress.org site.

Your only hope is to delete your LiveJournal account and wait for search engines to crawl and rank your new site. Even if you delete your old LiveJournal account, search engines will keep showing it in results for some time.

Another issue is that WordPress importer will not import your images. You can either download your images from LiveJournal and upload them manually, or you can follow instructions in our tutorial on how to import external images in WordPress.

Why you Should Move From LiveJournal to WordPress?

First, let’s make it clear that when we say WordPress, we mean self-hosted WordPress.org site and not the free WordPress.com blog. Please take a look at our guide on the difference between WordPress.com vs WordPress.org site.

LiveJournal comes with features like protected posts, friends, communities, etc. However, it is very limited in terms of how you display or control your journal. The basic free plan is even more limited than the paid plans.

On the other hand, WordPress allows you to create password protected posts(journal entries are called posts in WordPress). It has nested comments just like LiveJournal. It does not have communities feature, but you can connect your WordPress site to other online communities and even run your own using a WordPress forum plugin.

WordPress is open source and free (as in freedom). You own your content, and you can do whatever you want with it. You are free to extend your journal in any way you want. You can even make money out of your WordPress site.

Still not convinced? See our guide on why you should use WordPress for more reasons to switch.

Before You Start

To get started with WordPress, the first thing you would need is a good WordPress hosting company and your own domain name. We highly recommend Bluehost because they will give you a free domain and 50% off their hosting plan (special for WPCademy users). Bluehost is also an officially recommended hosting provider of WordPress.

If you want a Bluehost alternative, then take a look at Siteground who also offer the same special offer to WPCademy users.

Once you have signed up for WordPress hosting and set up your domain name, the next step is to install WordPress on your hosting account. We have a step by step tutorial on how to install WordPress. Once you have installed WordPress, it is time to move your content from LiveJournal to WordPress.

Importing Content From LiveJournal to WordPress

WordPress comes with a nifty import tool that automatically imports your LiveJournal entries, comments, and tags into WordPress. Simply visit Tools » Import page and click on LiveJournal.

LiveJournal Import tool in WordPress

WordPress will now show you a popup to install the LiveJournal importer plugin. You may see a warning about the plugin not tested with your version of WordPress. You can safely ignore this and click on Install Now button.

Install LiveJournal Importer

The LiveJournal Importer plugin will now be installed on your WordPress site. You will need to click on activate plugin and run importer link.

Activate and run LiveJournal importer

You will now see the LiveJournal Importer page where you need to enter your LiveJournal username and password. This allows your WordPress site to access your content on LiveJournal.

LiveJournal Importer settings

If you have password protected posts on your LiveJournal site, then you will need to enter a password which will be used on all protected posts.

Once you are done, click on the ‘Connect to LiveJournal and Import’ button. WordPress will now start importing your content. The process is divided into different steps and may take a long time if you have many entries and comments. If it fails abruptly during the import, then you can safely retry again. The importer is smart enough to avoid duplicate entries.

You will see a success message when the importer has finished its job.

Import finished

You can now visit Posts section to see all your posts.

Customizing WordPress

The first customization that most beginners want to try is WordPress Themes. There are thousands of free and paid WordPress themes that you can install on your website. See our guide on selecting the perfect theme for WordPress.

The real power of WordPress lies in the plugins. There are thousands of free WordPress plugins that you can install on your WordPress site right away. See our expert-pick of 20 must have WordPress plugins for 2015 or take a look at the plugins we are using in WPCademy’s Blueprint.

We understand that most beginners will need help with the new platform. WPCademy is the largest unofficial WordPress resource site on the planet. We have free tutorials, guides, and videos to help you quickly learn WordPress. See how you to make the most out of WPCademy’s free resources.

We hope this tutorial helped you move from LiveJournal to WordPress.

Easy Guide to Show User Registration Date in WordPress

In this tutorial, we will learn how to show user registration date in WordPress.

Where and How You Want to Show User Registration Date?

Some of you may just want to display a user’s registration date in the admin columns of the Users page. This will give you a quick overview of when a user joined your website and allow you to sort by registration date.

Another usage scenario is to display a user’s registration date on the ‘Edit Profile’ page. This will allow any administrator and the user themselves to see when they joined your website.

Last but probably the most popular usage scenario is when you want to display the user registration date on their public profile on the front-end of your website.

Let’s take a look at how you can do all of them.

Adding Registered Date Column on Users Page in Admin Area

First thing you need to do is install and activate the Admin Columns plugin. Upon activation, you need to visit Settings » Admin Columns to configure the plugin.
 Settings » Admin Columns to configure

Under the admin columns tab, click on users and then click on add column button.

Next select ‘Registered” in the Type drop down menu and click on store updates button.

You can now visit the users screen where you will see a new column labeled ‘Registered’ showing the date when a user registered on your WordPress site.

Users table with registration date column

See what other things you can do to add and customize admin columns in WordPress.

Showing Registration Date Field in User Profile

For showing registration date on the edit profile page, you will need to upload a custom plugin to your website.

Simply create a new file on your computer using a text editor like Notepad and save it as membersince.php on your desktop.

Next open the file and paste the following code inside it.

<?php
/*
Plugin Name: Member Since
Plugin URI:  http://www.wpbeginner.com
Description: Adds registration date on edit user profile screen. 
Version:     1.0
Author:      WPBeginner
*/
 
 
namespace ShowMemberSince;
add_action( 'plugins_loaded', 'ShowMemberSince\init' );
/**
 * Adding needed action hooks
*/
function init(){
  foreach( array( 'show_user_profile', 'edit_user_profile' ) as $hook )
        add_action( $hook, 'ShowMemberSince\add_custom_user_profile_fields', 10, 1 );
}
/**
 * Output table
 * @param object $user User object
 */
function add_custom_user_profile_fields( $user ){
    $table =
    '


Save your file and then upload it to your WordPress site.

Finally you can connect to your WordPress site using a FTP client and then go to /wp-content/plugins/ folder. Select the membersince.php file from your computer and then upload it.

Now you can go to your WordPress plugins page and activate this plugin on your website.

That’s all. Verify everything is working by editing a user profile on in your WordPress admin area, and you will see the user registration date.

Showing member registration date in WordPress user profile

Showing User Registration Date on Your Website

In this method, we will be using a simple shortcode to display any users registration date on the front-end of your WordPress site.

First you will need to add the following code in your theme’s functions.php file or in a site-specific plugin.

function wpb_user_registration_date($atts, $content = null ) { 
 
$userlogin = shortcode_atts( array(
'user' => FALSE,
), $atts );
 
$uname = $userlogin['user'];     
 
if ($uname!== FALSE) {             
 
$user = get_user_by( 'login', $uname );  
if ($user == false) { 
 
$message ='Sorry no such user found.'; 
 
 
} else { 
 
$udata = get_userdata( $user-ID );
$registered = $udata->user_registered;
 
$message =  'Member since: ' . date( "d F Y", strtotime( $registered ) );
 
}
     
} else { 
 
$message = 'Please provide a username.'; 
 
} 
 
return $message; 
 
} 
 
add_shortcode('membersince', 'wpb_user_registration_date');

Next, you can display a user’s registration date by simply using the shortcodelike this:

[membersince user=peter]

Replace peter with the username that you want to show.

We hope this tutorial helped you show registration date in WordPress user profiles.

Easy Guide to Restore a WordPress Site with DB Backup

In this tutorial, we will learn how to restore a WordPress site with just a database backup. It will not be a complete restore, but we will show you how you can minimize the damage.

Introduction

For the sake of this tutorial, we are assuming that you have your WordPress database backup in a zip file. If you do not have one yet, here is how to make a WordPress database backup manually.

If you are recovering from a bad experience with your web hosting provider, then it is probably the time to find a better host. We have hand picked some of the best WordPress hosting providers. These are the companies that we have worked with and trust with our own projects.

Preparing to Restore WordPress Database Backup

First, you will need to create a new database. Simply login to your cPanel account and click on MySQL Databases under the Database section.

MySQL databases in cPanel

Next, provide a name for your database and then click on create database button.

Creating new MySQL database

Now that you have created a database, you need a MySQL user who will be assigned all privileges to work on your newly created database.

On the same MySQL databases page, scroll down to MySQL users section and add a new user.

Adding a new MySQL user

Provide a username and a strong password for your database user and then click on create user button.

Next, you need to add this user to the MySQL database. Scroll down to ‘Add user to database’ section and select the user along with the database from the drop down menus and then click on the add button.

Adding a user to database

Your new database is now ready for WordPress.

Importing WordPress Database Backup

First you need to visit the cPanel dashbaord. Under the databases section, you need to click on phpMyAdmin.
Launching phpMyAdmin from cPanel

On then next step, select the database you created earlier on the phpMyAdmin page and then click on the Import button.

Now you need to click on the choose file button to upload your WordPress database backup file. Simply click on the go button at the bottom of the page to start importing.

Importdb

You will see a success message when the import job is finished.

You have successfully imported your WordPress database. Now the next step is to install WordPress using your new database.

Restoring Your WordPress Site

For a manual restore of WordPress, you will need to manually install WordPress on your server. Visit our step by step WordPress installation tutorialand jump to the section ‘how to install WordPress using FTP’ for detailed instructions.

During the installation, when you reach ‘create a configuration file’ step. Enter the database name and user you created earlier.

Creating configuration file step during WordPress installation

You will now see a message that WordPress can connect to your database, and you can run the installation now.

Clicking on the install button will now show you the ‘Already Installed’ message.

Already installed message

That’s all you can now proceed to login to your WordPress site.

Restoration Troubleshooting

Since you do not have your old WordPress files, there will be several things missing. Some of them can be easily restored while others will be a bit difficult. We will go through all of them one by one.

1. Theme

Simply install a fresh copy of your old WordPress theme. If you made direct changes to your theme files, then all those changes will be gone.

You will have to go through theme options to set it up the way it was before.

2. Widgets

Widgets play an important role in WordPress themes. Luckily, they are stored in your WordPress database and switching to your old theme will restore some of your widgets.

You can always go to Appearance » Widgets to add and rearrange widgets in your sidebars.

Some WordPress plugins come with their own widgets. In order to use those widgets, you will first need to install and activate those plugins.

3. Permalinks

Your site’s permalink structure is also stored in database, and it will be automatically restored. However, if you are seeing 404 errors on front-end of your site, then you need to refresh permalink settings.

Simply go to Settings » Permalinks and click on the save changes button without changing anything. This will refresh your WordPress url structure.

4. Plugins

WordPress stores a record of your site’s active plugins. When you visit the plugins page for the first time, WordPress will show you a list of errors for each plugin that was in the database but is not installed anymore.

Deactivated plugins

Copy all the plugin names and start installing and activating them one by one.

Recovering Lost Images for your WordPress Site

Finding and replacing lost images on your website would be the trickiest part of the recovery. Depending on how much content and images you have, this can take a long time.

Unfortunately, there is no easy way around it. You will have to use a variety of tools to extract your images from different sources. Your chances of recovering all images are fairly low.

1. Look in Your Browser Caches

If you have recently lost your website, then you can look into your browser cache.

Firefox users can download CacheViewer2 add-on to easily find images from their website stored in browser cache.

Finding cached images in Firefox

You can just right click on an image and select save as from the menu.

Google Chrome users on Windows can try Chrome Cache Viewer.

Google Chrome users on Mac will be out of luck. We were unable to find any reasonable solution to browse, preview, and save image from Google Chrome cache on Mac.

2. Look for Your Images in Web Caches

There are several web services that keep cached versions of websites. You can start by looking for your images in Google’s image search. Simply enter your site’s URL and you will be able to see images Google found on your website.

If you are restoring a much older site and can’t find images on Google or Bing, then you can try Archive.org. It is a non-profit organization that stores snapshots of websites for historical purposes.

Internet Archive Way Back Machine

Finding and Replacing Images on Your Website

If you did not have much content on your old site, then you can manually replace images in your posts. However, if you have a lot of content then finding and replacing images manually will be difficult.

Here is how you can easily locate broken images and replace them.

First, you need to install and activate the Broken Link Checker plugin. Upon activation, simply go to Tools » Broken Links Checker page. The plugin will show you a list of all broken links on your site.

Find and replace missing images in WordPress

Broken images are also considered broken links, so they will appear in the list as well. You can click on the link text column to sort the broken links list to show images first.

Now you can replace the images that you have recovered by editing posts. For the images that you were not able to recover, you can either try to recreate them or simply unlink them.

Bonus Tip

It will be hard to recover all your lost data. Your site may even show errors and affect user experience. This is why you see many experts strongly urging you to set up automatic backups.

We recommend using BackupBuddy. It is a premium WordPress backup plugin with easy restore options and the ability to automatically create and save your backups on the cloud.

That’s all, we hope this tutorial helped you restore your WordPress site from database backup.

Easy Guide to Display Code on Your WordPress Site

In this tutorial, we will learn how to easily display code on your WordPress site.

First you need to install and activate the Syntax Highlighter Evolved plugin. For more details, see our step by step guide on how to install a WordPress plugin.

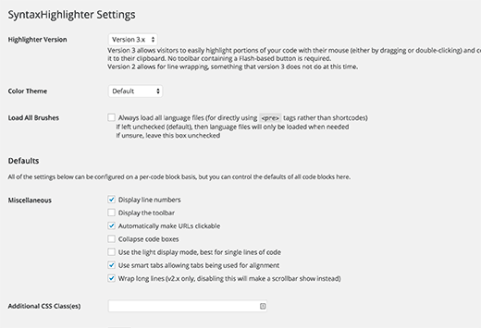
Upon activation, you need to visit Settings » Syntax Highlighter to configure the plugin settings.

Syntax Highlighter settings page

The default plugin settings should work for most websites. However, you should review all settings and make changes if necessary.

Each option has detailed description to explain what it does. Once you are done, simply click on the save changes button to store your settings.

Syntax Highlighter Evolved uses simple shortcodes to display code. For each programming language you need wrap your code in the shortcode for that language.

For PHP you would wrap your code like this:

<?php
echo “Hello World”;
?>

It will appear in your post like this:

For CSS you will wrap your code like this:

.entry-title {
font-family:”Open Sans”, arial, sans-serif;
font-size:16px;
color:#272727;
}

It will appear on your site like this:

.entry-title { 
font-family:"Open Sans", arial, sans-serif;
font-size:16px;
color:#272727; 
}

Syntax Highlighter will automatically highlight the code for that particular language. It will also add line numbers and handle tab indent properly. Your users will be able to easily copy and paste code snippets from your WordPress site.

How to Display Code in WordPress Without Using Plugin

Many bloggers do not run a development blog, so they don’t need to add sample code snippets in their posts very often. For rare occasions, you can add code by encoding the code into HTML entities. Like this:

&gt;?php echo "Hello World"; ?&lt;

The problem with converting code into HTML entities is that it is difficult to do manually. You can use online tools like this one, to convert code into HTML entities.

By converting PHP, HTML, JavaScript code into HTML entities, you can paste them into your WordPress posts. For additional styling you can wrap code between <code> and </code> tags.

We hope this tutorial helped you find the best syntax highlighter plugin for WordPress.

Easy Guide to Disable Auto Linking of URLs in WordPress Comments

In this tutorial, we will learn how to disable auto-linking of URLs in WordPress comments.

Why WordPress Autolinks Text URLs in Comments?

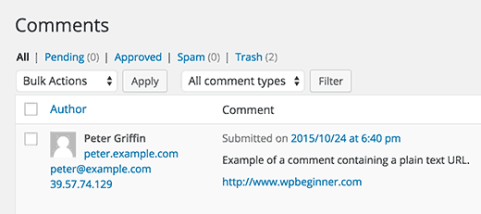
WordPress automatically converts text URLs into links which makes it easier to visit the link while moderating comments.

This auto-linking is not stored in your database. WordPress makes URLs clickable when displaying them on screen in admin area as well as comments section below your articles.

Auto-linked clickable text URL in WordPress comments

Some of these comments are genuine where commenters didn’t know how to add a link in comments. But many spam comments also contain plain URLs pasted directly in the comment text.

Disabling Auto-Link in WordPress Comments

Simply add this single line of code in your theme’s functions.php file or in a site-specific plugin.

 remove_filter( 'comment_text', 'make_clickable', 9 );

WordPress does not store plain text URLs as links in the database. Instead it changes them into clickable links on the fly. This code simply disables the filter that makes URLs clickable.

This makes plain text URLs non-clickable in admin area and comments section below your posts. Removing this code will re-enable the auto linking.

If you are adding it to your theme’s functions.php file, then updating your theme will overwrite your functions file.

Also keep in mind that this code only works on plain text URLs. If a user decided to create a link by adding the proper HTML tag, then those links will appear as they should.

If you want to complete turn off any HTML in comments, then take a look at our tutorial on how to disable HTML in WordPress comments.

We hope this tutorial helped you disable auto linking of URLs in WordPress comments.