Easy Guide to Set, Get, and Delete WordPress Cookies

In this ultimate guide, we will show you how to set, get, and delete WordPress cookies.


Editors Note: This is an advanced tutorial. It requires you to have proficient understanding of HTML, CSS, WordPress site, and PHP.

What Are Cookies?

Cookies are plain text files that are created and stored in users browser when they visit a website. Cookies are used to add different features on a website.

Following are some of the common usage of cookies on various websites.

  • Store and manage user’s login information
  • Store temporary session information during a users visit
  • Ecommerce stores use cookies to remember cart items during a user’s visit
  • Track user activity on a site to offer personalized user experience
  • and more

As you can see, cookies are highly useful tool for website owners, but they can also be a bit invasive. Recent trends in email marketing, growth hacking, and online marketing as a whole allow websites to set cookies that act as a beacon and can be used to store and even share user activity across websites.

This is why European Union enacted the EU Cookie Law, which requires website owners to declare that they use cookies to store information.

How Cookies are Used in a Typical WordPress Website

By default, WordPress uses cookies to manage logged-in user sessions and authentication. It also uses cookies to remember a user’s name and email address if they fill out a comment form.

However, many WordPress plugins on your website may also set their own cookies.

If you are using third party services on your website like Google Analytics or Google AdSense, then they may also set cookies on your website.

You can view all website cookies in your browser’s settings. For example, in Google Chrome you need to go to settings and search for ‘content settings’.

Content settings in Google Chrome

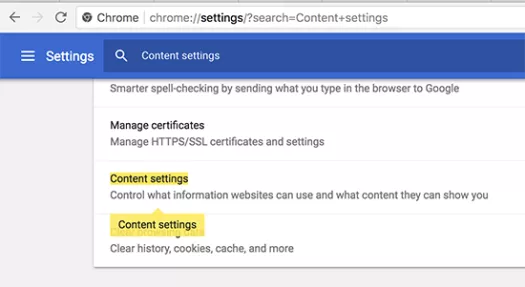
Under content settings, you will need to click on ‘Cookies’ to open the cookies settings page.

Next, you need to click on the ‘All cookies and site data’ option.

On the next page, you will see a list of all cookies and site data stored on your browser by all websites you visited.

You can type a website address in the search box, and it will show you the data stored by that website.

Clicking on a single item will show you more details about individual cookies and their contents.

How to Set a Cookie in WordPress

To follow this tutorial, you will need to add code to your theme’s functions.phpfile or a site-specific plugin. If you haven’t done this before, then please take a look at our guide on how to copy and paste code snippets in WordPress.

First we will use the setcookie() function in PHP. This function accepts the following parameters.

  • Cookie name
  • Cookie value
  • Expire (Optional: sets a time period after which cookie expires)
  • Path (Optional, by default it will use the site’s root)
  • Domain (Optional, by default uses your website’s domain)
  • Secure (Optional, If true then only transfers cookie data via HTTPS)
  • httponly (Optional, when set true the cookie is only accessible via HTTP and cannot be used by scripts)

Now let’s add a code snippet to your WordPress site. This code stores the exact timestamp when a user visited your website in a cookie.

function wpb_cookies_tutorial1() { 
 
$visit_time = date('F j, Y  g:i a');
 
if(!isset($_COOKIE[$wpb_visit_time])) {
 
// set a cookie for 1 year
setcookie('wpb_visit_time', $current_time, time()+31556926);
 
}
 
} 

You can now visit your website and then check your browser cookies. You will find a cookie with the name wpb_visit_time.

How to Get a Cookie and Use it in WordPress

Now that we have created this cookie that’s stored in user’s browser for 1 year, let’s take a look at how can we use this information on our website.

If you know the name of a cookie, then you can easily call it anywhere in PHP using the $_COOKIE[] variable. Let’s add some code that not only sets the cookie but also uses it to do something on your website.

function wpb_cookies_tutorial2() { 
// Time of user's visit
$visit_time = date('F j, Y g:i a');
 
// Check if cookie is already set
if(isset($_COOKIE['wpb_visit_time'])) {
 
// Do this if cookie is set 
function visitor_greeting() {
 
// Use information stored in the cookie 
$lastvisit = $_COOKIE['wpb_visit_time'];
 
$string .= 'You last visited our website '. $lastvisit .'. Check out whats new'; 
 
return $string;
}   
 
} else { 
 
// Do this if the cookie doesn't exist
function visitor_greeting() { 
$string .= 'New here? Check out these resources...' ;
return $string;
}   
 
// Set the cookie
setcookie('wpb_visit_time',  $visit_time, time()+31556926);
}
 
// Add a shortcode 
add_shortcode('greet_me', 'visitor_greeting');
 
} 
add_action('init', 'wpb_cookies_tutorial2');

We have commented the code to show you what each part does. This code uses the information stored in the cookie and outputs it using the shortcode. You can now add shortcode [greet_me] anywhere on your website, and it will show when a user last visited.

Feel free to modify the code to make it more useful for your website. For example, you can show recent posts to returning users and popular posts to new users.

Deleting a Cookie in WordPress

So far we have learned how to set a cookie and use it later in your website. Now let’s take a look at how to delete a cookie.

To delete a cookie, you need to add the following line to your code.

unset($_COOKIE['wpb_visit_time']);

Don’t forget to replace wpb_visit_time with the name of the cookie you are trying to delete.

Let’s put this code in some context using the same sample code we used above. This time we will delete a cookie and set it again with new information.

function wpb_cookies_tutorial2() { 
// Time of user's visit
$visit_time = date('F j, Y g:i a');
 
// Check if cookie is already set
if(isset($_COOKIE['wpb_visit_time'])) {
 
// Do this if cookie is set 
function visitor_greeting() {
 
// Use information stored in the cookie 
$lastvisit = $_COOKIE['wpb_visit_time'];
 
$string .= 'You last visited our website '. $lastvisit .'. Check out whats new'; 
 
// Delete the old cookie so that we can set it again with updated time
unset($_COOKIE['wpb_visit_time']); 
 
return $string;
}   
 
} else { 
// Do this if the cookie doesn't exist
function visitor_greeting() { 
$string .= 'New here? Check out these resources...' ;
return $string;
}   
}
add_shortcode('greet_me', 'visitor_greeting');
 
// Set or Reset the cookie
setcookie('wpb_visit_time',  $visit_time, time()+31556926);
} 
add_action('init', 'wpb_cookies_tutorial2');

As you can see, this code deletes the cookie once we have used the information stored inside. Later we set the cookie again with the updated time information.

We hope this article helped you learn how to easily set, get, and delete WordPress cookies.

Easy Guide to Fix Custom Fields Not Showing in WordPress

In this article, we will show you how to easily fix custom fields not showing issue in WordPress.

Fixing Custom Fields Not Showing Issue in WordPress

Custom fields are typically associated with WordPress post, pages, or custom post types. Often you will find custom fields mentioned in various WordPress tutorials around the web, but you will likely not see the custom fields option on your site specially if you recently started your WordPress blog.

In the past, custom fields were visible by default on the post edit screen of all WordPress sites. However since it is an advance feature, the WordPress core development team decided to hide custom fields by default for all new users in the WordPress 3.1 release.

They also made it easy for anyone to make them visible with just two clicks from within the post edit screen.

Simply create or edit an existing post / page, and then click on the ‘Screen Options‘ button at the top right corner of the screen. This will show you a menu with several options that you can show or hide on your post edit screen.

Go ahead and click on the checkbox next to ‘Custom Fields’ option.
Show custom fields

Note: If you don’t see the Custom Fields option on your site, then please scroll to the troubleshooting option below in the article.

You can now scroll down on the post edit screen, and you will notice a new meta box labeled ‘Custom Fields’ below your post editor.
Custom Fields box

Since WordPress remembers your display choice, it will continue to display the custom fields box whenever you are editing posts on your website.

You can use this box to add, edit, and delete custom fields and their values.

What are Custom Fields? What Can You Do with them?

By default, when you write a new post, page, or any content type, WordPress saves it into two different areas. The first part is the body of your content that you add using the post editor.

The second part is the information about that particular content. For example, title, author name, date / time, and more. This bit of information about the post is called metadata.

Apart from the default post metadata, WordPress also allows you to save custom metadata by using custom fields.

To learn more, see our beginner’s guide to WordPress custom fields with examples, tips, and tricks that you can use on your website.

WordPress developers use custom fields to store custom post metadata for your posts. For example, the Yoast SEO plugin uses custom fields to store SEO settings for your posts.
Yoast SEO meta box

However instead of using the default custom fields box shown above, these plugin developers create their own custom meta boxes. This makes it easier for users to input information.

If you want to create a custom meta box to easily input custom metadata, then see our guide on how to add custom meta boxes in WordPress.

Troubleshooting

Recently one of our readers came to us with a problem where the Custom Fields option was missing from the WordPress screen options. After some investigation, we were able to find the cause of the issue.

If your WordPress site is missing the custom fields option under the ‘Screen Options’ menu, then you need to check if you have the Advanced Custom Fields (ACF) plugin active on your site.

ACF is a very popular WordPress plugin that developers use to create custom meta boxes. ACF is running on over 1 million websites.

In ACF version 5.5.13, they added a setting to remove the default WordPress custom field metabox to speed up the load times on the post edit page. The idea being that you shouldn’t need the default metabox since you’re using ACF.

However if you need to have the default WordPress custom field metabox enabled, then you need to add the following code to your WordPress theme’s functions.php file.

add_filter('acf/settings/remove_wp_meta_box', '__return_false');

This will solve the custom fields option missing issue in WordPress.

We hope this article helped you fix the custom fields not showing issue on your WordPress site.

Easy Guide to Upload a HTML Page to WordPress without 404 Errors

In this article, we will show you how to properly upload a HTML page to your WordPress site without causing 404 errors.

Why Upload HTML Pages to WordPress?

WordPress comes with a built-in content type to add pages to your website. Often WordPress themes add pre-designed page templates to display your pages.

There are even WordPress landing page plugins that allow you to create beautiful page templates with a drag and drop builder.

This means that in most cases, you shouldn’t need to upload a HTML page to your WordPress site.

However, sometimes a user may have static HTML pages from their old website or a static template that they really like and want to use. In these scenarios, you will need to upload your HTML page to WordPress.

Since, WordPress comes with its own SEO friendly URL structure, it can cause a 404 error if you simply uploaded your HTML page and tried to access it.

That being said, let’s take a look at how to upload a HTML page to your WordPress site without causing 404 errors.

Uploading HTML Page to WordPress Site

Step -01: Before you upload your HTML page to the WordPress site, you need to make sure that the ‘index.html’ file is renamed to ‘index.php’.

HTML Template File

Step-02: After that, you need to add all files including the HTML page, CSS, and other folders to a Zip archive.

Step-03: Windows users can right-click and select Send to » Compressed Zip Folderoption to create a zip file. Next, simply drag and drop all files and folders for your HTML page to the zip file.

Zip Archive HTML Page

Mac users can select the parent folder containing all files and folders, and then right-click to select ‘Compress folder’ option.

Create zip file in Mac

Step – 04: Next, you need to go to the cPanel of your WordPress hosting account. In the cPanel, you need to scroll down to the Files section and then click on the File Manager app.

Step-05: Once you are in File Manager, you need to navigate to the website root folder which is usually called public_html and contains all your WordPress files folders. From there, you need to click on the Folder link from the top menu to create a new empty folder.

A popup will open where you need to add a name for the new folder. Use a name that you want to use as the URL of your HTML page and then click on the Create New Folder button.

Create zip file in Mac

Step -06: After creating the folder successfully, you need to open it and click on the Upload button from the top menu to select and upload the zip file you created earlier from your computer. You’ll see the progress bar while the zip file uploads to your site.

Once uploaded, you need to select the zip file and then click on Extract button from the top menu.

Step -07: You will be asked where to extract the files. Simply select the same new folder that you created and click on the Extract File(s) button.

File Manager will now extract the zip file, and you will be able to see files in your folder.

Note: You can now delete the zip file from here. It doesn’t affect your HTML page or any other folders that are extracted.

Create zip file in Mac

Step – 08: Now you can visit this page in the browser by using the name of the folder (For example, yourwebsite.com/example). If your server doesn’t support the redirection, then you may see a 404 error. It happens because your ‘index.php’ file is not redirected on loading the URL in browser.

It is one of the common WordPress errors and can be fixed easily.

Using the File Manager app, you need to edit .htaccess file in your website’s root folder and add the following code:

RewriteRule ^(.*)index\.(php|html?)$ /$1 [R=301,NC,L]

This code will redirect your ‘index.php’ file and load it in the browser. If you are using a case-sensitive name for a file or folder, then the above code will also redirect that to show you the content.

We hope this article helped you learn how to upload an HTML page to your WordPress site without 404 error.

Easy Guide to Automatically Change WordPress SALT Keys

In this article, we will show you how to automatically change WordPress SALT keys without any code.

What are SALT Security Keys?

Salt Keys aka security keys in WordPress are the variables that store your login credentials in an encrypted form. By default, WordPress saves your login information in cookies which given the right conditions can be compromised specially when using public computers.

One way to stay ahead of this risk is to change your security keys manually from your wp-config.php file that is available in the root folder of your WordPress site. The security and SALT keys will look like this:

Security Config Keys

We recommend changing these codes on a regular basis to improve your website security (every 3 – 6 months). You can manually generate the Salt keys from WordPress.org secret-key service.

While changing the keys manually isn’t hard, it’s still time consuming to manually edit a core file and upload via FTP. In case, you don’t have coding knowledge, or don’t have the time, then this solution is for you.

Let’s take a look at how easily you can set an automated process to change security and SALT keys in WordPress:

How to Change WordPress SALT Keys?

The first thing you need to do is install and activate Salt Shaker plugin. For more details, see our guide on how to install a WordPress plugin.

Once the plugin is activated, you need to go to Tools » Salt Shaker page in your WordPress admin to set a schedule for changing the SALT keys.

You need to check the option for automatically changing the Salt keys and then select your schedule from the dropdown. You can automatically change the authentication keys daily, weekly, and monthly.

In case you want to change the security and Salt keys manually, then you can do so by clicking on the Change Now button.

Note: Every time your WordPress SALT keys are changed, you and other users will be automatically logged out from your WordPress site on all devices. You can easily re-login to your WordPress dashboard by going to the WordPress login page.

We hope this article helped you automatically change the WordPress SALT keys.

Easy Guide to Use Shortcodes in your WordPress Sidebar Widgets

In this article, we will show you how to use shortcodes in your WordPress sidebar widgets.


What Are Shortcodes?

Shortcodes allow you to add dynamic items like contact form, tables, and others inside your WordPress content area.

You can also use shortcodes in your widgets to add these dynamic items in your sidebars and other widget-ready area.

Let’s take a look at how to easily add and use shortcodes in your WordPress sidebar widgets.

Method 1: Adding Shortcode in WordPress Sidebar Using Text Widget

First thing you need to do is drag & drop a Text widget to your WordPress sidebar on the Appearance » Widgets screen in your dashboard. After adding the widget, you can simply add your shortcode inside the text edit area of the widget.

Don’t forget to click on the ‘Save’ button to store your widget settings.

You can now visit your website and see the shortcode in action.

Method 2: Adding Shortcode in WordPress Using Custom HTML Widget

Sometimes you may want to add custom HTML code around your shortcode which may not work so well in the plain text widget. In that case, you will need to add your shortcode using the ‘Custom HTML’ widget.

By default, shortcodes are not allowed to be executed in a custom HTML widget. To change this, you will need to add the following code to your theme’s functions.php file or a site-specific plugin.

add_filter( 'widget_text', 'do_shortcode' );

After that, you can simply add a ‘Custom HTML’ widget to your sidebar and add your shortcode inside it.

Don’t forget to click on the save button to store your widget settings.

You can now visit your website to see your shortcode in action.

We hope this article helped you learn how to easily add shortcode to your WordPress sidebar widgets.

Easy Guide to Fix the HTTP Image Upload Error in WordPress

In this article, we will show you how to easily fix the HTTP image upload error in WordPress.


What Causes HTTP Error During Media Upload in WordPress?

There are a number of things that could lead to a HTTP error when you are trying to upload files using the WordPress media uploader. Basically, WordPress is unable to figure out the cause and that’s why it displays the generic ‘HTTP error’ message.

The frustrating part is that this error message doesn’t give you any clue as to what may have caused it. This means that you will have to try different solutions to find the cause and fix the error.

That being said, let’s take a look at how to troubleshoot and fix the HTTP error during media upload in WordPress.

1. Make Sure The HTTP Error is Not Temporary

First, you should wait a few minutes and then try uploading your image file again. This error is sometimes caused by unusual traffic and low server resources, which are automatically fixed on most WordPress hosting servers.

If that doesn’t work, then you may want to try uploading a different image file. If the other file uploads successfully, then try saving your original image file to a smaller size and retry uploading.

Lastly, you may want to try saving the file to a different format. For example, change jpeg to png using an image editing software. After that, retry uploading the file.

If all these steps result in the HTTP error, then this means that the error is not caused by a temporary glitch and definitely needs your immediate attention.

2. Increase WordPress Memory Limit

The most common cause of this error is lack of memory available for WordPress to use. To fix this, you need to increase the amount of memory PHP can use on your server.

You can do this by adding the following code to your wp-config.php file.

define( 'WP_MEMORY_LIMIT', '256M' );

This code increases the WordPress memory limit to 256MB, which would be enough to fix any memory limit issues.

3. Change Image Editor Library Used by WordPress

WordPress runs on PHP which uses two modules to handle images. These modules are called GD Library and Imagick. WordPress may use either one of them depending on which one is available.

However, Imagick is known to often run into memory issues causing the http error during image uploads. To fix this, you can make the GD Library your default image editor.

You can do this by simply adding this code to your theme’s functions.php file or a site-specific plugin.

function wpb_image_editor_default_to_gd( $editors ) {
    $gd_editor = 'WP_Image_Editor_GD';
    $editors = array_diff( $editors, array( $gd_editor ) );
    array_unshift( $editors, $gd_editor );
    return $editors;
}
add_filter( 'wp_image_editors', 'wpb_image_editor_default_to_gd' );

After adding this code, you can retry uploading files using the media uploader. If this doesn’t solve the issue, then you can remove this code and try other methods described in this article.

4. Using The .htaccess Method

This method allows you to control how Imagick uses server resources. Many shared hosting providers limit Imagick’s ability to use multiple threads for faster image processing. However, this would result in you seeing the http error when uploading images.

An easy fix is be to add the following code in your .htaccess file:

SetEnv MAGICK_THREAD_LIMIT 1

This code simply limits Imagick to use a single thread to process images.

We hope this article helped you fix the HTTP error during media upload in WordPress.

Easy Guide to Embed a Facebook Video in WordPress

In this article, we will show you how to easily embed a Facebook video and Facebook live video in WordPress.


Why Add Facebook Videos in WordPress?

We tell our users that they should never upload videos to WordPress. Instead, we recommend using a video sharing site like YouTube.

While YouTube is currently the world’s largest video hosting platform, Facebook is the biggest social network, and their videos are growing fast.

Recently, Facebook introduced auto-play and Facebook live video features. Marketers all over the world are raving about these features because they increase user engagement and overall reach.

You can also use Facebook videos to increase likes on your Facebook page. For a more immersive social experience, you can add Facebook page plugin, install Facebook comments, and add Facebook like button on your WordPress site.

Having said that, let’s take a look at how to embed Facebook videos on a WordPress site.

Embedding Facebook Videos in WordPress

First, you need to locate the video that you want to embed on your WordPress site.

Next, you need to right click on the video name or date, and then select copy link address.

After that, you need to visit the Facebook embedded video player website and scroll down to the code generator section.

You will need to paste the URL you copied earlier in the ‘URL of video’ field.

Next, you need to click on the get code button which will bring up a popup showing you two boxes of code.

The first part of the code needs to go in your website’s header section. There are multiple ways to add this code to your website.

If you are comfortable editing theme files, then you can add it to your theme or a child theme by simply editing the header.php file and paste it right after the <body> tag.

Alternatively, you can install and activate the Insert Headers and Footersplugin. For more details, see our step by step guide on how to install a WordPress plugin.

Upon activation, you need to go to the Settings » Insert Headers and Footerspage in your WordPress admin and paste the code into the footer box. Click on the save button to store your changes.

Important: You only need to add the first part of the code once. Next time you add a Facebook video, you will only need to copy and paste the second part of the code.

Now return to the Facebook video embedder page and copy the second part of the code.

You can add this code in your WordPress posts, pages, or even a sidebar widget. When adding the code to your posts and pages, you need to make sure to switch to the Text editor, otherwise WordPress visual editor will mess up the code.

You can now visit your website to see the Facebook video in action.

How to Embed Facebook Live Video in WordPress

You can embed the Facebook Live video just like you would embed a regular Facebook video. The only difference here is how to get the URL of your Facebook live video.

Facebook doesn’t allow you to get a URL for your live video before you go live. If you want to simultaneously broadcast the Facebook Live video on your website, then you will need to first go live.

Once you are live, right click on the date and select copy link address to get the live video URL.

Once you have the URL, you can go to the Facebook embedded video playerwebsite and paste the link in the ‘URL of video’ field.

The video embed code generator will now fetch and display a preview of your Facebook live video. You need to click on the Get Code button to continue and follow the instructions described above to add these codes to your website.

Once you have added the Facebook live video code to your site, your users will be able to view the Facebook live video directly from your website as well as their Facebook feeds.

We hope this article helped you learn how to embed Facebook videos in WordPress.