How To Install FFmpeg on CentOS 7 Step by Step

Install FFmpeg on CentOS 7

FFmpeg is a cross-platform solution for streaming audio and video as well as recording and conversion. There’s also a great PHP package called ffmpeg-php that allows for easy use of FFmpeg from inside PHP scripts. In this tutorial i will show you the easy way to install ffmpeg and ffmpeg-php (php extension). In this tutorial we will learn how to Install FFmpeg on CentOS 7 Step by Step.

Prerequisites

This tutorial assumes you have at least basic knowledge of Linux, know how to use the shell, and most importantly, you host your site on your own VPS. The installation is quite simple and assumes you are running in the root account, if not you may need to add ‘sudo’ to the commands to get root privileges. I will show you through the step by step installation FFmpeg on a CentOS 7 server.

Install FFmpeg on CentOS 7

Step 1. First let’s start by ensuring your system is up-to-date.

yum clean all
yum install -y epel-release
yum -y update

Step 2. Installing the Nux repository.

After enabling Epel repo, go ahead and install Nux Dextop repository:

sudo rpm --import http://li.nux.ro/download/nux/RPM-GPG-KEY-nux.ro
sudo rpm -Uvh http://li.nux.ro/download/nux/dextop/el7/x86_64/nux-dextop-release-0-5.el7.nux.noarch.rpm

Step 3. Installing FFmpeg and FFmpeg development packages on CentOS 7.

Install ffmpeg and ffmpeg -devel packages:

yum install ffmpeg ffmpeg-devel -y

To check for a installed ffmpeg version run:

ffmpeg -version

This should result in something very similar to the following output:

[[email protected] ~]# ffmpeg -version ffmpeg -version
ffmpeg version 2.6.8 Copyright (c) 2000-2016 the FFmpeg developers
built with gcc 4.8.5 (GCC) 20150623 (Red Hat 4.8.5-4)
configuration: --prefix=/usr --bindir=/usr/bin --datadir=/usr/share/ffmpeg --incdir=/usr/include/ffmpeg --libdir=/usr/lib64 --mandir=/usr/share/man --arch=x86_64 --optflags='-O2 -g -pipe -Wall -Wp,-D_FORTIFY_SOURCE=2 -fexceptions -fstack-protector-strong --param=ssp-buffer-size=4 -grecord-gcc-switches -m64 -mtune=generic' --enable-bzlib --disable-crystalhd --enable-gnutls --enable-ladspa --enable-libass --enable-libcdio --enable-libdc1394 --enable-libfaac --enable-nonfree --enable-libfdk-aac --enable-nonfree --disable-indev=jack --enable-libfreetype --enable-libgsm --enable-libmp3lame --enable-openal --enable-libopenjpeg --enable-libopus --enable-libpulse --enable-libschroedinger --enable-libsoxr --enable-libspeex --enable-libtheora --enable-libvorbis --enable-libv4l2 --enable-libx264 --enable-libx265 --enable-libxvid --enable-x11grab --enable-avfilter --enable-avresample --enable-postproc --enable-pthreads --disable-static --enable-shared --enable-gpl --disable-debug --disable-stripping --shlibdir=/usr/lib64 --enable-runtime-cpudetect
libavutil 54. 20.100 / 54. 20.100
libavcodec 56. 26.100 / 56. 26.100
libavformat 56. 25.101 / 56. 25.101
libavdevice 56. 4.100 / 56. 4.100
libavfilter 5. 11.102 / 5. 11.102
libavresample 2. 1. 0 / 2. 1. 0
libswscale 3. 1.101 / 3. 1.101
libswresample 1. 1.100 / 1. 1.100
libpostproc 53. 3.100 / 53. 3.100

If you want to learn more about FFmpeg, input:

ffmpeg -h

Congratulation’s! You have successfully installed FFmpeg. Thanks for using this tutorial for installing FFmpeg in CentOS 7 system. For additional help or useful information, we recommend you to check the official FFmpeg web site.
How To Install Ansible on CentOS 7 Step by Step

Install Ansible on CentOS 7

Ansible is a radically simple IT automation engine that simplifies cloud computing, configuration management, program setup, intra-service orchestration, and several other IT needs. Ansible uses a very simple language (YAML, in the form of Ansible Playbooks) that allow you to spell out your automation jobs in a way that means plain English. Using Ansible you can control multi host or device simultaneously using single command. You don’t need install client in apparatus or each server. In this tutorial we will learn how To install Ansible on CentOS 7 Step by Step.

Prerequisites

This tutorial assumes you have at least basic knowledge of Linux, know how to use the shell, and most importantly, you host your site on your own VPS. The installation is quite simple and assumes you are running in the root account, if not you may need to add ‘sudo’ to the commands to get root privileges. I will show you through the step by step installation Ansible on a CentOS 7 server.

Install Ansible on CentOS 7

Step 1. First let’s start by ensuring your system is up-to-date.

yum clean all
yum install -y epel-release
yum -y update

Step 2. Installing Ansible on CentOS 7.

Method 1. Install Ansible from EPEL repository.

yum install ansible

Check the version of Ansible that is installed:

ansible --version

Method 2. Install Ansible from Source.

First, Installation of all required prerequisites to perform Ansible compilation:

yum install make git make gcc python-devel libffi-devel openssl-devel epel-release python-sphinx

Next, install python package manager:

yum install python-pip
pip install --upgrade setuptools

Then, download the Ansible source code using git command:

git clone git://github.com/ansible/ansible.git
cd ansible

Select desired version:

git checkout stable-2.3

Now check that Ansible is installed with the following command:

ansible --version

Congratulation’s! You have successfully installed Ansible. Thanks for using this tutorial for installing Ansible in CentOS 7 system. For additional help or useful information, we recommend you to check the official Ansible web site.

How To Install Gulp.js on CentOS 7 Step by Step

Install Gulp.js on CentOS 7

gulp is a toolkit for automating painful or time-consuming tasks in your development workflow, so you can stop messing around and build something. In this tutorial we will learn how to Install Gulp.js on CentOS 7 Step by Step.

Prerequisites

This tutorial assumes you have at least basic knowledge of Linux, know how to use the shell, and most importantly, you host your site on your own VPS. The installation is quite simple and assumes you are running in the root account, if not you may need to add ‘sudo’ to the commands to get root privileges. I will show you through the step by step installation Gulp.js on a CentOS 7 server.

install gulp.js on centos7

Install Gulp.js on CentOS 7

Step 1. First, let’s start by ensuring your system is up-to-date.

yum clean all
yum install -y epel-release
yum -y update

Step 2. Installing Node.js.

Install Node.js using the following command:

curl -sL https://rpm.nodesource.com/setup_8.x | sudo -E bash -
sudo yum install -y nodejs
sudo yum install gcc-c++ make

Step 3. Installing Gulp.js on CentOS 7.

After installing Node.js, proceed to install Gulp.js:

sudo npm install -g gulp

Then, let’s check the installed version on your system using the following command:

gulp --version

[12:19:46] CLI version 3.9.1
[12:19:46] Local version 3.9.1

Congratulation’s! You have successfully installed Gulp.js. Thanks for using this tutorial for installing Gulp.js in CentOS 7 system. For additional help or useful information, we recommend you to check the official Gulp.js web site.

How To Install MyWebSQL on CentOS 7 Step by Step

Install MyWebSQL on CentOS 7

MyWebSQL is a powerful web interface designed to help handle all aspects of your MySQL server through a web browser. Made to be fast, easy-to-use, and readily accessible from anywhere, MyWebSQL allows you to keep track of your databases from any location, through any device. And with support for various MySQL servers, you also don’t need to worry about it supporting the one you are currently using. If you’re looking for a web management tool, but you need something other than phpMyAdmin, then this is a solid choice to go with. In this tutorial we will learn how to Install MyWebSQL on CentOS 7 Step by Step.

Prerequisites

This tutorial assumes you have at least basic knowledge of Linux, know how to use the shell, and most importantly, you host your site on your own VPS. The installation is quite simple and assumes you are running in the root account, if not you may need to add ‘sudo’ to the commands to get root privileges. I will show you through the step by step installation MyWebSQL on a CentOS 7 server.

Install MyWebSQL on CentOS 7

Step 1. First, let’s start by ensuring your system is up-to-date.

yum clean all
yum install -y epel-release
yum -y update

Step 2. Install LAMP server.

An CentOS 7 LAMP stack server is required. you need to install LAMP server with the following link. Also install required PHP modules:

yum -y install php-gd php-imap php-ldap php-odbc php-pear php-xml php-xmlrpc php-mbstring php-mcrypt php-mssql php-snmp php-soap php-tidy curl curl-devel

Step 3. Installing MyWebSQL on CentOS 7.

First, download a MyWebSQL package from the terminal using the wget command:

wget https://downloads.sourceforge.net/project/mywebsql/stable/mywebsql-3.7.zip

Once this is done, we will need to unzip the file into our httpd folder. You can unzip the file by entering this command:

unzip mywebsql-3.7.zip -d /var/www/html

Change ownership and permission of the as MyWebSQL follows:

chown -R www-data:www-data /var/www/html/mywebsql/
chmod -R 775 /var/www/html/mywebsql/

Restart the Apache web server to take effect:

systemctl restart httpd

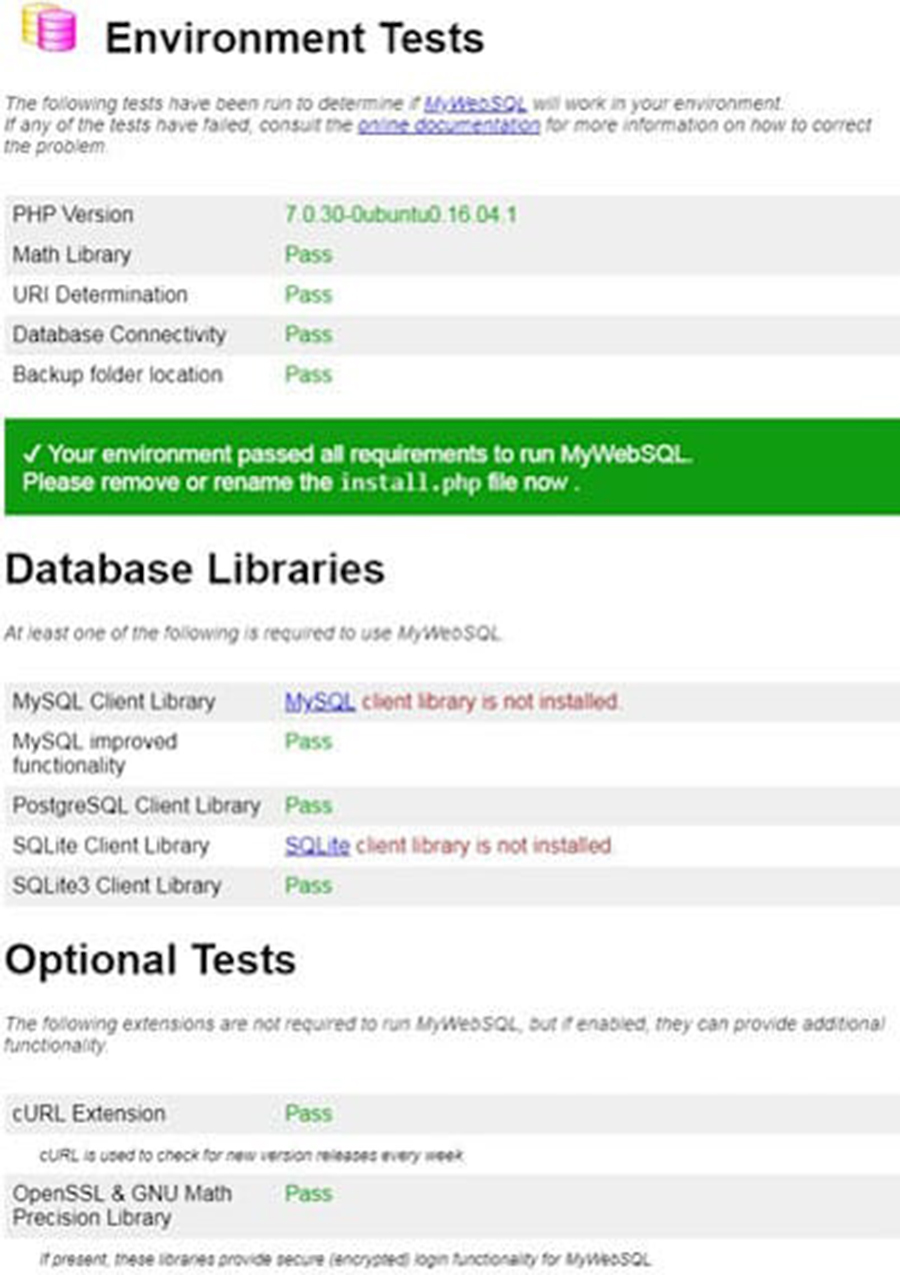
Then, You can now test and verify the installation by the typing the following in your browser (using your own server IP address): http://your-IP-address/mywebsql/install.php.
Install-MyWebSQL
Congratulation’s! You have successfully installed MyWebSQL. Thanks for using this tutorial for installing MyWebSQL in CentOS 7 system. For additional help or useful information, we recommend you to check the official MyWebSQL web site.

How To Install Visual Studio Code on CentOS 7 Step by Step

Install Visual Studio Code on CentOS 7

Visual Studio Code provides developers with a new choice of developer tool that combines the simplicity and streamlined experience of a code editor with the best of what developers need for their core code-edit-debug cycle. Visual Studio Code available free for Windows, Linux and Mac OS. In this tutorial we will learn how to Install Visual Studio Code on CentOS 7 Step by Step.

This tutorial assumes you have at least basic knowledge of Linux, know how to use the shell, and most importantly, you host your site on your own VPS. The installation is quite simple and assumes you are running in the root account, if not you may need to add ‘sudo’ to the commands to get root privileges. I will show you through the step by step installation Visual Studio Code on a CentOS 7 server.

Install Visual Studio Code on CentOS 7

Step 1. First, let’s start by ensuring your system is up-to-date.

yum clean all
yum install -y epel-release
yum -y update

Step 2. Installing Visual Studio Code on CentOS 7.

Importing the Microsoft GPG key:

sudo rpm --import https://packages.microsoft.com/keys/microsoft.asc

Next, create the following repo file to enable the Visual Studio Code repository:

sudo nano /etc/yum.repos.d/vscode.repo

Paste the following file:

name=Visual Studio Code
baseurl=https://packages.microsoft.com/yumrepos/vscode
enabled=1
gpgcheck=1
gpgkey=https://packages.microsoft.com/keys/microsoft.asc

Next, update the package cache and install Visual Studio with:

sudo yum install code

Step 3. Starting Visual Studio Code.

Now that VS Code is installed on your CentOS system you can launch it either from the command line by typing code or by clicking on the VS Code icon (Applications -> Accessories -> Visual Studio Code).

Congratulation’s! You have successfully installed Visual Studio Code. Thanks for using this tutorial for installing Visual Studio in CentOS 7 system. For additional help or useful information, we recommend you to check the official Visual Studio Code web site.

How To Install Jekyll on CentOS 7 Step by Step

Install Jekyll on CentOS 7

Welcome to Jekyll’s step-by-step tutorial. The goal of this tutorial is to take you from having some front end web development experience to building your first Jekyll site from scratch — not relying on the default gem-based theme. Let’s get into it!

Jekyll is a Ruby program so you need to install Ruby on your machine to begin with. Head over to the install guide and follow the instructions for your operating system.

Prerequisites

This tutorial assumes you have at least basic knowledge of Linux, know how to use the shell, and most importantly, you host your site on your own VPS. The installation is quite simple and assumes you are running in the root account, if not you may need to add ‘sudo’ to the commands to get root privileges. I will show you through the step by step install Jekyll on CentOS 7 server.

Install Jekyll on CentOS 7

Step 1. First let’s start by ensuring your system is up-to-date.

yum clean all
yum -y update

Step 2. Installing Ruby.

Jekyll requires Ruby to work, so we have to have it installed on the server. It is available in the official CentOS 7 repositories, so we can simply install it running the following command:

yum install ruby

Once done, you can run the following command to check if Ruby is installed successfully:

ruby -v

Step 3. Installing Jekyll on CentOS 7.

Install Jekyll package using gem:

gem install jekyll

We can test Jekyll is working by checking the version installed:

jekyll -v

After it is done, use the gem install command to install bundler:

gem install bundler

Step 4. Create blog and up the server using Jekyll.

Now we are ready to create the blog and run the server. The below given command create the directory called wpcademyblog. You can given another name of your choice. In this directory, jekyll configuration file and setup is all set:

cd /home
jekyll new wpcademyblog

Change to newly created directory wpcademyblog or the new name which you have given at the time of using command jekyll:

cd wpcademyblog

Start the Jekyll application and replace below mentioned ip address with your ip:

jekyll server --host 192.168.77.21 &

Step 5. Accessing Jekyll.

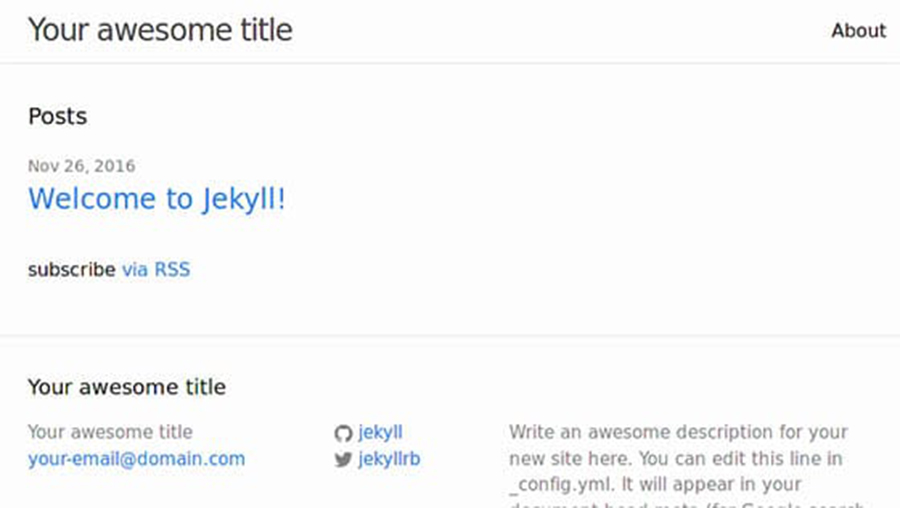
Jekyll will be available on HTTP port 4000 by default. Open your favorite browser and navigate to http://yourdomain.com:4000 or http://server-ip:4000/
jekyll-linux
Congratulation’s! You have successfully installed Jekyll. Thanks for using this tutorial for installing Jekyll on CentOS 7 systems. For additional help or useful information, we recommend you to check the official Jekyll web site.

How To Install Buildbot on CentOS 7 Step by Step

Install Buildbot on CentOS 7

Buildbot is a continuous integration tool based on Python which automates the build, test and release software cycles. It is built using the Twisted networking engine, supports parallel execution of jobs across multiple platforms and it is compatible with all major operating systems. In this tutorial we will learn how to Install Buildbot on CentOS 7 Step by Step.

Prerequisites

This tutorial assumes you have at least basic knowledge of Linux, know how to use the shell, and most importantly, you host your site on your own VPS. The installation is quite simple and assumes you are running in the root account, if not you may need to add ‘sudo’ to the commands to get root privileges. I will show you through the step by step install Buildbot on CentOS 7 server.

Install Buildbot on CentOS 7

Step 1. First let’s start by ensuring your system is up-to-date.

yum clean all
yum -y update

Step 2. Installing Python.

First you need to install pip and python development packages using the yum package manager:

yum install epel-release
yum install python-pip gcc python-devel git
pip install --upgrade pip

Step 3. Installing Buildbot on CentOS 7.

Use the following command to install Buildbot with pip:

pip install 'buildbot[bundle]'

You can verify by checking the version of Buildbot:

buildbot --version

The output should:

Buildbot version: 1.1.1
Twisted version: 18.4.0

Next, create a new system user for Buildbot:

adduser --home /opt/buildbot --shell /bin/bash buildbot

Step 4. Configuring Buildbot Master.

First, create the Buildbot master run the following command:

su - buildbot
buildbot create-master master

Next, copy the default sample Buildbot configuration file by using the following command:

cp master/master.cfg.sample master/master.cfg

Then, configure Buildbot’s web interface:

### nano master/master.cfg
c['buildbotURL'] = "http://your_ip_or_domain:8010/"

Once you save the file run the following command to verify the master configuration:

buildbot checkconfig master

Step 5. Configuring Buildbot Worker.

To create the Buildbot worker named ‘wpcademy-worker’ with password ‘pass’ on ‘localhost’, execute the following command:

buildbot-worker create-worker worker localhost wpcademy-worker pass

If you want to use a different username (example-worker), and password (pass) you need to update the following line in the master/master.cfg file:

# a Worker object, specifying a unique worker name and password. The same
# worker name and password must be configured on the worker.
c['workers'] = [worker.Worker("wpcademy-worker", "pass")]

Finally we can start the worker by typing:

buildbot-worker start worker

Step 6. Accessing Buildbot.

Buildbot will be available on HTTP port 8010 by default. Open your favorite browser and navigate to http://yourdomain.com:8010 or http://server-ip:8010 and complete the required the steps to finish the installation. If you are using a firewall, please open port 80 to enable access to the control panel.

Congratulation’s! You have successfully installed Buildbot. Thanks for using this tutorial for installing Buildbot on CentOS 7 systems. For additional help or useful information, we recommend you to check the official Buildbot web site.