How To Hide Nginx Server Default Header

Hide Nginx Server Default Header

In this tutorial we will learn How To Hide Nginx Server Default Header on your Linux server.  In default Nginx configuration, the server sends HTTP Header with the information of Nginx version number of the Server. The HTTP response header “Server” displays the version number of the server. This information can be used to try to exploit any vulnerabilities in the Nginx, specially if you are running an older version with known vulnerabilities.

Hiding nginx version is very easy and it’s done using server_tokens directive. This tutorial helps you customize the name of the server on your host.

Hide Nginx Server Header

Step 1. Go to nginx/conf folder (it can be located at /etc/nginx/nginx.conf or /usr/local/nginx/conf/nginx.conf file)

Step 2. Hide Nginx version.

Add following in nginx.conf under server section:

 server_tokens off;

Step 3. Restart nginx web server:

 service nginx restart

Let’s verify if we see the server information now:

curl -I https://wpcademy.com/
HTTP/1.1 200 OK
Server: nginx
Date: Sun, 03 Aug 2014 06:06:52 GMT
Content-Type: text/html; charset=UTF-8
Connection: keep-alive
Vary: Accept-Encoding
X-Pingback: https://wpcademy.com/xmlrpc.php

Congratulation’s! You have successfully hide Nginx version. For additional help or useful information, we recommend you to check the official Nginx web site.

You Might Also Like: How To Install Nginx Web Server On CentOS

How To Check Disk Space Usage on Linux With Ncdu Utility

Disk Space Usage on Linux With Ncdu

Ncdu (NCurses Disk Usage)  is a command line tool to view and analyse disk space usage on linux. It can drill down into directories and report space used by individual directories. This way it is very easy to track down space consuming files/directories. This article walks you through the process of installing and using NCDU on a Linux server.

In this tutorial we will learn How To Check Disk Space Usage on Linux With Ncdu Utility on linux server.

Check Disk Space Usage With Ncdu Utility

 apt-get install ncdu -y

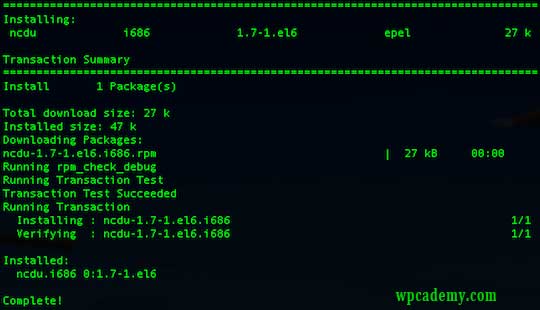
Install ncdu on RHEL/CentOS

 yum install ncdu -y

Ncdu-linux

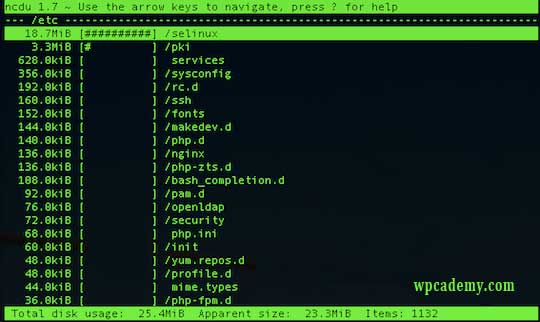
Ncdu sample usage

To start  ncdu type following command on your terminal:

 ncdu

Ncdu-sample-usage

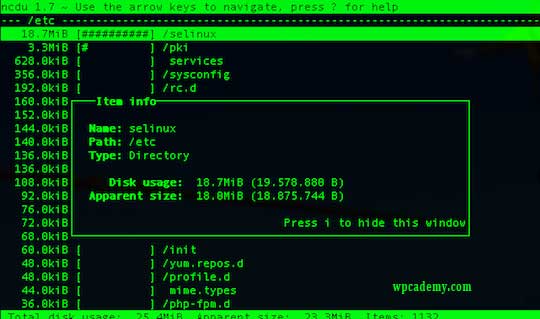
To get more information on selected directory press “i” button:

Disk Space Usage on Linux With Ncdu

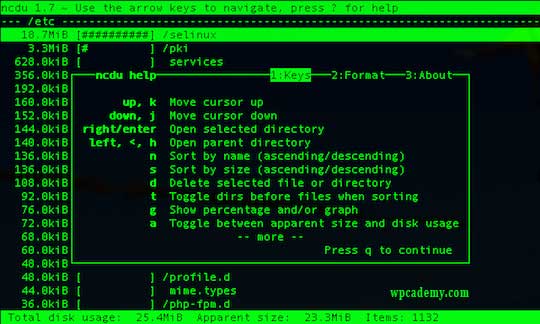
To see help window with ncdu available options press  “Shift+?” key combination. You can use arrow keys to move up and down for more options.

Ncdu windows help

For command line options and other information, go through the man page of ncdu command.

If you are not satisfied with the standard du command and are looking for a fast, ncurses based du-like utility then try out ncdu. It provides lots of customization options. You’ll definitely like it. Follow Wpcademy Facebook page

You Might Also Like: How To Install NCDU on Ubuntu 17.04

How To Install Nginx Web Server On CentOS

How To Install Nginx Using Yum Command On CentOS

Nginx is one of the most popular web servers in the world and is responsible for hosting some of the largest and highest-traffic sites on the internet. It is more resource-friendly than Apache in most cases and can be used as a web server or a reverse proxy.

This article assumes you have at least basic knowledge of linux, know how to use the shell, and most importantly, you host your site on your own VPS. So today I’m going to show you how to setup Nginx webserver on CentOS 6 or 7. In this tutorial we will learn how to install and configuration of Nginx web server on your CentOS server.

Install Nginx Using Yum Command On CentOS

Step 1. To install, first you must add the Webtatic yum repository information corresponding to your CentOS/RHEL version to yum:

CentOS/RHEL 7.x:

rpm -Uvh https://mirror.webtatic.com/yum/el7/epel-release.rpm
rpm -Uvh https://mirror.webtatic.com/yum/el7/webtatic-release.rpm

CentOS/RHEL 6.x:

 rpm -Uvh https://mirror.webtatic.com/yum/el6/latest.rpm

Step 2. Install nginx package and dependencies using the below command :

 yum install nginx16

Starting and stopping the server

To start the Nginx server, issue the following command:

 service nginx start

Top stop the Nginx server, issue the following command:

 service nginx stop

Configuration files/folders

  • The main configuration file for Nginx is /etc/nginx/nginx.conf
  • Virtual hosts are defined in /etc/nginx/sites-available/default
  • PHP will be configured in /etc/php5/fpm/php.ini

Before you close that terminal window, it’s necessary to set the Nginx service to start at boot. Just issue the following command:

 chkconfig nginx on

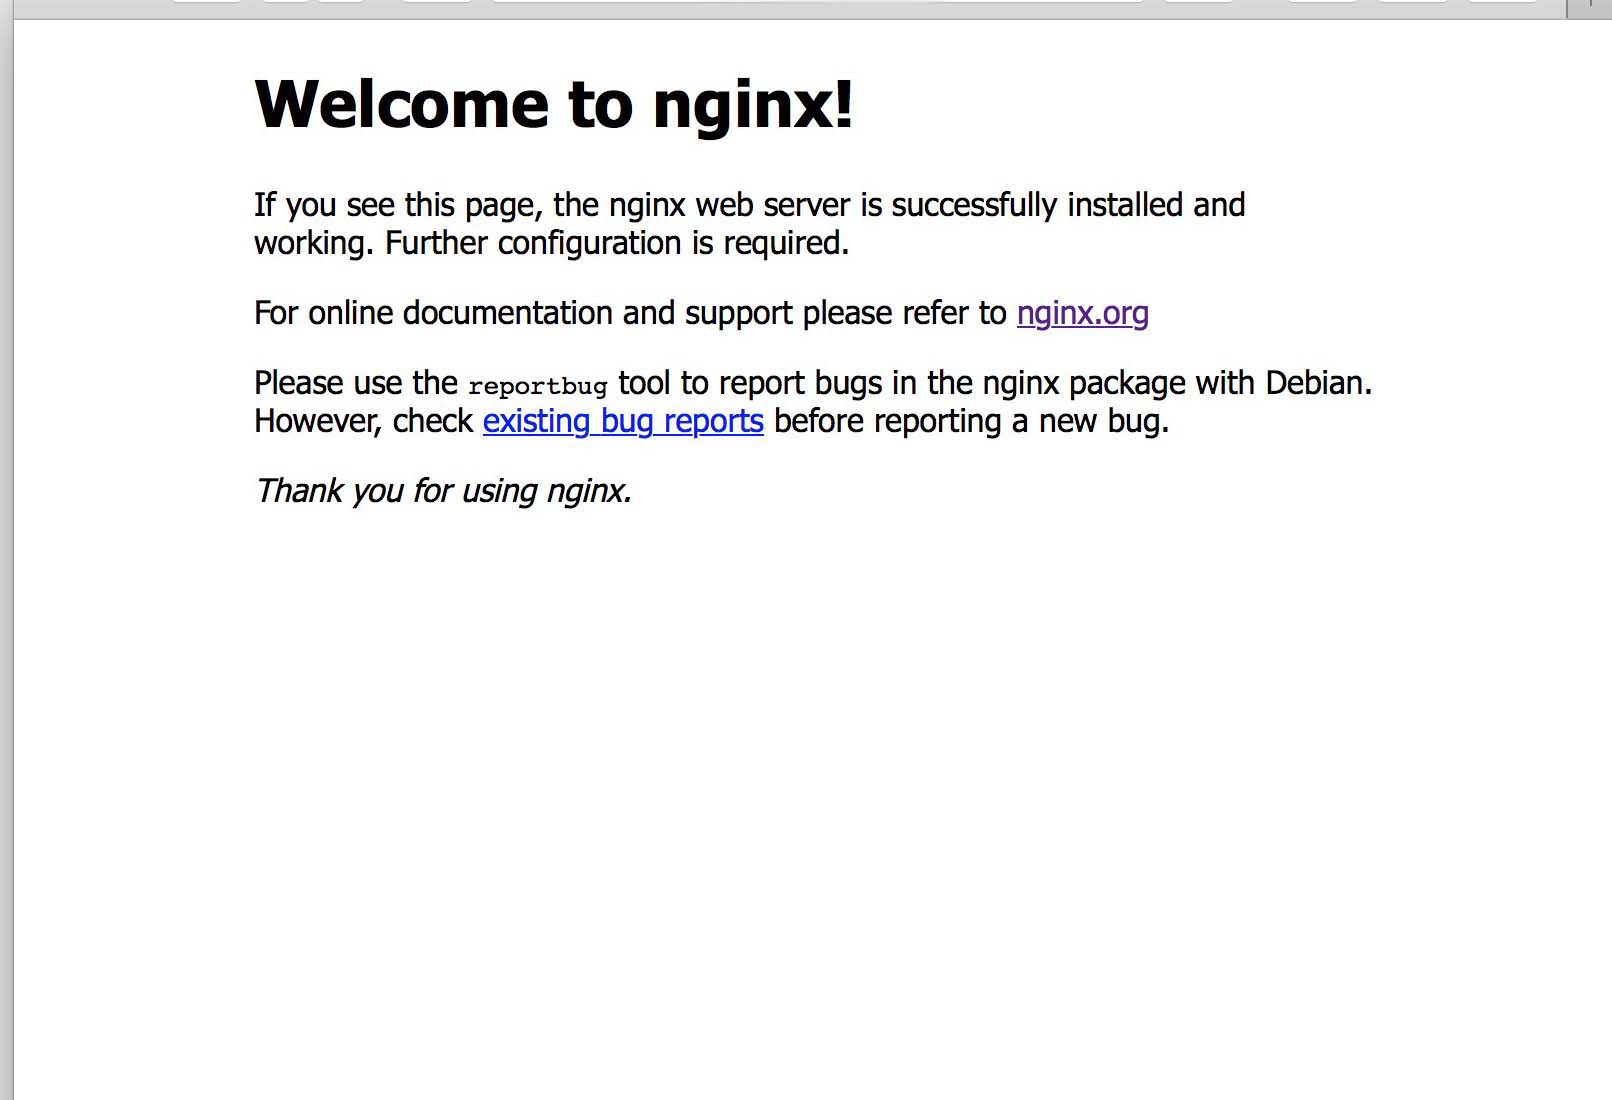
Navigating to your Server’s IP address (assuming you have no other server listening on port 80), you will be greeted with the standard welcome page:

nginx-default

The steps above should produce a running Nginx which serves the Nginx default pages on port 80. We’ll start working through various configurations and optimizations to round out the series. Enjoy your new web server!

Click here to learn How To Install Nginx Web Server on Ubuntu

How To Install OwnCloud 8 With Nginx and PHP-FPM on CentOS 6 Server

Install OwnCloud 8 With Nginx

OwnCloud is a free and open-source software which enables you to create a private “file-hosting” cloud. OwnCloud is similar to DropBox service with the diference of being free to download and install on your private server. Owncloud made by PHP and backend database MySQL (MariaDB), SQLLite or PostgreSQL. OwnCloud also enables you to easily view and sync address book, calendar events, tasks and bookmarks. You can access it via the good looking and easy to use web interface or install OwnCloud client on your Desktop or Laptop machine (supports Linux, Windows and Mac OSX).

This article assumes you have at least basic knowledge of linux, know how to use the shell, and most importantly, you host your site on your own VPS. The installation is quite simple. We will learn through the step by step installation OwnCloud 8 with nginx and php-fpm on CentOS 6 server.

Install OwnCloud 8 With Nginx and PHP-FPM on CentOS 6

Step 1. First, we need to install the latest EPEL and Remi repository RPM suited to your architecture.

wget http://rpms.famillecollet.com/enterprise/remi-release-6.rpm
rpm -Uvh remi-release-6.rpm

wget http://download.fedoraproject.org/pub/epel/6/x86_64/epel-release-6-8.noarch.rpm
rpm -ivh epel-release-6-8.noarch.rpm

Step 2. Install Nginx webserver.

 yum install nginx

Step 3. Install the necessary PHP components.

yum update
yum install php-fpm php php-mysql sqlite php-dom php-mbstring php-gd php-pdo php-json php-xml php-zip php-gd curl php-curl php-ldap php-magickwand php-xmlrpc php-magpierss -y

Step 4. Install MySQL.

 yum install mysql-server -y

Start MySQL:

 service mysql start

By default, MySQL is not hardened. You can secure MySQL using the mysql_secure_installation script. you should read and below each steps carefully which will set root password, remove anonymous users, disallow remote root login, and remove the test database and access to secure MySQL.

 mysql_secure_installation

Step 5. Create a new MySQL database using the following commands.

#mysql -uroot -p

CREATE DATABASE owncloud;
GRANT ALL PRIVILEGES ON owncloud.* TO 'owncloud_user'@'localhost' IDENTIFIED BY 'owncloud_user_pasword';
FLUSH PRIVILEGES;

Step 6. Install OwnCloud and dependencies.

wget https://download.owncloud.org/community/owncloud-8.0.0.tar.bz2
tar -xjf owncloud-8.0.0.tar.bz2
mv owncloud /var/www/html/owncloud/

Set the directory permissions:

 chown -R www-data:www-data /var/www/html/owncloud/

Step 7. Configuring Nginx for OwnCloud.

Create a new virtual hosts for your domain with the following content:

#nano /etc/nginx/conf.d/yourdomain.tld.conf

server {
listen 80;
server_name yourdomain.tld www.yourdomain.tld;

root /var/www/owncloud;
index index.php index.html;

rewrite ^/caldav(.*)$ /remote.php/caldav$1 redirect;
rewrite ^/carddav(.*)$ /remote.php/carddav$1 redirect;
rewrite ^/webdav(.*)$ /remote.php/webdav$1 redirect;
error_page 403 /core/templates/403.php;
error_page 404 /core/templates/404.php;

  location = /robots.txt {
    allow all;
    log_not_found off;
    access_log off;
    }

  location ~ ^/(?:\.htaccess|data|config|db_structure\.xml|README){
    deny all;
    }

  location / {
   rewrite ^/.well-known/host-meta /public.php?service=host-meta last;
   rewrite ^/.well-known/host-meta.json /public.php?service=host-meta-json last;
   rewrite ^/.well-known/carddav /remote.php/carddav/ redirect;
   rewrite ^/.well-known/caldav /remote.php/caldav/ redirect;
   rewrite ^(/core/doc/[^\/]+/)$ $1/index.html;

   try_files $uri $uri/ /index.php;
   }

  location ~ \.php$ {
   try_files $uri =404;
   fastcgi_split_path_info ^(.+\.php)(/.+)$;
   fastcgi_pass 127.0.0.1:9000;
   fastcgi_index index.php;
   fastcgi_param SCRIPT_FILENAME $document_root$fastcgi_script_name;
   include fastcgi_params;
}
}

Remember to restart all services related to Nginx server and php-fpm.

service nginx restart
service php-fpm restart

Step 8. Access OwnCloud application.

Navigate to http://your-domain.com/ and follow the easy instructions. Enter username and password for the administrator user account, click on the ‘Advanced options’ hyperlink and enter the data directory (or leave the default setting), then enter database username, database password, database name, host (localhost) and click ‘Finish setup’.
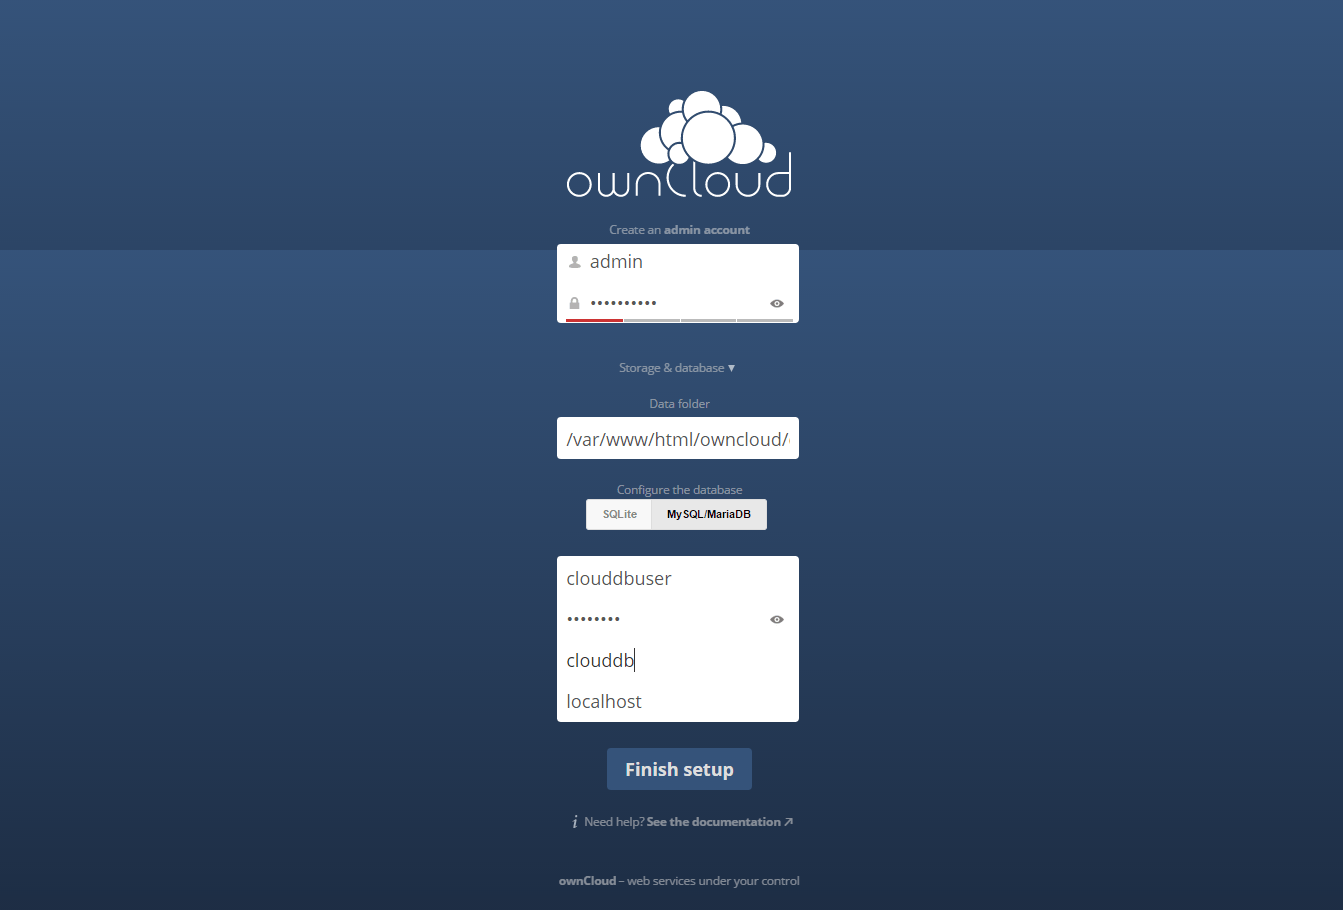
owncloud 8 installed successfully

Congratulation’s! You have successfully installed OwnCloud. Thanks for using this tutorial for installing OwnCloud 8 in CentOS 6 system. For additional help or useful information, we recommend you to check the official OwnCloud web site.

Click here to learn How To Install OwnCloud 8 on Ubuntu 14.04

How To Install Rar/Unrar on CentOS

How To Install Rar/Unrar on CentOS

RAR is most popular tool for creating and extracting compressed archive (.rar) files, but unfortunately rar tool doesn’t pre-installed under Linux systems, we need to install it using third-party tools to open, extract, uncompress or unrar a archive files.

In this tutorial we will learn how to install and configuration of rar/unrar on your CentOS server.

This article assumes you have at least basic knowledge of linux, know how to use the shell, and most importantly, you host your site on your own VPS. The installation is quite simple and assumes you are running in the root account, if not you may need to add ‘sudo’ to the commands to get root privileges. I will show you through the step by step installation unrar and rar command-line tools using RPMforge repository CentOS with yum.

Install Rar/Unrar on CentOS

Step 1. To install, first you must add the rar/unrar yum repository information corresponding to your CentOS/RHEL version to yum:

  • CentOS 7 64 Bit
## RHEL/CentOS 7 64-Bit ##
# wget http://dl.fedoraproject.org/pub/epel/7/x86_64/e/epel-release-7-6.noarch.rpm
# rpm -ivh epel-release-7-6.noarch.rpm
  • CentOS 6 64 Bit
## RHEL/CentOS 6 64-Bit ##
# wget http://dl.fedoraproject.org/pub/epel/6/x86_64/epel-release-6-8.noarch.rpm
# rpm -ivh epel-release-6-8.noarch.rpm
  • CentOS 6 32 Bit
## RHEL/CentOS 6 32-Bit ##
# wget http://dl.fedoraproject.org/pub/epel/6/i386/epel-release-6-8.noarch.rpm
# rpm -ivh epel-release-6-8.noarch.rpm
  • CentOS 5 64 Bit
## RHEL/CentOS 5 64-Bit ##
# wget http://dl.fedoraproject.org/pub/epel/5/x86_64/epel-release-5-4.noarch.rpm
# rpm -ivh epel-release-5-4.noarch.rpm
  • CentOS 5 32 Bit
## RHEL/CentOS 5 32-Bit ##
# wget http://dl.fedoraproject.org/pub/epel/5/i386/epel-release-5-4.noarch.rpm
# rpm -ivh epel-release-5-4.noarch.rpm

Step 2. Install rar/unrar

Type the following command to install Rar/Unrar

 #yum install rar unrar

Commands for Rar/Unrar archive

Following are the some useful and helpful rar/unrar archive commands

# unrar x (file_name).rar           extract with full path
# unrar e -kb (file_name).rar       (Keep broken)
# unrar l (file_name).rar           list files inside
# unrar e (file_name).rar           dump files excluding folders
# rar a (file_name).rar (file_name) create a archive Rar file
# rar r (file_name).rar             recover or fix a archive file or files
# rar a -p (file_name).rar          create a archive Rar file with password

Congratulation’s! You have successfully installed rar/unrar.

Click here to learn How To Install Rar/Unrar Packages on Ubuntu

How To Replacing OpenSSH With Dropbear on CentOS

Replacing OpenSSH With Dropbear on CentOS

Dropbear is a relatively small SSH server and client. It runs on a variety of POSIX-based platforms. Dropbear is open source software, distributed under a MIT-style license. Dropbear is particularly useful for “embedded”-type Linux (or other Unix) systems, such as wireless routers.

Features

  • A small memory footprint suitable for memory-constrained environments – Dropbear can compile to a 110kB statically linked binary with uClibc on x86 (only minimal options selected)
  • Dropbear server implements X11 forwarding, and authentication-agent forwarding for OpenSSH clients
  • Can run from inetd or standalone
  • Compatible with OpenSSH ~/.ssh/authorized_keys public key authentication
  • The server, client, keygen, and key converter can be compiled into a single binary (like busybox)
  • Features can easily be disabled when compiling to save space
  • Multi-hop mode uses SSH TCP forwarding to tunnel through multiple SSH hosts in a single command. dbclient user1@hop1,user2@hop2,destination

This article assumes you have at least basic knowledge of linux, know how to use the shell, and most importantly, you host your site on your own VPS. The installation is quite simple and assumes you are running in the root account, if not you may need to add ‘sudo’ to the commands to get root privileges. In this tutorial we will learn through the step by step replacing Dropbear SSH in CentOS server.

Replacing OpenSSH With Dropbear on CentOS

To install, first you must add the yum repository information corresponding to your CentOS/RHEL version to yum:

For CentOS 6.x use:

#wget http://dl.fedoraproject.org/pub/epel/6/i386/dropbear-0.58-1.el6.i686.rpm
#rpm -Uvh dropbear-0.58-1.el6.i686.rpm

For CentOS 5.x use:

#wget http://dl.fedoraproject.org/pub/epel/5/i386/dropbear-0.55-1.el5.i386.rpm
#rpm -Uvh dropbear-0.55-1.el5.i386.rpm

First we will just install dropbear using yum:

 #yum install dropbear

Now we just need to start up new SSH server:

 #nano /etc/init.d/dropbear

Edit port dropbear:

 #OPTIONS=" -p 222"

Add dropbear to startup and start the sever:

#chkconfig dropbear on
#service dropbear start

Next you can stop the current OpenSSH server:

 #yum remove openssh-server

Note: Make sure you check that it is indeed running and verify from another box before you logout your current session otherwise.

Congratulation’s! You have successfully installed Dropbear. Thanks for using this tutorial for installing Dropbear SSH in CentOS system.

How To Install Mtop (MySQL Database Server Monitoring) on CentOS 6

Install Mtop On CentOS 6

Mtop is an open source real time MySQL Server monitoring program that shows queries which are taking longer time to process and kills those longer queries after certain number of specified time. Mtop program enable us to monitor and identify performance and related issues of MySQL Server from the command line interface similar to Linux Top Command. In this tutorial we will show you how to install and configuration of Mtop (MySQL Database Server Monitoring) on your CentOS 6 server.

This article assumes you have at least basic knowledge of linux, know how to use the shell, and most importantly, you host your site on your own VPS. The installation is quite simple. Here is the step by step installation Mtop on CentOS 6.

Install Mtop (MySQL Database Server Monitoring) on CentOS 6

Step 1. First, you need to enable RPMForge repository under your Linux machine to download and install latest version of MTOP program.

## RHEL/CentOS 6 32-Bit ##

wget http://packages.sw.be/rpmforge-release/rpmforge-release-0.5.2-2.el6.rf.i686.rpm
rpm -Uvh rpmforge-release-0.5.2-2.el6.rf.i686.rpm

## RHEL/CentOS 6 64-Bit ##

wget http://packages.sw.be/rpmforge-release/rpmforge-release-0.5.2-2.el6.rf.x86_64.rpm
rpm -Uvh rpmforge-release-0.5.2-2.el6.rf.x86_64.rpm

Step 2. Install Mtop using yum.

 yum install mtop

Step 3. Starting Mtop.

To start Mtop program, you need to connect to your MySQL Server, using following command:

# mysql -u root -p

mysql> grant super, reload, process on *.* to mysqltop;
Query OK, 0 rows affected (0.00 sec)

mysql> grant super, reload, process on *.* to mysqltop@localhost;
Query OK, 0 rows affected (0.00 sec)

mysql> flush privileges;
Query OK, 0 rows affected (0.00 sec)

mysql> quit;
Bye

Step 4. Running Mtop in CentOS 6.

 mtop

Mtop usage and functions keys:

s – change the number of seconds to delay between updates
m – toggle manual refresh mode on/off
d – filter display with regular expression (user/host/db/command/state/info)
F – fold/unfold column names in select statement display
h – display process for only one host
u – display process for only one user
i – toggle all/non-Sleeping process display
o – reverse the sort order
q – quit
? – hel

Congratulation’s! You have successfully installed Mtop. Thanks for using this tutorial for installing Mtop (MySQL Database Server Monitoring) on CentOS 6 system.

Read more from mtop/mkill – MySQL Monitoring Tools Official Website

You Might Also Like: How To Enable Slow Query Log for MySQL