
Plasma is the KDE workspace. Actually it is a technology that can adapt to many types of devices. Currently there are two varieties of Plasma: The Plasma Desktop environment which is the focus of the majority of our pages and Plasma Mobile, the new cool environment for pads and smartphones.
This article assumes you have at least basic knowledge of Linux, know how to use the shell, and most importantly, you host your site on your own VPS. The installation is quite simple and assumes you are running in the root account, if not you may need to add ‘sudo’ to the commands to get root privileges. I will show you through the step by step installation KDE Plasma desktop environment on an Ubuntu Ubuntu 17.10 Artful Aardvark server.
Install KDE Plasma on Ubuntu 17.10 Artful Aardvark
Step 1. First make sure that all your system packages are up-to-date
sudo apt-get update
sudo apt-get upgrade
Step 2. Installing KDE Plasma on Ubuntu 17.10.
First, you need to add backports PPA to yourteam:
sudo add-apt-repository ppa:kubuntu-ppa/backports
sudo apt update && sudo apt upgrade
After completion of above commands, finally install KDE Plasma:
sudo apt-get install kubuntu-desktop
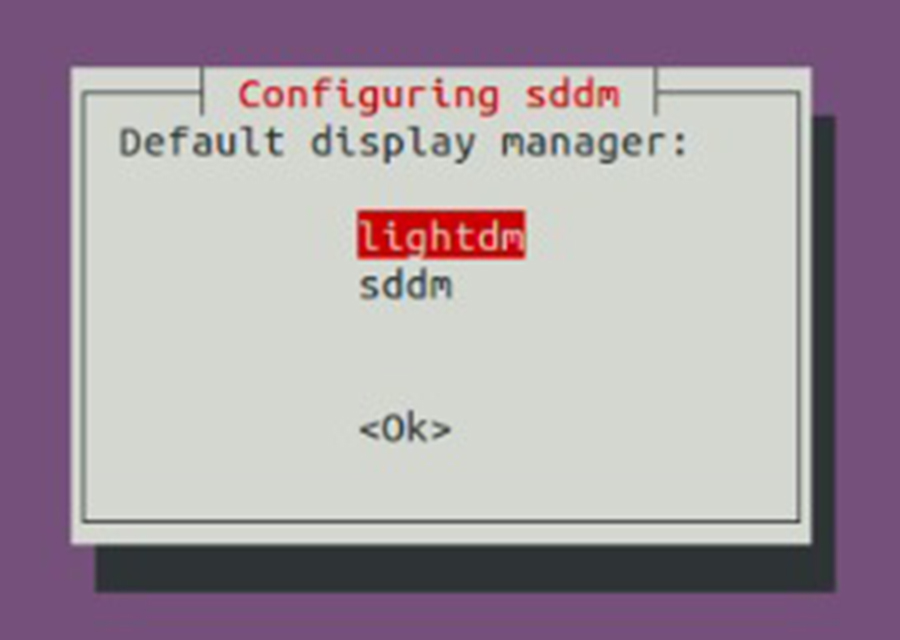
You will be asked to configure sddm, select OK and then selectlightdm as Default display manager as shown in the following figure:
Once the KDE installation is done, reboot the system to take effect. On the login screen, select KDE Plasma as a desktop environment and login to the system. Now your Ubuntu system has the KDE desktop environment.
Congratulation’s! You have successfully installed KDE Plasma. Thanks for using this tutorial for installing KDE Plasma desktop environment in Ubuntu 17.10 Artful Aardvark system. For additional help or useful information, we recommend you to check the official KDE web site.