A LEMP software stack is a group of open source software that is typically installed together to enable a server to host dynamic websites and web apps. This term is actually an acronym which represents the Linux operating system, with the Nginx web server (which replaces the Apache component of a LAMP stack). The site data is stored in a MySQL database (using MariaDB), and dynamic content is processed by PHP.
This article assumes you have at least basic knowledge of Linux, know how to use the shell, and most importantly, you host your site on your own VPS. The installation is quite simple and assumes you are running in the root account, if not you may need to add ‘sudo’ to the commands to get root privileges. I will show you through the step by step installation LEMP stack (Linux, Nginx, MariaDB and PHP) on an Ubuntu 18.04 Bionic Beaver server.
Install LEMP on Ubuntu 18.04 LTS
Step 1. First make sure that all your system packages are up-to-date
sudo apt-get update
sudo apt-get upgrade
Step 2. Installing Nginx on Ubuntu 18.04 LTS.
Install Nginx with apt, which is the default package manager for Ubuntu:
sudo apt install nginx
Once installed, start Nginx service using the following command:
sudo systemctl start nginx
Now if you have your UFW firewall running, you will need to allow connections to Nginx:
sudo ufw allow 'Nginx HTTP'
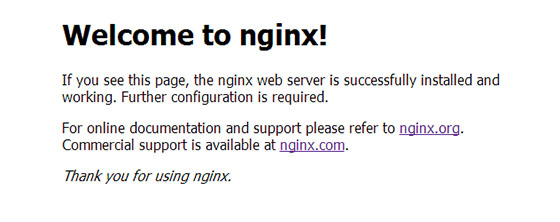
You can verify that Nginx is really running by opening your favorite web browser and entering the URL http://your-domain.com, if it is installed, then you will see this:Install LEMP on Ubuntu 18.04 LTS

To get Nginx to work with PHP correctly, we need to make changes to the Nginx configuration file. This guide we will be using a simple Nginx config file:
sudo nano /etc/nginx/sites-available/default
Copy the following into your text editor:
    server {
            listen       80;
            server_name  your_domain_name.com;
            root /usr/share/nginx/html;
            index index.php index.html;
            location / {
                    try_files $uri $uri/ =404;
            }
            error_page 404 /404.html;
            error_page 500 502 503 504 /50x.html;
            location = /50x.html {
                    root /var/www/html;
            }
            location ~ \.php$ {
                    try_files $uri =404;
                    fastcgi_pass unix:/var/run/php7.2-fpm.sock;
                    fastcgi_index index.php;
                    fastcgi_param SCRIPT_FILENAME $document_root$fastcgi_script_name;
                    include fastcgi_params;
            }
    }
Once you have finished editing the file restart Nginx with:
sudo nginx -t
sudo systemctl restart nginx
Step 4. Installing MariaDB on Ubuntu 18.04 LTS.
To install MariaDB in Ubuntu 18.04 run the following command:
sudo apt install mariadb-server
Once complete, you can verify MariaDB is installed by running the below command:
sudo systemctl status mariadb
By default, MariaDB is not hardened. You can secure MariaDB using the mysql_secure_installation script. you should read and below each steps carefully which will set root password, remove anonymous users, disallow remote root login, and remove the test database and access to secure MariaDB:
mysql_secure_installation
Configure it like this:
- Set root password? [Y/n] y
- Remove anonymous users? [Y/n] y
- Disallow root login remotely? [Y/n] y
- Remove test database and access to it? [Y/n] y
- Reload privilege tables now? [Y/n] y
To log into MariaDB, use the following command (note that it’s the same command you would use to log into a MariaDB database):
mysql -u root -p
Step 5. Installing PHP and Configure PHP-FPM Settings.
Unlike Apache, Nginx does not contain native PHP processing. For that we have to install PHP-FPM (FastCGI Process Manager):
sudo apt install php-fpm php-mysql
Once installed, check the PHP version:
php --version
Now open the PHP-FPM default file to edit the following content:
### nano /etc/php/7.2/fpm/php.ini
cgi.fix_pathinfo=0
date.timezone = Africa/Douala
Save the file and restart php-fpm:
systemctl restart php7.2-fpm
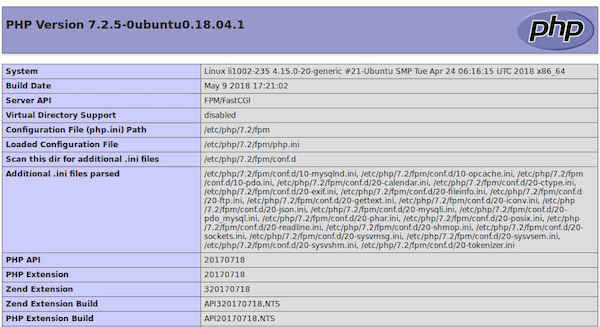
To test PHP, create a test file named info.php with he content below. Save the file, then browse to it to see if PHP is working:
nano /usr/share/nginx/html/info.php
Copy the following into your text editor:
<?php
phpinfo();
?>
Try to access it at http://your_server_ip/info.php . If the PHP info page is rendered in your browser then everything looks good and you are ready to proceed further.

Congratulation’s! You have successfully installed LEMP stack. Thanks for using this tutorial for installing LAMP (Linux, Nginx, MySQL and PHP) in Ubuntu 18.04 LTS system.
