How To Install FreeIPA on Ubuntu 18.04 LTS

Install FreeIPA on Ubuntu 18

FreeIPA is an open source identity management system for Linux/Unix environments which provides centralized account management and authentication, like Microsoft Active Directory or LDAP.

This article assumes you have at least basic knowledge of Linux, know how to use the shell, and most importantly, you host your site on your own VPS. The installation is quite simple and assumes you are running in the root account, if not you may need to add ‘sudo’ to the commands to get root privileges. I will show you through the step by step installation FreeIPA open source identity management system on an Ubuntu 18.04 (Bionic Beaver) server.

Install FreeIPA on Ubuntu 18.04 LTS Bionic Beaver

Step 1. First make sure that all your system packages are up-to-date by running these following apt-get commands in the terminal.

sudo apt-get update
sudo apt-get upgrade


<strong>Step 2. Installing FreeIPA on Ubuntu 18.04.</strong>

The first thing that we are going to do is to prepare the Ubuntu 18.04 server to run FreeIPA. In order to do this, we are going to set the IP address on the system, In our case the host IP is 192.168.1.8/24:
[php]
### nano /etc/hosts
192.168.1.8 ipa.wpcademy.com

Next, Install the package dependencies required for our setup with the following commands if they are not already installed:

ipa-server-install

Then, install FreeIPA using following command:

apt-get install freeipa-server freeipa-server-dns

After the FreeIPA installation, authenticate to the Kerberos realm to ensure that the administrator is configured correctly:

​​kinit admin

Ensure the following ports are opened in the security group of the FreeIPA Server:

    80,443
    tcp 88,464
    ldap 389

Step 3. Accessing FreeIPA.

FreeIPA will be available on HTTP port 80 by default. Open your favorite browser and navigate to https://ipa.wpcademy.local/ and complete the required the steps to finish the installation.

Congratulation’s! You have successfully installed FreeIPA. Thanks for using this tutorial for installing FreeIPA open source identity management system on your Ubuntu 18.04 LTS Bionic Beaver. For additional help or useful information, we recommend you to check the official FreeIPA web site.

How To Install Icinga 2 on Ubuntu 18.04 LTS

Install Icinga 2 on Ubuntu 18

Icinga 2 is an open source network monitoring system which checks the availability of your network resources, notifies users of outages, and generates performance data for reporting. Its Scalable and extensible, Icinga2 can monitor large, complex environments across multiple locations.

This article assumes you have at least basic knowledge of Linux, know how to use the shell, and most importantly, you host your site on your own VPS. The installation is quite simple and assumes you are running in the root account, if not you may need to add ‘sudo’ to the commands to get root privileges. I will show you through the step by step installation Icinga 2 on an Ubuntu 18.04 Bionic Beaver server.

Install Icinga 2 on Ubuntu 18.04 LTS Bionic Beaver

Step 1. First, make sure that all your system packages are up-to-date by running these following apt-get commands in the terminal.

sudo apt-get update
sudo apt-get upgrade

Step 2. Install LAMP (Linux, Apache, MariaDB and PHP) server.

An Ubuntu 18.04 LAMP server is required. If you do not have a LAMP installed, you can follow our guide here. Also install all required PHP modules:

apt-get install php7.1-cli php7.1-mbstring php7.1-gd php7.1-opcache php7.1-mysql php7.1-json php7.1-mcrypt php7.1-xml php7.1-curl

Step 3. Installing Icinga 2 on Ubuntu 18.04.

First, enable the add-repository feature and add the repository for Icinga with the below commands:
curl -sSL https://packages.icinga.com/icinga.key | sudo apt-key add -
echo "deb https://packages.icinga.com/ubuntu icinga-bionic main" | sudo tee /etc/apt/sources.list.d/icinga.list

Run update of package list and install Icinga2 packages:

sudo apt-get install icinga2 icingaweb2 icinga2-ido-mysql

Once the installation is complete. Make sure the service is up and running fine:

systemctl status icinga2.service
systemctl enable icinga2.service
systemctl start icinga2.service

Step 4. Installing Nagios Plugins.

Icinga2 will collect the service information based on the monitoring plugins. So, we need to install nagios plugin using below command:

apt-get install monitoring-plugins

Next, you need to install the IDO module which is crucial for the Icinga 2 web interface. It will export all configuration and status information into its database. Execute the following command:

apt install icinga2-ido-mysql

Then restart Icinga 2 for the changes to take effect:

systemctl restart icinga2.service

Once you have enabled the IDO modules, Icinga 2 places the new configuration file at /etc/icinga2/features-enabled/ido-mysql.conf in which we need to update the database credentials manually:

cat /etc/icinga2/features-enabled/ido-mysql.conf

Update the above file shown like below:

[email protected]:~# nano /etc/icinga2/features-enabled/ido-mysql.conf
/**
* The db_ido_mysql library implements IDO functionality
* for MySQL.
*/
library "db_ido_mysql"
object IdoMysqlConnection "ido-mysql" {
user = "icinga2",
password = "icinga123",
host = "localhost",
database = "icinga2"
}

Step 4. Configuring MariaDB for Icinga 2.

By default, MariaDB is not hardened. You can secure MariaDB using the mysql_secure_installation script. You should read and below each step carefully which will set the root password, remove anonymous users, disallow remote root login, and remove the test database and access to secure MariaDB.

mysql_secure_installation

Configure it like this:

- Set root password? [Y/n] y
- Remove anonymous users? [Y/n] y
- Disallow root login remotely? [Y/n] y
- Remove test database and access to it? [Y/n] y
- Reload privilege tables now? [Y/n] y

Next we will need to log in to the MariaDB console and create a database for the Icinga 2. Run the following command:

mysql -u root -p

This will prompt you for a password, so enter your MariaDB root password and hit Enter. Once you are logged in to your database server, you need to create a database for Icinga 2 installation:

MariaDB [(none)]> create database icinga2;
MariaDB [(none)]> grant all privileges on icingaweb.* to icinga2@localhost identified by 'icinga123';
MariaDB [(none)]> flush privileges;
MariaDB [(none)]> \q

Step 5. Installing Icinga 2 Web.

After creating the database, we can install the Web interface plugin and configure it one by one:

apt-get install icingaweb2

Both Icinga Web 2 and CLI must have access to logs and configurations. Add web server user (www-data) to the system group (icingaweb2):

addgroup --system icingaweb2
usermod -a -G icingaweb2 www-data

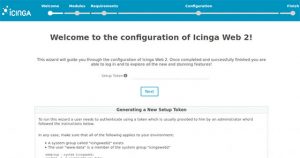
Icinga2 will be available on HTTP port 80 by default. Open your favorite browser and navigate to http://yourdomain.com/icingaweb2/setup or http://server-ip/icingaweb2/setup and complete the required the steps to finish the installation. If you are using a firewall, please open port 80 to enable access to the control panel.
icingaweb2

Congratulation’s! You have successfully installed Icinga. Thanks for using this tutorial for installing Icinga 2 on your Ubuntu 18.04 LTS system. For additional help or useful information, we recommend you to check the official Icinga web site.

How To Install Apache Hadoop on Ubuntu 18.04 LTS

Install Apache Hadoop on Ubuntu 18

Apache Hadoop is an open source framework used for distributed storage as well as distributed processing of big data on clusters of computers which runs on commodity hardwares. Hadoop stores data in Hadoop Distributed File System (HDFS) and the processing of these data is done using MapReduce. YARN provides an API for requesting and allocating resources in the Hadoop cluster. In this tutorial we will learn how to install Apache Hadoop on Ubuntu 18.04 LTS.

This article assumes you have at least basic knowledge of Linux, know how to use the shell, and most importantly, you host your site on your own VPS. The installation is quite simple and assumes you are running in the root account, if not you may need to add ‘sudo’ to the commands to get root privileges. I will show you through the step by step installation Apache Hadoop on an Ubuntu 18.04 Bionic Beaver server.

Install Apache Hadoop on Ubuntu 18.04 LTS Bionic Beaver

Step 1. First, make sure that all your system packages are up-to-date by running these following apt-get commands in the terminal.

sudo apt-get update
sudo apt-get upgrade

Step 2. Installing Java (OpenJDK).

Since hadoop is based on java, make sure you have java jdk installed on the system. If you don’t have Java installed on your system, use following link to install it first.

Install Java JDK 8 on Ubuntu:


[email protected] ~# java -version
java version "1.8.0_192"
Java(TM) SE Runtime Environment (build 1.8.0_192-b02)
Java HotSpot(TM) 64-Bit Server VM (build 25.74-b02, mixed mode)

Step 3. Installing Apache Hadoop on Ubuntu 18.04.

To avoid security issues, we recommend to setup new Hadoop user group and user account to deal with all Hadoop related activities, following command:

sudo addgroup hadoopgroup
sudo adduser —ingroup hadoopgroup hadoopuser

After creating the user, it also required to set up key based ssh on its own account. To do this use execute following commands:

su - hadoopuser
ssh-keygen -t rsa -P ""
cat /home/hadoopuser/.ssh/id_rsa.pub &amp;gt;&amp;gt; /home/hadoopuser/.ssh/authorized_keys
chmod 600 authorized_keys
ssh-copy-id -i ~/.ssh/id_rsa.pub slave-1
ssh slave-1

Download the latest stable version of Apache Hadoop, At the moment of writing this article it is version 2.8.1:

wget http://www-us.apache.org/dist/hadoop/common/hadoop-3.1.1/hadoop-3.1.1.tar.gz
tar xzf hadoop-3.1.1.tar.gz
mv hadoop-3.1.1 hadoop

Step 4. Configure Apache Hadoop.

Setting up the environment variables. Edit ~/.bashrc file and append following values at end of file:

export HADOOP_HOME=/home/hadoop/hadoop
export HADOOP_INSTALL=$HADOOP_HOME
export HADOOP_MAPRED_HOME=$HADOOP_HOME
export HADOOP_COMMON_HOME=$HADOOP_HOME
export HADOOP_HDFS_HOME=$HADOOP_HOME
export YARN_HOME=$HADOOP_HOME
export HADOOP_COMMON_LIB_NATIVE_DIR=$HADOOP_HOME/lib/native
export PATH=$PATH:$HADOOP_HOME/sbin:$HADOOP_HOME/bin

Apply environmental variables to current running session:

source ~/.bashrc

Now edit $HADOOP_HOME/etc/hadoop/hadoop-env.sh file and set JAVA_HOME environment variable:

export JAVA_HOME=/usr/jdk1.8.0_192/

Hadoop has many of configuration files, which need to configure as per requirements of your hadoop infrastructure. Let’s start with the configuration with basic Hadoop single node cluster setup:

cd $HADOOP_HOME/etc/hadoop

Edit core-site.xml:

&amp;lt;configuration&amp;gt;
&amp;lt;property&amp;gt;
  &amp;lt;name&amp;gt;fs.default.name&amp;lt;/name&amp;gt;
    &amp;lt;value&amp;gt;hdfs://localhost:9000&amp;lt;/value&amp;gt;
&amp;lt;/property&amp;gt;
&amp;lt;/configuration&amp;gt;

Edit hdfs-site.xml:

&amp;lt;configuration&amp;gt;
&amp;lt;property&amp;gt;
 &amp;lt;name&amp;gt;dfs.replication&amp;lt;/name&amp;gt;
 &amp;lt;value&amp;gt;1&amp;lt;/value&amp;gt;
&amp;lt;/property&amp;gt;

&amp;lt;property&amp;gt;
  &amp;lt;name&amp;gt;dfs.name.dir&amp;lt;/name&amp;gt;
    &amp;lt;value&amp;gt;file:///home/hadoop/hadoopdata/hdfs/namenode&amp;lt;/value&amp;gt;
&amp;lt;/property&amp;gt;

&amp;lt;property&amp;gt;
  &amp;lt;name&amp;gt;dfs.data.dir&amp;lt;/name&amp;gt;
    &amp;lt;value&amp;gt;file:///home/hadoop/hadoopdata/hdfs/datanode&amp;lt;/value&amp;gt;
&amp;lt;/property&amp;gt;
&amp;lt;/configuration&amp;gt;

Edit mapred-site.xml:

&amp;lt;configuration&amp;gt;
 &amp;lt;property&amp;gt;
  &amp;lt;name&amp;gt;mapreduce.framework.name&amp;lt;/name&amp;gt;
   &amp;lt;value&amp;gt;yarn&amp;lt;/value&amp;gt;
 &amp;lt;/property&amp;gt;
&amp;lt;/configuration&amp;gt;

Edit yarn-site.xml:

&amp;lt;configuration&amp;gt;
 &amp;lt;property&amp;gt;
  &amp;lt;name&amp;gt;yarn.nodemanager.aux-services&amp;lt;/name&amp;gt;
    &amp;lt;value&amp;gt;mapreduce_shuffle&amp;lt;/value&amp;gt;
 &amp;lt;/property&amp;gt;
&amp;lt;/configuration&amp;gt;

Now format namenode using the following command, do not forget to check the storage directory:

hdfs namenode -format

Start all hadoop services use the following command:

cd $HADOOP_HOME/sbin/
start-dfs.sh
start-yarn.sh

You should observe the output to ascertain that it tries to start datanode on slave nodes one by one. To check if all services are started well using ‘jps‘ command:

jps

Step 5. Accessing Apache Hadoop.

Apache Hadoop will be available on HTTP port 8088 and port 50070 by default. Open your favorite browser and navigate to http://yourdomain.com:50070 or http://server-ip:50070. If you are using a firewall, please open port 8088 and 50070 to enable access to the control panel.

Congratulation’s! You have successfully installed Hadoop. Thanks for using this tutorial for installing Apache Hadoop on Ubuntu 18.04 LTS system. For additional help or useful information, we recommend you to check the official Apache Hadoop web site.

How To Install Deluge on Ubuntu 18.04 LTS

Install Deluge on Ubuntu 18

Deluge is a popular multi-platform bittorrent client often used to provide torrenting / seedbox functionality on Linux servers. Like rTorrent, deluge uses libtorrent as its backend. Supported by daemon-service, awesome interface, and great plugin support, Deluge surpass Transmission and rTorrent for functionality.

This article assumes you have at least basic knowledge of Linux, know how to use the shell, and most importantly, you host your site on your own VPS. The installation is quite simple and assumes you are running in the root account, if not you may need to add ‘sudo’ to the commands to get root privileges. I will show you through the step by step installation Deluge bittorrent client on an Ubuntu 18.04 Bionic Beaver server.

Install Deluge on Ubuntu 18.04 LTS Bionic Beaver

Step 1. First make sure that all your system packages are up-to-date by running these following apt-get commands in the terminal.

sudo apt-get update
sudo apt-get upgrade

Step 2. Installing Deluge on Ubuntu 18.04 LTS.

Use the following command to install Deluge daemon and Deluge Web interface on Ubuntu 18.04 server:

sudo add-apt-repository ppa:deluge-team/ppa
sudo apt install deluged deluge-webui

Then create the Deluge user and group:

sudo adduser --system --group deluge
sudo gpasswd -a wpcademy deluge

Step 3. Create Systemd Service.

Create a systemd service file for deluge with your favourite text editor such as nano:

nano /etc/systemd/system/deluged.service

Add following lines:

[Unit]
Description=Deluge Bittorrent Client Daemon
After=network-online.target

[Service]
Type=simple
User=deluge
Group=deluge
UMask=007

ExecStart=/usr/bin/deluged -d

Restart=on-failure

# Configures the time to wait before service is stopped forcefully.
TimeoutStopSec=300

[Install]
WantedBy=multi-user.target

Now start deluge deamon with the following command:

systemctl start deluged
systemctl enable deluged

Next, we create a systemd service file for deluge web:

nano /etc/systemd/system/deluge-web.service

Add following lines:

[Unit]
Description=Deluge Bittorrent Client Web Interface
After=network-online.target

[Service]
Type=simple

User=deluge
Group=deluge
UMask=027

ExecStart=/usr/bin/deluge-web

Restart=on-failure

[Install]
WantedBy=multi-user.target

Save and close the file also start and enable deluge-web:

systemctl start deluge-web
systemctl enable deluge-web

Step 4. Accessing Deluge.

Deluge will be available on HTTP port 8112 by default. Open your favorite browser and navigate to http://yourdomain.com:8112 or http://server-ip:8112. The default password for deluge is deluge, better change it when you are first to login.

Congratulation’s! You have successfully installed Deluge. Thanks for using this tutorial for installing Deluge bittorrent client on your Ubuntu 18.04 LTS system. For additional help or useful information, we recommend you to check the official Deluge web site.

How To Install Yarn on Ubuntu 18.04 LTS

Install Yarn on Ubuntu 18

Yarn is an advanced package management software for Node.js applications. It is a fast, secure, and reliable alternative that any other Nodejs package manager’s.

This article assumes you have at least basic knowledge of Linux, know how to use the shell, and most importantly, you host your site on your own VPS. The installation is quite simple and assumes you are running in the root account, if not you may need to add ‘sudo’ to the commands to get root privileges. I will show you through the step by step installation R open source programming language on an Ubuntu 18.04 Bionic Beaver server.

Install Yarn on Ubuntu 18.04 LTS Bionic Beaver

Step 1. First make sure that all your system packages are up-to-date by running these following apt-get commands in the terminal.

sudo apt-get update
sudo apt-get upgrade
[php]


&lt;strong&gt; Step 2. Installing Yarn on Ubuntu 18.04 LTS.
&lt;/strong&gt;

First, Yarn repository and import the repository’s GPG key:

[php]
curl -sS https://dl.yarnpkg.com/debian/pubkey.gpg | sudo apt-key add -
echo "deb https://dl.yarnpkg.com/debian/ stable main" | sudo tee /etc/apt/sources.list.d/yarn.list

Next, update the package index and install Yarn using following command:

sudo apt-get update
sudo apt-get install yarn

If using nvm you can avoid the node installation by doing:

sudo apt install --no-install-recommends yarn

Verify the installation:

yarn --version

Step 3. Using Yarn.

Create a new Yarn project use yarn init:

yarn init my_yarn_wpcademy

Adding dependency:

yarn add [package_name]

Upgrading dependency:

yarn upgrade [package_name]
yarn upgrade [package_name]@[version_or_tag]

Installing all project dependencies:

yarn

Congratulation’s! You have successfully installed Yarn. Thanks for using this tutorial for installing Yarn on your Ubuntu 18.04 LTS Bionic Beaver. For additional help or useful information, we recommend you to check the official Yarn web site.

How To Install VNC Server on Ubuntu 18.04 LTS

Install VNC Server on Ubuntu 18

VNC (Virtual Network Computing) server is a free and open source software which is designed for allowing remote access to the Desktop Environment of the server to the VNC Client whereas VNC viewer is used on remote computer to connect to the server .

This article assumes you have at least basic knowledge of Linux, know how to use the shell, and most importantly, you host your site on your own VPS. The installation is quite simple and assumes you are running in the root account, if not you may need to add ‘sudo’ to the commands to get root privileges. I will show you through the step by step installation VNC Server on an Ubuntu 18.04 Bionic Beaver server.

Install VNC Server on Ubuntu 18.04 LTS Bionic Beaver

Step 1. First make sure that all your system packages are up-to-date by running these following apt-get commands in the terminal.

sudo apt-get update
sudo apt-get upgrade
[php]

<strong> Step 2. Installing VNC Server on Ubuntu 18.04 LTS.</strong>

First, type the following command to install Xfce on your server:
[php]
sudo apt install xfce4 xfce4-goodies xorg dbus-x11 x11-xserver-utils

Next, install TigerVNC on your Ubuntu server:

sudo apt install tigervnc-standalone-server tigervnc-common

Once installed the next step is to run the vncserver command which will create the initial configuration and set up the password:

vncserver

Result:

You will require a password to access your desktops.

Password:
Verify:
Would you like to enter a view-only password (y/n)? n
/usr/bin/xauth:  file /home/chedelics/.Xauthority does not exist

New 'server2.wpcademy.com:1 (chedelics)' desktop at :1 on machine server2.wpcademy.com
Starting applications specified in /etc/X11/Xvnc-session
Log file is /home/chedelics/.vnc/server2.wpcademy.com:1.log

Use xtigervncviewer -SecurityTypes VncAuth -passwd /home/chedelics/.vnc/passwd :1 to connect to the VNC server.

After VNC Server started and created some of it’s files. We are now can turn it off to modify the xstartup file (startup script) to make it start with xfce4:

vncserver -kill :1
[php]

<strong> Step 3. Configuring VNC Server. </strong>

First, create the following file:
[php]
~/.vnc/xstartup

Add following files:

#!/bin/sh
unset SESSION_MANAGER
unset DBUS_SESSION_BUS_ADDRESS
exec startxfce4

Next, Run the following command to make sure permissions are correct:

chmod u+x ~/.vnc/xstartup

Step 4. Creating a Systemd unit file.

The next step is to create VNC Server statup script:

/etc/systemd/system/[email protected]

Add following files:

[Unit]
Description=Remote desktop service (VNC)
After=syslog.target network.target

[Service]
Type=simple
User=chedelics
PAMName=login
PIDFile=/home/%u/.vnc/%H%i.pid
ExecStartPre=/bin/sh -c '/usr/bin/vncserver -kill :%i > /dev/null 2>&1 || :'
ExecStart=/usr/bin/vncserver :%i -geometry 1440x900 -alwaysshared -fg
ExecStop=/usr/bin/vncserver -kill :%i

[Install]
WantedBy=multi-user.target

The next step is to enable the unit file with the following command:

sudo systemctl daemon-reload
sudo systemctl enable [email protected]
sudo systemctl start [email protected]

Step 4. Connecting to VNC server.

To access remote desktop on vnc server from windows system, you must have vnc viewer installed on your system. There are various vnc viewer available to use. Download any one and install on your system, for example:

TightVNC
RealVNC
TigerVNC

tightvnc-connection

Congratulation’s! You have successfully installed VNC Server. Thanks for using this tutorial for installing VNC Server on your Ubuntu 18.04 LTS Bionic Beaver. For additional help or useful information, we recommend you to check the official VNC web site.

How To Install Vagrant on Ubuntu 18.04 LTS

Install Vagrant on Ubuntu 18

Vagrant is an open source tool for building an entire virtual development environment. Frequently, a test environment is needed for analyzing the latest release and new tools. Also, it reduces the time spent on re-building that your OS. By default, vagrant uses virtualbox for managing the Virtualization. Vagrant acts as the fundamental configuration for managing/deploying multiple reproducible virtual environments with the same configuration.

This article assumes you have at least basic knowledge of Linux, know how to use the shell, and most importantly, you host your site on your own VPS. The installation is quite simple and assumes you are running in the root account, if not you may need to add ‘sudo’ to the commands to get root privileges. I will show you through the step by step installation Vagrant virtual development environment on an Ubuntu 18.04 Bionic Beaver server.

Install Vagrant on Ubuntu 18.04 LTS Bionic Beaver


Step 1. First make sure that all your system packages are up-to-date by running these following apt-get commands in the terminal.

sudo apt-get update
sudo apt-get upgrade

Step 2. Installing VirtualBox.

Install Virtualbox from the terminal using following command:
[/php]
apt install virtualbox


<strong> Step 3. Installing Vagrant on Ubuntu 18.04 LTS.
</strong>
Install Vagrant from the terminal using following command:

[php]
apt install vagrant

To verify that the installation was successful run the following command which will print the Vagrant version:

vagrant --version

Step 4. Deploy your development environment.

Vagrant can quickly deploy the development environment. The following command will install precise32 box from the vagrant website. A box is nothing more then a specially packaged image that can later be used to provision a server:

vagrant box add precise32 http://files.vagrantup.com/precise32.box

Create a root directory for your Project. Then create a vagrant file in this folder by calling ‘vagrant init’, which will be the central file for the project configuration:

mkdir vagrant_project_wpcademy
cd vagrant_project wpcademy
vagrant init

Edit the Vagrantfile in this directory and replace:

config.vm.box = "precise32"

Start Environment:

vagrant up
Bringing machine 'default' up with 'virtualbox' provider...
[default] Importing base box 'precise32'...
[default] Matching MAC address for NAT networking...
[default] Setting the name of the VM...
[default] Clearing any previously set forwarded ports...
[default] Clearing any previously set network interfaces...
[default] Preparing network interfaces based on configuration...
[default] Forwarding ports...

Congratulation’s! You have successfully installed Vagrant. Thanks for using this tutorial for installing Vagrant virtual development environment on your Ubuntu 18.04 LTS Bionic Beaver system. For additional help or useful information, we recommend you to check the official Vagrant web site.