How To Install Apache Solr on Ubuntu 14.04

apache solr on ubuntu

Apache Solr is an open source enterprise search platform used to easily create search engines which searches websites, files and databases. Its major features include powerful full-text search, faceted search, distributed search, hit highlighting and index replication. But before you proceed, make sure you have already installed Tomcat which is necessary to access Solr from the browser.

This article assumes you have at least basic knowledge of linux, know how to use the shell, and most importantly, you host your site on your own VPS. The installation is quite simple. I will show you through the step by step installation Apache Solr on Ubuntu 14.04.

Step 1. First, Install Java.

Because tomcat and solr are Java based softwares we need the Java environment (As it is advised in the Solr wiki : prefere a full JDK to a simple JRE.)

Add the webupd8team Java PPA repository in your system:

 sudo add-apt-repository -y ppa:webupd8team/java
sudo apt-get update
sudo aptitude -y install oracle-java8-installer

Verify installed Java version:

#java -version
java version "1.8.0_40"
Java(TM) SE Runtime Environment (build 1.8.0_40-b25)
Java HotSpot(TM) 64-Bit Server VM (build 25.40-b25, mixed mode)

Step 2. Install Apache Solr.

Ubuntu provides 3 Solr packages by default: nsolr-commo, the package that contains the actual Solr code; solr-tomcat, Solr integrated with Tomcat; and solr-jetty, which is just like solr-tomcat but with the Jetty web server. In this article, we will install solr-tomcat, so execute the following command:

 sudo apt-get -y install solr-tomcat

Then let’s start the server:

 sudo service tomcat6 start

Important: the config & index will be stored at : /usr/share/solr/

Step 3. Install tomcat management utilities.

 sudo apt-get install tomcat6-admin

Once installed, you’ll have to grant some user:

 sudo nano /etc/tomcat6/tomcat-users.xml

Paste these lines (change username and password as you whish):

<role rolename="manager"/>
<role rolename="admin"/>
<user username="tomcat" password="tomcat" roles="manager,admin"/>

Step 4. Accessing Apache Solr.

Apache Solr will be available on HTTP port 8080 by default. Open your favorite browser and navigate to http://yourdomain.com:8080/solr  or http://server-ip:8080/solr. If you are using a firewall, please open port 8080 to enable access to the control panel.
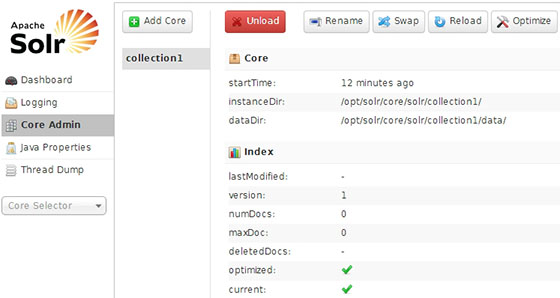
apache solr web admin

Congratulation’s! You have successfully installed Apache Solr. Thanks for using this tutorial for installing Apache Solr on Ubuntu 14.04 system.

You might also like: How To Install Apache Solr on CentOS 6

How To Install Java JDK 8 on CentOS 6

install java jdk on centos 6

There are many programs and scripts that require java to run it, but usually Java is not installed by default on VPS or Dedicated Server. This article assumes you have at least basic knowledge of linux, know how to use the shell, and most importantly, you host your site on your own VPS. The installation is quite simple. I will show you through the step by step installation Java JDK 8 on CentOS 6.

Step 1. Remove the Java 1.6 or 1.7 have been installed already, you can uninstall them using the following commands.

yum remove java-1.6.0-openjdk
yum remove java-1.7.0-openjdk

Step 2. Downloading latest Java archive.

Download latest Java SE Development Kit 8 release from its official download page or use following commands to download from shell:

### CentOS 64-Bit ###
cd /opt/
wget --no-cookies --no-check-certificate --header "Cookie: gpw_e24=http%3A%2F%2Fwww.oracle.com%2F; oraclelicense=accept-securebackup-cookie" "http://download.oracle.com/otn-pub/java/jdk/8u40-b25/jdk-8u40-linux-x64.tar.gz"
tar xzf jdk-8u40-linux-x64.tar.gz
### CentOS 32-Bit ###
cd /opt/
wget --no-cookies --no-check-certificate --header "Cookie: gpw_e24=http%3A%2F%2Fwww.oracle.com%2F; oraclelicense=accept-securebackup-cookie" "http://download.oracle.com/otn-pub/java/jdk/8u40-b25/jdk-8u40-linux-i586.tar.gz"
tar xzf jdk-8u40-linux-i586.tar.g

Step 3. Install JAVA using alternatives.
After extracting archive file use alternatives command to install it. alternatives command is available in chkconfig package:

# cd /opt/jdk1.8.0_40/
# alternatives --install /usr/bin/java java /opt/jdk1.8.0_40/bin/java 2
# alternatives --config java
There are 3 programs which provide 'java'.
  Selection    Command
-----------------------------------------------
*  1           /opt/jdk1.8.0/bin/java
 + 2           /opt/jdk1.8.0_25/bin/java
   3           /opt/jdk1.8.0_40/bin/java
Enter to keep the current selection[+], or type selection number: 3

At this point JAVA 8 has been successfully installed on your system. We also recommend to setup javac and jar commands path using alternatives:

alternatives --install /usr/bin/jar jar /opt/jdk1.8.0_40/bin/jar 2
alternatives --install /usr/bin/javac javac /opt/jdk1.8.0_40/bin/javac 2
alternatives --set jar /opt/jdk1.8.0_40/bin/jar
alternatives --set javac /opt/jdk1.8.0_40/bin/javac

Step 4. Verify Installed Java version.

# java -version
java version "1.8.0_40"
Java(TM) SE Runtime Environment (build 1.8.0_40-b25)
Java HotSpot(TM) 64-Bit Server VM (build 25.40-b25, mixed mode)

Step 5. Setup global environment variables.

We can easily set the environment variables using the export command as shown below:

Setup JAVA_HOME Variable:

 export JAVA_HOME=/opt/jdk1.8.0_40

Setup JRE_HOME Variable:

 export JRE_HOME=/opt/jdk1.8.0_40/jre

Setup PATH Variable:

 export PATH=$PATH:/opt/jdk1.8.0_40/bin:/opt/jdk1.8.0_40/jre/bin

Congratulation’s! You have successfully installed Java. Thanks for using this tutorial for installing Oracle Java (JDK) 8 on CentOS 6 system.

How To Install Cacti on CentOS 6

install cacti on centos

Cacti is an open-source, web-based network monitoring and graphing tool designed as a front-end application for the open-source, industry-standard data logging tool RRDtool. It is used by IT businesses and stores all of the necessary information about bandwidth, hard disk usage, CPU usage, load average, RAM statistics etc in a MySQL database. Cacti creates graphs and populates them with data. It offers SNMP support, 3rd party templates and plugins and has built in user authentications and user permission features.

This article assumes you have at least basic knowledge of linux, know how to use the shell, and most importantly, you host your site on your own VPS. The installation is quite simple. I will show you through the step by step installation Cacti on CentOS 6.

Step 1. First, you need to enable EPEL repository on your system.

## RHEL/CentOS 6 64-Bit ##
# wget http://download.fedoraproject.org/pub/epel/6/x86_64/epel-release-6-8.noarch.rpm
# rpm -ivh epel-release-6-8.noarch.rpm
## RHEL/CentOS 6 32-Bit ##
# wget http://download.fedoraproject.org/pub/epel/6/i386/epel-release-6-8.noarch.rpm
# rpm -ivh epel-release-6-8.noarch.rpm

Step 2. Install required packages.

Install apache:

 yum install httpd httpd-devel

Install MySQL server:

 yum install mysql mysql-server

Intsall PHP modules:

 yum install php-mysql php-pear php-common php-gd php-devel php php-mbstring php-cli php-mysql

Install PHP-SNMP:

 yum install php-snmp

Install NET-SNMP:

 yum install net-snmp-utils p net-snmp-libs

Install RRDTool:

 yum install rrdtool

Once installed all the above softwares, start them:

/etc/init.d/mysqld start
/etc/init.d/httpd start
/etc/init.d/snmpd start

In order for these services to run at startup we need to enter the following commands:

chkconfig mysqld on
chkconfig httpd on
chkconfig snmpd on

Step 2. Install Cacti.

chkconfig mysqld on
chkconfig httpd on
chkconfig snmpd on

Step 3. Configuring MySQL.

By default, MySQL is not hardened. You can secure MySQL using the mysql_secure_installation script. you should read and below each steps carefully which will set root password, remove anonymous users, disallow remote root login, and remove the test database and access to secure MySQL.

 mysql_secure_installation

Cacti requires a MySQL user and database, so create them by executing the following commands:

# mysql -u root -p
create database cacti;
grant all privileges on cacti.* to 'cactiuser'@'localhost' identified by 'your-password-here';
flush privileges;
exit

Step 4. Setup Cacti tables to MySQL.

Now import cacti database tables from the file cacti.sql . Issue the below command to find the location of cacti.sql file:

#rpm -ql cacti | grep cacti.sql
/usr/share/doc/cacti-0.8.8a/cacti.sql

Now we need to install the tables into the cacti.sql file. Use the following command to do this and enter your database password when prompted:

 #rpm -ql cacti | grep cacti.sql
/usr/share/doc/cacti-0.8.8a/cacti.sql

Now we need to edit the database configuration file of cacti so that it uses the correct database name and username:

 mysql -u cactiuser -p cacti < /usr/share/doc/cacti-0.8.8b/cacti.sql

Configure MySQL settings for Cacti. Open /etc/cacti/db.php with your favourite editor and enter the values for your ‘cacti’ database:

 nano /etc/cacti/db.php
/* make sure these values reflect your actual database/host/user/password */
$database_type = "mysql";
$database_default = "cacti";
$database_hostname = "localhost";
$database_username = "cactiuser";
$database_password = "your-password-here";
$database_port = "3306";
$database_ssl = false;

Step 5. Configure the Apache Server.

We can change the Apache configuration to choose what IP addresses / subnets are allowed to connect. You can do this by editing the following file:

##nano /etc/httpd/conf.d/cacti.conf

<Directory /usr/share/cacti/>
 Order Deny,Allow
 Deny from none
 Allow from <YOUR_IP_ADDRESS_RANGE>
 </Directory>

Restart Apache:

 /etc/init.d/httpd restart

Step 6. Configure Cron for Cacti.

Open /etc/cron.d/cacti file:

nano /etc/cron.d/cacti
###Remove the # in the following line###
#*/5 * * * * cacti /usr/bin/php /usr/share/cacti/poller.php > /dev/null 2>&1

Step 7. Configuring Iptables or firewall for Cacti.

iptables -A INPUT -p udp -m state --state NEW --dport 80 -j ACCEPT
iptables -A INPUT -p tcp -m state --state NEW --dport 80 -j ACCEPT
service iptables save

Step 8. Accessing Cacti.

Cacti will be available on HTTP port 80 by default. Open your favorite browser and navigate to http://yourdomain.com/cacti or http://server-ip/cacti. The default username and password for Cacti is admin / admin. Upon first login, you will be force to change the default password.

Congratulation’s! You have successfully installed Cacti.

How To Install Winusb on Ubuntu 14.04

install winusb ubuntu

WinUSB is simple tool allows to create bootable Windows USB install stick from Ubuntu Linux.  It comprises of both GUI and command line tool and you can decide to choose which to use based on your preference. This tool supports Windows 7, 8, Vista, XP and can use either an ISO or a DVD as a source. Currently there is no version for Ubuntu 14.04 in Ubuntu Repository. To successfully install Winusb on Ubuntu 14.04, you need to install the Saucy version and run the dependencies fix switch to fix the dependencies.

This article assumes you have at least basic knowledge of linux, know how to use the shell, and most importantly, you host your site on your own VPS. The installation is quite simple. I will show you through the step by step installation Winusb on Ubuntu 14.04.

Step 1. Download the winusb package that is compatible with your operating system’s architecture

Open the terminal and run the following commands:

##for Ubuntu 32-Bit##
wget https://launchpad.net/~colingille/+archive/freshlight/+files/winusb_1.0.11+saucy1_i386.deb

##for Ubuntu 64-Bit##
wget https://launchpad.net/~colingille/+archive/freshlight/+files/winusb_1.0.11+saucy1_amd64.deb

Step 2. Install Winusb.

 sudo dpkg -i winusb_1.0.11+saucy1*

Step 3. Fix dependencies errors.

 sudo apt-get -f install

Step 4. Afterwards, you can search for WinUSB in Unity Dash and use it to create a live USB of Windows in Ubuntu 14.04.

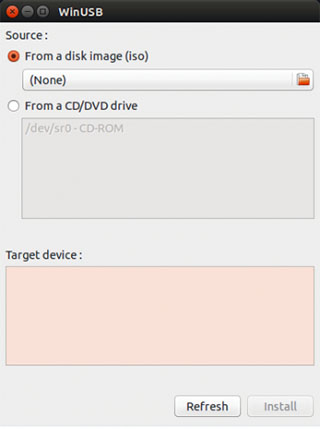
winusb ubuntu

These three steps will install the WinUSB graphical interface and the WinUSB command line tool. The WinUSB GUI is much easier to use than the WinUSB command line tool.

Congratulation’s! You have successfully installed Winusb. Thanks for using this tutorial for installing Winusb on Ubuntu 14.04 system.

How To Install PHP 5.6 on Ubuntu 16.04 LTS

Install PHP 5.6 on Ubuntu 16

PHP (recursive acronym for PHP: Hypertext Preprocessor) is an open source, popular general-purpose scripting language that is widely-used and best suited for developing websites and web-based applications. It is a server-side scripting language that can be embedded in HTML. By default Ubuntu 16.04 (Xenial) now comes with PHP 7.0. You can install PHP 5.6 in parallel and switch between them using the following instructions.

This article assumes you have at least basic knowledge of linux, know how to use the shell, and most importantly, you host your site on your own VPS. The installation is quite simple and assumes you are running in the root account, if not you may need to add ‘sudo’ to the commands to get root privileges. I will show you through the step by step installation PHP 5.6 on a Ubuntu 16.04 (Xenial Xerus) server.

Install PHP 5.6 on Ubuntu 16.04 LTS

Step 1. First make sure that all your system packages are up-to-date

sudo apt-get update
sudo apt-get upgrade

Step 2. Installing PHP 5.6 on Ubuntu 16.04.

Use the following set of commands to enable PPA for PHP 5.6 in your Ubuntu system and install PHP 5.6:

sudo apt-get install -y software-properties-common
sudo add-apt-repository ppa:ondrej/php

Now, install PHP 5.6using the apt command:

apt-get install -y php5.6

Verify the PHP version using the following command:

php -V

Result:

PHP 5.6.32-1+ubuntu16.04.1+deb.sury.org+1 (cli)
Copyright (c) 1997-2016 The PHP Group
Zend Engine v2.6.0, Copyright (c) 1998-2016 Zend Technologies
 with Zend OPcache v7.0.6-dev, Copyright (c) 1999-2016, by Zend Technologies

Congratulation’s! You have successfully installed PHP 5. Thanks for using this tutorial for installing latest stable version of PHP 5.6 on Ubuntu 16.04 LTS (Xenial Xerus) system. For additional help or useful information, we recommend you to check the official PHP web site.

How to view records from Database in CakePHP

view records in CakePHP

To view records in CakePHP and To monitor records of database, we need to get hold of a table using the TableRegistry class. We can fetch the instance out of registry using get() method. The get() method will take the name of the database table as argument. Now, this new instance is used to find records from database using find() method. This method will return all records from the requested table.

Example

Make changes in the config/routes.php file as shown in the following code.

config/routes.php

<?php
   use Cake\Core\Plugin;
   use Cake\Routing\RouteBuilder;
   use Cake\Routing\Router;

   Router::defaultRouteClass('DashedRoute');
   Router::scope('/', function (RouteBuilder $routes) {
      $routes->connect('/users', ['controller' => 'Users', 'action' => 'index']);
      $routes->fallbacks('DashedRoute');
   });
   Plugin::routes();

Create a UsersController.php file at src/Controller/UsersController.php. Copy the following code in the controller file.

src/controller/UsersController.php

<?php
   namespace App\Controller;
   use App\Controller\AppController;
   use Cake\ORM\TableRegistry;
   use Cake\Datasource\ConnectionManager;

   class UsersController extends AppController{
      public function index(){
         $users = TableRegistry::get('users');
         $query = $users->find();
         $this->set('results',$query);
      }
   }
?>

Create a directory Users at src/Template, ignore if already created, and under that directory create a View file called index.ctp. Copy the following code in that file.

src/Template/Users/index.ctp

<a href = "add">Add User</a>
<table>
   <tr>
      <td>ID</td>
      <td>Username</td>
      <td>Password</td>
      <td>Edit</td>
      <td>Delete</td>
   </tr>

   <?php
      foreach ($results as $row):
         echo "<tr><td>".$row->id."</td>";
         echo "<td>".$row->username."</td>";
         echo "<td>".$row->password."</td>";
         echo "<td><a href = '".$this->Url->build
         (["controller" => "Users","action"=>"edit",$row->id])."'>Edit</a></td>";
         
         echo "<td><a href = '".$this->Url->build
         (["controller" => "Users","action"=> "delete",$row->id])."'>Delete</a></td></tr>";
      endforeach;
   ?>
</table>

Execute the above example by visiting the following URL.

http://localhost:85/CakePHP/users

Output

Upon execution, the above URL will give you the following output.

View a Record in CakePHP

click here to read more cakePHP official website


Read more:

How to fix Potential for Information Disclosure in CakePHP