How To Install KVM and Create Virtual Machines on Ubuntu 16.04 LTS

Install KVM and Create Virtual Machines on Ubuntu 16

Kernel-based Virtual Machine (KVM) is free and open source virtualisation software. You can create multiple VM (virtual machines) , each VM has its own private virtualised hardware like disk, CPU, RAM etc.

This article assumes you have at least basic knowledge of linux, know how to use the shell, and most importantly, you host your site on your own VPS. The installation is quite simple and assumes you are running in the root account, if not you may need to add ‘sudo’ to the commands to get root privileges. I will show you through the step by step installation KVM and Create Virtual Machines on a Ubuntu 16.04 (Xenial Xerus) server.
Install KVM and Create Virtual Machines on Ubuntu 16.04 LTS

Step 1. First make sure that all your system packages are up-to-date by running these following apt-get commands in the terminal.

sudo apt-get update
sudo apt-get upgrade

Step 2. Installing KVM.

First, let us check if your system supports hardware virtualization. To do so, run the following command:

egrep -c ‘(svm|vmx)’ /proc/cpuinfo

A 0 indicates that your CPU doesn’t support hardware virtualization, while a 1 or more indicates that it does. You may still have to enable hardware virtualization support in your computer’s BIOS, even if this command returns a 1 or more.

Install KVM and other required packages to setup a virtualization environment in Linux:

apt-get install qemu-kvm libvirt-bin bridge-utils virt-manager virtinst virt-viewer

The bridge-utils is used to create bridge networking so other devices on your network can see your virtual machine.

Verify the KVM installation:
virsh -c qemu:///system list

After running this command, log out and log back in. Run this command after logging back in and you should see an empty list of virtual machines. This indicates that everything is working correctly.

Step 3. Create Virtual Machines.

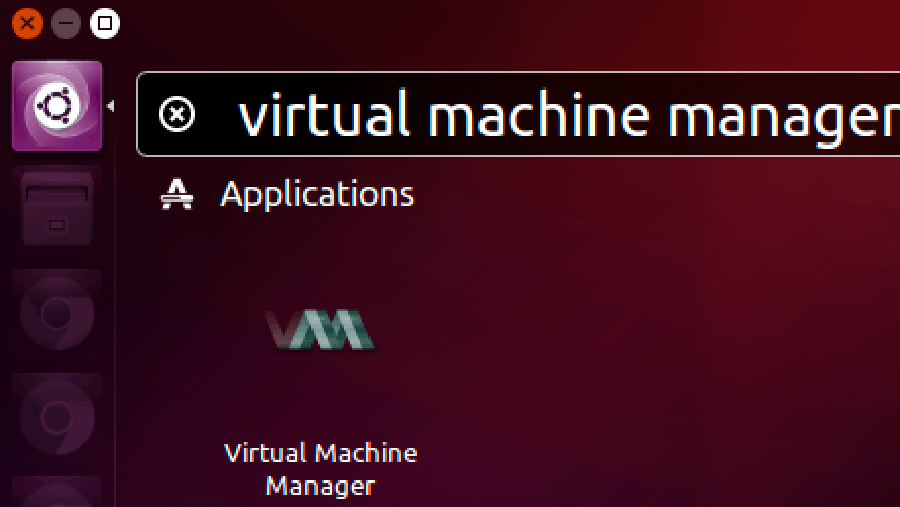
You can open the Virtual Machine Manager by typing the same in Dash Home.Click the icon , it will open the application.

Create-Virtual-Machines-KVM
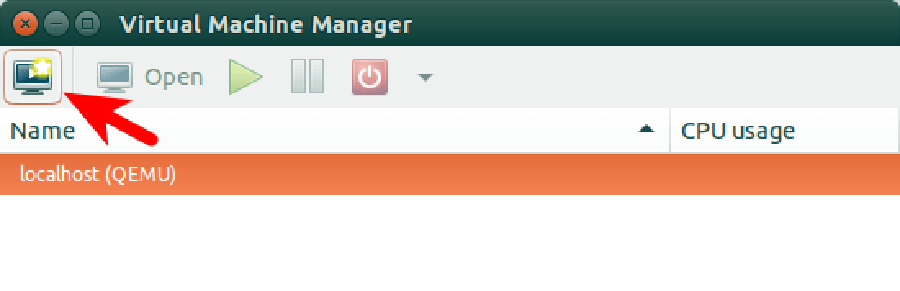
In the virtual machine manager window, click the first icon in the toolbar
Create-Virtual-Machines-KVM-1
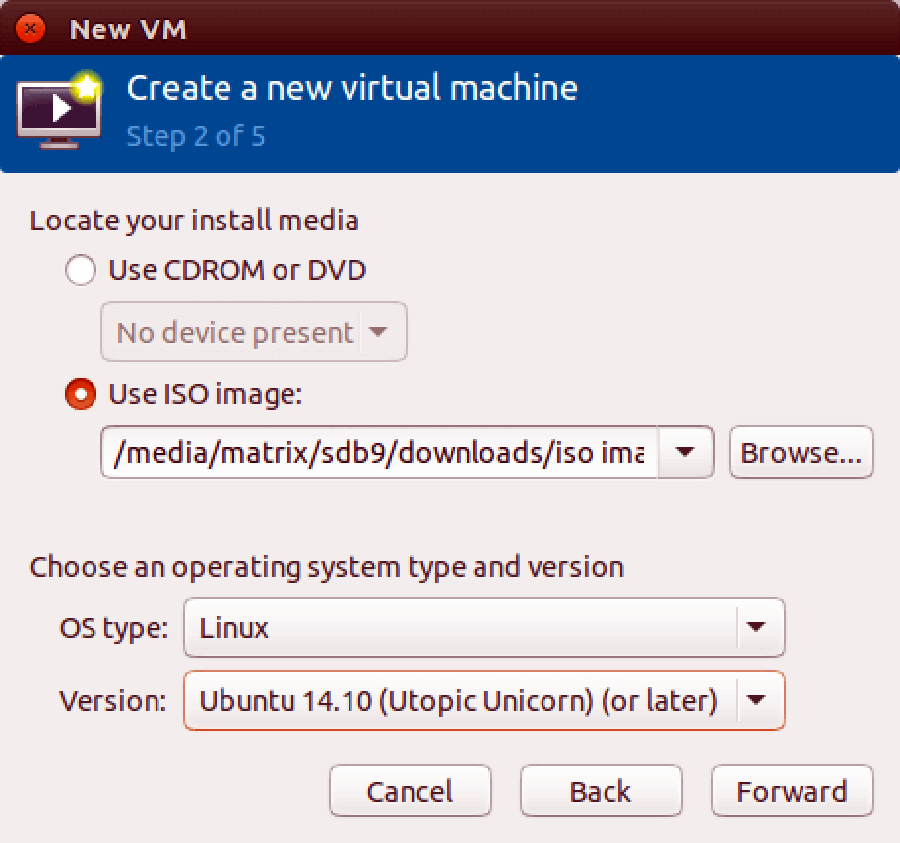
Next, Choose the location of your installation media.
Create-Virtual-Machines-KVM-2
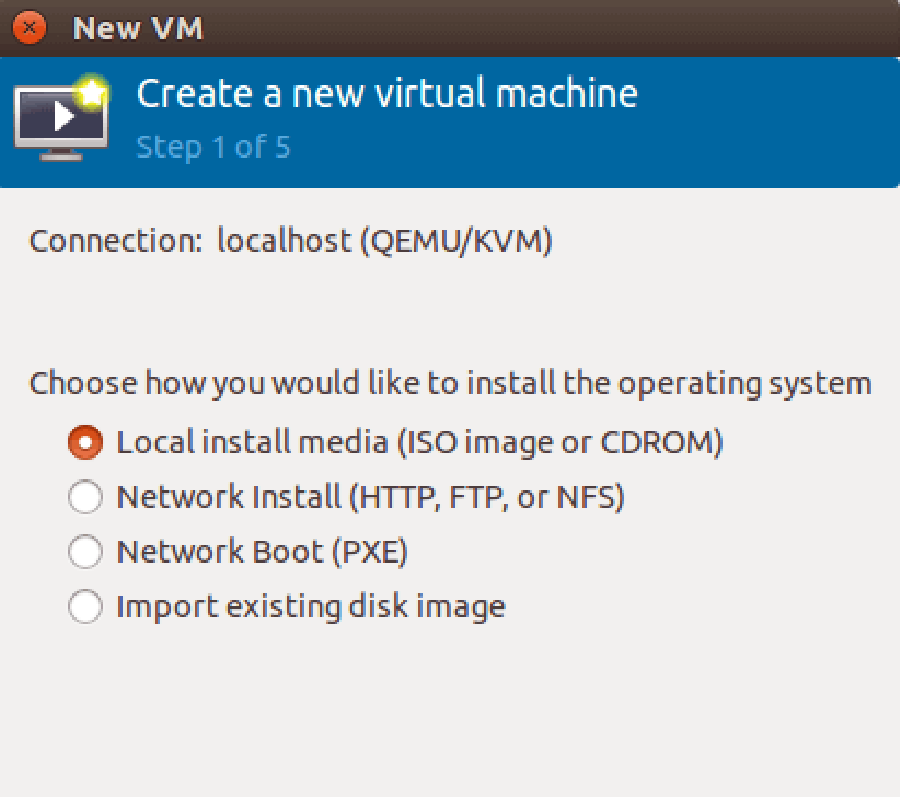
You can install from a disc, ISO image, or even a network location.
Create-Virtual-Machines-KVM-3
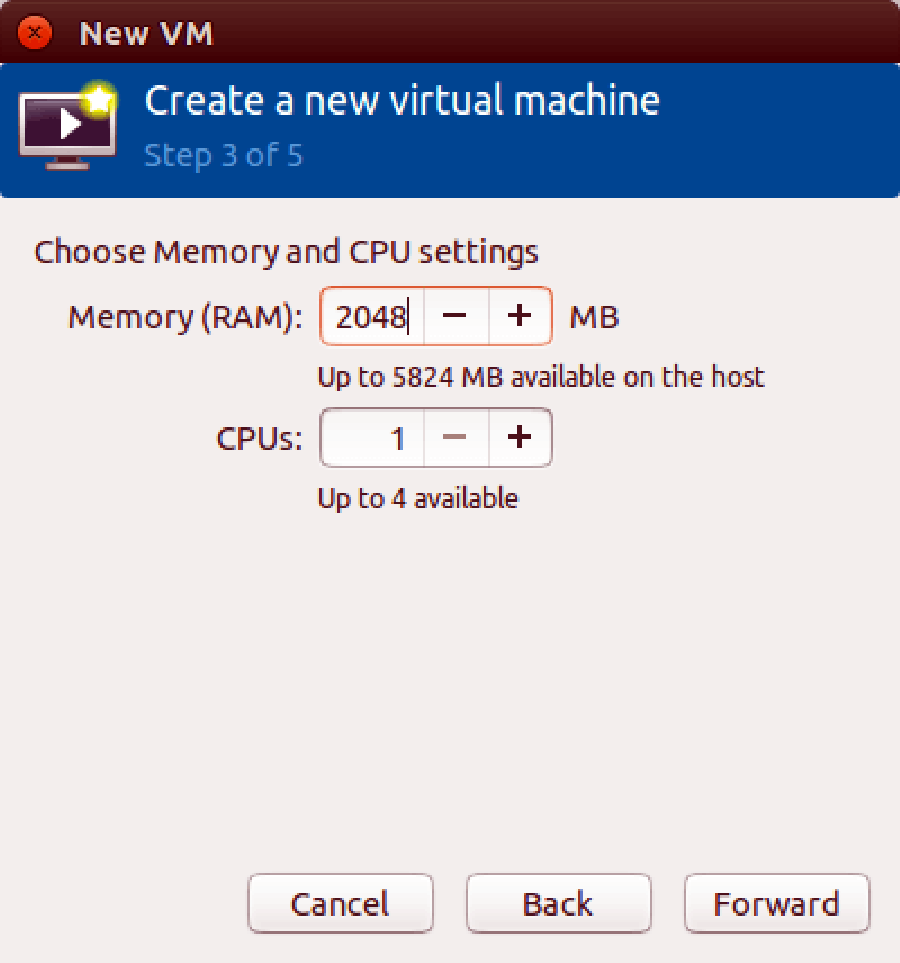
Next, allocate memory and CPU to your virtual machine
Create-Virtual-Machines-KVM-4
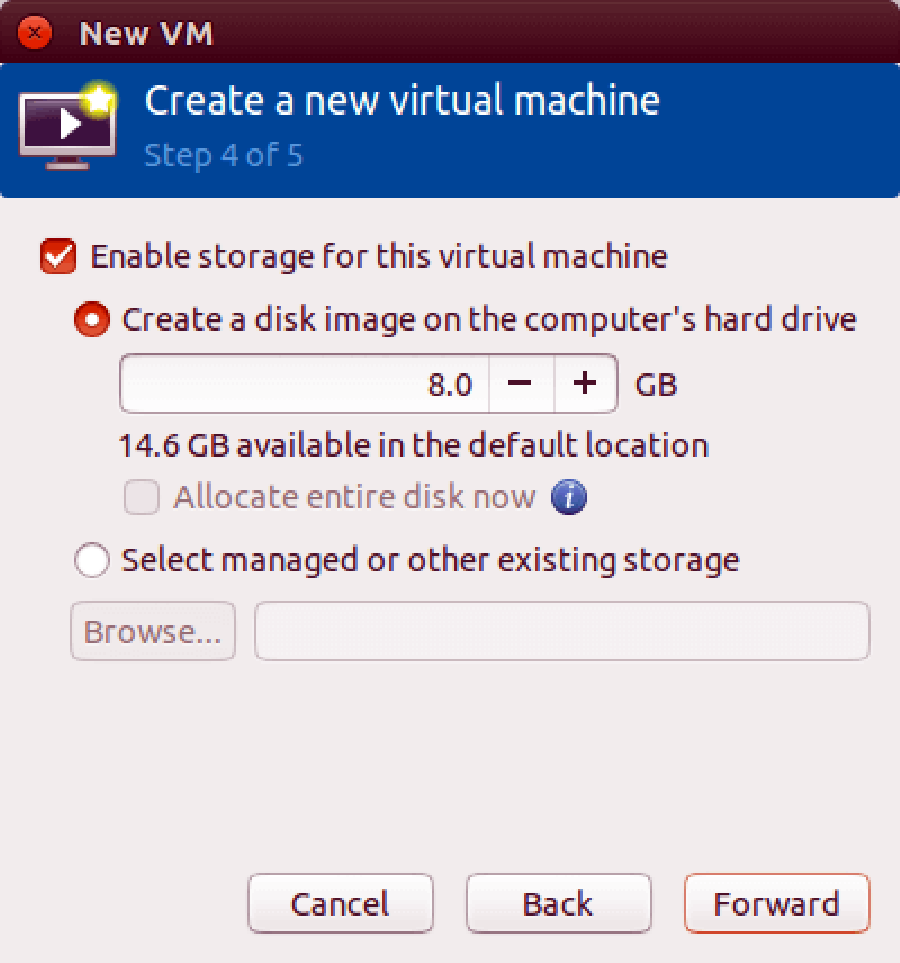
After that, specify the size of your virtual disk. If you check the box before allocate entire disk now, then the disk size is fixed.
Create-Virtual-Machines-KVM-5
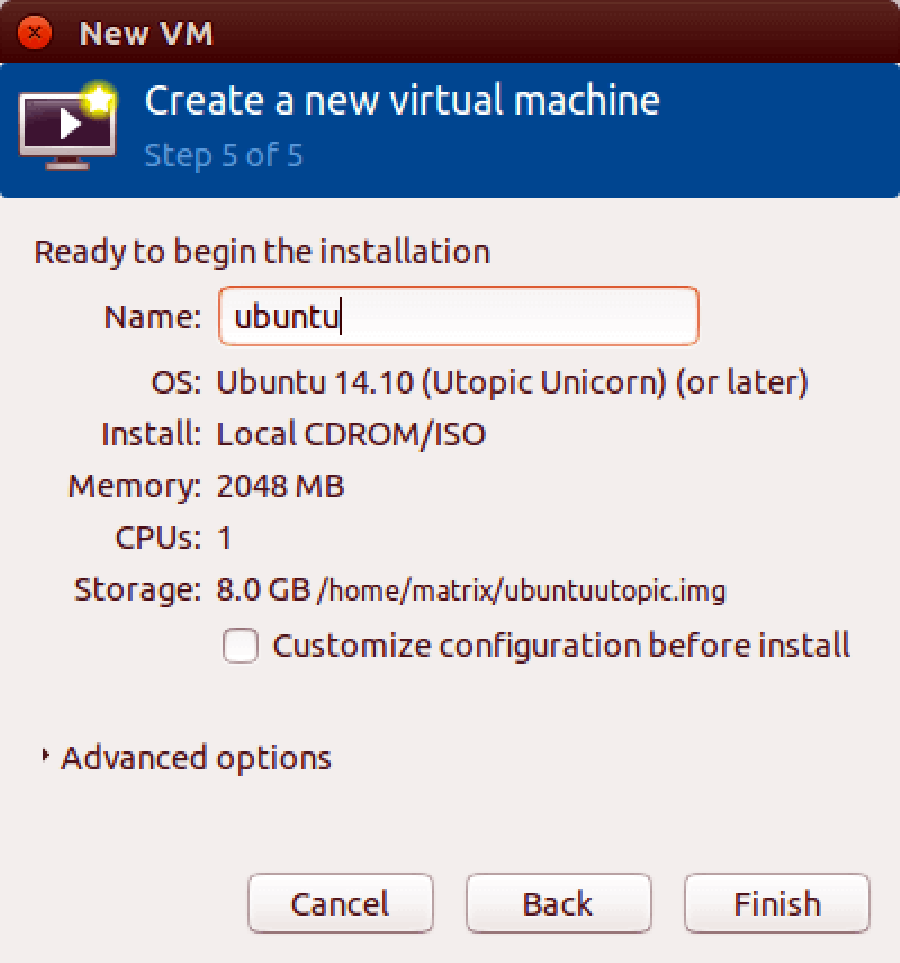
In the next window, you can give your virtual machine a name. Then click finish to begin installing OS to your virtual machine.
Create-Virtual-Machines-KVM-6
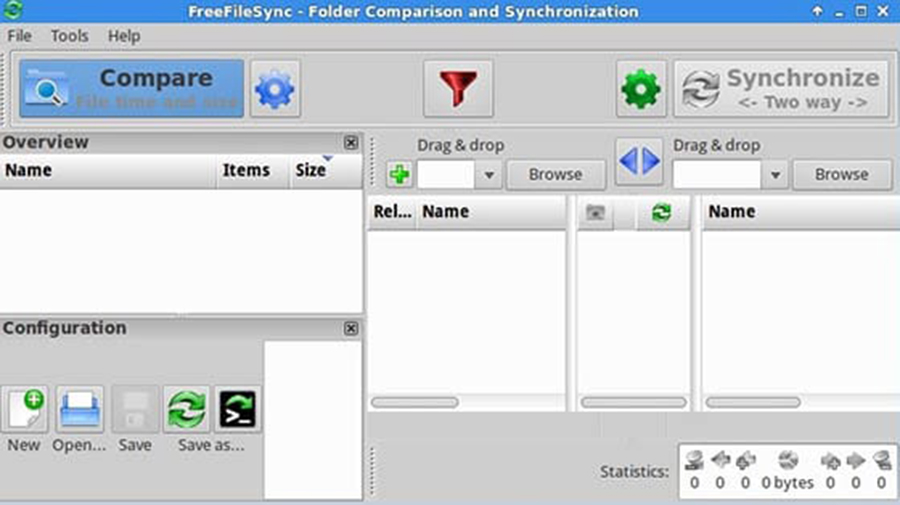
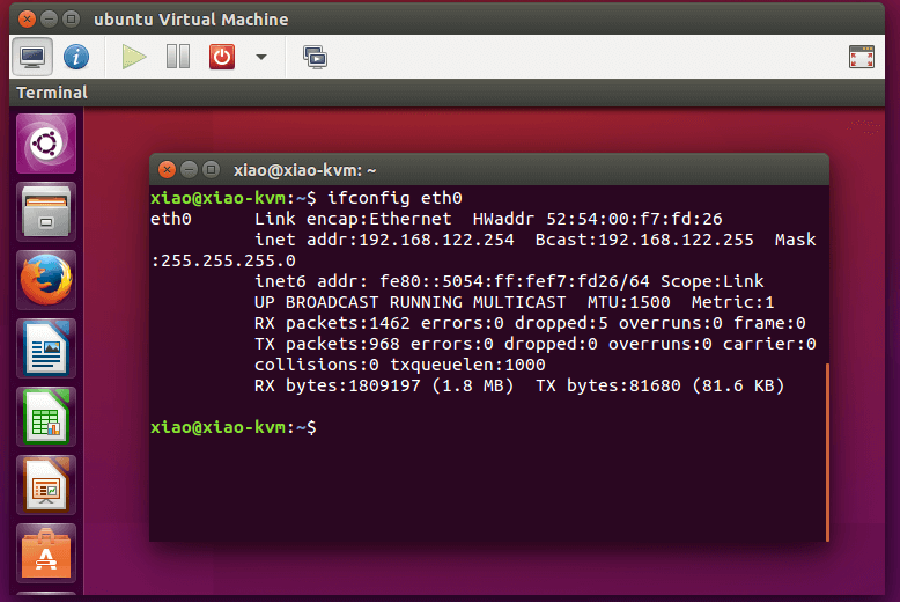
Here’s a screenshot of ubuntu virtual machine running in virt-manager window.
Create-Virtual-Machines-KVM-7
Congratulation’s! You have successfully installed KVM. Thanks for using this tutorial for installing KVM and Create Virtual Machines on Ubuntu 16.04 LTS (Xenial Xerus) system. For additional help or useful information, we recommend you to check the official KVM web site.

How To Install Google Drive Ocamlfuse on Ubuntu 16.04

Install Google Drive Ocamlfuse on Ubuntu 16

Google Drive Ocamlfuse is a FUSE-based file system powered by Google Drive. It lets you mount your Google Drive on Linux so that you can access your files and folders, either via the command line or through a traditional GUI file manager, like Nautilus, Nemo or Caja.

This article assumes you have at least basic knowledge of linux, know how to use the shell, and most importantly, you host your site on your own VPS. The installation is quite simple and assumes you are running in the root account, if not you may need to add ‘sudo’ to the commands to get root privileges. I will show you through the step by step installation Google Drive Ocamlfuse on a Ubuntu 16.04 (Xenial Xerus) server.
Install Google Drive Ocamlfuse on Ubuntu 16.04

Step 1. First make sure that all your system packages are up-to-date by running these following apt-get commands in the terminal.

sudo apt-get update
sudo apt-get upgrade

Step 2. Installing Google Drive Ocamlfuse.

Run the following commands in Terminal to install Google Drive Ocamlfuse:

sudo add-apt-repository ppa:alessandro-strada/ppa
sudo apt update
sudo apt install google-drive-ocamlfuse

Once installed complete you can go ahead and set up the app to work with your Google Drive account. While there isn’t a fancy-pants GUI front-end for setting things up don’t feel put. GDO is super simple to use via the CLI:

google-drive-ocamlfuse

It will open a new tab in your browser asking you to grant it permission to view and manage the files in your Google Drive. Click Allow:
Google-drive-ocamlfuse-browser-auth

Step 3. Mount Your Google Drive.

First, create a mount point for your Google Drive, such as ~/google-drive:

mkdir ~/google-drive
google-drive-ocamlfuse ~/google-drive/

If you have more than one account, you can run:

google-drive-ocamlfuse -label label [mountpoint]

Step 4. Unmount Google Drive:

To unmount the filesystem, run this command:

fusermount -u ~/google-drive

Congratulation’s! You have successfully installed Google Drive. Thanks for using this tutorial for installing Google Drive Ocamlfuse on Ubuntu 16.04 LTS (Xenial Xerus) system. For additional help or useful information, we recommend you to check the official Google Drive web site.

How To Install WebTorrent Desktop on Ubuntu 16.04 LTS

Install WebTorrent Desktop on Ubuntu 16

WebTorrent Desktop is a free, open source streaming torrent application for Mac, Windows, and Linux. With WebTorrent Desktop, you can watch video from the Internet Archive, listen to music from Creative Commons, or audiobooks from Librivox.

This article assumes you have at least basic knowledge of linux, know how to use the shell, and most importantly, you host your site on your own VPS. The installation is quite simple and assumes you are running in the root account, if not you may need to add ‘sudo’ to the commands to get root privileges. I will show you through the step by step installation WebTorrent Desktop on a Ubuntu 16.04 (Xenial Xerus) server.
WebTorrent Desktop Features

Lightweight, fast torrent app
Beautiful user experience
Free, non-commercial, ad-free, and open source
Instantly stream video and audio
WebTorrent fetches file pieces from the network on demand for instant playback.
Even when the file isn’t fully downloaded, seeking still works.
(Seeking just reprioritizes which pieces are fetched from the network.)
Stream videos to AirPlay, Chromecast, and DLNA
Based on the most popular and comprehensive torrent package in Node.js, web torrent
Full-featured, but bloat free
Opens magnet links and .torrent files
Drag-and-drop makes adding or creating torrents easy
Discovers peers via tracker servers, DHT (Distributed Hash Table), and peer exchange
Supports the WebTorrent protocol for connecting to WebRTC peers (i.e. web browsers)

Install WebTorrent Desktop on Ubuntu 16.04 LTS

Step 1. First make sure that all your system packages are up-to-date by running these following apt-get commands in the terminal.

sudo apt-get update
sudo apt-get upgrade

Step 2. Installing WebTorrent Desktop.

First, Download the deb package from Github project page and run the following commands to install WebTorrent Desktop on Ubuntu systems:

sudo apt-get install gdebi
wget https://github.com/feross/webtorrent-desktop/releases/download/v0.18.0/webtorrent-desktop_0.18.0-1_amd64.deb
sudo gdebi webtorrent-desktop_0.18.0-1_amd64.deb

Once installed, WebTorrent Desktop can be started from Unity Dash or your preferred app launcher or from the terminal:

webtorrent-desktop

Congratulation’s! You have successfully installed WebTorrent Desktop. Thanks for using this tutorial for installing WebTorrent Desktop on Ubuntu 16.04 LTS (Xenial Xerus) system. For additional help or useful information, we recommend you to check the official WebTorrent Desktop web site.

How To Install Facebook Messenger Desktop on Ubuntu 16.04 LTS

Install Facebook Messenger Desktop on Ubuntu 16

Messenger for Desktop is a wrapper for the official client messenger.com. Therefore it works like a regular browser which can only navigate to the messenger.com web app. MFD doesn’t touch your messages, account or personal data. All that is handled securely by Facebook.

This article assumes you have at least basic knowledge of linux, know how to use the shell, and most importantly, you host your site on your own VPS. The installation is quite simple and assumes you are running in the root account, if not you may need to add ‘sudo’ to the commands to get root privileges. I will show you through the step by step installation Facebook Messenger Desktop on a Ubuntu 16.04 (Xenial Xerus) server.
Install Facebook Messenger Desktop on Ubuntu 16.04 LTS

Step 1. First make sure that all your system packages are up-to-date by running these following apt-get commands in the terminal.

sudo apt-get update
sudo apt-get upgrade

Step 2. Installing Facebook Messenger Desktop.

First, Download the deb package from this page and run the following commands to install Facebook Messenger Desktop on Ubuntu systems:

sudo apt-get install gdebi
wget https://github.com/aluxian/Messenger-for-Desktop/releases/download/v2.0.9/messengerfordesktop-2.0.9-linux-amd64.deb
sudo dpkg -i messengerfordesktop*.deb

Once installed, Facebook Messenger Desktop can be started from Unity Dash or your preferred app launcher or from the terminal:

messengerfordesktop

Congratulation’s! You have successfully installed Facebook Messenger App. Thanks for using this tutorial for installing Facebook Messenger Desktop on Ubuntu 16.04 LTS (Xenial Xerus) system. For additional help or useful information, we recommend you to check the official Facebook Messenger Desktop web site.

How To Install FreeFileSync on Ubuntu 16.04

Install FreeFileSync on Ubuntu 16

FreeFileSync is a free Open Source software that helps you synchronize files and synchronize folders in Windows, Linux and Mac OS X. It is designed to save your time setting up and running backup jobs while having nice visual feedback along the way. With FreeFileSync, you can detect moved and renamed files and folders, keep versions of deleted/updated files, including copy locked files and much more.

This article assumes you have at least basic knowledge of linux, know how to use the shell, and most importantly, you host your site on your own VPS. The installation is quite simple and assumes you are running in the root account, if not you may need to add ‘sudo’ to the commands to get root privileges. I will show you through the step by step installation FreeFileSync open source file synchronization tool on a Ubuntu 16.04 (Xenial Xerus) server.
Install FreeFileSync on Ubuntu 16.04

Step 1. First make sure that all your system packages are up-to-date by running these following apt-get commands in the terminal.

sudo apt-get update
sudo apt-get upgrade

Step 2. Installing FreeFileSync on Linux Ubuntu.

First, go to FreeFileSync download page to install FreeFileSync on Ubuntu systems:

install-freefilesync-on-Ubuntu-16.04
Once downloaded, You can manually install just by extracting the *.tar.gz file into any folder. FreeFileSync is an executable binary and needs no install.
freefilesync-binary
Finally step, Double-click the FreeFileSync binary and you will see the program running:
FreeFileSync-linux

FreeFileSync is an executable binary there is no installation required but you should place the FreeFileSync folder into a more appropriate folder such as /opt/FreeFileSync.


Congratulation’s! You have successfully installed FreeFileSync. Thanks for using this tutorial for installing FreeFileSync on Ubuntu 16.04 LTS (Xenial Xerus) system. For additional help or useful information, we recommend you to check the official FreeFileSync web site.

How To Install Nginx With Ngx_Pagespeed Module on Ubuntu 16.04 LTS

Install Nginx With Ngx_Pagespeed Module on Ubuntu 16

PageSpeed (ngx_pagespeed) is a Nginx module created by Google to help Make the Web Faster by rewriting web pages to reduce latency and bandwidth. For the installation, we will need to compile nginx from souce with the PageSpeed module, as Nginx doesn’t support Dynamic module loading (DSO), unless you want to build your own rpm or deb files.

This article assumes you have at least basic knowledge of linux, know how to use the shell, and most importantly, you host your site on your own VPS. The installation is quite simple and assumes you are running in the root account, if not you may need to add ‘sudo’ to the commands to get root privileges. I will show you through the step by step installation nginx with pagespeed module on a Ubuntu 16.04 (Xenial Xerus) server.
Install Nginx With Ngx_Pagespeed Module on Ubuntu 16.04 LTS

Step 1. First make sure that all your system packages are up-to-date by running these following apt-get commands in the terminal.

sudo apt-get update
sudo apt-get upgrade
sudo apt-get install dpkg-dev build-essential zlib1g-dev libpcre3 libpcre3-dev unzip

Step 2. Add the Nginx repository.

Run the commands below in terminal to compiling the latest Nginx mainline version:

wget http://nginx.org/keys/nginx_signing.key
apt-key add nginx_signing.key

Create a new repository and edit the sources.list file:

nano /etc/apt/sources.list

Add the following two lines at the end of this file:

deb http://nginx.org/packages/mainline/ubuntu/ xenial nginx
deb-src http://nginx.org/packages/mainline/ubuntu/ xenial nginx

Step 3. Download Nginx from source package.

Create a new directory for the nginx source files and download the nginx sources using apt command:

mkdir ~/nginx && cd ~/nginx
sudo apt source nginx

Check out the downloaded files:

### ls ~/nginx/
nginx-1.11.1                               nginx_1.11.1-1~xenial.dsc
nginx_1.11.1-1~xenial.debian.tar.xz        nginx_1.11.1.orig.tar.gz

Step 4. Download ngx_pagespeed source package.

To compile Nginx with ngx_pagespeed module, we also need ngx_pagespeed source package. Go to Github ngx_pagespeed download page:

wget https://codeload.github.com/pagespeed/ngx_pagespeed/zip/v1.11.33.4-beta

Unzip into the current directory:

unzip v1.11.33.4-beta
cd ngx_pagespeed-1.11.33.4-beta/

Next, we also need to download the psol library. (PageSpeed Optimization Library) and extract it:

wget https://dl.google.com/dl/page-speed/psol/1.11.33.4.tar.gz
tar xvf 1.11.33.4.tar.gz

Step 5. Configure Nginx to build with Pagespeed.

First, edit Nginx compilation rule file:

nano ~/nginx/nginx-1.11.1/debian/rules

Add the new line under ‘COMMON_CONFIGURE_ARGS’:

--add-module=/home/username/ngx_pagespeed-1.11.33.2-beta

Step 6. Start the Compilation Nginx Ubuntu package.

Go to the nginx source directory and build nginx from source with the dpkg-buildpackage command:

cd ~/nginx/nginx-1.11.1/
apt build-dep nginx
dpkg-buildpackage -b

When it’s done, there will be 7 deb files in ~/nginx/ directory. We only need to install the nginx_1.11.1-1~xenial_amd64.deb or nginx_1.11.1-1~xenial_i386.deb package, depending on your OS architecture. The others are Nginx dynamic module package and a debug package:

cd ~/nginx
dpkg -i nginx_1.11.1-1~xenial_amd64.deb

Now let’s start Nginx:

systemctl start nginx

Step 7. Configure ngx_pagespeed Module in Nginx.

Now edit Nginx server block config file:

nano /etc/nginx/nginx.conf

Add the following pagespeed directives in server section:

# enable pagespeed module on this server block
pagespeed on;

# Needs to exist and be writable by nginx. Use tmpfs for best performance.
pagespeed FileCachePath /var/ngx_pagespeed_cache;

# Ensure requests for pagespeed optimized resources go to the pagespeed handler
# and no extraneous headers get set.
location ~ "\.pagespeed\.([a-z]\.)?[a-z]{2}\.[^.]{10}\.[^.]+" {
  add_header "" "";
}
location ~ "^/pagespeed_static/" { }
location ~ "^/ngx_pagespeed_beacon$" { }

pagespeed RewriteLevel CoreFilters;

Step 8. Check if PageSpeed is Working.

Go to your website. Refresh a few times then check your page source. Hit Ctrl+F key and search pagespeed. You will see that many of your website resource has been processed by pagespeed or you can issue the following command:

curl -I -p http://y0ur-domain.com| grep X-Page-Speed

Congratulation’s! You have successfully installed nginx pagespeed. Thanks for using this tutorial for installing nginx with ngx_pagespeed module on Ubuntu 16.04 LTS (Xenial Xerus) system. For additional help or useful information, we recommend you to check the official Nginx web site.

How To Install Epub Reader on Ubuntu 16.04 LTS

Install Epub Reader on Ubuntu 16

Epub (Electronic Publications) is an open book standard for reading documents on computers and mobile devices. Epub book’s format is a popular format as it adjusts its font size to the device display. In other words, Epub format is responsive. Since the default Document Viewer is unable to read ePub, we need to use another application specifically for this purpose. If you ask any experienced Linux user about eBook readers, his/her answer will be Calibre.

This article assumes you have at least basic knowledge of linux, know how to use the shell, and most importantly, you host your site on your own VPS. The installation is quite simple and assumes you are running in the root account, if not you may need to add ‘sudo’ to the commands to get root privileges. I will show you through the step by step installation Epub Reader on a Ubuntu 16.04 (Xenial Xerus) server.
Install Epub Reader on Ubuntu 16.04 LTS

Step 1. First make sure that all your system packages are up-to-date by running these following apt-get commands in the terminal.

sudo apt-get update
sudo apt-get upgrade

Step 2. Installing Calibre on Linux Ubuntu.

Install Calibre on Ubuntu 16.04, run the following command:

sudo apt-get install calibre

Once installed, Calibre can be started from Unity Dash . For the first time users, it will ask you to configure Calibre. Simply select the default options are you are ready to use the software.

Congratulation’s! You have successfully installed epub reader. Thanks for using this tutorial for installing Calibre epub reader on Ubuntu 16.04 LTS (Xenial Xerus) system. For additional help or useful information, we recommend you to check the official Calibre web site.