How To Install Visual Studio Code on CentOS 7 Step by Step

Install Visual Studio Code on CentOS 7

Visual Studio Code provides developers with a new choice of developer tool that combines the simplicity and streamlined experience of a code editor with the best of what developers need for their core code-edit-debug cycle. Visual Studio Code available free for Windows, Linux and Mac OS. In this tutorial we will learn how to Install Visual Studio Code on CentOS 7 Step by Step.

This tutorial assumes you have at least basic knowledge of Linux, know how to use the shell, and most importantly, you host your site on your own VPS. The installation is quite simple and assumes you are running in the root account, if not you may need to add ‘sudo’ to the commands to get root privileges. I will show you through the step by step installation Visual Studio Code on a CentOS 7 server.

Install Visual Studio Code on CentOS 7

Step 1. First, let’s start by ensuring your system is up-to-date.

yum clean all
yum install -y epel-release
yum -y update

Step 2. Installing Visual Studio Code on CentOS 7.

Importing the Microsoft GPG key:

sudo rpm --import https://packages.microsoft.com/keys/microsoft.asc

Next, create the following repo file to enable the Visual Studio Code repository:

sudo nano /etc/yum.repos.d/vscode.repo

Paste the following file:

name=Visual Studio Code
baseurl=https://packages.microsoft.com/yumrepos/vscode
enabled=1
gpgcheck=1
gpgkey=https://packages.microsoft.com/keys/microsoft.asc

Next, update the package cache and install Visual Studio with:

sudo yum install code

Step 3. Starting Visual Studio Code.

Now that VS Code is installed on your CentOS system you can launch it either from the command line by typing code or by clicking on the VS Code icon (Applications -> Accessories -> Visual Studio Code).

Congratulation’s! You have successfully installed Visual Studio Code. Thanks for using this tutorial for installing Visual Studio in CentOS 7 system. For additional help or useful information, we recommend you to check the official Visual Studio Code web site.
How To Install Jekyll on CentOS 7 Step by Step

Install Jekyll on CentOS 7

Welcome to Jekyll’s step-by-step tutorial. The goal of this tutorial is to take you from having some front end web development experience to building your first Jekyll site from scratch — not relying on the default gem-based theme. Let’s get into it!

Jekyll is a Ruby program so you need to install Ruby on your machine to begin with. Head over to the install guide and follow the instructions for your operating system.

Prerequisites

This tutorial assumes you have at least basic knowledge of Linux, know how to use the shell, and most importantly, you host your site on your own VPS. The installation is quite simple and assumes you are running in the root account, if not you may need to add ‘sudo’ to the commands to get root privileges. I will show you through the step by step install Jekyll on CentOS 7 server.

Install Jekyll on CentOS 7

Step 1. First let’s start by ensuring your system is up-to-date.

yum clean all
yum -y update

Step 2. Installing Ruby.

Jekyll requires Ruby to work, so we have to have it installed on the server. It is available in the official CentOS 7 repositories, so we can simply install it running the following command:

yum install ruby

Once done, you can run the following command to check if Ruby is installed successfully:

ruby -v

Step 3. Installing Jekyll on CentOS 7.

Install Jekyll package using gem:

gem install jekyll

We can test Jekyll is working by checking the version installed:

jekyll -v

After it is done, use the gem install command to install bundler:

gem install bundler

Step 4. Create blog and up the server using Jekyll.

Now we are ready to create the blog and run the server. The below given command create the directory called wpcademyblog. You can given another name of your choice. In this directory, jekyll configuration file and setup is all set:

cd /home
jekyll new wpcademyblog

Change to newly created directory wpcademyblog or the new name which you have given at the time of using command jekyll:

cd wpcademyblog

Start the Jekyll application and replace below mentioned ip address with your ip:

jekyll server --host 192.168.77.21 &

Step 5. Accessing Jekyll.

Jekyll will be available on HTTP port 4000 by default. Open your favorite browser and navigate to http://yourdomain.com:4000 or http://server-ip:4000/
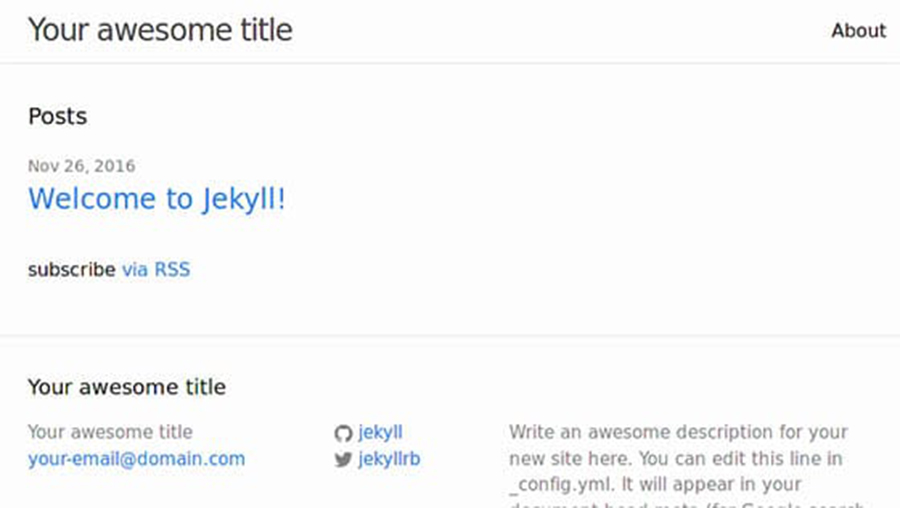
jekyll-linux
Congratulation’s! You have successfully installed Jekyll. Thanks for using this tutorial for installing Jekyll on CentOS 7 systems. For additional help or useful information, we recommend you to check the official Jekyll web site.

How To Install Buildbot on CentOS 7 Step by Step

Install Buildbot on CentOS 7

Buildbot is a continuous integration tool based on Python which automates the build, test and release software cycles. It is built using the Twisted networking engine, supports parallel execution of jobs across multiple platforms and it is compatible with all major operating systems. In this tutorial we will learn how to Install Buildbot on CentOS 7 Step by Step.

Prerequisites

This tutorial assumes you have at least basic knowledge of Linux, know how to use the shell, and most importantly, you host your site on your own VPS. The installation is quite simple and assumes you are running in the root account, if not you may need to add ‘sudo’ to the commands to get root privileges. I will show you through the step by step install Buildbot on CentOS 7 server.

Install Buildbot on CentOS 7

Step 1. First let’s start by ensuring your system is up-to-date.

yum clean all
yum -y update

Step 2. Installing Python.

First you need to install pip and python development packages using the yum package manager:

yum install epel-release
yum install python-pip gcc python-devel git
pip install --upgrade pip

Step 3. Installing Buildbot on CentOS 7.

Use the following command to install Buildbot with pip:

pip install 'buildbot[bundle]'

You can verify by checking the version of Buildbot:

buildbot --version

The output should:

Buildbot version: 1.1.1
Twisted version: 18.4.0

Next, create a new system user for Buildbot:

adduser --home /opt/buildbot --shell /bin/bash buildbot

Step 4. Configuring Buildbot Master.

First, create the Buildbot master run the following command:

su - buildbot
buildbot create-master master

Next, copy the default sample Buildbot configuration file by using the following command:

cp master/master.cfg.sample master/master.cfg

Then, configure Buildbot’s web interface:

### nano master/master.cfg
c['buildbotURL'] = "http://your_ip_or_domain:8010/"

Once you save the file run the following command to verify the master configuration:

buildbot checkconfig master

Step 5. Configuring Buildbot Worker.

To create the Buildbot worker named ‘wpcademy-worker’ with password ‘pass’ on ‘localhost’, execute the following command:

buildbot-worker create-worker worker localhost wpcademy-worker pass

If you want to use a different username (example-worker), and password (pass) you need to update the following line in the master/master.cfg file:

# a Worker object, specifying a unique worker name and password. The same
# worker name and password must be configured on the worker.
c['workers'] = [worker.Worker("wpcademy-worker", "pass")]

Finally we can start the worker by typing:

buildbot-worker start worker

Step 6. Accessing Buildbot.

Buildbot will be available on HTTP port 8010 by default. Open your favorite browser and navigate to http://yourdomain.com:8010 or http://server-ip:8010 and complete the required the steps to finish the installation. If you are using a firewall, please open port 80 to enable access to the control panel.

Congratulation’s! You have successfully installed Buildbot. Thanks for using this tutorial for installing Buildbot on CentOS 7 systems. For additional help or useful information, we recommend you to check the official Buildbot web site.

How To Install GCC on CentOS 7 Step by Step

Install GCC on CentOS 7

GCC or GNU Compiler Collection is released by the Free Software Foundation and as the name suggests, it is very useful collection of programming compilers such as C, C++, Objective-C, Objective-C++, Fortran, Java, Go. GCC is an official compiler of the GNU operation system but also it is a standard compiler on many Unix operating systems such as Linux. In this tutorial we will learn How To Install GCC on CentOS 7 Step by Step.

Prerequisites

This tutorial assumes you have at least basic knowledge of Linux, know how to use the shell, and most importantly, you host your site on your own VPS. The installation is quite simple and assumes you are running in the root account, if not you may need to add ‘sudo’ to the commands to get root privileges. I will show you through the step by step install GCC Compiler on CentOS 7 server.

Install GCC on CentOS 7

Step 1. First let’s start by ensuring your system is up-to-date.

yum clean all
yum -y update

Step 2. Installing GCC on CentOS 7.

Method 1 Install GCC from repository:

GCC can be easily installed from the official CentOS repositories. Run the following command to install GCC:

yum -y install gcc

Once the installation, you can the version of GCC:

gcc --version

Method 2 Install GCC from source:

First, download the tarball of the GCC version you want to install:

wget http://ftp.mirrorservice.org/sites/sourceware.org/pub/gcc/releases/gcc-7.3.0/gcc-7.3.0.tar.gz

Unpack the tar archive and change the current directory:

tar zxf gcc-7.3.0.tar.gz
cd gcc-7.3.0

Install bzip2 and run the ‘download_prerequisites’ script to download some prerequisites needed:

yum -y install bzip2
./contrib/download_prerequisites

Next, start configuring the GCC build environment:

./configure --disable-multilib --enable-languages=c,c++

Once it is completed, run the following command to compile the source code:

make -j 4
make install

You can check if GCC is properly installed:

gcc --version

Congratulation’s! You have successfully installed GCC. Thanks for using this tutorial for installing GCC compiler on CentOS 7 systems. For additional help or useful information, we recommend you to check the official GCC web site.

How To Install Apache Tomcat on CentOS 7 Step by Step

Install Apache Tomcat on CentOS 7

Apache Tomcat is an open source web server and servlet container developed by the Apache Software Foundation. It implements the Java Servlet, JavaServer Pages (JSP), Java Unified Expression Language and Java WebSocket specifications from Sun Microsystems and provides a web server environment for Java code to run in. In this tutorial we will learn how to Install Apache Tomcat on CentOS 7 Step by Step.

Prerequisites

This article assumes you have at least basic knowledge of Linux, know how to use the shell, and most importantly, you host your site on your own VPS. The installation is quite simple and assumes you are running in the root account, if not you may need to add ‘sudo’ to the commands to get root privileges. I will show you through the step by step install Apache Tomcat on CentOS 7 server.

Install Apache Tomcat on CentOS 7

Step 1. First let’s start by ensuring your system is up-to-date.

yum clean all
yum -y update

Step 2. Installing Java 8.

Apache Tomcat 9 requires Java 8 or newer to be installed on the server. Run the following command to install Java 8:

yum install java-1.8.0-openjdk.x86_64 java-1.8.0-openjdk-devel.x86_64

Once installed, You can also verify it, by issuing the following command:

java -version

Step 3. Install Apache Tomcat 9 on CentoS 7.

First, go to the official Apache Tomcat website and download the most recent version of the software to your server. At the moment the most recent release is version 9.0.7:

wget http://www.apache.org/dist/tomcat/tomcat-9/v9.0.7/bin/apache-tomcat-9.0.7.zip

Unpack the downloaded zip archive:

unzip apache-tomcat-9.0.7.zip -d /opt

Next, create a new directory named ‘apache-tomcat-9.0.7’. We will rename it to something simpler:

cd /opt
mv apache-tomcat-9.0.7/ tomcat

Then, run the following commands to set the CATALINA_HOME environment variable:

echo "export CATALINA_HOME='/opt/tomcat/'" >> ~/.bashrc
source ~/.bashrc

It is not recommended to run Apache Tomcat as user root, so add tomcat user and group:

useradd -r tomcat --shell /bin/false
chown -R tomcat:tomcat /opt/tomcat/

Now, Create the a systemd file with the following content:

### nano /etc/systemd/system/tomcat.service

[Unit]
Description=Apache Tomcat 9
After=syslog.target network.target[Service]
User=tomcat
Group=tomcat
Type=forking
Environment=CATALINA_PID=/opt/tomcat/tomcat.pid
Environment=CATALINA_HOME=/opt/tomcat
Environment=CATALINA_BASE=/opt/tomcat
ExecStart=/opt/tomcat/bin/startup.sh
ExecStop=/opt/tomcat/bin/shutdown.sh
Restart=on-failure

[Install] WantedBy=multi-user.target

Save the file and run the following command to reload the systemd manager:

systemctl daemon-reload
systemctl start tomcat
systemctl enable tomcat

Step 4. Assessing Apache Tomcat 9.

Finally, open Tomcat from your browser, go to your IP or domain with the 8080 port (because Tomcat will always run on the 8080 port) as an example: http://IP_address:8080/manager/html using user ‘admin’ and password ‘PASSWORD’

Congratulation’s! You have successfully installed Apache Tomcat. Thanks for using this tutorial for installing Apache Tomcat on CentOS 7 systems. For additional help or useful information, we recommend you to check the official Apache Tomcat web site.

How To Install Popcorn Time on CentOS 7 Step by Step

Install Popcorn Time on CentOS 7

Popcorn Time is an Open source free software BitTorrent client which includes integrated media player. Although other trackers can be added and used manually, popcorn time uses sequential downloading to stream video listed by torrent websites. The files can be searched by genres and categories. Popcorn time is an easy interface to use and has a clear modern look. In this tutorial we will learn how To Install Popcorn Time on CentOS 7.

Prerequisites

This article assumes you have at least basic knowledge of Linux, know how to use the shell, and most importantly, you host your site on your own VPS. The installation is quite simple and assumes you are running in the root account, if not you may need to add ‘sudo’ to the commands to get root privileges. I will show you through the step by step installation Popcorn Time on a CentOS 7 server.

Install Popcorn Time on CentOS 7

Step 1. First, let’s start by ensuring your system is up-to-date.

yum clean all
yum install -y epel-release
yum -y update

Step 2. Installing Popcorn Time on CentOS 7.

First install some tools to be used for the Popcorn Time installation:

yum install wget xz

Next, use wget command to download the tarballs directly in your system’ s terminal:

### 32-bit ###
wget https://get.popcorntime.sh/build/Popcorn-Time-0.3.10-Linux-32.tar.xz
tar -xvf Popcorn-Time-0.3.10-Linux32.tar.xz
cd Popcorn-Time/
chmod 755 Popcorn-Time
./Popcorn-Time

### 64-bit ###
https://get.popcorntime.sh/build/Popcorn-Time-0.3.10-Linux-64.tar.xz
tar -xvf Popcorn-Time-0.3.10-Linux64.tar.xz
cd Popcorn-Time/
chmod 755 Popcorn-Time
./Popcorn-Time

Congratulation’s! You have successfully installed Popcorn Time. Thanks for using this tutorial for installing Popcorn Time movie player in CentOS 7 system. For additional help or useful information, we recommend you to check the official Popcorn Time web site.

How To Install Plex Media Server on CentOS 7 Step by Step

Plex Media Server on CentOS 7

Plex is a free piece of software that allows you to organize your movies, TV shows, music and photos in one beautiful interface and stream those media files on your PC, tablet, phone, TV, Roku, etc on the network or over the Internet. In this tutorial we will learn how To Install Plex Media Server on CentOS 7.

Prerequisites

This article assumes you have at least basic knowledge of linux, know how to use the shell, and most importantly, you host your site on your own VPS. The installation is quite simple and assumes you are running in the root account, if not you may need to add ‘sudo’ to the commands to get root privileges. I will show you through the step by step installation Plex on a CentOS 7 server.

Install Plex Media Server on CentOS 7

Step 1. First let’s start by ensuring your system is up-to-date.

yum clean all
yum -y update

Step 2. Installing Plex on CentOS 7.

Go to the Plex Downloads page and copy the installation link for CentOS. Use wget to download the installer via the copied link:

wget https://downloads.plex.tv/plex-media-server/1.14.1.5488-cc260c476/plexmediaserver-1.14.1.5488-cc260c476.x86_64.rpm
sudo yum install plexmediaserver*.rpm

Then, start Plex Media Server and enable it to start on boot time by running the following command:

sudo systemctl enable plexmediaserver.service
sudo systemctl start plexmediaserver.service

Step 3. Configure Plex.

Now, open a web browser and type the following address. Change the IP address with your CentOS 7 IP address:

http://[your-server-ip-address]:32400/web/

Congratulation’s! You have successfully installed Plex. Thanks for using this tutorial for installing Plex Media Server on CentOS 7 system. For additional help or useful information, we recommend you to check the official Plex web site.