How To Install UFW Firewall on Ubuntu 16.04 LTS

Install UFW Firewall on Ubuntu 16

The default firewall configuration tool for Ubuntu is ufw. Developed to ease iptables firewall setup, ufw provides a user friendly way to produce an IPv4 or IPv6 host-based antivirus. By default UFW is disabled.

This article assumes you have at least basic knowledge of Linux, know how to use the shell, and most importantly, you host your site on your own VPS. The installation is quite simple and assumes you are running in the root account, if not you may need to add ‘sudo’ to the commands to get root privileges. I will show you through the step by step installation UFW Firewall on an Ubuntu 16.04 Xenial Xerus server.

Install UFW Firewall on Ubuntu 16.04 LTS

Step 1. First make sure that all your system packages are up-to-date

sudo apt-get update
sudo apt-get upgrade

Step 2. Installing UFW Firewall.

In Ubuntu 16.04, UFW is installed by default. If not, you can easily install it by running the following command:

apt-get install ufw

After installation, UFW is deactivated. If you configure your server via SSH, it is important to release SSH before you enable UFW:

ufw allow ssh

Step 3. UFW control.

Turn on:

ufw enable

Turn off:

ufw disable

Attention! The following are examples, please use only if you know what you are doing!

Allow protocol:

ufw allow ssh

Allow port:

ufw allow 22

Allow Port Ranges:

ufw allow 1000:2000

Prohibit connections:

Deny protocol:

ufw deny ssh

Deny port:

ufw deny 22

For more usage commands you can use the –help flag:

ufw --help

Congratulation’s! You have successfully installed UFW. Thanks for using this tutorial for installing UFW Firewall on your Ubuntu 16.04 system. For additional help or useful information, we recommend you to check the official UFW Firewall web site.

How to Install WordPress on Ubuntu 17.10

Install WordPress on Ubuntu 17

WordPress is an online, open source website creation tool written in PHP. But in non-geek speak, it’s probably the easiest and most powerful blogging and website content management system (or CMS) in existence today. In this tutorial we will show you how to install WordPress on Ubuntu 17.10.

This article assumes you have at least basic knowledge of Linux, know how to use the shell, and most importantly, you host your site on your own VPS. The installation is quite simple and assumes you are running in the root account, if not you may need to add ‘sudo’ to the commands to get root privileges. I will show you through the step by step installation WordPress content management systems on an Ubuntu 17.10 Artful Aardvark server.

Install WordPress on Ubuntu 17.10 Artful Aardvark

Step 1. First make sure that all your system packages are up-to-date

sudo apt-get update
sudo apt-get upgrade

Step 2. Install LAMP (Linux, Apache, MariaDB, PHP) server.

A Ubuntu 17.10 LAMP server is required. If you do not have LAMP installed, you can follow our guide here. Also install all required PHP modules:

apt-get install php7.0-mysql php7.0-curl php7.0-json php7.0-cgi php7.0 libapache2-mod-php7.0 php7.0-mcrypt php7.0-xmlrpc php7.0-gd

Step 3. Installing WordPress on Ubuntu 17.10 Artful Aardvark.

First thing to do is to go to WordPress’s download page and download the latest stable version of WordPress, At the moment of writing this article it is version 4.8.2:

wget http://wordpress.org/latest.zip

Unpack the WordPress archive to the document root directory on your server:

unzip -q latest.zip -d /var/www/html/
cd wordpress
cp -a * ..

We will need to change some folders permissions:

chown www-data:www-data -R /var/www/html/

We need to create the upload directory manually:

mkdir -p /var/www/html/wp-content/uploads

Allow the Apache web server to write to the uploads directory. Do this by assigning group ownership of this directory to your web server which will allow Apache to create files and directories. Issue the following command:

chown www-data:www-data -R /var/www/html/wp-content/uploads

Step 4. Configuring MariaDB for WordPress.

By default, MariaDB is not hardened. You can secure MariaDB using the mysql_secure_installation script. you should read and below each steps carefully which will set root password, remove anonymous users, disallow remote root login, and remove the test database and access to secure MariaDB:

mysql_secure_installation

Configure it like this:

- Set root password? [Y/n] y
- Remove anonymous users? [Y/n] y
- Disallow root login remotely? [Y/n] y
- Remove test database and access to it? [Y/n] y
- Reload privilege tables now? [Y/n] y

Next we will need to log in to the MariaDB console and create a database for the WordPress. Run the following command:

mysql -u root -p

This will prompt you for a password, so enter your MariaDB root password and hit Enter. Once you are logged in to your database server you need to create a database for WordPress installation:

create database wordpress;
grant all privileges on wordpress.* to wpuser@localhost identified by 'your-password';
flush privileges;
exit;

Step 5. Configuring WordPress

In this step we will configure the main configuration file of WordPress, where we need to configure it’s basic parameters so that it can be connected with the database and user:

mv wp-config-sample.php wp-config.php

Now open it using any of your favourite editor, to make any changes in the WordPress configuration file:

nano wp-config.php

Here are the values that we need to update according to our previous database and user’s setup:

// ** MySQL settings - You can get this info from your web host ** //
/** The name of the database for WordPress */
define('DB_NAME', 'wordpress');

/** MySQL database username */
define('DB_USER', 'wpuser');

/** MySQL database password */
define('DB_PASSWORD', 'your_password');

/** MySQL hostname */
define('DB_HOST', 'localhost');

Step 6. Configuring Apache web server for WordPress.

Create a new virtual host directive in Apache. For example, create a new Apache configuration file named ‘wordpress.conf’ on your virtual server:

sudo a2enmod rewrite
touch /etc/apache2/sites-available/wordpress.conf
ln -s /etc/apache2/sites-available/wordpress.conf /etc/apache2/sites-enabled/wordpress.conf
nano /etc/apache2/sites-available/wordpress.conf

Add the following lines:

<VirtualHost *:80>
ServerAdmin [email protected]
DocumentRoot /var/www/html/
ServerName your-domain.com
ServerAlias www.your-domain.com
<Directory /var/www/html/>
Options FollowSymLinks
AllowOverride All
Order allow,deny
allow from all
</Directory>
ErrorLog /var/log/apache2/your-domain.com-error_log
CustomLog /var/log/apache2/your-domain.com-access_log common
</VirtualHost>

Next step we will need to adjust the some some values in the PHP configuration files as follow:

nano /etc/php/7.0/apache2/php.ini

Add/modify the following settings:

max_execution_time = 300
max_input_time = 600
memory_limit = 256M
post_max_size = 64M
upload_max_filesize = 64M

Now, we can restart Apache web server so that the changes take place:

systemctl restart apache2.service

Step 7. Accessing WordPress.

WordPress will be available on HTTP port 80 by default. Open your favorite browser and navigate to http://yourdomain.com or http://server-ip/ and complete the required the steps to finish the installation. If you are using a firewall, please open port 80 to enable access to the control panel.

Congratulation’s! You have successfully installed WordPress. Thanks for using this tutorial for installing WordPress CMS (Content Management Systems) on your Ubuntu 17.10 Artful Aardvark. For additional help or useful information, we recommend you to check the official WordPress web site.
How To Install Shotcut Video Editor on Ubuntu 16.04 LTS

Install Shotcut Video Editor on Ubuntu 16

Shotcut is an free supply, multi-platform video editing software, that supports all forms of audio and video files. It’s an application with a OpenGL GPU-based image processing system. It allows appending, insert, overwrite, export and import options in the timeline. In this tutorial we will learn How To Install Shotcut Video Editor on Ubuntu 16.04 LTS

This article assumes you have at least basic knowledge of Linux, know how to use the shell, and most importantly, you host your site on your own VPS. The installation is quite simple and assumes you are running in the root account, if not you may need to add ‘sudo’ to the commands to get root privileges. I will show you through the step by step installation Shotcut video editor on an Ubuntu 16.04 Xenial Xerus server.

Install Shotcut Video Editor on Ubuntu 16.04 LTS

Step 1. First make sure that all your system packages are up-to-date

sudo apt-get update
sudo apt-get upgrade

Step 2. Installing Shotcut video editor.
Install shotcut on Ubuntu systems is easy, First add the PPA to your system, update the local repository index and install the shotcut package:

sudo add-apt-repository ppa:haraldhv/shotcut
sudo apt-get update

Lets install the shotcut package by utilizing the following command:

sudo apt-get install shotcut

Once it is done, just run the command shotcut in terminal, shotcut dashboard will be opened:

shotcut

Congratulation’s! You have successfully installed Shotcut. Thanks for using this tutorial for installing Shotcut video editor on your Ubuntu 16.04 system. For additional help or useful information, we recommend you to check the official Shotcut web site.

How To Install Minecraft Server on Ubuntu 16.04 LTS

Install Minecraft Server on Ubuntu 16

Minecraft is a game about breaking and placing blocks. The creative and building aspects of Minecraft allow players to build constructions out of textured cubes in a 3D procedurally generated world. Minecraft servers allow players to play online or via a local area network with other people. They may either be run on a hosted server, on local dedicated server hardware, a Virtual Private server on a home machine, or on your local gaming computer. In this tutorial we will show you how to install Minecraft server on Ubuntu 16.04 LTS.

This article assumes you have at least basic knowledge of Linux, know how to use the shell, and most importantly, you host your site on your own VPS. The installation is quite simple and assumes you are running in the root account, if not you may need to add ‘sudo’ to the commands to get root privileges. I will show you through the step by step installation Minecraft Server on an Ubuntu 16.04 Xenial Xerus server.

Install Minecraft Server on Ubuntu 16.04 LTS

Step 1. First make sure that all your system packages are up-to-date

sudo apt-get update
sudo apt-get upgrade

Step 2. Installing Java-JDK.

Minecraft server setup requires Java to be installed on your system. To do this, follow these steps:

apt-get install openjdk-8-jre-headless screen

Step 3. Installing Minecraft Server on Ubuntu.

First, create a new user for Minecraft to run as:

adduser minecraft

Create a Minecraft directory:

mkdir minecraft
cd minecraft

Now download and install your own Minecraft server:

wget -O minecraft_server.jar https://s3.amazonaws.com/Minecraft.Download/versions/1.12.2/minecraft_server.1.12.2.jar

Accept Minecraft’s end-user license agreement:

echo "eula=true" > eula.txt

Get screen up and running, so that the server can run in the background:

screen -S "Minecraft server 1"

Step 4. Running Minecraft Server.

Now you only need to run the installed server (you can edit the 1024M value to match your server’s RAM):

java -Xmx1024M -Xms1024M -jar minecraft_server.jar nogui

To get back to the normal screen, press these keys: Control+A+D, To get back to the screen where Minecraft is running:

screen -r

Congratulation’s! You have successfully installed Minecraft. Thanks for using this tutorial for installing Minecraft server on your Ubuntu 16.04 system. For additional help or useful information, we recommend you to check the official Minecraft web site.

How To Install LAMP Stack on Ubuntu 17.10

Install LAMP Stack on Ubuntu 17

LAMP represents a full featured stack containing the most popular web server known as Apache, the most popular database server MySQL and the most popular open-source web programming language known as PHP. All components are free and open-source software, and the combination is suitable for building dynamic web pages.

This article assumes you have at least basic knowledge of linux, know how to use the shell, and most importantly, you host your site on your own VPS. The installation is quite simple. I will show you through the step by step installation LAMP (Linux Apache, MySQL and PHP) on Ubuntu 17.10 Artful Aardvark server.

Install LAMP Stack on Ubuntu 17.10 Artful Aardvark

Step 1. First make sure that all your system packages are up-to-date

apt-get update
apt-get upgrade

Step 2. Installing Apache web server on Ubuntu 17.10.

We will be installing Apache with apt-get, which is the default package manager for ubuntu:

apt-get install -y apache2 apache2-utils

After installing apache services on your system, start all required services:

systemctl enable apache2
systemctl start apache2
systemctl status apache2

Check Apache version:

### apache2 -v
Server version: Apache/2.4.27 (Ubuntu)
Server built: 2017-09-18T15:46:93

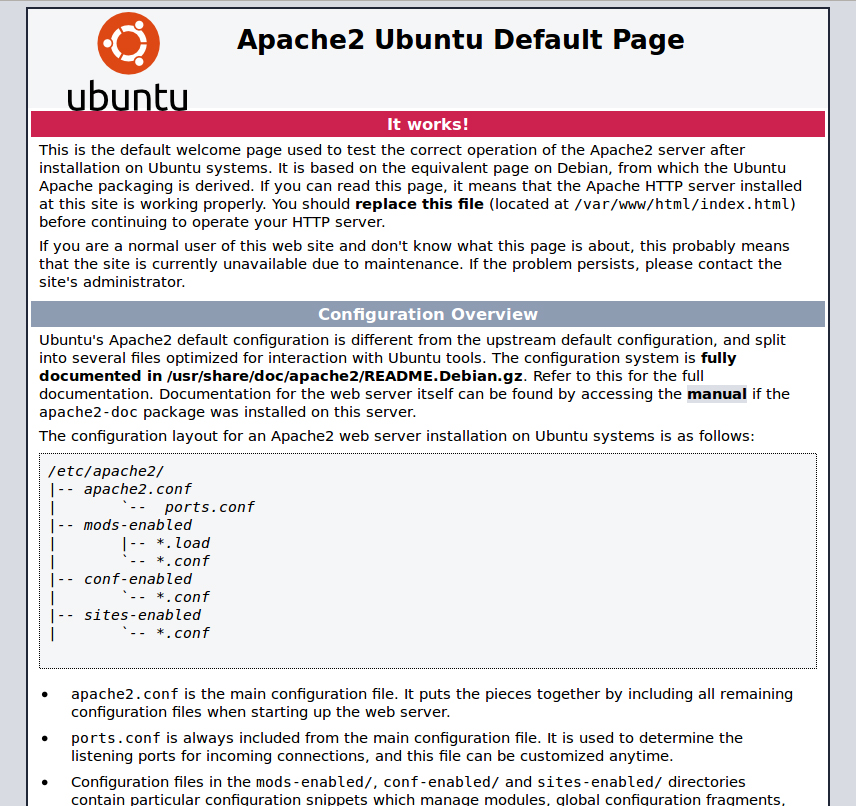
You can verify that Apache is really running by opening your favorite web browser and entering the URL http://your-server’s-address, if it is installed, then you will see this:

screenshot-from

Step 3. Installing MariaDB on Ubuntu 17.10.

Now that we have our web server up and running, it is time to install MariaDB. MariaDB is a database management system. Basically, it will organize and provide access to databases where our site can store information:

apt-get install mariadb-server mariadb-client

Once complete, you can verify MariaDB is installed by running the below command:

systemctl status mariadb
systemctl enable mariadb
systemctl start mariadb

By default, MariaDB is not hardened. You can secure MariaDB using the mysql_secure_installation script. you should read and below each steps carefully which will set root password, remove anonymous users, disallow remote root login, and remove the test database and access to secure MariaDB:

mysql_secure_installation

Configure it like this:

- Set root password? [Y/n] y
- Remove anonymous users? [Y/n] y
- Disallow root login remotely? [Y/n] y
- Remove test database and access to it? [Y/n] y
- Reload privilege tables now? [Y/n] y

To log into MariaDB, use the following command (note that it’s the same command you would use to log into a MySQL database):

mysql -u root -p

Step 4. Installing PHP 7.1 on Ubuntu 17.10.

At the the time of this writing, PHP7.1 is the latest stable version of PHP and has a minor performance edge over PHP7.0. Enter the following command to install PHP7.1:

apt-get install php7.1 libapache2-mod-php7.1 php7.1-mysql php-common php7.1-cli php7.1-common php7.1-json php7.1-opcache php7.1-readline

Enable the Apache php7.1 module then restart Apache web server:

a2enmod php7.1
systemctl restart apache2

Check PHP version:

### php --version
PHP 7.1.8-1ubuntu1 (cli) (built: Aug 18 2017 15:46:93) ( NTS )
Copyright (c) 1997-2017 The PHP Group
Zend Engine v3.1.0, Copyright (c) 1998-2017 Zend Technologies
 with Zend OPcache v7.1.8-1ubuntu1, Copyright (c) 1999-2017, by Zend Technologies

To test PHP, create a test file named info.php with he content below. Save the file, then browse to it to see if PHP is working:

nano /var/www/html/info.php

In this file, paste the following code:

<?php phpinfo(); ?>

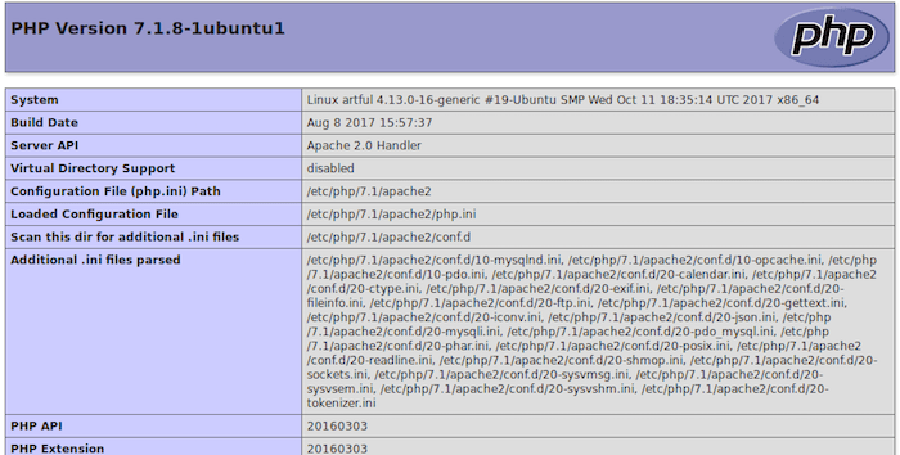
Try to access it at http://your_server_ip/info.php . If the PHP info page is rendered in your browser then everything looks good and you are ready to proceed further.

install-php7.1-on-ubuntu
ongratulation’s! You have successfully installed LAMP stack. Thanks for using this tutorial for installing LAMP (Linux Apache, MySQL and PHP) in Ubuntu 17.10 (Artful Aardvark) system. For additional help or useful information, we recommend you to check the official Apache, MySQL and PHP web site.

How To Install SpiderOak One on Ubuntu 16.04 LTS

Install SpiderOak One on Ubuntu 16

SpiderOak is a renowned cloud storage service, a free account allows you upload up to 2 GB of information to the cloud, all you want to do is to install Spideroak client on your desktop, smart phone or laptop and it will keep synchronizing your specified information from your neighborhood machine to the online cloud server. The backups are extremely important and this kind of free app that could automate the backup process is no less than a blessing.

This article assumes you have at least basic knowledge of Linux, know how to use the shell, and most importantly, you host your site on your own VPS. The installation is quite simple and assumes you are running in the root account, if not you may need to add ‘sudo’ to the commands to get root privileges. I will show you through the step by step installation SpiderOak One on a Ubuntu 16.04 Xenial Xerus server.

Install SpiderOak One on Ubuntu 16.04 LTS Xenial Xerus

Step 1. First make sure that all your system packages are up-to-date

sudo apt-get update
sudo apt-get upgrade

Step 2. Installing SpiderOak One on Ubuntu 16.04.

First create a source list file for SpiderOak:

nano /etc/apt/sources.list.d/spideroakone.list

Add the following line:

deb http://APT.spideroak.com/ubuntu-spideroak-hardy/ release restricted

Then execute the following command to import public key of SpiderOak repository:

apt-key adv --keyserver keyserver.ubuntu.com --recv-keys 573E3D1C51AE1B3D

Update package index and install SpiderOakOne:

apt-get update
apt-get install spideroakone

Step 3. Accessing SpiderOak One.

Once the SpiderOak One installation is complete, you can start SpiderOak by typing below command in the terminal or Going to Activities on Ubuntu:

SpiderOakONE

Congratulation’s! You have successfully installed SpiderOak One. Thanks for using this tutorial for installing SpiderOak One Server in Ubuntu 16.04 Xenial Xerus system. For additional help or useful information, we recommend you to check the official SpiderOak One web site.

How To Install Lyricfier on Ubuntu 16.04 LTS

Install Lyricfier on Ubuntu 16

Lyricfier is an electron app that communicates with Spotify Desktop Client to get the current song and then looks for a matching lyric scraping the web.

This article assumes you have at least basic knowledge of Linux, know how to use the shell, and most importantly, you host your site on your own VPS. The installation is quite simple and assumes you are running in the root account, if not you may need to add ‘sudo’ to the commands to get root privileges. I will show you through the step by step installation Lyricfier on Ubuntu 16.04 Xenial Xerus.

Install Lyricfier on Ubuntu 16.04 LTS

Step 1. First make sure that all your system packages are up-to-date

sudo apt-get update
sudo apt-get upgrade

Step 2. Installing Spotify on Ubuntu.

First make sure you have installed Spotify on your desktop machine, If you do not have Spotify installed, you can follow our guide here.

Step 3. Installing Lyricfier.

First thing to do is to go to lyricfier’s download page and download the latest stable version of lyricfier:

cd ~/Download
mkdir lyricfier
cd lyricfier
wget https://github.com/emilioastarita/lyricfier/releases/download/0.2.5/lyricfier-linux-x64.zip

Unpack the lyricfier archive to the document root directory on your server:

unzip lyricfier-linux-x64.zip

Step 4. Fix Bugs Lyricfier Identified.

First bug is “Current song error: No song“. Follow the steps below to fix that:

wget https://github.com/emilioastarita/lyricfier/files/852262/mol_lyricfier.zip
unzip mol_lyricfier.zip
mv SpotifyService.* resources/app/render/

Next lets fix this error “Sorry, couldn’t find lyrics for this song“. Follow the steps below to fix this:

wget https://github.com/emilioastarita/lyricfier/files/1176862/fix_lyrics_not_found.zip
unzip fix_lyrics_not_found.zip
mv Searcher* resources/app/render/

Once installed, next you can start Lyricfier by searching for it Unity Dash or typing in terminal. If the app icon doesn’t show up, try logging out and logging back in.

./lyricfier

Congratulations! You have successfully installed Lyricfier. Thanks for using this tutorial for installing Lyricfier in Ubuntu 16.04 Xenial Xerus systems. For additional help or useful information, we recommend you to check the official Lyricfier web site.