How To Install Nagios on Ubuntu 16.04

Install Nagios on Ubuntu 16

Nagios is an open source software that can be used for network and infrastructure monitoring. Nagios will monitor servers, switches, applications and services. It alerts the System Administrator when something went wrong and also alerts back when the issues has been rectified. Resources that can be monitored include CPU, memory and disk space loads, log files, temperature or hardware errors. It can monitor various parameters and problems for services like HTTP, SMTP, DNS, and with the help of plugins it can be highly extended. Nagios core was originally designed to run under Linux, although it should work under most other unices as well.

This article assumes you have at least basic knowledge of linux, know how to use the shell, and most importantly, you host your site on your own VPS. The installation is quite simple and assumes you are running in the root account, if not you may need to add ‘sudo’ to the commands to get root privileges. I will show you through the step by step installation Nagios on a Ubuntu 16.04 (Xenial Xerus) server.

Install Nagios on Ubuntu 16.04

Step 1. First make sure that all your system packages are up-to-date by running these following apt-get commands in the terminal.

sudo apt-get update
sudo apt-get upgrade

Step 2. Install LAMP (Linux, Apache, MariaDB, PHP) server.

A Ubuntu 16.04 LAMP server is required. If you do not have LAMP installed, you can follow our guide here. Also install all required PHP modules:

apt-get install php7.0 openssl perl make php7.0-gd libgd2-xpm-dev libapache2-mod-php7.0 libperl-dev libssl-dev daemon wget apache2-utils unzip

Step 3. Create users and groups for Nagios.

Now create a new nagios user account and setup a password to this account:

useradd nagios
groupadd nagcmd
usermod -a -G nagcmd nagios
usermod -a -G nagcmd www-data

Step 4. Installing Nagios and plugins.

First thing to do is to go to Nagios’s download page and download the latest stable version of Nagios, At the moment of writing this article it is version 4.1.1:

wget https://assets.nagios.com/downloads/nagioscore/releases/nagios-4.1.1.tar.gz
tar -zxvf /tmp/nagios-4.1.1.tar.gz
cd /tmp/nagios-4.1.1/

Perform below steps to compile the Nagios from the source code:

./configure --with-nagios-group=nagios --with-command-group=nagcmd --with-httpd_conf=/etc/apache2/sites-enabled/
make all
make install
make install-init
make install-config
make install-commandmode
make install-webconf

Next steps, Download latest nagios-plugins source and install using following commands:

wget http://www.nagios-plugins.org/download/nagios-plugins-2.1.1.tar.gz
tar xzf nagios-plugins-2.1.1.tar.gz
cd nagios-plugins-2.1.1
./configure --with-nagios-user=nagios --with-nagios-group=nagios
make
make install

Step 5. Configure Nagios.

Edit the /usr/local/nagios/etc/objects/contacts.cfg config file with your favorite editor and change the email address associated with the nagiosadmin contact definition to the address you’d like to use for receiving alerts.

nano /usr/local/nagios/etc/objects/contacts.cfg

Change the email address field to receive the notification:

[...]
define contact{
contact_name nagiosadmin ; Short name of userus
generic-contact ; Inherit default values from generic-contact template (defined above)
alias Nagios Admin ; Full name of useremail
[email protected] ; <<***** CHANGE THIS TO YOUR EMAIL ADDRESS ******
[...]

Step 6. Configure Apache web server for Nagios.

Now create nagios apache2 configuration file:

nano /etc/apache2/sites-enabled/nagios.conf

Edit the following lines if you want to access nagios administrative console from a particular IP series, Here, I want to allow nagios administrative access from 192.168.1.0/24 series only:

[...]
## Comment the following lines ##
# Order allow,deny
# Allow from all

## Uncomment and Change lines as shown below ##
Order deny,allow
Deny from all
Allow from 127.0.0.1 192.168.1.0/24
[...]

Enable Apache’s rewrite and cgi modules:

sudo a2enmod rewrite
sudo a2enmod cgi

Configure Apache authentication:

We need to setup the password for the user nagiosadmin. This username will be used to access the web interface so it is important to remember the password that you will input here. Set the password running the following command and enter the password twice:

# sudo htpasswd -s -c /usr/local/nagios/etc/htpasswd.users nagiosadmin
New password:
Re-type new password:
Adding password for user nagiosadmin

Restart Apache for the changes to take effect:

systemctl restart apache2

Step 7. Verify and Start Nagios service.

Next we have to make Nagios start at boot time, so first verify that the configuration file has no errors running the following command:

sudo /usr/local/nagios/bin/nagios -v /usr/local/nagios/etc/nagios.cfg

And you should get the output:

[...]
Checking objects...
Checked 8 services.
Checked 1 hosts.
Checked 1 host groups.
Checked 0 service groups.
Checked 1 contacts.
Checked 1 contact groups.
Checked 24 commands.
Checked 5 time periods.
Checked 0 host escalations.
Checked 0 service escalations.
Checking for circular paths...
Checked 1 hosts
Checked 0 service dependencies
Checked 0 host dependencies
Checked 5 timeperiods
Checking global event handlers...
Checking obsessive compulsive processor commands...
Checking misc settings...

Total Warnings: 0
Total Errors: 0

Things look okay - No serious problems were detected during the pre-flight check
[...]

Ubuntu 16.04 uses systemd for starting / stopping all the services, so, we need to create nagios.service file:

nano /etc/systemd/system/nagios.service

Add the following lines:

[Unit]
Description=Nagios
BindTo=network.target

[Install]
WantedBy=multi-user.target

[Service]
User=nagios
Group=nagios
Type=simple
ExecStart=/usr/local/nagios/bin/nagios /usr/local/nagios/etc/nagios.cfg

Enable Nagios to start automatically at system startup:

systemctl enable /etc/systemd/system/nagios.service

Now, start Nagios service:

systemctl start nagios

Step 8. Accessing Nagios.

Nagios will be available on HTTP port 80 by default. Open your favorite browser and navigate to http://yourdomain.com/install.php or http://server-ip/install.php and complete the required the steps to finish the installation. When prompted for username and password you will introduce the username “nagiosadmin” and the password that you entered in step 6.
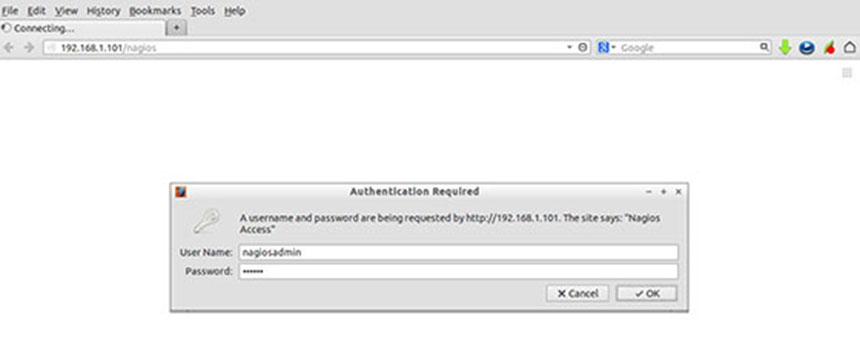
Nagios-admin-panel
Congratulation’s! You have successfully installed Nagios. Thanks for using this tutorial for installting Nagios monitoring tool in ubuntu 16.04 (Xenial Xerus) systems. For additional help or useful information, we recommend you to check the official Nagios web site.

How To Install YetiForce CRM on Ubuntu 16.04

Install YetiForce CRM on Ubuntu 16

YetiForce is an open source innovative CRM system. YetiForce was built on a rock-solid Vtiger foundation, but has hundreds of changes that help to accomplish even the most challenging tasks in the simplest way. Every function within the system was thought through and automated to ensure that all of them work together seamlessly and form a coherent integrity.

Install YetiForce CRM on Ubuntu 16.04

This article assumes you have at least basic knowledge of linux, know how to use the shell, and most importantly, you host your site on your own VPS. The installation is quite simple and assumes you are running in the root account, if not you may need to add ‘sudo’ to the commands to get root privileges. I will show you through the step by step installation YetiForce CRM on a Ubuntu 16.04 (Xenial Xerus) server.

Step 1. First make sure that all your system packages are up-to-date by running these following apt-get commands in the terminal.

sudo apt-get update
sudo apt-get upgrade

Step 2. Install LAMP (Linux, Apache, MariaDB and PHP) server.

A Ubuntu 16.04 LAMP server is required. If you do not have LAMP installed, you can follow our guide here. Also install all required PHP modules:

apt-get install php7.0-mysql php7.0-curl php7.0-json php7.0-cgi php7.0 libapache2-mod-php7.0 <code>php7.0-mcrypt php7.0-gd
</code>

tep 3. Installing YetiForce CRM.

First thing to do is to go to YetiForce CRM’s download page and download the latest stable version of YetiForce CRM, At the time of writing, the latest version is YetiForce version 3.1.0:

wget https://github.com/YetiForceCompany/YetiForceCRM/archive/3.1.0.zip

Unpack the YetiForce archive to the document root directory on your server:

unzip 3.1.0.zip -d /var/www/html/
mv YetiForceCRM-3.1.0 yetiforce

Set the file permissions for YetiForce CRM:

chown -R www-data:www-data /var/www/html/yetiforce/

Step 4. Configuring MariaDB for YetiForce CRM.

By default, MariaDB is not hardened. You can secure MariaDB using the mysql_secure_installation script. you should read and below each steps carefully which will set root password, remove anonymous users, disallow remote root login, and remove the test database and access to secure MariaDB:

mysql_secure_installation

Configure it like this:

- Set root password? [Y/n] y
- Remove anonymous users? [Y/n] y
- Disallow root login remotely? [Y/n] y
- Remove test database and access to it? [Y/n] y
- Reload privilege tables now? [Y/n] y

Next we will need to log in to the MariaDB console and create a database for the YetiForce CRM. Run the following command:

mysql -u root -p

This will prompt you for a password, so enter your MariaDB root password and hit Enter. Once you are logged in to your database server you need to create a database for YetiForce CRM installation:

MariaDB [(none)]&gt; CREATE DATABASE yetiforce;
MariaDB [(none)]&gt; GRANT ALL PRIVILEGES ON yetiforce.* TO 'yetiforce'@'localhost' IDENTIFIED BY 'strong_password';
MariaDB [(none)]&gt; FLUSH PRIVILEGES;
MariaDB [(none)]&gt; \q

Step 5. Configuring Apache web server for YetiForce CRM.

Create a new virtual host directive in Apache. For example, create a new Apache configuration file named ‘yetiforce.conf’ on your virtual server:

sudo a2enmod rewrite
touch /etc/apache2/sites-available/yetiforce.conf
ln -s /etc/apache2/sites-available/yetiforce.conf /etc/apache2/sites-enabled/yetiforce.conf
nano /etc/apache2/sites-available/yetiforce.conf

Add the following lines:

ServerAdmin [email protected]
DocumentRoot /var/www/html/yetiforce/
ServerName your-domain.com
ServerAlias www.your-domain.com

Options FollowSymLinks
AllowOverride All
Order allow,deny
allow from all

ErrorLog /var/log/apache2/your-domain.com-error_log
CustomLog /var/log/apache2/your-domain.com-access_log common

Now, we can restart Apache web server so that the changes take place:

systemctl restart apache2.service

Step 6. Accessing YetiForce CRM.

YetiForce CRM will be available on HTTP port 80 by default. Open your favorite browser and navigate to http://yourdomain.com or http://server-ip and complete the required the steps to finish the installation. The default username admin and password admin. If you are using a firewall, please open port 80 to enable access to the control panel.

Congratulation’s! You have successfully installed YetiForce CRM. Thanks for using this tutorial for installing YetiForce customer relationship management on your Ubuntu 16.04 system. For additional help or useful information, we recommend you to check the official YetiForce CRM web site.

[youtube https://www.youtube.com/watch?v=UhqxUabMej4]

How To Install Bludit CMS on Ubuntu 16.04

Install Bludit CMS on Ubuntu 16

Bludit is a simple web application to make your own blog or site in seconds, it’s completly free and open source. Bludit uses flat-files (text files in JSON format) to store the posts and pages, you don’t need to install or configure a database.

Install Bludit CMS on Ubuntu 16.04 LTS

This article assumes you have at least basic knowledge of linux, know how to use the shell, and most importantly, you host your site on your own VPS. The installation is quite simple and assumes you are running in the root account, if not you may need to add ‘sudo’ to the commands to get root privileges. I will show you through the step by step installation Bludit CMS on a Ubuntu 16.04 (Xenial Xerus) server.

Step 1. First make sure that all your system packages are up-to-date by running these following apt-get commands in the terminal.

sudo apt-get update
sudo apt-get upgrade

Step 2. Install LAMP (Linux, Apache, MariaDB and PHP) server.

A Ubuntu 16.04 LAMP server is required. If you do not have LAMP installed, you can follow our guide here. Also install all required PHP modules:

apt-get install php7.0-mysql php7.0-curl php7.0-json php7.0-cgi php7.0 libapache2-mod-php7.0 <code>php7.0-mcrypt php7.0-gd
</code>

Step 3. Installing Bludit CMS.

First thing to do is to go to Bludit CMS’s download page and download the latest stable version of Bludit, At the moment of writing this article it is version 1.4:

wget https://s3.amazonaws.com/bludit-s3/bludit-builds/bludit_latest.zip

Unpack the Bludit archive to the document root directory on your server:

unzip bludit_latest.zip
mv bludit /var/www/html/

Set the file permissions for Bludit CMS:

chown -R www-data:www-data /var/www/html/bludit/bl-content

Step 4. Configuring Apache web server for Bludit CMS.

Create a new virtual host directive in Apache. For example, create a new Apache configuration file named ‘bludit.conf’ on your virtual server:

sudo a2enmod rewrite
touch /etc/apache2/sites-available/bludit.conf
ln -s /etc/apache2/sites-available/bludit.conf /etc/apache2/sites-enabled/bludit.conf
nano /etc/apache2/sites-available/bludit.conf

Add the following lines:

ServerAdmin [email protected]
DocumentRoot /var/www/html/bludit/
ServerName your-domain.com
ServerAlias www.your-domain.com

Options FollowSymLinks
AllowOverride All
Order allow,deny
allow from all

ErrorLog /var/log/apache2/your-domain.com-error_log
CustomLog /var/log/apache2/your-domain.com-access_log common

Now, we can restart Apache web server so that the changes take place:

systemctl restart apache2.service

Step 5. Accessing Bludit Content Management System.

Bludit CMS will be available on HTTP port 80 by default. Open your favorite browser and navigate to http://yourdomain.com/bludit or http://server-ip/bludit and complete the required the steps to finish the installation. The default username admin and password admin. If you are using a firewall, please open port 80 to enable access to the control panel.

Congratulation’s! You have successfully installed Bludit CMS. Thanks for using this tutorial for installing Bludit content management system (CMS) on your Ubuntu 16.04 system. For additional help or useful information, we recommend you to check the official Bludit CMS web site.

[youtube https://www.youtube.com/watch?v=NGCshaVotZI]

How To Install Git on Ubuntu 16.04

Install Git on Ubuntu 16

Git is a free and open source distributed version control system . Git 2.9.3 comes with the large number of updates verses previous release 2.8. It is designed to handle a small to very large projects with speed and efficiency.

This article assumes you have at least basic knowledge of linux, know how to use the shell, and most importantly, you host your site on your own VPS. The installation is quite simple and assumes you are running in the root account, if not you may need to add ‘sudo’ to the commands to get root privileges. I will show you through the step by step installation Git on a Ubuntu 16.04 (Xenial Xerus) server.

Install Git on Ubuntu 16.04

Step 1. First make sure that all your system packages are up-to-date by running these following apt-get commands in the terminal.

sudo apt-get update
sudo apt-get upgrade

Step 2. Installing Git.

Ubuntu 16.04 comes with Git 2.7.x, which is a little old now. As versions 2.9 are not part of the Ubuntu repositories, you need to add the git-core personal package archive. Run the following commands in Terminal to install Git 2.9.3 on Ubuntu, via PPA:

sudo add-apt-repository ppa:git-core/ppa
sudo apt-get update
sudo apt-get install git

To check current version installed of Git use following command:

[root@wpcademy ~]# git --version
git version 2.8.1

Congratulation’s! You have successfully installed Git. Thanks for using this tutorial for installing Git in Ubuntu 16.04 (Xenial Xerus) systems. For additional help or useful information, we recommend you to check the official Git web site.

How To Install Ruby on Rails on Ubuntu 16.04

Install Ruby on Rails on Ubuntu 16

Ruby on Rails (RoR) is a framework written in the Ruby programming language that allows you to use Ruby in combination with HTML, CSS, and similar programming languages. It is used by many developers since it makes the application development very simple.

This article assumes you have at least basic knowledge of linux, know how to use the shell, and most importantly, you host your site on your own VPS. The installation is quite simple and assumes you are running in the root account, if not you may need to add ‘sudo’ to the commands to get root privileges. I will show you through the step by step installation Ruby on Rails on a Ubuntu 16.04 (Xenial Xerus) server.

Install Ruby on Rails on Ubuntu 16.04

Step 1. First make sure that all your system packages are up-to-date by running these following apt-get commands in the terminal.

sudo apt-get update
sudo apt-get upgrade

Step 2. Installing RVM.

One way of installing Ruby on Rails on an vps is by using the Ruby enVironment Manager, or shortly RVM. We will use RVM to install Ruby on Rails in this tutorial. In order to install RVM on your server, you can use the following commands:

gpg --keyserver hkp://keys.gnupg.net --recv-keys 409B6B1796C275462A1703113804BB82D39DC0E3
cd /tmp &amp;&amp; \curl -sSL https://get.rvm.io -o rvm.sh
cat /tmp/rvm.sh | bash -s stable

To start using RVM you need to run:

source /usr/local/rvm/scripts/rvm

If, for some reason, you need or want a different version of Ruby, you can check which ones are available easily in RVM:

rvm list known

The list result should look like the following one:

# MRI Rubies
[ruby-] 1.8.6 [-p420]
[ruby-] 1.8.7 [-head] # security released on head
[ruby-] 1.9.1 [-p431]
[ruby-] 1.9.2 [-p330]
[ruby-] 1.9.3 [-p551]
[ruby-] 2.0.0 [-p648]
[ruby-] 2.1 [.8]
[ruby-] 2.2 [.4]
[ruby-] 2.3 [.0]
[ruby-] 2.2-head
ruby-head
...

To install a different version of Ruby, just find the version number that you want and tell RVM to install it:

rvm install 2.3.0
rvm use 2.3.0

Step 3. Installing Rails.

Now that RVM is installed and configured and Ruby is on the system, you can install Rails. Rails is available as a Gem, which is a Ruby package. When Ruby is installed, its native Gem packaging system is also installed. Installing Ruby packages is very similar to any Linux package manager. To install Rails you can use the command below:

gem install rails

Or, run the following command to install a particular version of rails:

gem install rails -v 5.0.0

To verify the installation as well as to check what version of Rail you are currently using, you can use the command:

rails -v

Sample output:

# rails -v
Rails 5.0.0.1

Now you are ready to start with your first Ruby on Rails project. Create a new Ruby on Rails application in your home directory:

cd ~
rails new wpcademyApp

This should take no longer than a minute. Once your new Ruby on Rails application is created, you can start developing the application. There are new guides for Rails 5.0 which will help you understand how all of the pieces fit together.

Congratulation’s! You have successfully installed Ruby on Rails. Thanks for using this tutorial for installing Ruby on Rails in Ubuntu 16.04 (Xenial Xerus) systems. For additional help or useful information, we recommend you to check the official Ruby on Rails web site.

How To Install PostgreSQL on Ubuntu 16.04

Install PostgreSQL on Ubuntu 16

PostgreSQL is a free, open-source object-relational database management system (object-RDBMS), similar to MySQL, and is standards-compliant and extensible. It is commonly used as a back-end for web and mobile applications. PostgreSQL, or ‘Postgres’ as it is nicknamed, adopts the ANSI/ISO SQL standards together, with the revisions.

This article assumes you have at least basic knowledge of linux, know how to use the shell, and most importantly, you host your site on your own VPS. The installation is quite simple and assumes you are running in the root account, if not you may need to add ‘sudo’ to the commands to get root privileges. I will show you through the step by step installation PostgreSQL on a Ubuntu 16.04 (Xenial Xerus) server.

Install PostgreSQL on Ubuntu 16.04

Step 1. First make sure that all your system packages are up-to-date by running these following apt-get commands in the terminal.

sudo apt-get update
sudo apt-get upgrade

Step 2. Installing PostgreSQL server.

PostgreSQL is available in the default repositories. So enter the following command from the Terminal to install it:

apt-get install postgresql postgresql-contrib phppgadmin

Step 3. Access PostgreSQL command prompt.

After installing PostgreSQL database server, by default it creates a user ‘postgres’ with role ‘postgres’. It also creates a system account with same name ‘postgres’. So to connect to postgres server, login to your system as user postgres and connect database:

su - postgres
psql

Now you are logged in to PostgreSQL database server. To check login info use following command from database command prompt:

postgres-# \conninfo

To disconnect from PostgreSQL database command prompt just type below command and press enter. It will return you back to Ubuntu command prompt:

postgres-# \q

Create new user and database:

### For example, let us create a new user called “wpcademy” with password “wpcademy.com”, and database called “wpcademydb”. ###
sudo -u postgres createuser -D -A -P wpcademy
sudo -u postgres createdb -O wpcademy wpcademydb

Step 4. Configure Apache2 for phpPgAdmin.

phpPgAdmin is a web-based administration tool for PostgreSQL. It is perfect for PostgreSQL DBAs, newbies, and hosting services. You need to configure apache for phpPgAdmin. Edit the file /etc/apache2/conf-available/phppgadmin.conf:

nano /etc/apache2/conf-available/phppgadmin.conf

Comment out the line #Require local by adding a # in front of the line and add below the line allow from all so that you can access from your browser:
phpPgAdmin-apache2-conf
Step 5. Configure phpPgAdmin.

Next, edit the file /etc/phppgadmin/config.inc.php:

nano /etc/phppgadmin/config.inc.php

Now change the following option:

$conf[‘extra_login_security'] = true;
to
$conf[‘extra_login_security'] = false;

Now, we can restart Apache and phpPgAdmin so that the changes take place:

systemctl restart postgresql
systemctl restart apache2
systemctl enable postgresql
systemctl enable apache2

Step 6. Accessing phpPgAdmin.

phpPgAdmin will be available on HTTP port 80 by default. Open your favorite browser and navigate to http://yourdomain.com/phppgadmin or http://server-ip/phppgadmin. If you are using a firewall, please open port 80 to enable access to the control panel.
phppgadmin-ubuntu-16.04

Congratulation’s! You have successfully installed PostgreSQL Server. Thanks for using this tutorial for installing PostgreSQL in Ubuntu 16.04 (Xenial Xerus) systems. For additional help or useful information, we recommend you to check the official PostgreSQL web site.

How To Install Node.js on Ubuntu 16.04

Install Node.js on Ubuntu 16

Node.js is a Javascript platform for programming that enables users to build network applications very quickly. If you are using Javascript on both the front-end and the back-end, it means your development can be much more consistent and be designed within the same system.

This article assumes you have at least basic knowledge of linux, know how to use the shell, and most importantly, you host your site on your own VPS. The installation is quite simple and assumes you are running in the root account, if not you may need to add ‘sudo’ to the commands to get root privileges. I will show you through the step by step installation Node.js on a Ubuntu 16.04 (Xenial Xerus) server.

Install Node.js on Ubuntu 16.04

Step 1. First make sure that all your system packages are up-to-date by running these following apt-get commands in the terminal.

sudo apt-get update
sudo apt-get upgrade

Step 2. Installing Node.js using repository.

The default Ubuntu repos do contain a version of Node.js. It is never the latest version but is usually known to be quite stable:

apt-get install nodejs

This will install Node.js, however we still need to install the package manager (NPM) so that 3rd party modules can be installed:

apt-get install npm

Verify the current version of Node.js installed:

node -v

Step 3. Installing Node.js using PPA repository for Ubuntu 16.04.

First you need to node.js ppa in our system provide by nodejs official website. We also need to install python-software-properties package if not installed already:

sudo apt-get install python-software-properties
curl -sL https://deb.nodesource.com/setup_7.x | sudo -E bash -

After adding required PPA file, lets install Nodejs package. NPM will also be installed with node.js. This command will also install many other dependent packages on your system:

apt-get install nodejs

Verify the current version of Node.js installed:

node -v

Step 4. Install Node.js using NVM (Node.js Version Manager).

Using nvm, you will be able to install multiple, self-contained versions of Node.js which will means you can control your environment much easier. It will give you on-demand access to the latest versions of Node.js, but it will also allow you to specify previous releases that your app may need. So, first we’ll want to update our local repository index and then install libssl-dev and build-essential . That can be done by running the below commands in a terminal or shell:

apt-get update
apt-get install build-essential libssl-dev

Once those are installed you need to download the setup script for NVM. Typically you can grab this from their github page. Though at the time of this writing the newest version is in the command below:

wget -qO- https://raw.githubusercontent.com/creationix/nvm/v0.31.1/install.sh

Verify that the script is indeed the one you want and then run:

bash install.sh

To begin the install of NVM. Once it finishes you will need to reload your profile to have your changes take effect without logging back in to your server again. Run the command:

source ~/.profile

Now as we have nvm installed, we can install isolated Node.js versions. To find out the versions of Node.js that are available for installation, we need to type:

[[email protected] ~]# nvm ls-remote
. . .
v5.8.0
v5.9.0
v5.9.1
v5.10.0
v5.10.1
v5.11.0
v6.0.0

Install the version you want with the command:

nvm install [your version]

Example:

nvm install 6.0.0

Configure nvm to use the version of Node.js that you just downloaded, the command is:

nvm use 6.0.0

To verify the current version of Node.js installed, the command is:

node -v

Congratulation’s! You have successfully installed Node.js. Thanks for using this tutorial for installing Node.js in Ubuntu 16.04 Xenial Xerus LTS system. For additional help or useful information, we recommend you to check the official Node.js web site.