
Nagios is an open source software that can be used for network and infrastructure monitoring. Nagios will monitor servers, switches, applications and services. It alerts the System Administrator when something went wrong and also alerts back when the issues has been rectified. Resources that can be monitored include CPU, memory and disk space loads, log files, temperature or hardware errors. It can monitor various parameters and problems for services like HTTP, SMTP, DNS, and with the help of plugins it can be highly extended. Nagios core was originally designed to run under Linux, although it should work under most other unices as well.
This article assumes you have at least basic knowledge of linux, know how to use the shell, and most importantly, you host your site on your own VPS. The installation is quite simple and assumes you are running in the root account, if not you may need to add ‘sudo’ to the commands to get root privileges. I will show you through the step by step installation Nagios on a Ubuntu 16.04 (Xenial Xerus) server.
Install Nagios on Ubuntu 16.04
Step 1. First make sure that all your system packages are up-to-date by running these following apt-get commands in the terminal.
sudo apt-get update
sudo apt-get upgrade
Step 2. Install LAMP (Linux, Apache, MariaDB, PHP) server.
A Ubuntu 16.04 LAMP server is required. If you do not have LAMP installed, you can follow our guide here. Also install all required PHP modules:
apt-get install php7.0 openssl perl make php7.0-gd libgd2-xpm-dev libapache2-mod-php7.0 libperl-dev libssl-dev daemon wget apache2-utils unzip
Step 3. Create users and groups for Nagios.
Now create a new nagios user account and setup a password to this account:
useradd nagios
groupadd nagcmd
usermod -a -G nagcmd nagios
usermod -a -G nagcmd www-data
Step 4. Installing Nagios and plugins.
First thing to do is to go to Nagios’s download page and download the latest stable version of Nagios, At the moment of writing this article it is version 4.1.1:
wget https://assets.nagios.com/downloads/nagioscore/releases/nagios-4.1.1.tar.gz
tar -zxvf /tmp/nagios-4.1.1.tar.gz
cd /tmp/nagios-4.1.1/
Perform below steps to compile the Nagios from the source code:
./configure --with-nagios-group=nagios --with-command-group=nagcmd --with-httpd_conf=/etc/apache2/sites-enabled/
make all
make install
make install-init
make install-config
make install-commandmode
make install-webconf
Next steps, Download latest nagios-plugins source and install using following commands:
wget http://www.nagios-plugins.org/download/nagios-plugins-2.1.1.tar.gz
tar xzf nagios-plugins-2.1.1.tar.gz
cd nagios-plugins-2.1.1
./configure --with-nagios-user=nagios --with-nagios-group=nagios
make
make install
Step 5. Configure Nagios.
Edit the /usr/local/nagios/etc/objects/contacts.cfg config file with your favorite editor and change the email address associated with the nagiosadmin contact definition to the address you’d like to use for receiving alerts.
nano /usr/local/nagios/etc/objects/contacts.cfg
Change the email address field to receive the notification:
[...]
define contact{
contact_name nagiosadmin ; Short name of userus
generic-contact ; Inherit default values from generic-contact template (defined above)
alias Nagios Admin ; Full name of useremail
[email protected] ; <<***** CHANGE THIS TO YOUR EMAIL ADDRESS ******
[...]
Step 6. Configure Apache web server for Nagios.
Now create nagios apache2 configuration file:
nano /etc/apache2/sites-enabled/nagios.conf
Edit the following lines if you want to access nagios administrative console from a particular IP series, Here, I want to allow nagios administrative access from 192.168.1.0/24 series only:
[...]
## Comment the following lines ##
# Order allow,deny
# Allow from all

## Uncomment and Change lines as shown below ##
Order deny,allow
Deny from all
Allow from 127.0.0.1 192.168.1.0/24
[...]
Enable Apache’s rewrite and cgi modules:
sudo a2enmod rewrite
sudo a2enmod cgi
Configure Apache authentication:
We need to setup the password for the user nagiosadmin. This username will be used to access the web interface so it is important to remember the password that you will input here. Set the password running the following command and enter the password twice:
# sudo htpasswd -s -c /usr/local/nagios/etc/htpasswd.users nagiosadmin
New password:
Re-type new password:
Adding password for user nagiosadmin
Restart Apache for the changes to take effect:
systemctl restart apache2
Step 7. Verify and Start Nagios service.
Next we have to make Nagios start at boot time, so first verify that the configuration file has no errors running the following command:
sudo /usr/local/nagios/bin/nagios -v /usr/local/nagios/etc/nagios.cfg
And you should get the output:
[...]
Checking objects...
Checked 8 services.
Checked 1 hosts.
Checked 1 host groups.
Checked 0 service groups.
Checked 1 contacts.
Checked 1 contact groups.
Checked 24 commands.
Checked 5 time periods.
Checked 0 host escalations.
Checked 0 service escalations.
Checking for circular paths...
Checked 1 hosts
Checked 0 service dependencies
Checked 0 host dependencies
Checked 5 timeperiods
Checking global event handlers...
Checking obsessive compulsive processor commands...
Checking misc settings...

Total Warnings: 0
Total Errors: 0

Things look okay - No serious problems were detected during the pre-flight check
[...]
Ubuntu 16.04 uses systemd for starting / stopping all the services, so, we need to create nagios.service file:
nano /etc/systemd/system/nagios.service
Add the following lines:
[Unit]
Description=Nagios
BindTo=network.target

[Install]
WantedBy=multi-user.target

[Service]
User=nagios
Group=nagios
Type=simple
ExecStart=/usr/local/nagios/bin/nagios /usr/local/nagios/etc/nagios.cfg
Enable Nagios to start automatically at system startup:
systemctl enable /etc/systemd/system/nagios.service
Now, start Nagios service:
systemctl start nagios
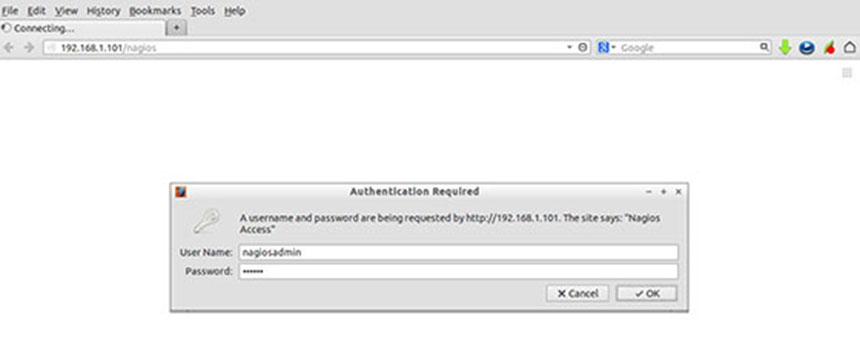
Step 8. Accessing Nagios.
Nagios will be available on HTTP port 80 by default. Open your favorite browser and navigate to http://yourdomain.com/install.php or http://server-ip/install.php and complete the required the steps to finish the installation. When prompted for username and password you will introduce the username “nagiosadmin” and the password that you entered in step 6.
Congratulation’s! You have successfully installed Nagios. Thanks for using this tutorial for installting Nagios monitoring tool in ubuntu 16.04 (Xenial Xerus) systems. For additional help or useful information, we recommend you to check the official Nagios web site.