How To Install Android Studio on CentOS 7

Android Studio on CentOS 7

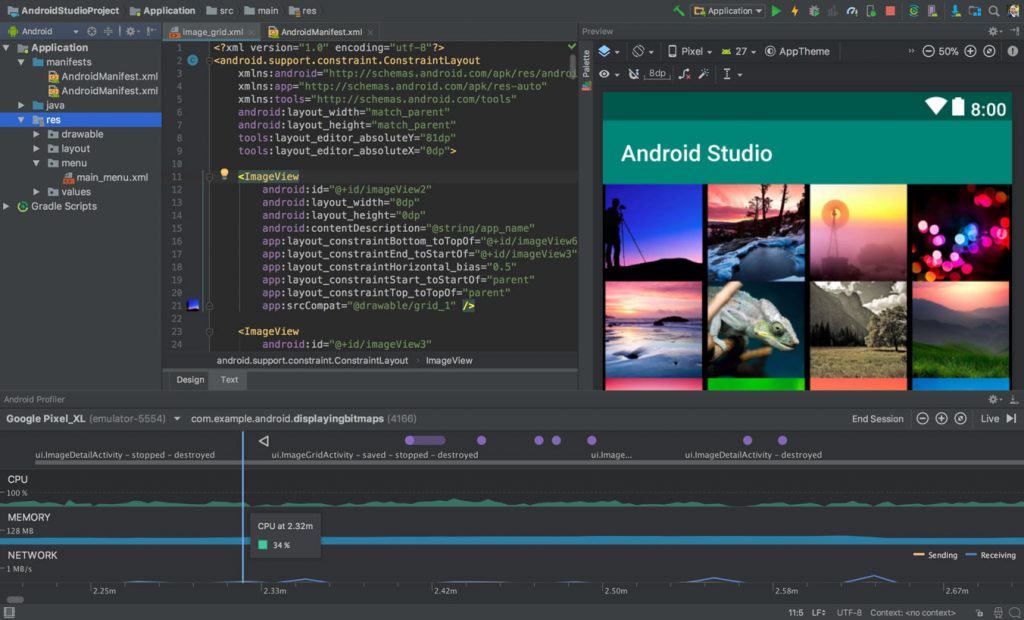
Android Studio is the official Integrated Development Environment (IDE) for Android app development, based on IntelliJ IDEA. On top of IntelliJ’s powerful code editor and developer tools, Android Studio offers even more features that enhance your productivity when building Android apps

Table of Contents

Step 1. First let’s start by ensuring your system is up-to-date.

Step 2. Installing Java 8 on CentOS.

Step 3. Install Android Studio on CentOS.

Prerequisites

This article assumes you have at least basic knowledge of Linux, know how to use the shell, and most importantly, you host your site on your own VPS. The installation is quite simple and assumes you are running in the root account, if not you may need to add ‘sudo’ to the commands to get root privileges. I will show you through the step by step install Android Studio on CentOS 7 server.

Install Android Studio on CentOS 7


Step 1. First let’s start by ensuring your system is up-to-date.

yum clean all
yum -y update

Step 2. Installing Java 8 on CentOS.

First you need to make sure that your CentOS is equipped with JAVA. For the installation you can download the latest version of Java:

rpm -ivh jdk-8u162-linux-x64.rpm

Once installed we need to set Java environment variables such as JAVA_HOME on CentOS 7:

export JAVA_HOME=/usr/java/jdk1.8.0_25/
export PATH=$PATH:$JAVA_HOME

Checking Installed java version:

### java -version
java version "1.8.0_65"
Java(TM) SE Runtime Environment (build 1.8.0_65-b17)
Java HotSpot(TM) 64-Bit Server VM (build 25.65-b01, mixed mode)

Step 3. Install Android Studio on CentOS.

Next, install studio by downloading the ide file from Android site and unzipping the same:

unzip android-studio-ide-171.4443003-linux.zip

Move android-studio directory to /opt directory:

mv /tmp/android-studio/ /opt/

Then, create a symlink to the studio executable to quickly start it whenever you need it:

ln -s /opt/android-studio/bin/studio.sh /usr/local/bin/android-studio

Now launch the studio from a terminal:

studio

Congratulation’s! You have successfully installed Android Studio on CentOS 7. Thanks for using this tutorial for installing Android Studio on CentOS 7 systems. For additional help or useful information, we recommend you to check the official Android Studio web site.

How To Install Android Studio 3.4 on Ubuntu 18.04 LTS

Install Android Studio on Ubuntu 18

Android Studio is the official Integrated Development Environment (IDE) for Android app development, based on IntelliJ IDEA. On top of IntelliJ’s powerful code editor and developer tools, Android Studio offers even more features that enhance your productivity when building Android apps

This article assumes you have at least basic knowledge of Linux, know how to use the shell, and most importantly, you host your site on your own VPS. The installation is quite simple and assumes you are running in the root account, if not you may need to add ‘sudo’ to the commands to get root privileges. I will show you through the step by step installation Android Studio on an Ubuntu 18.04 (Bionic Beaver) server.

install android studio on ubuntu 18

Install Android Studio on Ubuntu 18.04 LTS

Step 1. First, make sure that all your system packages are up-to-date

sudo apt update
sudo apt upgrade

Step 2. Installing Java on Ubuntu.

You need to have Java installed in your system before installing Android Studio:

sudo apt install openjdk-9-jre openjdk-9-jdk

Step 3. Install Android Studio on Ubuntu 18.04.

Run the following commands to add Android Studio PPA and install:

sudo add-apt-repository ppa:maarten-fonville/android-studio
sudo apt update
sudo apt install android-studio

Once the installation is finished, You can access android studio from the dash or app launcher or use the following command to start:

/opt/android-studio/bin/studio.sh

Congratulation’s! You have successfully installed Android Studio. Thanks for using this tutorial for installing Android Studio on your Ubuntu 18.04 LTS. For additional help or useful information, we recommend you to check the official Android Studio web site.
How To Install Android Studio on Ubuntu 16.04 LTS

Install Android Studio on Ubuntu 16

Android Studio is the official Integrated Development Environment (IDE) for Android app development, based on IntelliJ IDEA. On top of IntelliJ’s powerful code editor and developer tools, Android Studio offers even more features that enhance your productivity when building Android apps

This article assumes you have at least basic knowledge of Linux, know how to use the shell, and most importantly, you host your site on your own VPS. The installation is quite simple and assumes you are running in the root account, if not you may need to add ‘sudo’ to the commands to get root privileges. I will show you through the step by step installation Android Studio on an Ubuntu 16.04 Xenial Xerus server.

Install Android Studio on Ubuntu 16.04 LTS

Step 1. First make sure that all your system packages are up-to-date

sudo apt-get update
sudo apt-get upgrade

Step 2. Installing Java 8 on Ubuntu.

First you need to make sure that your ubuntu is equipped with JAVA. Here, we are using PPA or ORACLE Java. Run the following commands

sudo add-apt-repository ppa:webupd8team/java
sudo apt-get update
sudo apt-get install java-common oracle-java8-installer

Once installed we need to set Java environment variables such as JAVA_HOME on Ubuntu 16.04:

sudo apt-get install oracle-java8-set-default
source /etc/profile

Step 3. Install Android Studio on Ubuntu.

Run the following commands to add Android Studio PPA and install:

sudo add-apt-repository ppa:maarten-fonville/android-studio
sudo apt update
sudo apt install android-studio

Once the installation is finished, you can open Android Studio from Unity Dash or your preferred app launcher or You can access android studio from the dash or app launcher or use the following command to start:

/opt/android-studio/bin/studio.sh

Congratulation’s! You have successfully installed Android Studio. Thanks for using this tutorial for installing Android Studio on your Ubuntu 16.04 LTS. For additional help or useful information, we recommend you to check the official Android Studio web site.

How To Install IntelliJ IDEA on Ubuntu 18.04 LTS

Install IntelliJ IDEA on Ubuntu 18

IntelliJ IDEA is an integrated development environment for Java development. Notably, Google uses IntelliJ IDEA as the base for its Android Studio, an open source Android development IDE for developing Android applications. It is developed by JetBrains and is available in two editions, Community and Ultimate.

IntelliJ IDEA also supports major build automation tools such as Maven, Ant and Gradle, version controls systems such as Git and SVN. It has a built-in terminal, database tools, code completion, inline debugger. Also, it supports detecting duplicates, connecting Docker containers and application servers such as Tomcat, JBoss, etc.

This article assumes you have at least basic knowledge of Linux, know how to use the shell, and most importantly, you host your site on your own VPS. The installation is quite simple and assumes you are running in the root account, if not you may need to add ‘sudo’ to the commands to get root privileges. I will show you through the step by step installation IntelliJ IDEA on a Ubuntu 18.04 (Bionic Beaver) server.

Install IntelliJ IDEA on Ubuntu 18.04 LTS Bionic Beaver

Step 1. First, make sure that all your system packages are up-to-date by running these following apt-get commands in the terminal.

sudo apt update
sudo apt upgrade

Step 2. Installing IntelliJ IDEA on Ubuntu.

The recommended approach to install IntelliJ on Ubuntu 18.04 Linux system is to use the Snaps package. Run the following command to install the IntelliJ IDEA snap package:

### INTELLIJ IDEA COMMUNITY ###
sudo snap install intellij-idea-community --classic --edge

### INTELLIJ IDEA ULTIMATE ###
sudo snap install intellij-idea-ultimate --classic --edge

That’s it. IntelliJ IDEA has been installed on your Ubuntu desktop.

Step 3. Starting IntelliJ IDEA.

After successful instalation to start IntelliJ IDEA IDE via terminal run following command:

### INTELLIJ IDEA COMMUNITY ###
intellij-idea-community

### INTELLIJ IDEA ULTIMATE ###
intellij-idea-ultimate

Alternatively, you can start it by clicking on the IntelliJ IDEA icon (Activities -> IntelliJ IDE).

Congratulation’s! You have successfully installed IntelliJ IDEA. Thanks for using this tutorial for installing IntelliJ IDEA on your Ubuntu 18.04 system. For additional help or useful information, we recommend you to check the official IntelliJ IDEA website.