How To Install Yarn on CentOS 7 Step by Step

Install Yarn on CentOS 7

Yarn is a adavanced package management tool for Javascript applications mostly used for Node.js applications. Yarn is compatible with npm used for installing, configuring, updating and removing npm packages. It helps to solve problems with npm like network connectivity issues, speeding up the installation process etc. In this tutorial we will learn how To Install Yarn on CentOS 7 step by step.

Table of Contents

Step 1. First, let’s start by ensuring your system is up-to-date.
Step 2. Installing Yarn on CentOS.
Step 3. Using Yarn.

This article assumes you have at least basic knowledge of Linux, know how to use the shell, and most importantly, you host your site on your own VPS. The installation is quite simple and assumes you are running in the root account, if not you may need to add ‘sudo’ to the commands to get root privileges. I will show you through the step by step installation Yarn on a CentOS 7 server.

Install Yarn on CentOS 7

Step 1. First, let’s start by ensuring your system is up-to-date.

yum clean all
yum -y update

Step 2. Installing Yarn on CentOS.

To install Yarn, you must first install Node.js on your server, enable the Nodesource repository with the following curl command:

curl --silent --location https://rpm.nodesource.com/setup_8.x | sudo bash -

Install the Node.js package by typing:

sudo yum install nodejs

Next, execute the commands below to activate the repository for Yarn and import its GPG key:

curl --silent --location https://dl.yarnpkg.com/rpm/yarn.repo | sudo tee /etc/yum.repos.d/yarn.repo
sudo rpm --import https://dl.yarnpkg.com/rpm/pubkey.gpg

Once the repository is added, you can install Yarn, by running:

sudo yum install yarn

You can now issue the following command to confirm the installation:

yarn --version

Step 3. Using Yarn.

Create a new Yarn project use yarn init:

yarn init my_yarn_ramona

Adding dependency:

yarn add [package_name]

Upgrading dependency:

yarn upgrade [package_name]
yarn upgrade [package_name]@[version_or_tag]

Installing all project dependencies:

yarn

Congratulation’s! You have successfully installed Yarn. Thanks for using this tutorial for installing Yarn on CentOS 7 system. For additional help or useful information, we recommend you to check the official Yarn website.

How To Install Anaconda on CentOS 7 Step by Step

Install Anaconda on CentOS 7

Anaconda is a popular and commonly used Python/R Data Science platform, available for users of the data scientist and other scientific communities. The platform is available as an open source distribution, meaning you can perform Python/R data Science and Machine learning on commonly used operating systems like Linux, Windows, and Mac OS X. In this tutorial we will learn how To Install Anaconda on CentOS 7 step by step

Table of Contents

Step 1. Ensuring your system is up-to-date.

Step 2. Installing Anaconda Python on CentOS.

This article assumes you have at least basic knowledge of Linux, know how to use the shell, and most importantly, you host your site on your own VPS. The installation is quite simple and assumes you are running in the root account, if not you may need to add ‘sudo’ to the commands to get root privileges. I will show you through the step by step installation Anaconda on a CentOS 7 server.

Install Anaconda on CentOS 7

Step 1. First, let’s start by ensuring your system is up-to-date.

yum clean all
yum -y update

Step 2. Installing Anaconda Python on CentOS.

Download the Anaconda Installation Script:

cd /tmp
curl -O https://repo.anaconda.com/archive/Anaconda3-5.3.1-Linux-x86_64.sh

Once the progress bar is filled and the download is complete, we’ll verify the data integrity of the package. Do this by keying in this command into the command line:

sha256sum Anaconda3-5.3.1-Linux-x86_64.sh

The output should be like:

d4c4256a8f46173b675dd6a62d12f566ed3487f932bab6bb7058f06c124bcc27  Anaconda3-5.3.1-Linux-x86_64.sh

Now start anaconda installation script running following command:

bash Anaconda3-5.3.1-Linux-x86_64.sh

Now press ENTER to continue. Again press ENTER to scroll through the license of Anaconda. At last, you will be asked to accept the license terms.

Do you approve the license terms? [yes|no]

Type yes to continue. Then you will be asked to choose the installation directory.
Anaconda3 will now be installed into this location:

/home/linux4one/anaconda3

    - Press ENTER to confirm the location
    - Press CTRL-C to abort the installation
    - Or specify a different location below

Source the ~/.bashrc file to activate Anaconda:

source ~/.bashrc

Now verify the installation typing following command:

conda info

The output should be like:

active environment : base
    active env location : /home/wpcademy/anaconda3
            shell level : 1
    user config file : /home/wpcademy/.condarc
populated config files : 
        conda version : 4.5.11
    conda-build version : 3.15.1
        python version : 3.7.0.final.0
    base environment : /home/linuxize/anaconda3  (writable)
        channel URLs : https://repo.anaconda.com/pkgs/main/linux-64
                        https://repo.anaconda.com/pkgs/main/noarch
                        https://repo.anaconda.com/pkgs/free/linux-64
                        https://repo.anaconda.com/pkgs/free/noarch
                        https://repo.anaconda.com/pkgs/r/linux-64
                        https://repo.anaconda.com/pkgs/r/noarch
                        https://repo.anaconda.com/pkgs/pro/linux-64
                        https://repo.anaconda.com/pkgs/pro/noarch
        package cache : /home/wpcademy/anaconda3/pkgs
                        /home/wpcademy/.conda/pkgs
    envs directories : /home/wpcademy/anaconda3/envs
                        /home/wpcademy/.conda/envs
            platform : linux-64
            user-agent : conda/4.5.11 requests/2.19.1 CPython/3.7.0 Linux/3.10.0-957.1.3.el7.x86_64 centos/7 glibc/2.17
                UID:GID : 0:0
            netrc file : None
        offline mode : False

Congratulation’s! You have successfully installed Anaconda. Thanks for using this tutorial for installing Anaconda Python on CentOS 7 system. For additional help or useful information, we recommend you to check the official Anaconda website.

How To Install Mod_Security Apache on CentOS 7

Install Mod_Security Apache on CentOS 7

ModSecurity is an open source, cross platform web application firewall (WAF) developed by Trustwave’s SpiderLabs. It has a robust event-based programming language which provides protection from a range of attacks against web applications and allows for HTTP traffic monitoring, logging and real-time analysis. In this tutorial we will learn how To Install Mod_Security Apache on CentOS 7

This article assumes you have at least basic knowledge of Linux, know how to use the shell, and most importantly, you host your site on your own VPS. The installation is quite simple and assumes you are running in the root account, if not you may need to add ‘sudo’ to the commands to get root privileges. I will show you through the step by step installation ModSecurity on a CentOS 7 server.

Install Mod_Security Apache on CentOS 7

Step 1. First, let’s start by ensuring your system is up-to-date.

yum clean all
yum -y update

Step 2. Installing Mod_Security Apache on CentOS

Install Dependencies for mod_security:

yum install gcc make httpd-devel libxml2 pcre-devel libxml2-devel curl-devel git

Next, download latest stable release of mod_security source code from their official website to your server:

wget https://www.modsecurity.org/tarball/2.9.3/modsecurity-2.9.3.tar.gz
tar xzf modsecurity-apache_2.9.3.tar.gz
cd modsecurity-apache_2.9.3
./configure
make install
cp modsecurity.conf-recommended /etc/httpd/conf.d/modsecurity.conf
cp unicode.mapping /etc/httpd/conf.d/

Step 3. Configuring Mod_Security.

# nano /etc/httpd/conf/httpd.conf
LoadModule security2_module modules/mod_security2.so

Now set the basic rule set in your httpd.conf file. Add the following lines of code at the end of the file:

<IfModule security2_module>
    Include conf.d/modsecurity.conf
</IfModule>

Save the changes and restart Apache:

systemctl restart httpd

Step 4. Download and configure OWASP (Open Web Application Security Project) core rule set for a base configuration.

cd /etc/httpd
git clone https://github.com/SpiderLabs/owasp-modsecurity-crs.git
mv owasp-modsecurity-crs modsecurity-crs
cd modsecurity-crs
cp modsecurity_crs_10_setup.conf.example modsecurity_crs_10_config.conf

Open the Apache configuration file again, and add the following lines at the end of the file:

# nano /etc/httpd/conf/httpd.conf

Include modsecurity-crs/modsecurity_crs_10_config.conf
Include modsecurity-crs/base_rules/*.conf

Next, restart the Apache service to enable mod_security module:

systemctl restart httpd

Congratulation’s! You have successfully installed Mod_Security. Thanks for using this tutorial for installing Mod_Security on CentOS 7 system. For additional help or useful information, we recommend you to check the official ModSecurity website.

How To Install Slack on CentOS 7 – Step by Step

Install Slack on CentOS 7

Slack is a Cloud-based software that provides a team collaboration tool and services, founded by Stewart Butterfield. Slack offers a lot of IRC-like (Internet Relay Chat) features such as persistent chat room channel organized by topic. Slack can be searchable including files, conversation, and people. In this tutorial we will learn how To Install Slack on CentOS 7.

This article assumes you have at least basic knowledge of Linux, know how to use the shell, and most importantly, you host your site on your own VPS. The installation is quite simple and assumes you are running in the root account, if not you may need to add ‘sudo’ to the commands to get root privileges. I will show you through the step by step installation Slack on a CentOS 7 server.

Install Slack on CentOS 7

Step 1. First, let’s start by ensuring your system is up-to-date.

yum clean all
yum install epel-release
yum -y update
yum install libappindicator

Step 2. Installing Slack on CentOS.

Go to the Slack for Linux download page and download the latest Slack .rpm package:

wget https://downloads.slack-edge.com/linux_releases/slack-3.3.8-0.1.fc21.x86_64.rpm

After downloads successful, now install Slack using following command:

sudo yum -y install slack-3.3.8-0.1.fc21.x86_64.rpm

Step 3. Start Slack.

Now that you have Slack installed on your CentOS desktop, you can start it either from the command line by typing slack or by clicking on the Slack icon (Activities -> Slack).

Congratulation’s! You have successfully installed Slack. Thanks for using this tutorial for installing Slack on CentOS 7 system. For additional help or useful information, we recommend you to check the official Slack website.

How To Reset Root Password on MySQL Server

Reset Root Password on MySQL Server

By default, MySQL server will be installed with root account and password is blank. Have you ever forgotten the root password on one of your MySQL servers? If you have set the password for root and forget it, then you will need to reset the root password for MySQL. To reset your mysql password just follow these instructions and we assume that you already have a small amount of knowledge on MySQL.

This article assumes you have at least basic knowledge of linux, know how to use the shell, and most importantly, you host your site on your own VPS. The reset password MySQL is quite simple. I will show you through the step by step reset root password MySQL server.

Reset Root Password MySQL Server

Step 1. First thing to do is stop MySQL.

### CentOS 6 ###
service mysqld stop

### CentOS 7 ###
systemctl stop mysqld

Step 2. Next we need to start MySQL in safe mode with the –skip-grant-tables option so that it will not prompt for password.

 mysqld_safe --skip-grant-tables &

Step 3. Start the mysql client process using this command with root account and blank password.

 mysql -u root

Step 4. Change password for root account.

mysql> use mysql;
mysql> update user set password=PASSWORD("NEW-ROOT-PASSWORD") where #User='root';
mysql> flush privileges;
mysql> quit

Step 5. Restart MySQL.

Once complete, you can restart MySQL is installed by running the below command:

### CentOS 6 ###
service mysqld restart

### CentOS 7 ###
systemctl restart mysqld

Congratulation’s! You have successfully reset password MySQL. Thanks for using this tutorial for reset root password MySQL on Linux system. For additional help or useful information, we recommend you to check the official MySQL web site

You Might Also Like: How To Backup and Restore MySQL Database Using Command Line

How To Install Apache SVN on CentOS 7

Install Apache SVN on CentOS 7

Apache Subversion which is commonly referred to in its abbreviated form as SVN, (named after the command name SVN) is a popular software versioning and revision control system which is distributed as a free software under the Apache License. Mainly used by developers to maintain present and historic file versions like documentation, source code, and web pages, it primarily aims to be a compatible successor to the extensively used CVS (Concurrent Versions System).

SVN supports several protocols for network access: SVN, SVN+SSH, HTTP, HTTPS. If you are behind a firewall, HTTP-based Subversion is advantageous since SVN traffic will go through the firewall without any additional firewall rule setting. This article assumes you have at least basic knowledge of linux, know how to use the shell, and most importantly, you host your site on your own VPS.

In this tutorial we will show you how to install and configuration of Apache Subversion on your CentOS 7 server.

Install Apache SVN on CentOS 7

Step 1. First, you need to install subversion and mod_dav_svn (this stands for the Apache httpd module for subversion server) using the following command:

 yum install httpd subversion mod_dav_svn

Step 2. Configure Subversion with Apache.

Once installing the package, you must open the subversion httpd config file.

 nano /etc/httpd/conf.d/subversion.conf
LoadModule dav_svn_module     modules/mod_dav_svn.so
LoadModule authz_svn_module   modules/mod_authz_svn.so

<Location /svn>
   DAV svn
   SVNParentPath /var/www/svn
   AuthType Basic
   AuthName "Subversion User Authentication "
   AuthUserFile /etc/svn-users
   Require valid-user
</Location>

Step 3. Create SVN users.

Following commands will add two users for svn. It will prompt for users password to be assigned.

htpasswd -cm /etc/svn-users wpcademy
htpasswd -m /etc/svn-users p@sswd

Step 4. Create and configure SVN repository

cd /var/www/svn
svnadmin create testrepo
chown -R apache.apache testrepo

If you still have issues with SELinux Security please apply this:

chcon -R -t httpd_sys_content_t /var/www/svn/testrepo
chcon -R -t httpd_sys_rw_content_t /var/www/svn/testrepo

Step 5. Restart your web server.

 systemctl restart httpd.service

Step 6. Finally, You can visit the url http://your-ip-address/svn/testrepo to check out the content, you will be asked to enter the user name and password.

Step 7. Create basic repository structure with the below commands.

mkdir -p /tmp/svn/{trunk,branches,tags}
svn import -m 'Initializing basic repository structure' /tmp/svn/ http://localhost/svn/testrepo/

Congratulation’s! You have successfully installed Apache Subversion. Thanks for using this tutorial for installing Apache Subversion on CentOS 7 system. For additional help or useful information, we recommend you to check the official Apache SVN web site.

You Might Also Like: How To Install Apache SVN on Ubuntu 14.04

How To Install Gnome GUI on CentOS 7

Install Gnome GUI on CentOS 7

By default, RHEL/CentOS 7 server installed as minimal without any Graphical Desktop support. Installing GNOME Desktop on CentOS is faily straightforward. Most CentOS servers are run on CLI (Command-Line Interface) mode. But in some cases, one may need to have a desktop to install some applications with GUI (Grapich User Interface) mode. In this case, we will use GNOME, the most popular user-friendly desktop for any UNIX based system. This article assumes you have at least basic knowledge of linux, know how to use the shell, and most importantly, you host your site on your own VPS. Follow guide how to install Gnome GUI on CentOS 7.

In this tutorial we will show you how to install and configuration of Gnome on your CentOS 7 server.

Install Gnome GUI on CentOS 7

Step 1. Install Gnome GUI by issuing the following command.

CentOS 7:

 yum groupinstall "GNOME Desktop" "Graphical Administration Tools"

RHEL 7:

 yum groupinstall "Server with GUI"

Step 2. When the installation finishes, run the following command to tell the system to boot Gnome Desktop automatically at system startup.

 ln -sf /lib/systemd/system/runlevel5.target /etc/systemd/system/default.target

Step 3. Reboot the system.

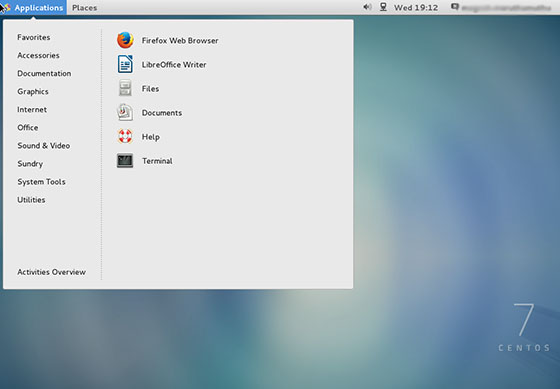
After you reboot the system , the system will enter into the Gnome GUI interface automatically.

centos-7-desktop-installation

Step 4. Installing additional applications.

After logging in to the GNOME Desktop, you can now go to System > Administration > Add/Remove Software to manage application in CentOS. By using this wizard, you can install various applications similar to yum but through a GUI. Applications installed using this method will appear in the Application menu list.

Congratulation’s! You have successfully installed Gnome. Thanks for using this tutorial for installing Gnome GUI on CentOS 7 system. For additional help or useful information, we recommend you to check the official Gnome web site.

You Might Also Like: How To Install GNOME on Ubuntu 14.04