How To Install Tmux Terminal Multiplexer on Linux

Tmux Terminal Multiplexer on Linux

Tmux is a terminal multiplexer that lets you switch easily between several programs in one terminal, detach them (they keep running in the background) and reattach them to a different terminal.

Prerequisites

This article assumes you have at least basic knowledge of linux, know how to use the shell, and most importantly, you host your site on your own VPS. The installation is quite simple and assumes you are running in the root account, if not you may need to add ‘sudo’ to the commands to get root privileges. I will show you through the step by step installation Tmux Terminal Multiplexer on a Linux server.
Install Tmux Terminal Multiplexer on Linux

Step 1. First make sure that all your system packages are up-to-date by running these following apt-get commands in the terminal.

sudo apt-get update
sudo apt-get upgrade

Step 2. Installing Tmux.

Installation is pretty straightforward if you have Ubuntu or CentOS distribution you can install tmux with:

### Debian / Ubuntu based ###
apt-get install tmux

### On RedHat / CentOS based ###
yum install tmux

After the installation is finish, then type tmux on your console to run tmux:

tmux

Step 3. Tmux Commands QuickStart.

Ctrl+b is the Tmux command prefix. Here below for the sake of Clarity the Ctrl+b will be repeated for every command:

To List the Available Commands:

Ctrl+b ?

To Create a New Pane:

Ctrl+b "

To Change Panes Layouts:

Ctrl+b Space

To Rotate Panes into Layout:

Ctrl+b Ctrl+o

To Switch into another Pane:

Ctrl+b ;

Congratulation’s! You have successfully installed Tmux. Thanks for using this tutorial for installing Tmux Terminal Multiplexer on Linux server. For additional help or useful information, we recommend you to check the official Tmux web site.

How To Install Plesk on Linux System

Plesk on Linux System

Plesk is one of the widely used web hosting control panels in the web hosting business. It offers simple server and website management solutions with single-click mechanisms. Plesk consists of webserver suite (LAMP), Mail server, FTP Server, Name Server applications etc.

Plesk supports a wide range of Linux releases, including all of the commonly used distributions like CentOS, Ubuntu, Debian and Cloudlinux. Plesk is a an enterprise hosting control panel and it requires license to work effectively. They also offers 15 day trial license which is intended for testing purposes.

Prerequisites

This article assumes you have at least basic knowledge of linux, know how to use the shell, and most importantly, you host your site on your own VPS. The installation is quite simple and assumes you are running in the root account, if not you may need to add ‘sudo’ to the commands to get root privileges. I will show you through the step by step installation Plesk web hosting control panels on a Linux system server.
Install Plesk on Linux System

Step 1. Download the autoinstaller from Plesk website:

wget http://autoinstall.plesk.com/plesk-installer

Add execute permissions to the autoinstaller:

chmod +x plesk-installer

Launch the autoinstaller:

./plesk-installer

Follow the script prompts and pick the options that best suits your use case.

Step 2. Accessing Plesk.

Once this is complete, you’ll be able to access your Plesk server via the web management interface. To do this, open a browser and point it to https://yourserverip:8443 and login to the control panel as root user.

Congratulation’s! You have successfully installed Plesk. Thanks for using this tutorial for installing Plesk web hosting control panels on a Linux system. For additional help or useful information, we recommend you to check the official Plesk web site.

How To Install Nextcloud on Ubuntu 16.04

Install Nextcloud on Ubuntu 16

Nextcloud is open source self-hosted file sync and share application (Calendar, Contacts, Documents, Email, and more). The developers at Nextcloud are doing their best to give the users a more secure platform, fewer bugs and overall a better product.

Install Nextcloud on Ubuntu 16.04

This article assumes you have at least basic knowledge of linux, know how to use the shell, and most importantly, you host your site on your own VPS. The installation is quite simple and assumes you are running in the root account, if not you may need to add ‘sudo’ to the commands to get root privileges. I will show you through the step by step installation Nextcloud on a Ubuntu 16.04 LTS (Xenial Xerus) server.

Step 1. First make sure that all your system packages are up-to-date by running these following apt-get commands in the terminal.

sudo apt-get update
sudo apt-get upgrade

Step 2. Install LAMP (Linux, Apache, MariaDB, PHP) server.

A Ubuntu 16.04 LAMP server is required. If you do not have LAMP installed, you can follow our guide here. Also install all required PHP modules:

apt-get install php7.0 libapache2-mod-php7.0 php7.0-mbstring php7.0-curl php7.0-zip php7.0-gd php7.0-mysql php7.0-mcrypt

Step 3. Installing Nextcloud.

First thing to do is to go to Nextcloud’s download page and download the latest stable version of Nextcloud, At the moment of writing this article it is version 9.0.52:

wget https://download.nextcloud.com/server/releases/nextcloud-9.0.52.zip

Unpack the Nextcloud archive to the document root directory on your server:

unzip nextcloud-9.0.52.zip
mv nextcloud /var/www/html

We will need to change some folders permissions:

chown -R www-data:www-data /var/www/html/nextcloud

Step 4. Configuring MariaDB for Nextcloud.

By default, MariaDB is not hardened. You can secure MariaDB using the mysql_secure_installation script. You should read and below each steps carefully which will set root password, remove anonymous users, disallow remote root login, and remove the test database and access to secure MariaDB.

mysql_secure_installation

Configure it like this:

- Set root password? [Y/n] y
- Remove anonymous users? [Y/n] y
- Disallow root login remotely? [Y/n] y
- Remove test database and access to it? [Y/n] y
- Reload privilege tables now? [Y/n] y

Next we will need to log in to the MariaDB console and create a database for the Nextcloud. Run the following command:

mysql -u root -p

This will prompt you for a password, so enter your MariaDB root password and hit Enter. Once you are logged in to your database server you need to create a database for Nextcloud installation:

MariaDB [(none)]> CREATE DATABASE nextcloud;
MariaDB [(none)]> GRANT ALL PRIVILEGES ON nextcloud.* TO 'nextcloud'@'localhost' IDENTIFIED BY 'strong_password';
MariaDB [(none)]> FLUSH PRIVILEGES;
MariaDB [(none)]> \q

Disable MariaDB binary logging by commenting the following lines:

nano /etc/mysql/my.cnf

Add the following three lines in [mysqld] section:

log-bin = /var/log/mysql/mariadb-bin
log-bin-index = /var/log/mysql/mariadb-bin.index
binlog_format = mixed

Step 5. Configuring Apache web server for Nextcloud.

Create a new virtual host directive in Apache. For example, create a new Apache configuration file named ‘nextcloud.conf’ on your virtual server:

sudo a2enmod rewrite
touch /etc/apache2/sites-available/nextcloud.conf
ln -s /etc/apache2/sites-available/nextcloud.conf /etc/apache2/sites-enabled/nextcloud.conf
nano /etc/apache2/sites-available/nextcloud.conf

Add the following lines:

ServerAdmin [email protected]
DocumentRoot "/var/www/html/nextcloud/"
ServerName your-domain.com
ServerAlias www.your-domain.com
<Directory "/var/www/html/nextcloud/">
Options FollowSymLinks
AllowOverride All
Order allow,deny
allow from all

ErrorLog /var/log/apache2/your-domain.com-error_log
CustomLog /var/log/apache2/your-domain.com-access_log common

Now, we can restart Apache web server so that the changes take place:

systemctl restart apache2.service

Step 6. Accessing Nextcloud.

Nextcloud will be available on HTTP port 80 by default. Open your favorite browser and navigate to http://yourdomain.com/ or http://server-ip/ and complete the required the steps to finish the installation. If you are using a firewall, please open port 80 to enable access to the control panel. What you do with Nextcloud is up to you. You can add new modules or just use it as a cloud-based file sync and share. You can install the Android app and even make use of the ownCloud desktop clients (they’ll work fine with Nextcloud).
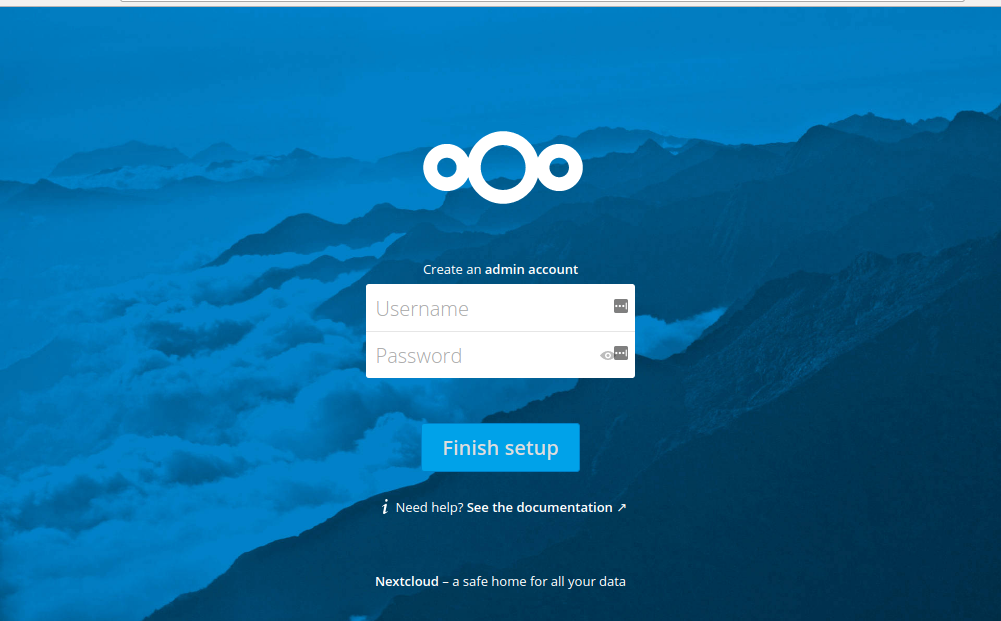
next cloud install on ubuntu 16 login page
Congratulation’s! You have successfully installed Nextcloud. Thanks for using this tutorial for installing Nextcloud personal cloud storage on your Ubuntu 16.04 LTS (Xenial Xerus) system. For additional help or useful information, we recommend you to check the official Nextcloud web site.

[youtube https://www.youtube.com/watch?v=wqRgeFXYUys]

How To Install Facebook Messenger Desktop on Ubuntu 16.04 LTS

Install Facebook Messenger Desktop on Ubuntu 16

Messenger for Desktop is a wrapper for the official client messenger.com. Therefore it works like a regular browser which can only navigate to the messenger.com web app. MFD doesn’t touch your messages, account or personal data. All that is handled securely by Facebook.

This article assumes you have at least basic knowledge of linux, know how to use the shell, and most importantly, you host your site on your own VPS. The installation is quite simple and assumes you are running in the root account, if not you may need to add ‘sudo’ to the commands to get root privileges. I will show you through the step by step installation Facebook Messenger Desktop on a Ubuntu 16.04 (Xenial Xerus) server.
Install Facebook Messenger Desktop on Ubuntu 16.04 LTS

Step 1. First make sure that all your system packages are up-to-date by running these following apt-get commands in the terminal.

sudo apt-get update
sudo apt-get upgrade

Step 2. Installing Facebook Messenger Desktop.

First, Download the deb package from this page and run the following commands to install Facebook Messenger Desktop on Ubuntu systems:

sudo apt-get install gdebi
wget https://github.com/aluxian/Messenger-for-Desktop/releases/download/v2.0.9/messengerfordesktop-2.0.9-linux-amd64.deb
sudo dpkg -i messengerfordesktop*.deb

Once installed, Facebook Messenger Desktop can be started from Unity Dash or your preferred app launcher or from the terminal:

messengerfordesktop

Congratulation’s! You have successfully installed Facebook Messenger App. Thanks for using this tutorial for installing Facebook Messenger Desktop on Ubuntu 16.04 LTS (Xenial Xerus) system. For additional help or useful information, we recommend you to check the official Facebook Messenger Desktop web site.

How To Install FFmpeg on Ubuntu 17.04

Install FFmpeg on Ubuntu

FFmpeg is a cross-platform solution for streaming audio and video as well as recording and conversion. There’s also a great PHP package called ffmpeg-php that allows for easy use of FFmpeg from inside PHP scripts. In this tutorial i will show you the easy way to install ffmpeg and ffmpeg-php (php extension).

This article assumes you have at least basic knowledge of Linux, know how to use the shell, and most importantly, you host your site on your own VPS. The installation is quite simple and assumes you are running in the root account, if not you may need to add ‘sudo’ to the commands to get root privileges. I will show you through the step by step installation FFmpeg on an Ubuntu 17.04 Zesty Zapus server.
Install FFmpeg on Ubuntu 17.04 Zesty Zapus

Step 1. First make sure that all your system packages are up-to-date by running these following apt-get commands in the terminal.

sudo apt-get update
sudo apt-get upgrade

Step 2. Installing FFmpeg.
You’ll need to add FFmpeg’s PPA (personal package archive) to your system:

sudo add-apt-repository ppa:jonathonf/ffmpeg-3
sudo apt-get update
sudo apt upgrade

To undo the changes and restore to the stock version of FFmpeg in main Ubuntu repositories, purge the PPA via command:

sudo apt install ppa-purge
sudo ppa-purge ppa:jonathonf/ffmpeg-3

Congratulation’s! You have successfully installed FFmpeg. Thanks for using this tutorial for installing FFmpeg on your Ubuntu 17.04 Zesty Zapus. For additional help or useful information, we recommend you to check the official FFmpeg web site.

How To Hide Nginx Server Default Header

Hide Nginx Server Default Header

In this tutorial we will learn How To Hide Nginx Server Default Header on your Linux server.  In default Nginx configuration, the server sends HTTP Header with the information of Nginx version number of the Server. The HTTP response header “Server” displays the version number of the server. This information can be used to try to exploit any vulnerabilities in the Nginx, specially if you are running an older version with known vulnerabilities.

Hiding nginx version is very easy and it’s done using server_tokens directive. This tutorial helps you customize the name of the server on your host.

Hide Nginx Server Header

Step 1. Go to nginx/conf folder (it can be located at /etc/nginx/nginx.conf or /usr/local/nginx/conf/nginx.conf file)

Step 2. Hide Nginx version.

Add following in nginx.conf under server section:

 server_tokens off;

Step 3. Restart nginx web server:

 service nginx restart

Let’s verify if we see the server information now:

curl -I https://wpcademy.com/
HTTP/1.1 200 OK
Server: nginx
Date: Sun, 03 Aug 2014 06:06:52 GMT
Content-Type: text/html; charset=UTF-8
Connection: keep-alive
Vary: Accept-Encoding
X-Pingback: https://wpcademy.com/xmlrpc.php

Congratulation’s! You have successfully hide Nginx version. For additional help or useful information, we recommend you to check the official Nginx web site.

You Might Also Like: How To Install Nginx Web Server On CentOS