How To Install phpMyAdmin 4.8.5 with Nginx on Ubuntu 18.04 LTS

Install phpMyAdmin with Nginx on Ubuntu 18

phpMyAdmin is a web-based client written in php for managing MySQL and MariaDB databases. It provides a user friendly web interface to access and manage your databases. To ease usage to a wide range of people, phpMyAdmin is being translated into 72 languages and supports both LTR and RTL languages.

This article assumes you have at least basic knowledge of Linux, know how to use the shell, and most importantly, you host your site on your own VPS. The installation is quite simple and assumes you are running in the root account, if not you may need to add ‘sudo’ to the commands to get root privileges. I will show you through the step by step installation phpMyAdmin with Nginx on an Ubuntu 18.04 LTS (Bionic Beaver) server.

Install phpMyAdmin with Nginx on Ubuntu

Step 1. First, make sure that all your system packages are up-to-date

sudo apt-get update
sudo apt-get upgrade


<strong> Step 2. Installing phpMyAdmin on Ubuntu 18.04 LTS.
</strong>

Use this command to install phpmyadmin on Ubuntu 18.04:
[php]
sudo apt install phpmyadmin

The installer will ask you to choose the web server that should be automatically configured to run phpMyAdmin. There is no option to choose Nginx, press TAB to select OK and then Enter. We’ll configure Nginx in the next section.
configuring-phpmyadmin-web-server

Next, the installer will ask you whether you want to use dbconfig-common tool to set up the database. Select Yes and hit Enter.
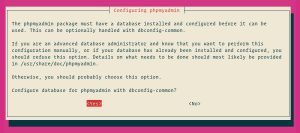
configuring-phpmyadmin-database

Enter a password for phpMyAdmin to register with the database, select OK and press Enter.
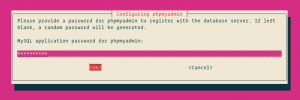
configuring-phpmyadmin-password

You will be prompted to confirm the password, enter the same password, select OK and press Enter.
configuring-phpmyadmin-confirm-password

Step 3. Configure Administrative MySQL.

Start by logging in to the MySQL server as the root user:

sudo mysql

From within the MySQL shell execute the following commands which will create a new administrative user and grant appropriate permissions:

CREATE USER 'padmin'@'localhost' IDENTIFIED BY 'change-with-your-secure-password';GRANT ALL PRIVILEGES ON *.* TO 'padmin'@'localhost' WITH GRANT OPTION;

Step 4. Configure Nginx to serve phpMyAdmin.

 In Nginx, virtual host file can be found in etc/nginx/snippets directory. Let’s create a file called “phpmyadmin.conf”:
sudo nano /etc/nginx/snippets/phpmyadmin.conf 

Add the following content:

location /phpmyadmin {
    root /usr/share/;
    index index.php index.html index.htm;
    location ~ ^/phpmyadmin/(.+\.php)$ {
        try_files $uri =404;
        root /usr/share/;
        fastcgi_pass unix:/run/php/php7.2-fpm.sock;
        fastcgi_index index.php;
        fastcgi_param SCRIPT_FILENAME $document_root$fastcgi_script_name;
        include /etc/nginx/fastcgi_params;
    }

    location ~* ^/phpmyadmin/(.+\.(jpg|jpeg|gif|css|png|js|ico|html|xml|txt))$ {
        root /usr/share/;
    }
}

Then, add the following line to each domain’s server block where you want to access phpMyAdmin using: domain.com/phpmyadmin:

include snippets/phpmyadmin.conf;
### /etc/nginx/conf.d/domain.com.conf

server {

    # . . . other code

    include snippets/phpMyAdmin.conf;

    # . . . other code 

}

Step 5. Finally, test phpMyAdmin.

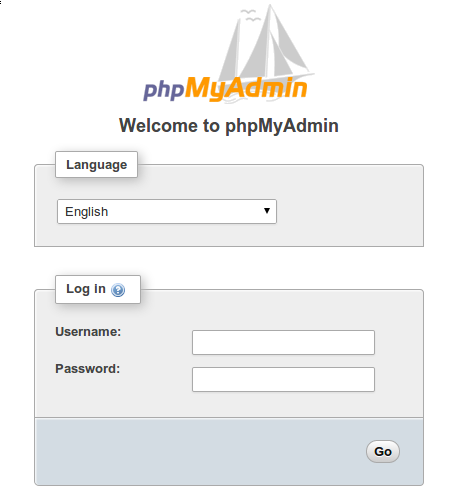
Now open your browser and surf to http://youripaddress/phpMyAdmin and your phpmyadmin will ask you for user and password of your mysql installation, you can use root as user and the root mysql password, or any other mysql user/password.
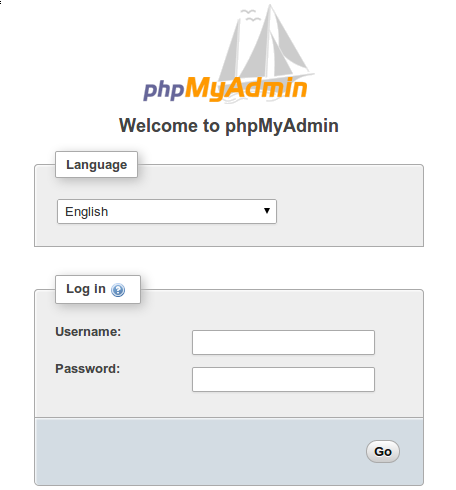
 

phpMyAdmin-login

Congratulation’s! You have successfully installed phpMyAdmin. Thanks for using this tutorial for installing phpMyAdmin with Nginx on Ubuntu 18.04 LTS system. For additional help or useful information, we recommend you to check the official phpMyAdmin web site.

How To Install phpMyAdmin 4.8.5 on Ubuntu 18.04 LTS

Install phpMyAdmin on Ubuntu 18

phpMyAdmin is web-based client written in php for managing MySQL and MariaDB databases. It provides a user friendly web interface to access and manage your databases. To ease usage to a wide range of people, phpMyAdmin is being translated into 72 languages and supports both LTR and RTL languages.

This article assumes you have at least basic knowledge of Linux, know how to use the shell, and most importantly, you host your site on your own VPS. The installation is quite simple and assumes you are running in the root account, if not you may need to add ‘sudo’ to the commands to get root privileges. I will show you through the step by step installation phpMyAdmin on a Ubuntu 18.04 LTS (Bionic Beaver) server.

Install phpMyAdmin on Ubuntu 18.04 LTS

Step 1. First make sure that all your system packages are up-to-date

sudo apt-get update
sudo apt-get upgrade

Step 2. Install LAMP (Linux, Apache, MariaDB and PHP) server.

A Ubuntu 18.04 LAMP server is required. If you do not have LAMP installed, you can follow our guide here. Also install all required PHP modules:

apt-get install php7.1-cli php7.1-gd php7.1-opcache php7.1-mysql php7.1-json php7.1-mcrypt php7.1-xml php7.1-curl

Step 3. Installing phpMyAdmin on Ubuntu 18.04 LTS.

Use this command to install phpmyadmin on Ubuntu 18.04:


sudo apt install phpmyadmin

Important, this step will ask you to select the web server where the application would be installed, it is mandatory that you select with the spacebar “Apache” server or your designate, not doing this will cause the files wont’t be copied correctly and then can not find the installed application.

Step 4. Accessing phpMyAdmin.

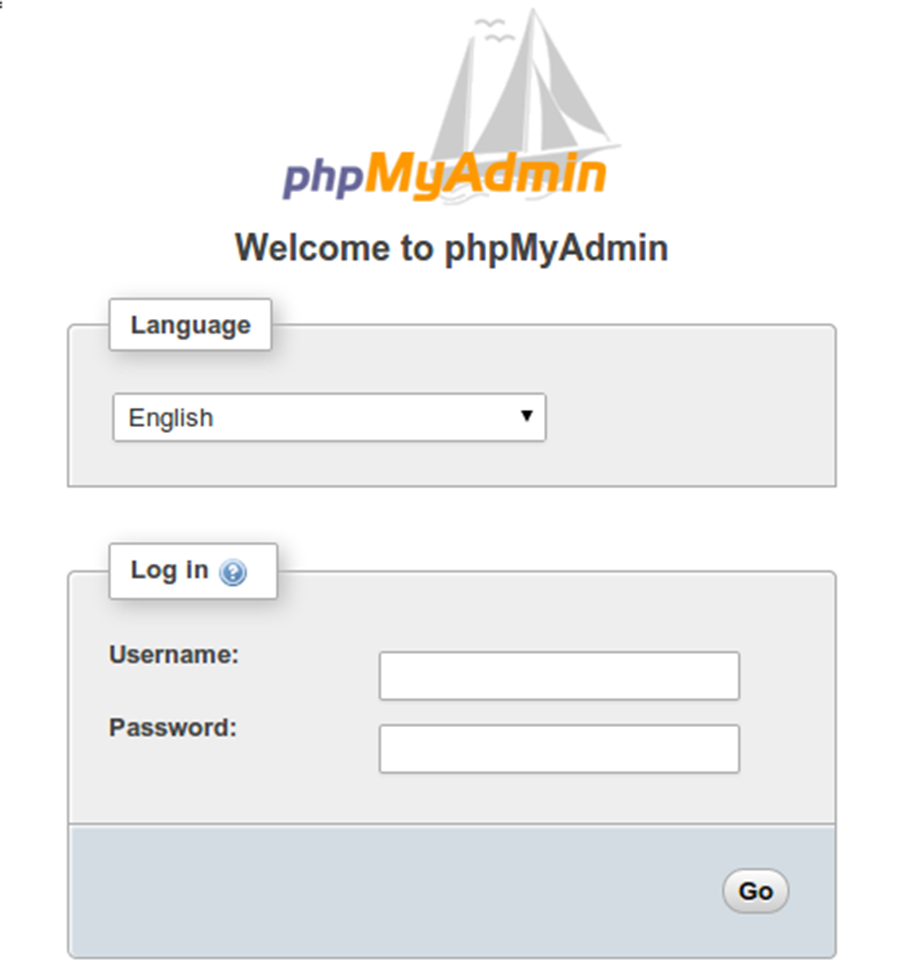
Now open your browser and surf to http://your-ip-address/phpmyadmin and your phpmyadmin will ask you for user and password of your mysql installation such as on step 2, you can use root as user and the root mysql password, or any other mysql user/password. If you are using a firewall, please open port 80 to enable access to the control panel.

phpMyAdmin-login

Congratulation’s! You have successfully installed phpMyAdmin. Thanks for using this tutorial for installing phpMyAdmin on Ubuntu 18.04 LTS system. For additional help or useful information, we recommend you to check the official phpMyAdmin web site.
Easy Guide to Change WordPress Theme via phpMyAdmin

Change WordPress Theme via phpMyAdmin

In this tutorial we are going to learn how to change WordPress theme from the database. WordPress makes it extremely easy to manage themes from the admin area. However, if you are unable to access your WordPress admin area, then you will need to find other ways to change your WordPress theme.

Why and When You Need to Use phpMyAdmin?

Normally, the easiest way to change your WordPress theme is by visiting the Appearance » Themes page in WordPress admin area. However, sometimes a WordPress error can make your website admin area inaccessible.

In that case, the safest way to recover your website is by restoring it from backup. Another way is to troubleshoot the WordPress error causing the problem. In troubleshooting, the easiest way to switch themes is to make a backup of your existing theme via FTP, and then remove all theme folders from /wp-content/themes/ except for the default theme. WordPress will automatically revert to the default theme.

Both of the above methods will give you access to the WordPress admin area, and you will be able to change the theme.

However if you don’t have a backup, and you don’t want to revert to a default theme, then you can change to a custom WordPress theme from your database by using phpMyAdmin.

That being said, let’s take a look at how to change your WordPress theme via phpMyAdmin.

Changing Your WordPress Theme via phpMyAdmin

This method allows you to tell WordPress which theme to use by changing the information in the database. For this method to work, the theme you want to switch to must already be installed on your website.

You will need to connect to your website using a FTP client and go to the /wp-content/themes/ folder. There you will be able to see all the themes that are currently installed on your website.

create ad with wordpress blog

Note: Write down the theme folder name that you want to switch to. You will need it in the next step.

If the theme you want to switch to isn’t installed on your website, then you can manually install a WordPress theme via FTP.

After making sure that theme you want is installed on your website, you can now go ahead and change the theme via phpMyAdmin.

Step 01. you need to go to cPanel dashboard of your WordPress hosting account. Next, scroll down to the databases section and then click on phpMyAdmin.

Once you are in phpMyAdmin, you’ll see a list of databases on the left side of the screen. Simply click on the database that you are using for your WordPress site.

If you are not using cPanel but using phpMyadmin, go to yourdomain.com/phpmyadmin or yourip/phpmyadmin.

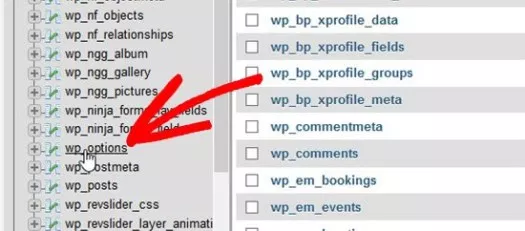
Step 02. it will show you the list of tables in this database. You need to click on the ‘wp_options’ table to open it.

Note: By default, WordPress database tables use wp_ as the prefix for table names. However, it is possible to see a different database prefix if you or an administrator on your site had changed the WordPress database prefix.

select table from database

Step 03. Upon opening the table, you need to scroll down and locate ‘template’ and ‘stylesheet’ rows. Next, click on the Edit button next to the template row.

Step 04. This will open the row editor where you need to change the value for the option_value field to the theme you want to use. It is usually the same as the folder name in /wp-content/themes/ folder.

Step 05. After that click on the ‘Go’ button below to save your changes. Now, repeat the process for stylesheet row as well.

Once you have saved your changes, you can go to your website to see the new theme in action.

Congratulations! You have changed your WordPress theme via phpMyAdmin successfully. You may also want to see how to install phpMyAdmin.

How To Install phpMyAdmin on Nginx

Install phpMyAdmin on Nginx

PhpMyaAdmin is the web based administration tool for managing the MySQL, MariaDB and Drizzle servers, it helps in performing databases activities such as creating, deleting ,querying , tables, columns, relations, indexes, users, permissions, etc. This article assumes you have at least basic knowledge of linux, know how to use the shell, and most importantly, you host your site on your own VPS and asume and that you already have Nginx installed on the system. You will also need php-fpm to have phpmyadmin working on Nginx.

In this tutorial we will show you how to install and configuration of phpMyaAdmin on Nginx web server on your CentOS 6 server.

Install phpMyAdmin on Nginx

Step 1. First add EPEL yum repository your system.

CentOS 6:

 rpm -Uvh http://dl.fedoraproject.org/pub/epel/6/x86_64/epel-release-6-8.noarch.rpm

CentOS 7:

 rpm -Uvh http://dl.fedoraproject.org/pub/epel/7/x86_64/e/epel-release-7-1.noarch.rpm

Step 2. Install phpMyAdmin using the following command.

 yum -y install phpmyadmin php

Step 3. Configure nginx to serve phpMyAdmin.

In Nginx, virtual host file can be found in /etc/nginx/conf.d directory. Lets create file called “phpmyadmin.conf”.

#nano /etc/nginx/conf.d/phpmyadmin.wpcademy.com.conf

server {
listen   80;
server_name phpmyadmin.wpcademy.com;
root /var/www/html/phpMyAdmin;
 
location / {
index  index.php;
}
 
## Images and static content is treated different
location ~* ^.+.(jpg|jpeg|gif|css|png|js|ico|xml)$ {
access_log        off;
expires           30d;
}
 
location ~ /\.ht {
deny  all;
}
 
location ~ /(libraries|setup/frames|setup/libs) {
deny all;
return 404;
}
 
location ~ \.php$ {
include /etc/nginx/fastcgi_params;
fastcgi_pass 127.0.0.1:9000;
fastcgi_index index.php;
fastcgi_param SCRIPT_FILENAME /var/www/html/phpMyAdmin$fastcgi_script_name;
}
}

Create required directory and enable Nginx virtual host for phpmyadmin.

 mkdir -p /var/www/html/phpMyAdmin

Step 4. Restart the services.

service nginx restart
service php-fpm restart


Step 5. Finally, test phpMyAdmin.

Now open your browser and surf to http://youripaddress/phpMyAdmin or http://yourdomin.com/phpMyAdmin and your phpmyadmin will ask you for user and password of your mysql installation, you can use root as user and the root mysql password, or any other mysql user/password.

phpMyAdmin-login

Congratulation’s! You have successfully installed phpMyaAdmin with Nginx. Thanks for using this tutorial for installing phpMyaAdmin on Nginx web server on Linux system. For additional help or useful information, we recommend you to check the official phpMyaAdmin web site.