How To Install Wireshark on Ubuntu 16.04 LTS

Install Wireshark on Ubuntu 16

Wireshark is a free and open-source packet analyzer. It is used for network troubleshooting, monitoring, analysis, software and communications protocol development. Wireshark offers graphical interface to view and analyze network results so it’s easy to use. It can capture network traffic to specific devices and network interfaces and can save the captured traffic to various formats for analysis and troubleshoot of network releted problems.

This article assumes you have at least basic knowledge of linux, know how to use the shell, and most importantly, you host your site on your own VPS. The installation is quite simple and assumes you are running in the root account, if not you may need to add ‘sudo’ to the commands to get root privileges. I will show you through the step by step installation wireshark network analyzer on a Ubuntu 16.04 (Xenial Xerus) server.
Install Wireshark on Ubuntu 16.04 LTS

Step 1. First make sure that all your system packages are up-to-date by running these following apt-get commands in the terminal.

sudo apt-get update
sudo apt-get upgrade

Step 2. Installing Wireshark.

Run the commands below in terminal to install wireshark:

apt-get install wireshark

During the installation,it will require to confirm security about allowing non-superuser to execute Wireshark. Just confirm YES if you want to. If you check on NO, you must run Wireshark with sudo. Later, if you want to change this:

sudo dpkg-reconfigure wireshark-common

Step 3. Start Capturing Packet.

Once installed, new group named wireshark will be created when installing wireshark. You can verify this by looking at the end of /etc/group file:

tail /etc/group

Running Wireshark as root is insecure. To run wireshark as normal user you have to add yourself into wireshark group:

sudo gpasswd -a <YourUserName> wireshark

Wireshark will be the user’s secondary group. To temporarily set wireshark as the user’s primary group, run the following command:

newgrp wireshark

Finally, Start the wireshark program from the terminal:

wireshark

Note: If you want to start wireshark in application menu, you have to log out of the current session and log back in.

Congratulation’s! You have successfully installed wireshark. Thanks for using this tutorial for installing wireshark network analyzer on Ubuntu 16.04 LTS (Xenial Xerus) system. For additional help or useful information, we recommend you to check the official wireshark web site.

How To Install Seafile on Ubuntu 16.04 LTS

Install Seafile on Ubuntu 16

Seafile is a open source cloud storage software. It offers file sharing and syncing for individual users and groups, it provides client side encryption and easy access from mobile devices. Also easily integrated with local services such as LDAP and WebDAV or can be deployed using advanced network services and databases like MySQL, SQLite, PostgreSQL, Memcached, Nginx or Apache Web Server.

This article assumes you have at least basic knowledge of linux, know how to use the shell, and most importantly, you host your site on your own VPS. The installation is quite simple and assumes you are running in the root account, if not you may need to add ‘sudo’ to the commands to get root privileges. I will show you through the step by step installation Seafile open source secure cloud storage on a Ubuntu 16.04 (Xenial Xerus) server.
Install Seafile on Ubuntu 16.04 LTS Xenial Xerus

Step 1. First make sure that all your system packages are up-to-date by running these following apt-get commands in the terminal.

sudo apt-get update
sudo apt-get upgrade

Step 2. Install LEMP (Linux, Nginx, MariaDB, PHP) server.

A Ubuntu 16.04 LAMP server is required. If you do not have LEMP installed, you can follow our guide here. Also install all required PHP modules:

apt-get install php7.0-curl php7.0-gd php7.0-mbstring php7.0-mysql libapache2-mod-php7.0 php7.0-mcrypt php7.0-zip

Installing Python modules:

apt-get install python2.7 libpython2.7 python-setuptools python-imaging python-ldap python-mysqldb python-memcache python-urllib3

Step 3. Configure the MariaDB database for Seafile.

By default, MariaDB is not hardened. You can secure MariaDB using the mysql_secure_installation script. You should read and below each steps carefully which will set root password, remove anonymous users, disallow remote root login, and remove the test database and access to secure MariaDB.

mysql_secure_installation

Configure it like this:

- Set root password? [Y/n] y
- Remove anonymous users? [Y/n] y
- Disallow root login remotely? [Y/n] y
- Remove test database and access to it? [Y/n] y
- Reload privilege tables now? [Y/n] y

Next we will need to log in to the MariaDB console and create a database for the Seafile. Run the following command:

mysql -u root -p

This will prompt you for a password, so enter your MariaDB root password and hit Enter. Once you are logged in to your database server you need to create a database for Seafile installation:

MariaDB [(none)]> create database ccnet_db character set = 'utf8'; MariaDB [(none)]> create database seafile_db character set = 'utf8'; MariaDB [(none)]> create database seahub_db character set = 'utf8';
MariaDB [(none)]> create user seacloud@localhost identified by 'password';
MariaDB [(none)]> grant all privileges on ccnet_db.* to seacloud@localhost identified by 'password'; MariaDB [(none)]> grant all privileges on seafile_db.* to seacloud@localhost identified by 'password'; MariaDB [(none)]> grant all privileges on seahub_db.* to seacloud@localhost identified by 'password';
MariaDB [(none)]> flush privileges; MariaDB [(none)]> exit

Step 4. Installing Seafile on Server.

You need to download the last stable release of Seafile:

wget https://bintray.com/artifact/download/seafile-org/seafile/seafile-server_6.0.6_x86-64.tar.gz

Extract the tarball into the current directory:

tar -xvzf seafile-server_6.0.6_x86-64.tar.gz
mv seafile-server_6.0.6 seafile-server

Install Seafile:

Run this script which will create the required databases and directories for the Seafile server and and answer all questions using the following configuration options, after the script verifies the existence of all Python required modules:

./setup-seafile-mysql.sh

After Seafile server successfully installs, it will generate some useful information such as what ports needs to be open on your Firewall to allow external connection and what scripts to handle in order to start the server.

Step 5. Starting the Seafile services.

Create startup script for the Seafile server like this:

nano /lib/systemd/system/seafile.service

Add the following lines:

[Unit]
Description=Seafile Server
After=network.target mariadb.service[Service]
Type=oneshot
ExecStart=/home/seafile/seafile-server/seafile.sh start
ExecStop=/home/seafile/seafile-server/seafile.sh stop
RemainAfterExit=yes
User=seafile
Group=seafile[Install]
WantedBy=multi-user.target

Save the file and create a new service file for seahub:

[Unit]
Description=Seafile Hub
After=network.target seafile.target[Service]
Type=oneshot
ExecStart=/home/seafile/seafile-server/seahub.sh start-fastcgi
ExecStop=/home/seafile/seafile-server/seahub.sh stop
RemainAfterExit=yes
User=seafile
Group=seafile[Install]
WantedBy=multi-user.target

Now try using the service and command to start a new Seafile server instance:

systemctl daemon-reload 
systemctl start seafile
systemctl start seahub

Step 6. Configuring Nginx web server for Seafile.

*Note: A static IP address 192.168.77.21 configure on your server.

First, create a new virtual host file with name seafile.conf:

nano /etc/nginx/sites-available/seafile.conf

Add the following lines:

server {
    listen 80;
    server_name 192.168.77.21;proxy_set_header X-Forwarded-For $remote_addr;# Reverse proxy for seafile
    location / {
        fastcgi_pass    127.0.0.1:8000;
        fastcgi_param   SCRIPT_FILENAME     $document_root$fastcgi_script_name;
        fastcgi_param   PATH_INFO           $fastcgi_script_name;fastcgi_param    SERVER_PROTOCOL        $server_protocol;
        fastcgi_param   QUERY_STRING        $query_string;
        fastcgi_param   REQUEST_METHOD      $request_method;
        fastcgi_param   CONTENT_TYPE        $content_type;
        fastcgi_param   CONTENT_LENGTH      $content_length;
        fastcgi_param   SERVER_ADDR         $server_addr;
        fastcgi_param   SERVER_PORT         $server_port;
        fastcgi_param   SERVER_NAME         $server_name;
        fastcgi_param   REMOTE_ADDR         $remote_addr;access_log      /var/log/nginx/seahub.access.log;
        error_log       /var/log/nginx/seahub.error.log;
        fastcgi_read_timeout 36000;
    }# Reverse Proxy for seahub
    location /seafhttp {
        rewrite ^/seafhttp(.*)$ $1 break;
        proxy_pass http://127.0.0.1:8082;
        client_max_body_size 0;
        proxy_connect_timeout  36000s;
        proxy_read_timeout  36000s;
        proxy_send_timeout  36000s;
        send_timeout  36000s;
    }#CHANGE THIS PATH WITH YOUR OWN DIRECTORY
    location /media {
        root /home/seafile/seafile-server/seahub;
    }
}

Save the file and restart nginx:

systemctl restart nginx

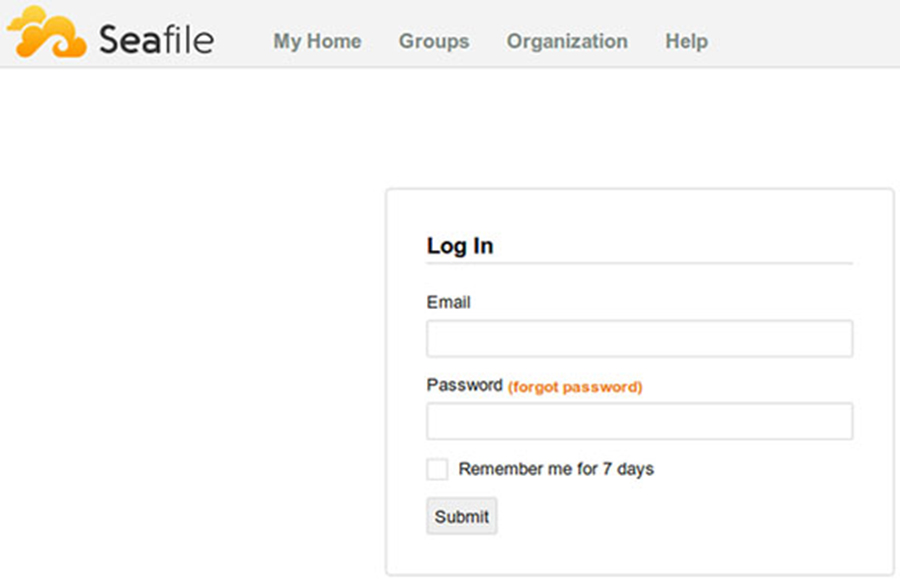
Step 7. Accessing Seafile.

Seafile cloud storage will be available on HTTP port 80 by default. Open your favorite browser and navigate to http://yourdomain.com or http://192.168.77.21. Enter the admin email id and password to login which you have created at the time of installation. If you are using a firewall, please open port 8000 to enable access to the control panel.

seafile-web-interface-login

Congratulation’s! You have successfully installed Seafile. Thanks for using this tutorial for installing Seafile open source secure cloud storage on Ubuntu 16.04 LTS (Xenial Xerus) system. For additional help or useful information, we recommend you to check the official Seafile web site.

How To Install XFCE Desktop on Ubuntu 16.04 LTS

Install XFCE Desktop on Ubuntu 16

XFCE is one of the most popular desktop environment for linux desktop. XFCE is a free lightweight, fast and easy to use software desktop environment for Unix/Linux like operating systems. It is designed for productivity and aims to be fast and low on system resources. Unlike GNOME and KDE desktops which are heavier, but XFCE uses fewer system resources. Furthermore, it offers better modularity and less dependencies to install and takes less time and low disk space on your hard drive.

This article assumes you have at least basic knowledge of linux, know how to use the shell, and most importantly, you host your site on your own VPS. The installation is quite simple and assumes you are running in the root account, if not you may need to add ‘sudo’ to the commands to get root privileges. I will show you through the step by step installation Xfce Desktop Environment on a Ubuntu 16.04 (Xenial Xerus) server.
Install XFCE Desktop on Ubuntu 16.04 LTS
Step 1. First make sure that all your system packages are up-to-date by running these following apt-get commands in the terminal.

sudo apt-get update
sudo apt-get upgrade

Step 2. Installing Xfce Desktop Environment.
Run following command to install XFCE desktop environment:

apt-get install xfce4

After installation there is no need to restart the system you can get the XFCE desktop. Now log off from current user and login back once again but click on ubuntu logo which is at right corner at user login box. On clicking the ubuntu logo, menu will appear select the XFCE one.

Congratulation’s! You have successfully installed XFCE Desktop. Thanks for using this tutorial for installing Xfce Desktop Environment on Ubuntu 16.04 LTS (Xenial Xerus) system. For additional help or useful information, we recommend you to check the official XFCE web site.

How To Install Gogs on Ubuntu 16.04 LTS

Install Gogs on Ubuntu 16

Gogs is a free and open source self-hosted Git service written in the Go programming language. It is very similar to GitLab and aims to be the easiest and most painless way to set up self-hosted Git service in your development environment.

This article assumes you have at least basic knowledge of Linux, know how to use the shell, and most importantly, you host your site on your own VPS. The installation is quite simple and assumes you are running in the root account, if not you may need to add ‘sudo’ to the commands to get root privileges. I will show you through the step by step installation Gogs on Ubuntu 16.04 Xenial Xerus server.
Install Gogs on Ubuntu 16.04 LTS

Step 1. First make sure that all your system packages are up-to-date by running these following apt-get commands in the terminal.

sudo apt-get update
sudo apt-get upgrade

Step 2. Install LAMP (Linux, Apache, MariaDB and PHP) server.

A Ubuntu 16.04 LAMP server is required. If you do not have LAMP installed, you can follow our guide here. Also install all required PHP modules:

apt-get install php7.0-curl php7.0-gd php7.0-mbstring php7.0-mysql libapache2-mod-php7.0 php7.0-mcrypt php7.0-zip

Step 3. Installing Gogs.

First thing to do is to go to Gogs’s download page and download the latest stable version of Gogs, At the moment of writing this article it is version 0.11.4:

cd /opt && wget https://dl.gogs.io/0.11.4/linux_amd64.zip

Unpack the Gogs archive to the document root directory on your server:

unzip linux_amd64.zip
mv gogs/ /var/www/html/gogs

Next, change the directory to the gogs and run the following command to start gogs:

cd /var/www/html/gogs
./gogs web &

Step 4. Configuring MariaDB for Gogs.

By default, MariaDB is not hardened. You can secure MariaDB using the mysql_secure_installation script. you should read and below each steps carefully which will set root password, remove anonymous users, disallow remote root login, and remove the test database and access to secure MariaDB:

mysql_secure_installation

Configure it like this:

- Set root password? [Y/n] y
- Remove anonymous users? [Y/n] y
- Disallow root login remotely? [Y/n] y
- Remove test database and access to it? [Y/n] y
- Reload privilege tables now? [Y/n] y

Next we will need to log in to the MariaDB console and create a database for the Gogs. Run the following command:

mysql -u root -p

This will prompt you for a password, so enter your MariaDB root password and hit Enter. Once you are logged in to your database server you need to create a database for Gogs installation:

MariaDB [(none)]> CREATE DATABASE gogs;
MariaDB [(none)]> GRANT ALL PRIVILEGES ON gogs.* TO 'gogs'@'localhost' IDENTIFIED BY 'your_gogs_password';
MariaDB [(none)]> FLUSH PRIVILEGES;
MariaDB [(none)]> \q

Step 5. Configuring Apache web server for Gogs.

Create a new virtual host directive in Apache. For example, create a new Apache configuration file named ‘gogs.conf’ on your virtual server:

sudo a2enmod rewrite
touch /etc/apache2/sites-available/gogs.conf
ln -s /etc/apache2/sites-available/gogs.conf /etc/apache2/sites-enabled/gogs.conf
nano /etc/apache2/sites-available/gogs.conf

Add the following lines:

<VirtualHost *:80>
ServerAdmin [email protected]
DocumentRoot /var/www/html/gogs/
ServerName your-domain.com
ServerAlias www.your-domain.com
<Directory /var/www/html/gogs/>
Options FollowSymLinks
AllowOverride All
Order allow,deny
allow from all
</Directory>
ProxyRequests Off
ProxyPass / http://192.168.77.20:3000/
ProxyPassReverse / http://192.168.77.20:3000/
ErrorLog /var/log/apache2/your-domain.com-error_log
CustomLog /var/log/apache2/your-domain.com-access_log common
</VirtualHost>

Now, we can restart Apache web server so that the changes take place:

systemctl restart apache2.service

Step 6. Accessing Gogs.

Gogs will be available on HTTP port 80 and 3000 by default. Open your favorite browser and navigate to http://yourdomain.com or http://server-ip and complete the required the steps to finish the installation. If you are using a firewall, please open port 80 to enable access to the control panel.

Congratulations! You have successfully installed Gogs. Thanks for using this tutorial for installing Gogs in Ubuntu 16.04 Xenial Xerus systems. For additional help or useful information, we recommend you to check the official Gogs web site.

How To Install Open Visual Traceroute on Ubuntu 16.04 LTS

Install Open Visual Traceroute on Ubuntu 16

Open visual traceroute is a free and open-source graphical traceroute tool, available for Linux, Mac OS X and Windows and licensed under LGPL v3.. It can also perform packet sniffer and Whois lookup. Data is presented in a 3D map which can be exported to an image file and text file. The gantt view is useful to analyze network bottlenecks.

This article assumes you have at least basic knowledge of Linux, know how to use the shell, and most importantly, you host your site on your own VPS. The installation is quite simple and assumes you are running in the root account, if not you may need to add ‘sudo’ to the commands to get root privileges. I will show you through the step by step installation Open Visual Traceroute on Ubuntu 16.04 Xenial Xerus server.
Install Open Visual Traceroute on Ubuntu 16.04 LTS

Step 1. First, make sure that all your system packages are up-to-date by running these following apt-get commands in the terminal.

sudo apt-get update
sudo apt-get upgrade
sudo apt-get install gdebi

Step 2. Installing Oracle Java 8 on Ubuntu.

Before starting, Oracle Java is required to run Open Visual Traceroute. By default Oracle JDK 8 is not available in Ubuntu repository so you will need to add Webupd8 team PPA repository to your system:

add-apt-repository ppa:webupd8team/java
apt-get update
apt-get install java-common oracle-java8-installer

Step 3. Installing Open Visual Traceroute.

First thing to do is to go to Open Visual Traceroute’s download page and download the latest stable version of Open Visual Traceroute, At the moment of writing this article it is version 1.6.5:

### 32-bits ###
wget http://heanet.dl.sourceforge.net/project/openvisualtrace/1.6.5/ovtr_1.6.5-1_i386.deb
### 64-bits ###
wget https://sourceforge.net/projects/openvisualtrace/files/1.6.5/ovtr_1.6.5-1_amd64.deb

Once the download is completed, run the following command to install Open Visual Traceroute:

sudo dpkg -i ovtr_*.deb

Once installed, next you can start Open Visual Traceroute by searching for it Unity Dash. If the app icon doesn’t show up, try logging out and logging back in.

Congratulations! You have successfully installed open visual traceroute. Thanks for using this tutorial for installing Open visual traceroute in Ubuntu 16.04 Xenial Xerus systems. For additional help or useful information, we recommend you to check the official Open Visual Traceroute web site.

How To Install LiteCart on Ubuntu 16.04 LTS

Install LiteCart on Ubuntu 16

LiteCart is a free e-commerce, feature rich e-commerce solution. The framework is constructed to be lightweight and easy for developers to modify and build upon. LiteCart relies on the latest HyperText standard HTML 5, the latest CSS 3 for styling, the amazing jQuery framework for client-side dynamics, and the popular web scripting language PHP for server-side dynamics.

This article assumes you have at least basic knowledge of Linux, know how to use the shell, and most importantly, you host your site on your own VPS. The installation is quite simple and assumes you are running in the root account, if not you may need to add ‘sudo’ to the commands to get root privileges. I will show you through the step by step installation LiteCart on Ubuntu 16.04 Xenial Xerus server.
Install LiteCart on Ubuntu 16.04 LTS

Step 1. First make sure that all your system packages are up-to-date by running these following apt-get commands in the terminal.

sudo apt-get update
sudo apt-get upgrade

Step 2. Install LAMP (Linux, Apache, MariaDB and PHP) server.

A Ubuntu 16.04 LAMP server is required. If you do not have LAMP installed, you can follow our guide here. Also install all required PHP modules:

apt-get install php7.0-curl php7.0-gd php7.0-mbstring php7.0-mysql libapache2-mod-php7.0 php7.0-mcrypt php7.0-zip

Step 3. Installing LiteCart.

First thing to do is to go to LiteCart’s download page and download the latest stable version of LiteCart, At the moment of writing this article it is version 2.0.1.

Unpack the LiteCart archive to the document root directory on your server:

mkdir /var/www/html/litecart/
unzip litecart-2.0.1.zip -d /var/www/html/litecart/

We will need to change some folders permissions:

chown www-data:www-data -R /var/www/html/litecart/

Step 4. Configuring MariaDB for LiteCart.

By default, MariaDB is not hardened. You can secure MariaDB using the mysql_secure_installation script. you should read and below each steps carefully which will set root password, remove anonymous users, disallow remote root login, and remove the test database and access to secure MariaDB:

mysql_secure_installation

Configure it like this:

- Set root password? [Y/n] y
- Remove anonymous users? [Y/n] y
- Disallow root login remotely? [Y/n] y
- Remove test database and access to it? [Y/n] y
- Reload privilege tables now? [Y/n] y

Next we will need to log in to the MariaDB console and create a database for the LiteCart. Run the following command:

mysql -u root -p

This will prompt you for a password, so enter your MariaDB root password and hit Enter. Once you are logged in to your database server you need to create a database for LiteCart installation:

MariaDB [(none)]> CREATE DATABASE lite DEFAULT CHARACTER SET utf8 DEFAULT COLLATE utf8_general_ci;
MariaDB [(none)]> GRANT ALL PRIVILEGES ON lite.* TO 'liteuser'@'localhost' IDENTIFIED BY 'strong_password';
MariaDB [(none)]> FLUSH PRIVILEGES;
MariaDB [(none)]> \q

Step 5. Configuring Apache web server for LiteCart.

Create a new virtual host directive in Apache. For example, create a new Apache configuration file named ‘litecart.conf’ on your virtual server:

sudo a2enmod rewrite
touch /etc/apache2/sites-available/litecart.conf
ln -s /etc/apache2/sites-available/litecart.conf /etc/apache2/sites-enabled/litecart.conf
nano /etc/apache2/sites-available/litecart.conf

Add the following lines:

<VirtualHost *:80>
ServerAdmin [email protected]
DocumentRoot /var/www/html/litecart/
ServerName your-domain.com
ServerAlias www.your-domain.com
<Directory /var/www/html/litecart/>
Options FollowSymLinks
AllowOverride All
Order allow,deny
allow from all
</Directory>
ErrorLog /var/log/apache2/your-domain.com-error_log
CustomLog /var/log/apache2/your-domain.com-access_log common
</VirtualHost>

Next step, Create the directory and the logs files that you have mentioned in your configuration file:

mkdir /var/log/apache2/your-domain.com
touch /var/log/apache2/your-domain.com-error_log
touch /var/log/apache2/your-domain.com-access_log common

Now, we can restart Apache web server so that the changes take place:

systemctl restart apache2.service

Step 6. Accessing LiteCart.

LiteCart will be available on HTTP port 80 by default. Open your favorite browser and navigate to http://yourdomain.com or http://server-ip and complete the required the steps to finish the installation. If you are using a firewall, please open port 80 to enable access to the control panel.

Congratulations! You have successfully installed LiteCart. Thanks for using this tutorial for installing LiteCart in Ubuntu 16.04 Xenial Xerus systems. For additional help or useful information, we recommend you to check the official LiteCart web site.

How To Install Monstra on Ubuntu 16.04 LTS

Install Monstra on Ubuntu 16

Monstra is a modern and lightweight content management system written in PHP. Monstra is the best CMS to manage a small-business website. Monstra provides amazing api’s for plugins, themes and core developers.

This article assumes you have at least basic knowledge of Linux, know how to use the shell, and most importantly, you host your site on your own VPS. The installation is quite simple and assumes you are running in the root account, if not you may need to add ‘sudo’ to the commands to get root privileges. I will show you through the step by step installation Monstra on a Ubuntu 16.04 (Xenial Xerus) server.
Install Monstra on Ubuntu 16.04 LTS

Step 1. First make sure that all your system packages are up-to-date by running these following apt-get commands in the terminal.

sudo apt-get update
sudo apt-get upgrade

Step 2. Install LAMP (Linux, Apache, MariaDB and PHP) server.

A Ubuntu 16.04 LAMP server is required. If you do not have LAMP installed, you can follow our guide here. Also install all required PHP modules:

apt-get install php7.0-readline php7.0-curl php7.0-gd php7.0-mbstring libapache2-mod-php7.0 php7.0-mcrypt php7.0-bz2 php7.0-zip

Step 3. Installing Monstra.

First thing to do is to go to Monstra’s download page and download the latest stable version of Monstra, At the moment of writing this article it is version 3.0.4:

wget https://bitbucket.org/Awilum/monstra/downloads/monstra-3.0.4.zip

Unpack the Monstra archive to the document root directory on your server:
unzip monstra-3.0.4.zip

mv monstra-3.0.4 /var/www/html/monstra

We will need to change some folders permissions:

chown -R www-data:www-data /var/www/html/monstra

Step 4. Configuring Apache web server for Monstra.

Create a new virtual host directive in Apache. For example, create a new Apache configuration file named ‘monstra.conf’ on your virtual server:

touch /etc/apache2/sites-available/monstra.conf
ln -s /etc/apache2/sites-available/monstra.conf /etc/apache2/sites-enabled/monstra.conf
nano /etc/apache2/sites-available/monstra.conf

Add the following lines:

<VirtualHost *:80>
ServerAdmin [email protected]
DocumentRoot /var/www/html/monstra
ServerName your-domain.com
ServerAlias www.your-domain.com
<Directory /var/www/html/monstra>
Options FollowSymLinks
AllowOverride All
</Directory>
ErrorLog /var/log/apache2/your-domain.com-error_log
CustomLog /var/log/apache2/your-domain.com-access_log common

Save and close the file. Restart the apache service for the changes to take effects:

systemctl restart apache2

Step 5. Accessing Monstra.

Monstra will be available on HTTP port 80 by default. Open your favorite browser and navigate to http://yourdomain.com/install.php or http://server-ipinstall.php and complete the required the steps to finish the installation. If you are using a firewall, please open port 80 to enable access to the control panel.

Congratulation’s! You have successfully installed Monstra. Thanks for using this tutorial for installing Monstra content management system on Ubuntu 16.04 LTS (Xenial Xerus) system. For additional help or useful information, we recommend you to check the official Monstra web site.