WordPress is an online, open source website creation tool written in PHP. But in non-geek speak, it’s probably the easiest and most powerful blogging and website content management system (or CMS) in existence today.
This article assumes you have at least basic knowledge of Linux, know how to use the shell, and most importantly, you host your site on your own VPS. The installation is quite simple and assumes you are running in the root account, if not you may need to add ‘sudo’ to the commands to get root privileges. I will show you through the step by step installation WordPress content management systems on an Ubuntu 16.04 Xenial Xerus server.
Install WordPress with OpenLiteSpeed on Ubuntu 16.04 LTS
Step 1. First make sure that all your system packages are up-to-date by running these following apt-get commands in the terminal.
sudo apt-get update
sudo apt-get upgrade
Step 2. Installing OpenLiteSpeed.
First, download the OpenLiteSpeed 1-click script on your server:
wget https://raw.githubusercontent.com/litespeedtech/ols1clk/master/ols1clk.sh
Make the file executable with the following command:
chmod +x ols1clk.sh
Step 3. Install PHP 7 on OpenLiteSpeed.
To install PHP 7, run the following command:
./ols1clk.sh --lsphp 70
When the installation is complete, configure an administrative username and password for the OpenLiteSpeed’s web interface by running the following command:
/usr/local/lsws/admin/misc/admpass.sh
Step 4. Installing MariaDB.
To install MariaDB, run the following command:
apt-get install -y mariadb-server
Configuring MariaDB for WordPress.
By default, MariaDB is not hardened. You can secure MariaDB using the mysql_secure_installation script. you should read and below each steps carefully which will set root password, remove anonymous users, disallow remote root login, and remove the test database and access to secure MariaDB:
mysql_secure_installation
Configure it like this:
- Set root password? [Y/n] y
- Remove anonymous users? [Y/n] y
- Disallow root login remotely? [Y/n] y
- Remove test database and access to it? [Y/n] y
- Reload privilege tables now? [Y/n] y
Next we will need to log in to the MariaDB console and create a database for the WordPress. Run the following command:
mysql -u root -p
This will prompt you for a password, so enter your MariaDB root password and hit Enter. Once you are logged in to your database server you need to create a database for WordPress installation:
CREATE DATABASE wordpress character set utf8 collate utf8_bin;
GRANT ALL PRIVILEGES on wordpress.* to 'wpuser'@'localhost' identified by 'your_password';
FLUSH PRIVILEGES;
Step 5. Installing WordPress.
First thing to do is to go to WordPress’s download page and download the latest stable version of WordPress, At the moment of writing this article it is version 4.8.1:
cd /usr/local/lsws/example
wget http://wordpress.org/latest.zip
Unpack the WordPress archive to the document root directory on your server:
unzip latest.zip
We will need to change some folders permissions:
chown -R nobody:nogroup /usr/local/lsws/example/wordpress/
Configuring WordPress
In this step we will configure the main configuration file of WordPress, where we need to configure it’s basic parameters so that it can be connected with the database and user:
cd wordpress
mv wp-config-sample.php wp-config.php
Now open it using any of your favourite editor, to make any changes in the WordPress configuration file:
nano wp-config.php
Here are the values that we need to update according to our previous database and user’s setup:
// ** MySQL settings - You can get this info from your web host ** //
/** The name of the database for WordPress */
define('DB_NAME', 'wordpress');

/** MySQL database username */
define('DB_USER', 'wpuser');

/** MySQL database password */
define('DB_PASSWORD', 'your_password');

/** MySQL hostname */
define('DB_HOST', 'localhost');
Step 6. Configure OpenLiteSpeed.
First, modifying the default virtual host that is already present in the OpenLiteSpeed configuration so that we can use it for our WordPress installation. First, login to the OpenLiteSpeed WebAdmin panel at https://your-ip-address:7080.
Once logged into the OLS WebAdmin Pick “Virtual Hosts” in the menu bar and click on the “View” link:
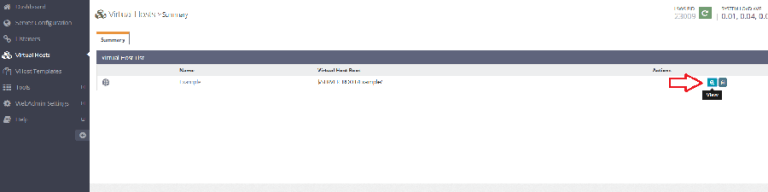
This will let you edit the configuration of your virtual server.
First, we will change the Document origin of this Virtual Host to tip into our WordPress directory.
Click on the “General” tab to the virtual host and then click on the “Edit” button to the “General” table:
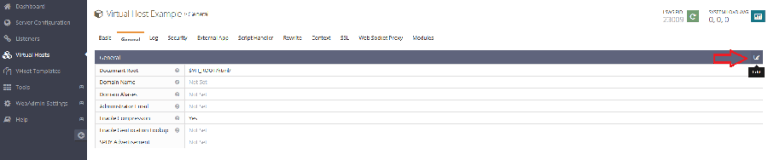
In the “Document Root” field, change the value from $VH_ROOT/html/ to $VH_ROOT/wordpress/:
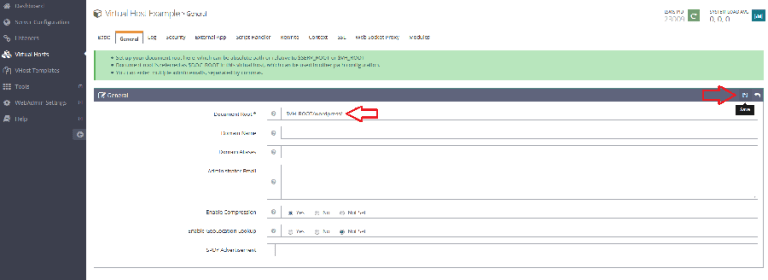
Click “Save” when you’re finished.
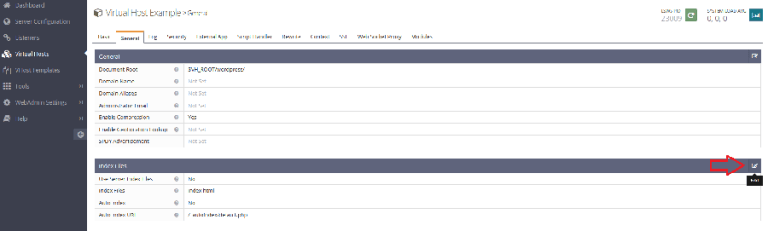
Then, We’ll allow index.php files so They Can be used to Process requests that are not handled by static documents. This will allow the primary logic of WordPress to operate properly.
Click the “Edit” button for the “Index Files” table:
From the field for valid “Index Files”, add index.php before index.html to let PHP index files to take precedence:
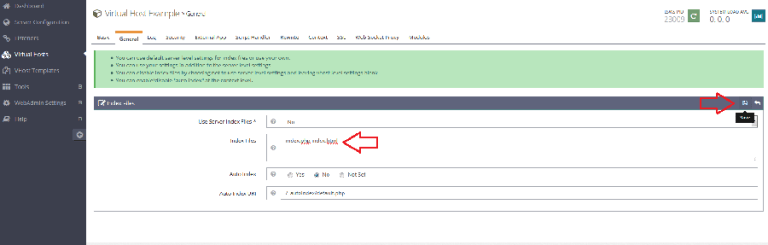
Click “Save” when you are finished.
Configure WordPress Rewrites to Enable Permalink Support:
Next, we will install the compilation instructions in order that we could use permalinks inside our WordPress installation.
To do so, click on the “Rewrite” tab to the virtual host. From the Second screen, click on the “Edit” button to the “Rewrite Control” table:

Select “Yes” under the “Enable Rewrite” alternative:

Click “Save” to return to the primary display menu. Click on the “Edit” button for the “Rewrite Rules” table:
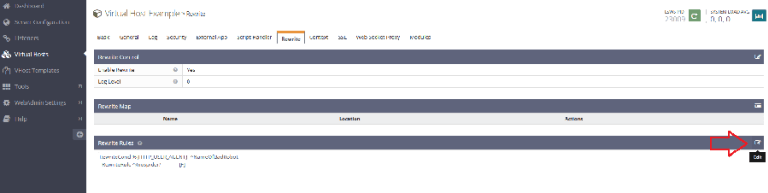
Remove the rules that are currently present and add the following rules to enable rewrites for WordPress:
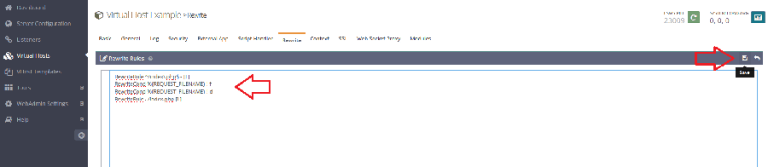
Click on the “Save” button to execute your new rewrite rules.
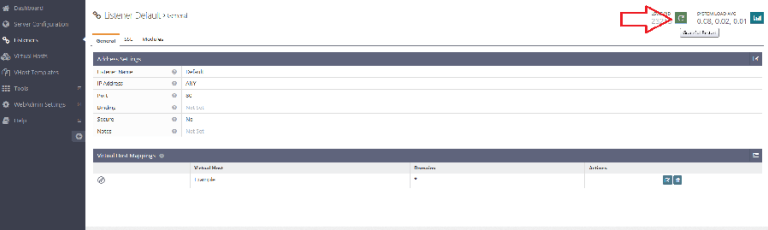
The second thing that we have to do would be to change the default listening port from 8088 to 80.
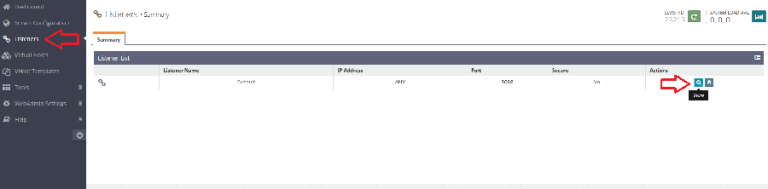
Select “Listeners” in the menu bar and click on the “View” link:
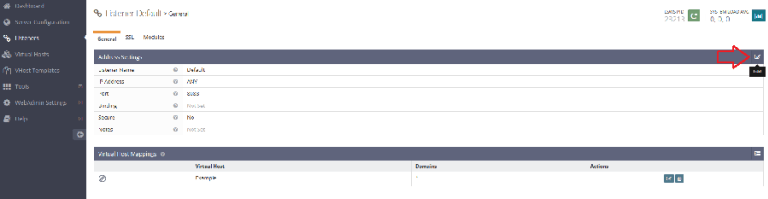
Next, click on the “Edit” button for the “Address Settings” table:
In the Port area, change the port number from 8088 to 80:
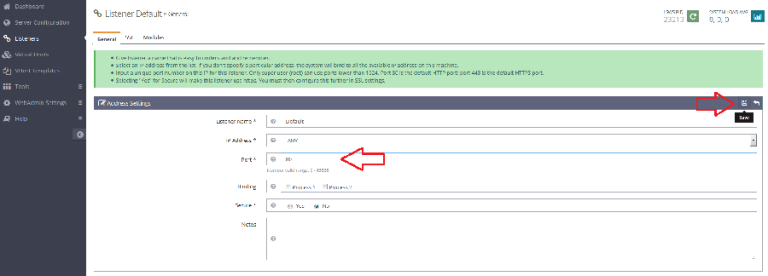
Click “Save” when you are finished.
Restart the Server to Implement the Change
With All the aforementioned configuration out of the way, we can now Gently restart the OpenLiteSpeed host to enable our modifications.
Step 7. Accessing WordPress.
WordPress will be available on HTTP port 80 by default. Open your favorite browser and navigate to http://yourdomain.com or http://server-ip/ and complete the required the steps to finish the installation.
Congratulation’s! You have successfully installed WordPress with Docker. Thanks for using this tutorial for installing WordPress with OpenLiteSpeed on your Ubuntu 16.04. For additional help or useful information, we recommend you to check the official OpenLiteSpeed web site.
You Might Also Like: How To Install WordPress with Docker on Ubuntu 16.04 LTS