How To Install OwnCloud on Ubuntu 16.04 LTS

Install OwnCloud on Ubuntu 16

OwnCloud is a free and open-source software which enables you to create a private “file-hosting” cloud. OwnCloud is similar to DropBox service with the diference of being free to download and install on your private server. Owncloud made by PHP and backend database MySQL (MariaDB), SQLLite or PostgreSQL. OwnCloud also enables you to easily view and sync address book, calendar events, tasks and bookmarks. You can access it via the good looking and easy to use web interface or install OwnCloud client on your Desktop or Laptop machine (supports Linux, Windows and Mac OSX).

Install OwnCloud on Ubuntu 16.04 LTS

This article assumes you have at least basic knowledge of linux, know how to use the shell, and most importantly, you host your site on your own VPS. The installation is quite simple and assumes you are running in the root account, if not you may need to add ‘sudo’ to the commands to get root privileges. I will show you through the step by step installation OwnCloud on a Ubuntu 16.04 (Xenial Xerus) server.

Step 1. First make sure that all your system packages are up-to-date by running these following apt-get commands in the terminal.

sudo apt-get update
sudo apt-get upgrade

Step 2. Install LAMP (Linux, Apache, MariaDB, PHP) server.

A Ubuntu 16.04 LAMP server is required. If you do not have LAMP installed, you can follow our guide here. Also install all required PHP modules:

apt-get install imagemagick php7.0-curl php7.0-gd php7.0-mbstring php7.0-mysql libapache2-mod-php7.0 php7.0-mcrypt php7.0-bz2 php7.0-zip php7.0-json

Step 3. Installing OwnCloud 9.

OwnCloud provides you the official deb packages for the installation of ownCloud. Setup ownCloud repository using the following command:

wget -nv https://download.owncloud.org/download/repositories/stable/Ubuntu_16.04/Release.key -O Release.key
sudo apt-key add - < Release.key sudo sh -c "echo 'deb http://download.owncloud.org/download/repositories/stable/Ubuntu_16.04/ /' > /etc/apt/sources.list.d/owncloud.list"

Install ownCloud using the following command:

apt-get update
apt-get -y install owncloud

Step 4. Configuring MariaDB for OwnCloud.

By default, MariaDB is not hardened. You can secure MariaDB using the mysql_secure_installation script. you should read and below each steps carefully which will set root password, remove anonymous users, disallow remote root login, and remove the test database and access to secure MariaDB:

mysql_secure_installation

Configure it like this:

- Set root password? [Y/n] y
- Remove anonymous users? [Y/n] y
- Disallow root login remotely? [Y/n] y
- Remove test database and access to it? [Y/n] y
- Reload privilege tables now? [Y/n] y

Next we will need to log in to the MariaDB console and create a database for the OwnCloud. Run the following command:

mysql -u root -p

This will prompt you for a password, so enter your MariaDB root password and hit Enter. Once you are logged in to your database server you need to create a database for OwnCloud installation:

CREATE DATABASE ownclouddb;
CREATE USER 'ownclouduser'@'localhost' IDENTIFIED BY 'YOURPASSWORD';
GRANT ALL ON ownclouddb.* TO 'ownclouduser'@'localhost';
FLUSH PRIVILEGES;
exit

Step 5. OwnCloud Configuration.

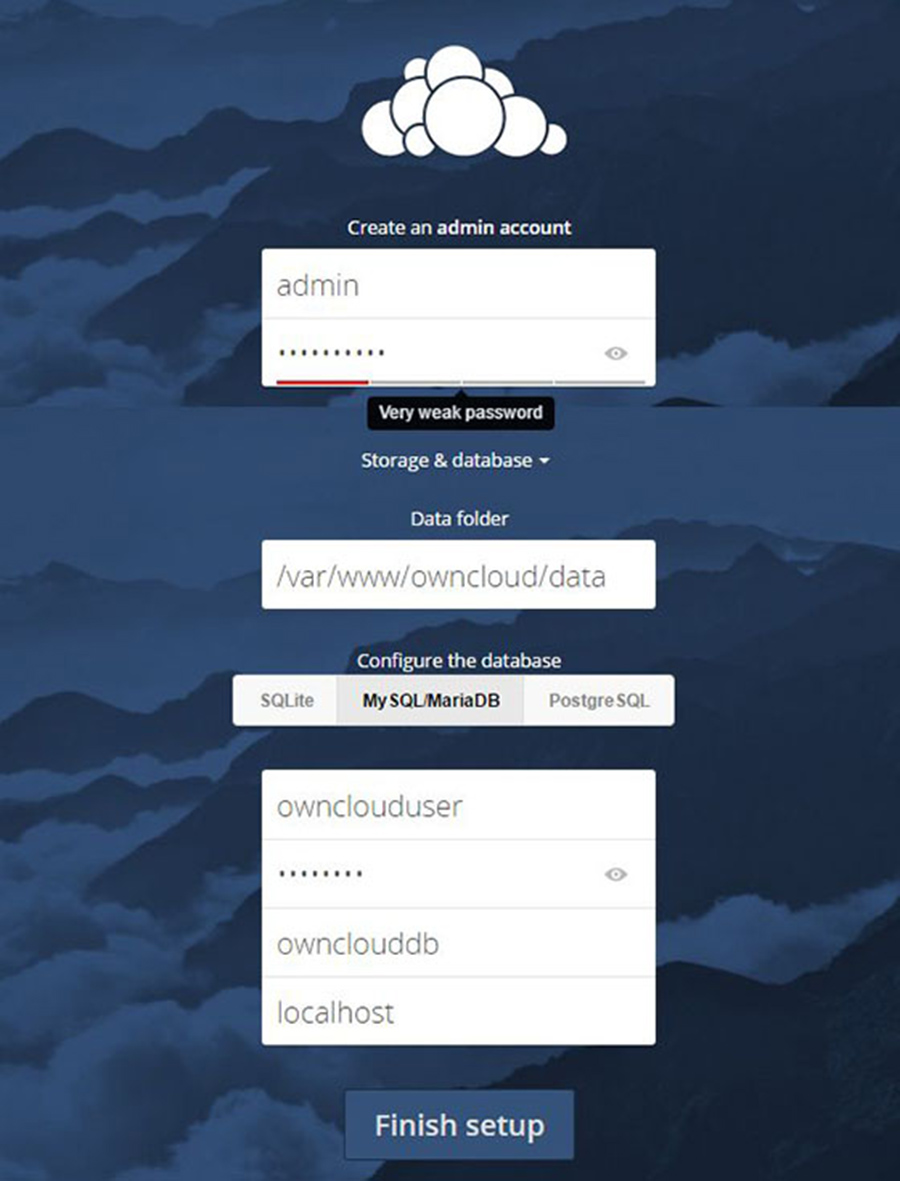
To configure ownCloud, we will use the web interface. So, go ahead and open up a web browser and point it to http://server_ip_address/owncloud You should see a web page like this. Enter username and password for the administrator user account, click on the ‘Advanced options’ hyperlink and enter the data directory (or leave the default setting), then enter database username, database password, database name, host (localhost) and click ‘Finish setup’.
Install-OwnCloud-9-on-Ubuntu-16.04
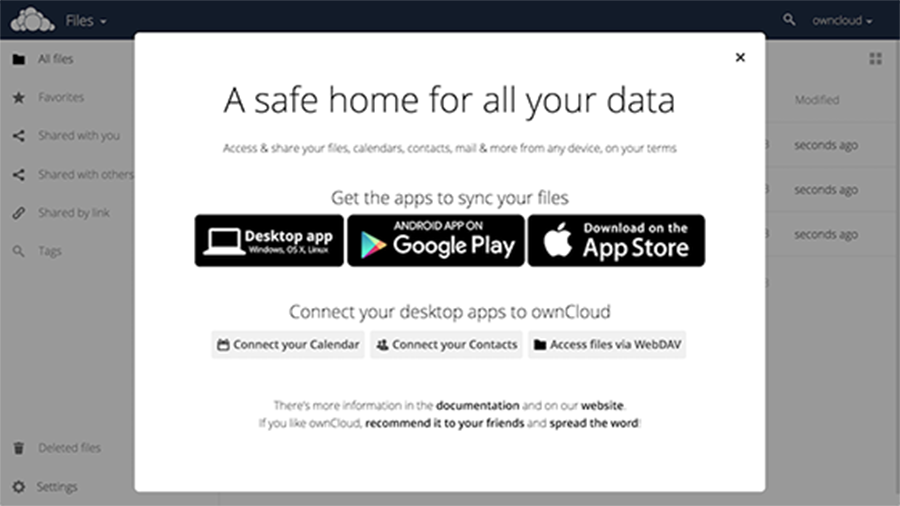
Alternately you can also download the ownCloud clients to sync the documents across your devices.
Install-OwnCloud-9-Ubuntu-16.04
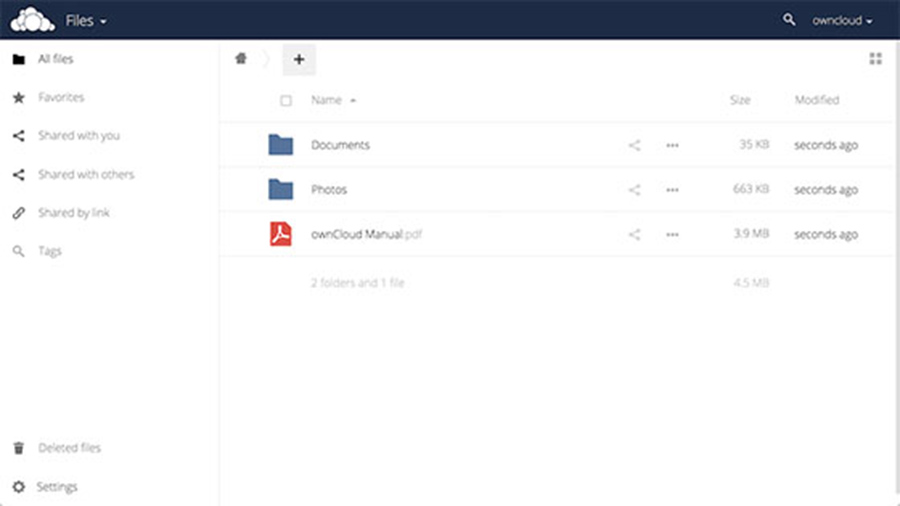
The home page will look like below; you can start uploading the contents using “+ sign” button.
OwnCloud-9-Ubuntu-16.04-Upload
Congratulation’s! You have successfully installed OwnCloud. Thanks for using this tutorial for installing OwnCloud on Ubuntu 16.04 LTS (Xenial Xerus) system. For additional help or useful information, we recommend you to check the official OwnCloud web site.

You Might Also Like: How To Install OwnCloud 8 on CentOS 6

How To Install Mail-in-a-Box on Ubuntu 16.04 LTS

Install Mail-in-a-Box on Ubuntu 16

Mailinabox is a free and open source software that deploys a complete full stack email solution with a well managed server control panel in few simple minutes. Deploying our own well managed email server is pretty easy with Mailinabox now. It is designed to handle SMTP, IMAP/POP, spam filtering, webmail, and since the server itself is handling our DNS, we’ll get an off-the-shelf DNS solution optimized for mail. Mailinabox has the ability to host multiple domains email and provides webmail, contacts, calendar synchronization and IMAP/SMTP server setting so that we can access our emails with mobile devices and desktop mailing clients.

Install Mail-in-a-Box on Ubuntu 16.04 LTS

This article assumes you have at least basic knowledge of linux, know how to use the shell, and most importantly, you host your site on your own VPS. The installation is quite simple and assumes you are running in the root account, if not you may need to add ‘sudo’ to the commands to get root privileges. I will show you through the step by step installation Mail-in-a-Box on a Ubuntu 16.04 (Xenial Xerus) server.

Step 1. First make sure that all your system packages are up-to-date by running these following apt-get commands in the terminal.

sudo apt-get update
sudo apt-get upgrade
sudo apt-get install git nano curl

Step 2. Setting Hostname.

First of all, we’ll need to setup a hostname for our machine running Ubuntu 16.04 LTS. Officially, hostname of our machine should be set to box.example.com so that our installation goes easy:

nano /etc/hostname

Then, we’ll need to append the file to the following line:

box.https://wpcademy.com

Step 3. Adding Hosts.

Now, we’ll edit /etc/hosts file so that we can associate our hostname with the server’s ip address where we are going to setup mailinabox. To do so, we’ll need to execute the following command:

nano /etc/hosts

Then, we’ll need to append the file with the following lines:

127.0.0.1 localhost.localdomain localhost
server_ip_address box.wpcademy.com box

Step 4. Installing Mail-in-a-Box.
Run the following command to install Mail-in-a-Box:

curl -s https://mailinabox.email/bootstrap.sh | sudo bash

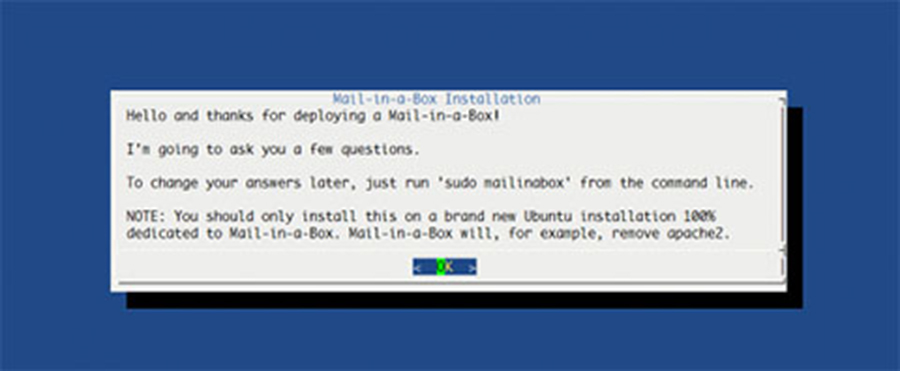
The script will prompt you with the introductory message in the following image. Press the Enter button on the keyboard:

Install Mail-in-a-Box on Ubuntu 16
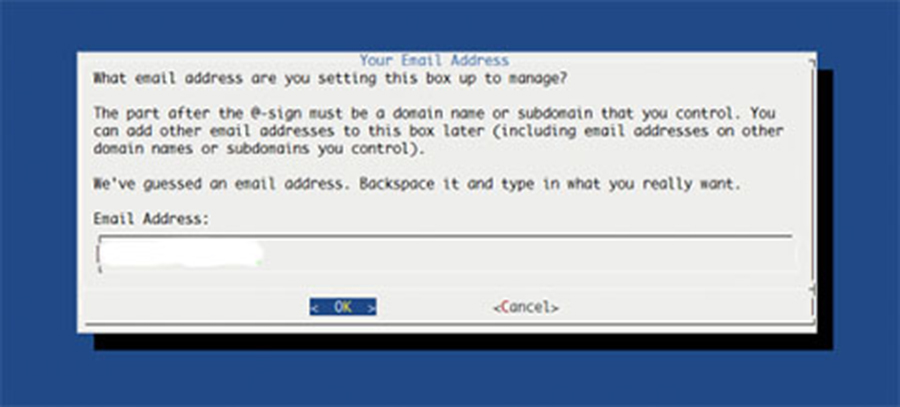
First question, we will be asked to enter our email address that we’ll use to login to our Mail-in-a-box control panel and use as the default email address for our server. We can add other email addresses later. Once it is done, we will continue by selecting OK in the menu.
Mail-in-a-Box-2
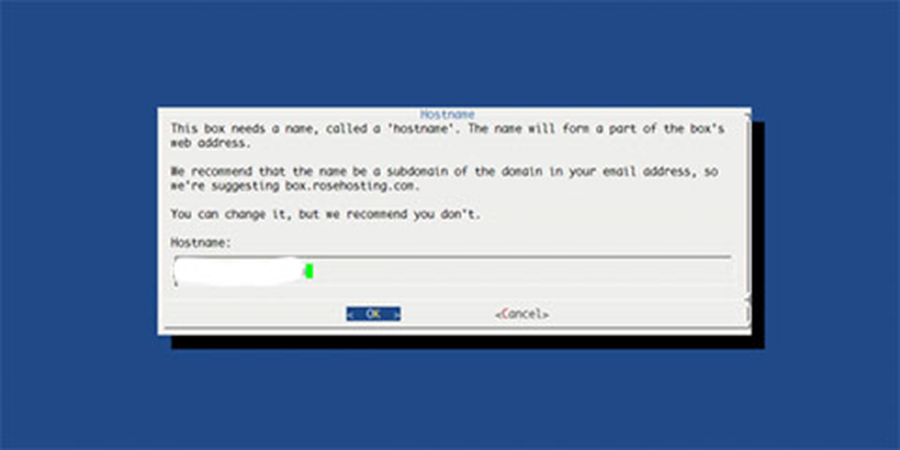
Next, we will be asked to enter the hostname for our mail server. As we have already set in the above step, we should be prompted with box.rosehosting.com as the default hostname. So, we will simply leave it as is and continue further.
Mail-in-a-Box-3
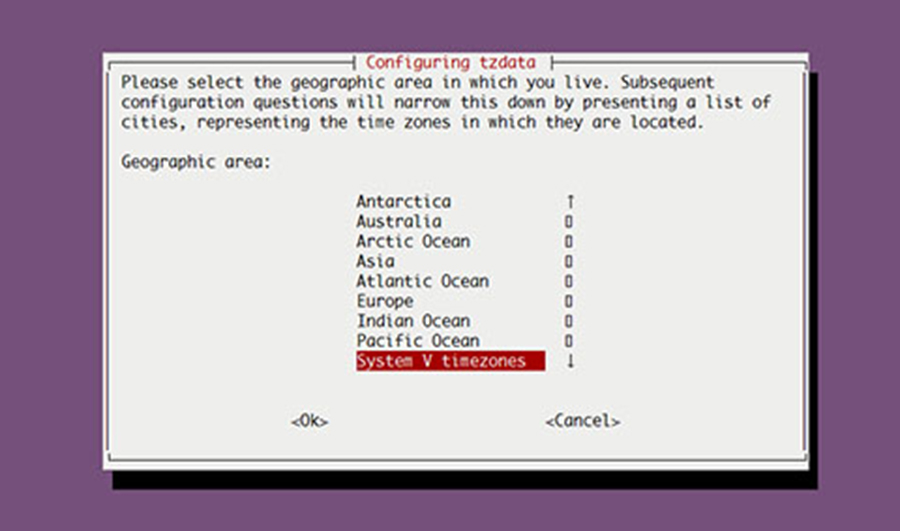
Once it is done, we will be asked to select our country where we live. After we have selected our country, we will need to hit enter to proceed ahead. This will prompt another box asking us to enter the city or region corresponding with our timezone. Doing this will exit the box and continue the installation process.
Mail-in-a-Box-4
At some point, you will get this prompt:

Okay. I'm about to set up [email protected] for you. This account will also have access to the box's control panel.
password:

That’s it. You are pretty much done. All that is left is to point your domains’ DNS to Mail-in-a-Box and you will have a fully functional Mail server, webmail, calendar, web server and contacts.

Step 5. Accessing Mail-in-a-Box Panel.

Mail-in-a-Box will be available on HTTP port 80 by default. Open your favorite browser and navigate to http://yourdomain.com/admin or http://server-ip/admin. If you are using a firewall, please open port 80 to enable access to the control panel.

[youtube https://www.youtube.com/watch?v=9WOmkoEYMIg]

Congratulation’s! You have successfully installed Mail-in-a-Box. Thanks for using this tutorial for installing Mail-in-a-Box on Ubuntu 16.04 LTS (Xenial Xerus) system. For additional help or useful information, we recommend you to check the official Mail-in-a-Box web site.

How To Install TeamSpeak Server on Ubuntu 16.04 LTS

Install TeamSpeak Server on Ubuntu 16

TeamSpeak is a VoIP (voice-over-Internet Protocol) solution first released in 2001 and most popular with those who play team-based online games. The software has two parts, a server and a client, both of which can be installed on Windows, Mac and Linux.

Install TeamSpeak Server on Ubuntu 16.04 LTS

This article assumes you have at least basic knowledge of linux, know how to use the shell, and most importantly, you host your site on your own VPS. The installation is quite simple and assumes you are running in the root account, if not you may need to add ‘sudo’ to the commands to get root privileges. I will show you through the step by step installation TeamSpeak Server on a Ubuntu 16.04 (Xenial Xerus) server.

Step 1. First make sure that all your system packages are up-to-date by running these following apt-get commands in the terminal.

sudo apt-get update
sudo apt-get upgrade

Step 2. Create a new user for TeamSpeak.

Now we need to create a new user on our server, this user will be used for the installation and running of TeamSpeak. This is done by executing the following command as root:

adduser --disabled-login teamspeak

Step 3. Installing TeamSpeak server.

Next, you’ll need to install TeamSpeak server, using the following command:

wget http://dl.4players.de/ts/releases/3.0.12.4/teamspeak3-server_linux_amd64-3.0.12.4.tar.bz2
tar xvf teamspeak3-server_linux_amd64-3.0.12.4.tar.bz2
cd teamspeak3-server_linux_amd64
cp * -R /home/teamspeak
cd ..
rm -rf teamspeak3-server_linux_amd64*
chown -R teamspeak:teamspeak /home/teamspeak

By default, the TeamSpeak server will not start when your system boots. You will need to create a startup script so that your system will automatically start the TeamSpeak server software on boot. This is where startup scripts can come in handy. Create the following file and open it in your text editor:

nano /lib/systemd/system/teamspeak.service

Copy the following content into the startup script file:

[Unit]
Description=Team Speak 3 Server
After=network.target

[Service]
WorkingDirectory=/home/teamspeak/
User=teamspeak
Group=teamspeak
Type=forking
ExecStart=/home/teamspeak/ts3server_startscript.sh start inifile=ts3server.ini
ExecStop=/home/teamspeak/ts3server_startscript.sh stop
PIDFile=/home/teamspeak/ts3server.pid
RestartSec=15
Restart=always

[Install]
WantedBy=multi-user.target

Now we will start the TeamSpeak server and enable it to start when your system boots:

systemctl --system daemon-reload
systemctl start teamspeak.service
systemctl enable teamspeak.service

Step 4. Configure Firewall for TeamSpeak.

Now our server installation is completed we can open the ports on our firewall. This can be done by executing the following command:

iptables -A INPUT -p udp --dport 9987 -j ACCEPT
iptables -A INPUT -p udp --sport 9987 -j ACCEPT
iptables -A INPUT -p tcp --dport 30033 -j ACCEPT
iptables -A INPUT -p tcp --sport 30033 -j ACCEPT
iptables -A INPUT -p tcp --dport 10011 -j ACCEPT
iptables -A INPUT -p tcp --sport 10011 -j ACCEPT

And connect with our TeamSpeak Client. The first person to logon will be asked to provide a privilege key, enter the one retrieved during the installation.

Congratulation’s! You have successfully installed TeamSpeak Server. Thanks for using this tutorial for installing TeamSpeak Server on your Ubuntu 16.04 LTS (Xenial Xerus) system. For additional help or useful information, we recommend you to check the official TeamSpeak Server web site.

How To Install HHVM on Ubuntu 16.04 LTS

Install HHVM on Ubuntu

HipHop Virtual Machine (HHVM) is a virtual machine developed and open sourced by Facebook to process and execute programs and scripts written in PHP. Facebook developed HHVM because the regular Zend+Apache combination isn’t as efficient to serve large applications built in PHP.

This article assumes you have at least basic knowledge of linux, know how to use the shell, and most importantly, you host your site on your own VPS. The installation is quite simple and assumes you are running in the root account, if not you may need to add ‘sudo’ to the commands to get root privileges. I will show you through the step by step installation HHVM (HipHop Virtual Machine) on a Ubuntu 16.04 (Xenial Xerus) server.
Install HHVM on Ubuntu 16.04 LTS

Step 1. First make sure that all your system packages are up-to-date by running these following apt-get commands in the terminal.

sudo apt-get update
sudo apt-get upgrade

Step 2. Installing HHVM.

First we need to add the HHVM repository to your Ubuntu Server with the following command:

apt-get install software-properties-common
apt-key adv --recv-keys --keyserver hkp://keyserver.ubuntu.com:80 0x5a16e7281be7a449
add-apt-repository "deb http://dl.hhvm.com/ubuntu $(lsb_release -sc) main"

Now we can install HHVM with the following command:

apt-get update
apt-get install -y hhvm

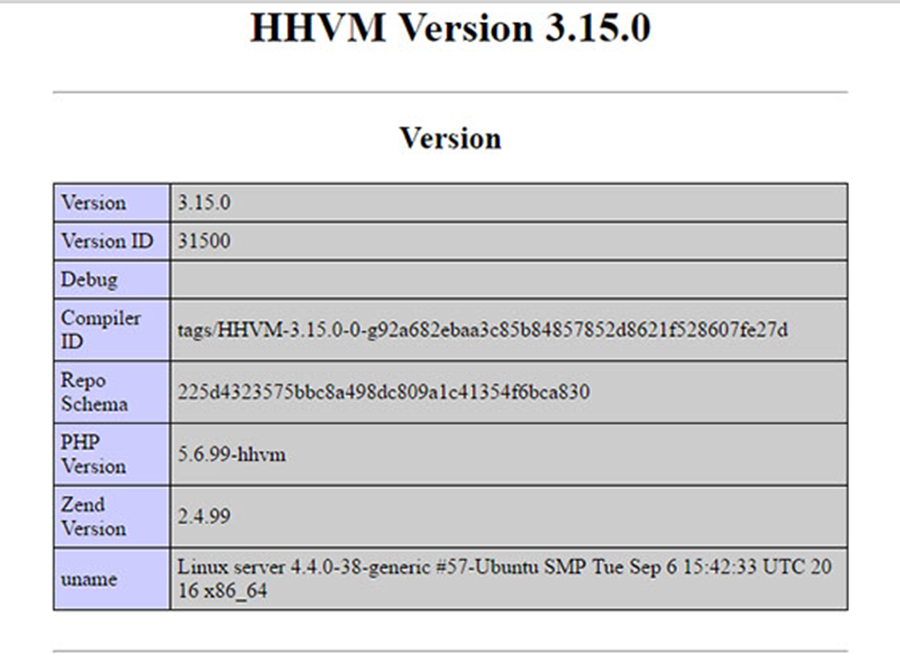
HHVM should have been successfully installed, to make sure run the following command:

$ php -v

HipHop VM 3.15.0 (rel)
Compiler: tags/HHVM-3.15.0-0-g92a682ebaa3c85b84857852d8621f528607fe27d
Repo schema: 225d4323575bbc8a498dc809a1c41354f6bca83

HHVM includes an excellent script to install FastCGI based on web server you have installed. This section will help you configure HHVM in the FastCGI mode with the Apache and Nginx servers:

With Apache

Configuring HHVM to work in the FastCGI mode with Apache is extremely simple. All you need to do is execute the following following script:

sudo /usr/share/hhvm/install_fastcgi.sh

With Nginx

If you are using Nginx with PHP-FPM, you’ll have to modify the configuration file to disable the use of PHP-FPM. This file is normally located at /etc/nginx/sites-available/default.Look for the following section and make sure it’s all commented (by adding a # at the beginning of each line):

# pass the PHP scripts to FastCGI server listening on 127.0.0.1:9000
#
# location ~ \.php$ {
# fastcgi_split_path_info ^(.+\.php)(/.+)$;
# # NOTE: You should have "cgi.fix_pathinfo = 0;" in php.ini
#
# # With php5-cgi alone:
# fastcgi_pass 127.0.0.1:9000;
# # With php5-fpm:
# fastcgi_pass unix:/var/run/php5-fpm.sock;
# fastcgi_index index.php;
# include fastcgi_params;
#}

After doing this, execute the following script:

sudo /usr/share/hhvm/install_fastcgi.sh

Finally, run the commands below to start up HHVM:

systemctl start hhvm

Step 3. Testing HHVM.

To test HHVM, create a test page in the root directory and type these lines in the file and save it:

nano /var/www/html/hhvminfo.php

Then add the following code to your new file:

<? php phpinfo(); ?>

Try to access it at http://your_server_ip/hhvminfo.php. If the PHP info page is rendered in your browser then everything looks good and you are ready to proceed further.
Install-HHVM-on-Ubuntu-16.04
Congratulation’s! You have successfully installed HHVM. Thanks for using this tutorial for installing HHVM (HipHop Virtual Machine) on your Ubuntu 16.04 LTS (Xenial Xerus) system. For additional help or useful information, we recommend you to check the official HipHop Virtual Machine web site.

How To Install Magento on Ubuntu 16.04 LTS

Install Magento on Ubuntu

Magento is one of the worlds most widely used applications for managing E-Commerce sites. Magento is fully customizable to meet the users requirements and allowing them to create and launch a fully functional online store in minutes. Magento employs the MySQL relational database management system, the PHP programming language, and elements of the Zend Framework.

Marry content with commerce to customer demands for flawless brand interactions. Magento Commerce features are ever evolving with the consumer in mind. Own your customer experience, craft personalized content and promotions, and deliver a smooth path to purchase. Page Builder is a simple drag and drop solution to eCommerce website builders.

Page Builder
Customer Segmentation & Personalization
Content Staging & Preview
Instant Purchase
Merchandising

Install Magento on Ubuntu 16.04 LTS

This article assumes you have at least basic knowledge of linux, know how to use the shell, and most importantly, you host your site on your own VPS. The installation is quite simple and assumes you are running in the root account, if not you may need to add ‘sudo’ to the commands to get root privileges. I will show you through the step by step installation Magento on a Ubuntu 16.04 (Xenial Xerus) server.

Step 1. First make sure that all your system packages are up-to-date by running these following apt-get commands in the terminal.

sudo apt-get update
sudo apt-get upgrade

Step 2. Install LAMP (Linux, Apache, MariaDB, PHP) server.

A Ubuntu 16.04 LAMP server is required. If you do not have LAMP installed, you can follow our guide here. Also install all required PHP modules:

apt-get install imagemagick php7.0-curl php7.0-gd php7.0-mbstring php7.0-mysql libapache2-mod-php7.0 php7.0-mcrypt

Step 3. Installing Magento.

First thing to do is to go to Magento’s download page and download the latest stable version of Magento, At the moment of writing this article it is version 2.1.2:

wget http://www.magentocommerce.com/downloads/assets/2.1.2/magento-2.1.2.zip

Unpack the Magento archive to the document root directory on your server:

unzip magento*.zip
cp -rf magento/* /var/www/html/

We will need to change some folders permissions:

chown -R www-data:www-data /var/www/html/
chmod -R 755 /var/www/html

Step 4. Configuring MariaDB for Magento.

By default, MariaDB is not hardened. You can secure MariaDB using the mysql_secure_installation script. you should read and below each steps carefully which will set root password, remove anonymous users, disallow remote root login, and remove the test database and access to secure MariaDB:

mysql_secure_installation

Configure it like this:

- Set root password? [Y/n] y
- Remove anonymous users? [Y/n] y
- Disallow root login remotely? [Y/n] y
- Remove test database and access to it? [Y/n] y
- Reload privilege tables now? [Y/n] y

Next we will need to log in to the MariaDB console and create a database for the Magento. Run the following command:

mysql -u root -p

This will prompt you for a password, so enter your MariaDB root password and hit Enter. Once you are logged in to your database server you need to create a database for Magento installation:

CREATE DATABASE magentodb;
GRANT ALL PRIVILEGES ON magentodb . * TO magento@'localhost' IDENTIFIED BY 'PASSWORD' WITH GRANT OPTION;
flush privileges;
exit

Step 5. Configuring Apache web server for Magento.

Create a new virtual host directive in Apache. For example, create a new Apache configuration file named ‘magento.conf’ on your virtual server:

touch /etc/apache2/sites-available/magento.conf
ln -s /etc/apache2/sites-available/magento.conf /etc/apache2/sites-enabled/magento.conf
nano /etc/apache2/sites-available/magento.conf

Add the following lines:

ServerAdmin [email protected]
DocumentRoot /var/www/html/
ServerName your-domain.com
ServerAlias www.your-domain.com

Options FollowSymLinks
AllowOverride All

ErrorLog /var/log/apache2/your-domain.com-error_log
CustomLog /var/log/apache2/your-domain.com-access_log common

Save and close the file. Restart the apache service for the changes to take effects:

systemctl restart apache2

Step 6. Configure PHP for Magento.

Now here we should allow Magento to use enough PHP memory (it is recommended that PHP should be allowed 512 MB of RAM). To do that, run the commands below to open the configuration file:

nano /etc/php5/apache2/php.ini

Search for the line ‘memory_limit‘ in the file:

memory_limit = 128M
### And change the value to 512 ###
memory_limit = 512M

Restart Apache for the changes to take effect using the following command:

systemctl restart apache2

Step 7. Accessing Magento.

Magento will be available on HTTP port 80 by default. Open your favorite browser and navigate to http://yourdomain.com/ or http://server-ip and complete the required the steps to finish the installation. If you are using a firewall, please open port 80 to enable access to the control panel.

Congratulation’s! You have successfully installed Magento. Thanks for using this tutorial for installing Magento eCommerce in Ubuntu 16.04 LTS system. For additional help or useful information, we recommend you to check the official Magento web site.

You Might Also Like: How To Install OpenCart on Ubuntu 16.04

How To Change Hostname on Ubuntu 16.04 LTS

Change Hostname on Ubuntu 16

Hostname is a label used to identify the machine and will help you to easily distinguish the server from another one. The hostname should be a Fully Qualified Domain Name (FQDN) and should point to the server IP address so you can access the server by using it.

This article assumes you have at least basic knowledge of linux, know how to use the shell, and most importantly, you host your site on your own VPS. The tutorial is quite simple and assumes you are running in the root account, if not you may need to add ‘sudo’ to the commands to get root privileges. If you are ready open up your terminal and follow through this tutorial, and in less than 10 minutes you will have changed your hostname on a Ubuntu 16.04 server.
Change Hostname on Ubuntu 16.04 LTS

Step 1. First I will check the current hostname by running “hostnamectl status” on the shell of my server:

hostnamectl status

The output on my system is:

[root@wpcademy ~]# hostnamectl status
Static hostname: wpcademy
Icon name: computer-vm
Chassis: vm
Machine ID: 20f9865d34b5a4637a9a4ffokeocef6da37
Boot ID: 28d1685056d743b39e57a7okeocefe467f
Virtualization: oracle
Operating System: Ubuntu 16.04 LTS
CPE OS Name: cpe:/o:ubuntu:ubuntu:16.04
Kernel: Linux 3.10.0-042stab120.3
Architecture: x86_64

Step 2. Change and Set Hostname.

To change the hostname type the command:

hostnamectl set-hostname vps1.wpcademy.com

Check the host name again (Close the session and open new session using console):
[php]
[root@wpcademy ~]# hostnamectl status
Static hostname: vps1.https://wpcademy.com
Icon name: computer-vm
Chassis: vm
Machine ID: d89865d34b5a4637a9a4ffokeocef6da02
Boot ID: 56d1685056d743b39e57a7okeocefe467c
Virtualization: vmware
Operating System: Ubuntu 16.04 LTS
CPE OS Name: cpe:/o:ubuntu:ubuntu:16.04
Kernel: Linux 3.10.0-042stab120.3
Architecture: x86_64

In each of these configurations, you’ll need to be sure your hostname conforms to the standards for FQDNs (Fully Qualified Domain Names). The ASCII letters a – z, the digits 0 – 9, and the hyphen (‘-‘) are the only characters acceptable (the first character, however, cannot be a hyphen). You may also find it necessary (or useful) to include the domain name as well, in which case you would then also use periods (dots) to separate the hostname and the domain name (and top-level domain).

For more command options you can add the –help flag at the end.

# hostnamectl --help
hostnamectl [OPTIONS...] COMMAND ...

Query or change system hostname.

-h --help Show this help
--version Show package version
--no-ask-password Do not prompt for password
-H --host=[USER@]HOST Operate on remote host
-M --machine=CONTAINER Operate on local container
--transient Only set transient hostname
--static Only set static hostname
--pretty Only set pretty hostname
Commands:
status Show current hostname settings
set-hostname NAME Set system hostname
set-icon-name NAME Set icon name for host
set-chassis NAME Set chassis type for host
set-deployment NAME Set deployment environment for host
set-location NAME Set location for host

Congratulation’s! You have successfully change hostname. Thanks for using this tutorial how to change and set hostname on your Ubuntu 16.04 LTS (Xenial Xerus) system. For additional help or useful information, we recommend you to check the official Ubuntu web site.

How To Install Thunderbird Email Client on Ubuntu 16.04 LTS

Install Thunderbird Email Client on Ubuntu 16

Mozilla Thunderbird is world’s leading email client software; it is free, open source, cross platform, works flawlessly, designed to handle high flow of emails. Not only email client, it is one of the best chat and news client app as well. Mozilla Thunderbird is being used by millions of people all around the globe on daily basis to cater their email and news needs. It is lighting fast app and is extremely lightweight, it hardly contributes to your system load or high resource consumption.

Install Thunderbird Email Client on Ubuntu 16.04 LTS

This article assumes you have at least basic knowledge of linux, know how to use the shell, and most importantly, you host your site on your own VPS. The installation is quite simple and assumes you are running in the root account, if not you may need to add ‘sudo’ to the commands to get root privileges. I will show you through the step by step installation Thunderbird Email Client on a Ubuntu 16.04 (Xenial Xerus) server.

Step 1. First make sure that all your system packages are up-to-date by running these following apt-get commands in the terminal.

sudo apt-get update
sudo apt-get upgrade

Step 2. Installing Thunderbird.

Let’s Add the Thunderbird repository under Ubuntu and its derivatives:

sudo add-apt-repository ppa:ubuntu-mozilla-security/ppa

Install Thunderbird package using apt-get command:

sudo apt-get update
sudo apt-get install thunderbird

That’s it, you’ve successfully installed Thunderbird 45.6.0 under your Linux system.

installed thunderbird

Congratulation’s! You have successfully installed Thunderbird. Thanks for using this tutorial for installing Thunderbird Email Client on Ubuntu 16.04 LTS (Xenial Xerus) system. For additional help or useful information, we recommend you to check the official Thunderbird web site.