How To Install Magento 2.3 on Ubuntu 18.04 LTS

Install Magento on Ubuntu 18

Magento is one of the worlds most widely used applications for managing E-Commerce sites. Magento is fully customizable to meet the users requirements and allowing them to create and launch a fully functional online store in minutes. Magento employs the MySQL relational database management system, the PHP programming language, and elements of the Zend Framework.

This article assumes you have at least basic knowledge of Linux, know how to use the shell, and most importantly, you host your site on your own VPS. The installation is quite simple and assumes you are running in the root account, if not you may need to add ‘sudo’ to the commands to get root privileges. I will show you through the step by step installation Magento on an Ubuntu 18.04 Bionic Beaver server.

Magento Features:

  • Analytics and Reporting – the script is integrated with Google Analytics and offers many different reports.
  • Product Browsing – multiple images for products, options for extensive reviews, wishlists and much more.
  • Catalog Browsing – easy navigation, advanced product filtering system, product comparison.
  • Catalog Management – inventory management, batch import and export of products, different tax rates per location, additional product attributes.
  • Customer Accounts – order status and history, e-mail and RSS feeds for products in the wishlist, newsletter subscription, default billing and shipping address.
  • Customer Service – enhanced features for customers’ accounts, Contact Us form, comprehensive order tracking and history, customizable order e-mails.
  • Order Management – create orders through admin area, create multiple invoices shipments and credit memos, call center order creation option.
  • Payment – different payment methods: credit cards, PayPal, Authorize.net,
  • Google Checkout, checks, money orders, support of external payment modules like Cybersource, ePay, eWAY and many more.
  • Shipping – shipping to multiple addresses, flat rating shipping, supports UPS,
  • UPS XML (account rates), FedEx (account rates), USPS and DHL.
  • Checkout – one page checkout, SSL support, checkout without having an account.
  • Search Engine Optimization – 100% Search Engine Friendly, Google SiteMap support.
  • International Support – multiple languages and currencies, list of allowed countries for registration, purchasing and shipping, localization.
  • Marketing Promotions and Tools – coupons, discounts and different promotion options.
  • Site Management – control of multiple web sites, multiple languages, tax rate with support for US and International markets, customizable outlook through templates.

Install Magento on Ubuntu 18.04 LTS

Step 1. First, make sure that all your system packages are up-to-date

sudo apt update
sudo apt upgrade

Step 2. Install LAMP (Linux, Apache, MariaDB and PHP) server.

A Ubuntu 18.04 LAMP server is required. If you do not have LAMP installed, you can follow our guide here. Also install all required PHP modules:

apt-get install php7.1-cli php7.1-mbstring php7.1-gd php7.1-opcache php7.1-mysql php7.1-json php7.1-mcrypt php7.1-xml php7.1-curl

Step 3. Installing Magento on Ubuntu 18.04.
First thing to do is to go to Magento’s download page and download the latest stable version of Magento, At the moment of writing this article it is version 2.3.0.

Next, unpack the Magento archive to the document root directory on your server:

unzip magento*.zip
cp -rf magento/* /var/www/html/

We will need to change some folders permissions:

chown -R www-data:www-data /var/www/html/
chmod -R 755 /var/www/html

Step 4. Configuring MariaDB for Magento.

By default, MariaDB is not hardened. You can secure MariaDB using the mysql_secure_installation script. you should read and below each steps carefully which will set root password, remove anonymous users, disallow remote root login, and remove the test database and access to secure MariaDB:

mysql_secure_installation

Configure it like this:

- Set root password? [Y/n] y
- Remove anonymous users? [Y/n] y
- Disallow root login remotely? [Y/n] y
- Remove test database and access to it? [Y/n] y
- Reload privilege tables now? [Y/n] y

Next we will need to log in to the MariaDB console and create a database for the Magento. Run the following command:

mysql -u root -p

This will prompt you for a password, so enter your MariaDB root password and hit Enter. Once you are logged in to your database server you need to create a database for Magento installation:

CREATE DATABASE magentodb;
GRANT ALL PRIVILEGES ON magentodb . * TO magento@'localhost' IDENTIFIED BY 'PASSWORD' WITH GRANT OPTION;
flush privileges;
exit

Step 5. Configuring Apache web server for Magento.

Create a new virtual host directive in Apache. For example, create a new Apache configuration file named ‘magento.conf’ on your virtual server:

touch /etc/apache2/sites-available/magento.conf
ln -s /etc/apache2/sites-available/magento.conf /etc/apache2/sites-enabled/magento.conf
nano /etc/apache2/sites-available/magento.conf

Add the following lines:

<VirtualHost *:80>
ServerAdmin [email protected]
DocumentRoot /var/www/html/
ServerName your-domain.com
ServerAlias www.your-domain.com
<Directory /var/www/html/>
Options FollowSymLinks
AllowOverride All
</Directory>
ErrorLog /var/log/apache2/your-domain.com-error_log
CustomLog /var/log/apache2/your-domain.com-access_log common

Save and close the file. Restart the apache service for the changes to take effects:

sudo a2ensite magento.conf
sudo a2enmod rewrite
sudo systemctl restart apache2

Step 6. Configure PHP for Magento.

Now here we should allow Magento to use enough PHP memory (it is recommended that PHP should be allowed 512 MB of RAM). To do that, run the commands below to open the configuration file:

sudo nano /etc/php/7.1/apache2/php.ini

Search for the line ‘memory_limit‘ in the file:

memory_limit = 128M
### And change the value to 512 ###
memory_limit = 512M

Restart Apache for the changes to take effect using the following command:

systemctl restart apache2

Step 7. Accessing Magento.

Magento will be available on HTTP port 80 by default. Open your favorite browser and navigate to http://yourdomain.com/ or http://server-ip and complete the required the steps to finish the installation. If you are using a firewall, please open port 80 to enable access to the control panel.

Congratulation’s! You have successfully installed Magento. Thanks for using this tutorial for installing Magento eCommerce in Ubuntu 18.04 LTS system. For additional help or useful information, we recommend you to check the official Magento web site.

How To Install XRDP-v0.6.1 on Ubuntu 18.04 LTS

Install XRDP on Ubuntu 18

xrdp provides a graphical login to remote machines using RDP (Microsoft Remote Desktop Protocol). xrdp accepts connections from variety of RDP clients: FreeRDP, rdesktop, NeutrinoRDP and Microsoft Remote Desktop Client (for Windows, macOS, iOS and Android).

As Windows-to-Windows Remote Desktop can, xrdp supports not only graphics remoting but also

  • two-way clipboard transfer (text, bitmap, file)
  • audio redirection
  • drive redirection (mount local client drives on remote machine)

This article assumes you have at least basic knowledge of Linux, know how to use the shell, and most importantly, you host your site on your own VPS. The installation is quite simple and assumes you are running in the root account, if not you may need to add ‘sudo’ to the commands to get root privileges. I will show you through the step by step installation Wine on an Ubuntu 18.04 (Bionic Beaver) server.

Install XRDP on Ubuntu 18.04 LTS

Step 1. First, make sure that all your system packages are up-to-date

sudo apt update
sudo apt upgrade

Step 2. Installing XRDP on Ubuntu 18.04.

Now, Run the following command to install xrdp on Ubuntu:

sudo apt install xrdp

After installing, Setup the Xsession file for xrdp.Run the following command:

echo mate-session> ~/.xsession

Now, Install Mate-Core Package. To install mate-core package, you need to run the following command:

sudo apt-get install mate-core

Step 3. Configure firewall.

Allow just RDP through the local firewall:

sudo ufw allow 3389/tcp

You should be able to connect now. I use Remmina to connect from my laptop running Ubuntu. Windows users have a RDP connection application by default on their machine.

Congratulation’s! You have successfully installed XRDP. Thanks for using this tutorial for installing XRDP open source remote desktop protocol on Ubuntu 18.04 LTS system. For additional help or useful information, we recommend you to check the official XRDP web site.

How To Install Wine 4.6 on Ubuntu 18.04 LTS

Install Wine on Ubuntu 18

Wine (originally an acronym for “Wine Is Not an Emulator”) is a compatibility layer capable of running Windows applications on several POSIX-compliant operating systems, such as Linux, macOS, & BSD. Instead of simulating internal Windows logic like a virtual machine or emulator, Wine translates Windows API calls into POSIX calls on-the-fly, eliminating the performance and memory penalties of other methods and allowing you to cleanly integrate Windows applications into your desktop.

This article assumes you have at least basic knowledge of Linux, know how to use the shell, and most importantly, you host your site on your own VPS. The installation is quite simple and assumes you are running in the root account, if not you may need to add ‘sudo’ to the commands to get root privileges. I will show you through the step by step installation Wine on an Ubuntu 18.04 (Bionic Beaver) server.

Install Wine on Ubuntu 18.04 LTS

Step 1. First, make sure that all your system packages are up-to-date

sudo apt update
sudo apt upgrade

Step 2. Installing Wine on Ubuntu 18.04 LTS.

Install Wine from Ubuntu repository.

We recommend that you install Wine on your system through the standard Ubuntu repository, as this way you can have a more stable version on your system:

## 64bit ##
sudo apt install wine64

## 32bit ##
sudo apt install wine32

Installing Wine from the WineHQ repository.

The WineHQ repository has a set of standard Wine packages that you can download and install on your system:

sudo dpkg --add-architecture i386

Run the following in order to add the WineHQ signing key:

wget -qO- https://dl.winehq.org/wine-builds/Release.key | sudo apt-key add -

Next, run the following command in order to add the relevant repository from the WineHQ:

sudo apt-add-repository 'deb http://dl.winehq.org/wine-builds/ubuntu/ artful main'

This is the most recent and stable release of Wine available. Use the following command to install this version:

sudo apt-get install --install-recommends winehq-stable

Congratulation’s! You have successfully installed Wine. Thanks for using this tutorial for installing Wine on Ubuntu 18.04 LTS system. For additional help or useful information, we recommend you to check the official Wine web site.

How To Install Hashicorp Vault 1.1.1 on Ubuntu 18.04 LTS

Install Hashicorp Vault on Ubuntu 18

Secure, store and tightly control access to tokens, passwords, certificates, encryption keys for protecting secrets and other sensitive data using a UI, CLI, or HTTP API.

This article assumes you have at least basic knowledge of Linux, know how to use the shell, and most importantly, you host your site on your own VPS. The installation is quite simple and assumes you are running in the root account, if not you may need to add ‘sudo’ to the commands to get root privileges. I will show you through the step by step installation Hashicorp Vault on an Ubuntu 18.04 Bionic Beaver server.

Install Hashicorp Vault on Ubuntu 18.04 LTS

Step 1. First, make sure that all your system packages are up-to-date

sudo apt update
sudo apt upgrade

Step 2. Installing Consul.

First, go to the Consul downloads page. Right-click the link for Linux 64-bit and select ‘copy link address’ or whatever the similar option is for your browser:

wget https://releases.hashicorp.com/consul/1.3.0/consul_1.3.0_linux_amd64.zip
unzip consul_1.3.0_linux_amd64.zip
mv consul /usr/bin

Next, run Consul as a service so we need to configure a SystemD service for Consul:

nano /etc/systemd/system/consul.service
[Unit]
Description=Consul
Documentation=https://www.consul.io/

[Service]
ExecStart=/usr/bin/consul agent -server -ui -data-dir=/tmp/consul -bootstrap-expect=1 -node=vault -bind=192.168.1.28 -config-dir=/etc/consul.d/
ExecReload=/bin/kill -HUP $MAINPID
LimitNOFILE=65536

[Install]
WantedBy=multi-user.target


Next we need to add some configuration so that we can access the Consul GUI from our network:

mkdir /etc/consul.d/

Then, create a new file /etc/consul.d/ui.json and add the following file:

nano /etc/consul.d/ui.json
{
  "addresses": {
    "http": "0.0.0.0"
  }
}

Now we are ready to start the Consul Service:

systemctl daemon-reload
systemctl start consul
systemctl enable consul

Verify that our Consul Service:

root@ramona:~# consul members
Node   Address            Status  Type    Build  Protocol  DC   Segment
vault  192.168.1.28:8301  alive   server  1.3.0  2         dc1  <all>

Step 3. Installing Vault on Ubuntu 18.04.

First, go to the Vault Downloads page and copy the URL just like we did for Consul:

wget https://releases.hashicorp.com/vault/0.11.4/vault_0.11.4_linux_amd64.zip
unzip vault_0.11.4_linux_amd64.zip
mv vault /usr/bin

Next, Create a configuration directory /etc/vault:

mkdir /etc/vault

Then, Create a new file /etc/vault/config.hcl with the following contents:

storage "consul" {
  address = "127.0.0.1:8500"
  path    = "vault/"
}

listener "tcp" {
 address     = "192.168.1.28:8200"
 tls_disable = 1
}

ui = true

Now we need to create the SystemD Service for vault:

nano /etc/systemd/system/vault.service
[Unit]
Description=Vault
Documentation=https://www.vault.io/

[Service]
ExecStart=/usr/bin/vault server -config=/etc/vault/config.hcl
ExecReload=/bin/kill -HUP $MAINPID
LimitNOFILE=65536

[Install]
WantedBy=multi-user.target

Next, we need to start the Vault Service:

systemctl daemon-reload
systemctl start vault
systemctl enable vault

To enable the CLI to connect to our Vault service run this command:

export VAULT_ADDR=http://192.168.1.28:8200

After Vault starts we need to initialize it. This only has to be done once or when you change storage backends for some reason:

vault operator init

Congratulation’s! You have successfully installed Vault. Thanks for using this tutorial for installing Hashicorp Vault in Ubuntu 18.04 LTS system. For additional help or useful information, we recommend you to check the official Vault web site.

How To Install Android Studio 3.4 on Ubuntu 18.04 LTS

Install Android Studio on Ubuntu 18

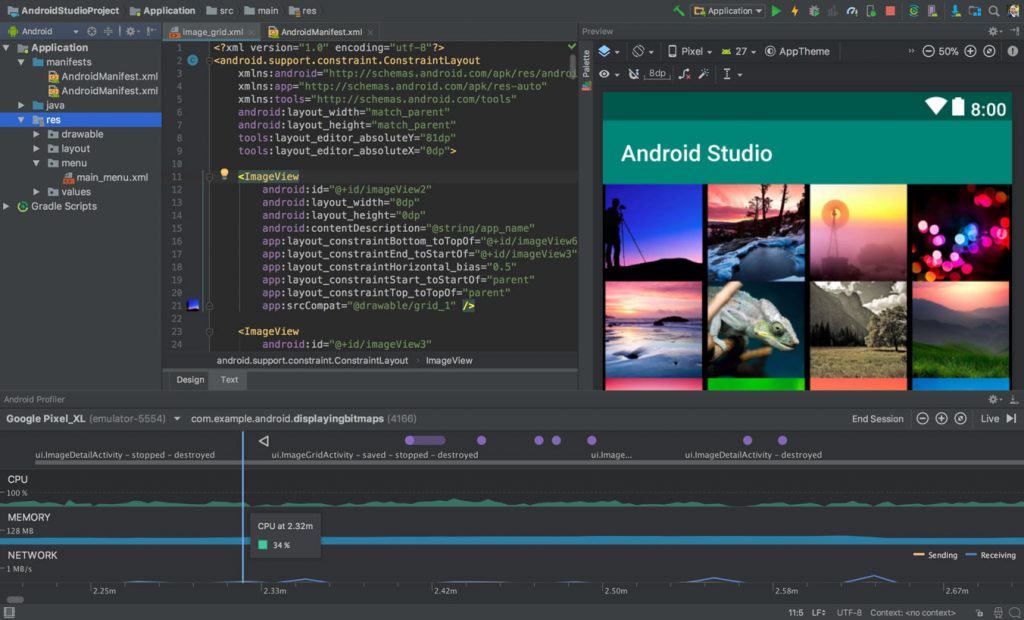
Android Studio is the official Integrated Development Environment (IDE) for Android app development, based on IntelliJ IDEA. On top of IntelliJ’s powerful code editor and developer tools, Android Studio offers even more features that enhance your productivity when building Android apps

This article assumes you have at least basic knowledge of Linux, know how to use the shell, and most importantly, you host your site on your own VPS. The installation is quite simple and assumes you are running in the root account, if not you may need to add ‘sudo’ to the commands to get root privileges. I will show you through the step by step installation Android Studio on an Ubuntu 18.04 (Bionic Beaver) server.

install android studio on ubuntu 18

Install Android Studio on Ubuntu 18.04 LTS

Step 1. First, make sure that all your system packages are up-to-date

sudo apt update
sudo apt upgrade

Step 2. Installing Java on Ubuntu.

You need to have Java installed in your system before installing Android Studio:

sudo apt install openjdk-9-jre openjdk-9-jdk

Step 3. Install Android Studio on Ubuntu 18.04.

Run the following commands to add Android Studio PPA and install:

sudo add-apt-repository ppa:maarten-fonville/android-studio
sudo apt update
sudo apt install android-studio

Once the installation is finished, You can access android studio from the dash or app launcher or use the following command to start:

/opt/android-studio/bin/studio.sh

Congratulation’s! You have successfully installed Android Studio. Thanks for using this tutorial for installing Android Studio on your Ubuntu 18.04 LTS. For additional help or useful information, we recommend you to check the official Android Studio web site.

How To Install Google Chrome on Ubuntu 18.10 Cosmic Cuttlefish

Install Google Chrome on Ubuntu

Google Chrome is a freeware web browser developed by Google, uses the WebKit layout engine. It is available for the Linux, Android, iOS, Microsoft Windows, and Mac OS X operating systems. But Google Chrome is more than a web browser, as it combines sophisticated open source technology, borrowed from the Chromium application, into a minimal design, all in order to help users surf the web much faster, a lot easier, and safer than ever before. In this tutorial we will learn how to install google chrome on ubuntu 18.10

This article assumes you have at least basic knowledge of Linux, know how to use the shell, and most importantly, you host your site on your own VPS. The installation is quite simple and assumes you are running in the root account, if not you may need to add ‘sudo’ to the commands to get root privileges. I will show you through the step by step installation Google Chrome on a Ubuntu 18.10 (Cosmic Cuttlefish).

Install Google Chrome on Ubuntu 18.10

Step 1. First, make sure that all your system packages are up-to-date

sudo apt-get update
sudo apt-get upgrade

Step 2. Installing Google Chrome on Ubuntu 18.04 LTS.


First, use the wget command to download the Google Chrome package:
wget -O ~/chrome.deb https://dl.google.com/linux/direct/google-chrome-stable_current_amd64.deb

Next, install the Google Chrome package, execute the following dpkg command:

sudo dpkg -i ~/chrome.deb

Step 3. Accessing Google Chrome.

Once installed, open Google Chrome from Ubuntu Dash or Terminal:

google-chrome

Congratulation’s! You have successfully installed Google Chrome. Thanks for using this tutorial for installing Google Chrome web browser in Ubuntu 18.10 Cosmic Cuttlefish system. For additional help or useful information, we recommend you to check the official Google Chrome web site.

How To Install Minecraft Server on Ubuntu 18.04 LTS

Install Minecraft Server on Ubuntu 18

Minecraft is a game about breaking and placing blocks. The creative and building aspects of Minecraft allow players to build constructions out of textured cubes in a 3D procedurally generated world. Minecraft servers allow players to play online or via a local area network with other people. They may either be run on a hosted server, on local dedicated server hardware, a Virtual Private server on a home machine, or on your local gaming computer.

This article assumes you have at least basic knowledge of Linux, know how to use the shell, and most importantly, you host your site on your own VPS. The installation is quite simple and assumes you are running in the root account, if not you may need to add ‘sudo’ to the commands to get root privileges. I will show you through the step by step installation Minecraft Server on an Ubuntu 18.04 Bionic Beaver server.
Install Minecraft Server on Ubuntu 18.04 LTS Bionic Beaver

Step 1. First make sure that all your system packages are up-to-date by running these following apt-get commands in the terminal.

sudo apt-get update
sudo apt-get upgrade

Step 2. Installing Java-JDK.

Minecraft server setup requires Java to be installed on your system. To do this, follow these steps:

sudo apt-get install openjdk-8-jdk screen

Step 3. Installing Minecraft Server on Ubuntu 18.04 LTS.

First, create a new user for Minecraft to run as:

sudo useradd -m -r -d /opt/minecraft minecraft

Create a Minecraft directory:

mkdir minecraft
cd minecraft

Now download the java Minecraft server and install your own Minecraft server:

wget -O minecraft_server.jar https://s3.amazonaws.com/Minecraft.Download/versions/1.12.2/minecraft_server.1.12.2.jar

Accept Minecraft’s terms and conditions:

echo "eula=true" > eula.txt

Get screen up and running, so that the server can run in the background:

screen -S "Minecraft server 1"

Step 4. Running Minecraft Server.

Now you only need to run the installed server (you can edit the 1024M value to match your server’s RAM):

java -Xmx1024M -Xms1024M -jar minecraft_server.jar nogui

To get back to the normal screen, press these keys: Control+A+D, To get back to the screen where Minecraft is running:

screen -r

Congratulation’s! You have successfully installed Minecraft. Thanks for using this tutorial for installing Minecraft server on your Ubuntu 18.04 LTS system. For additional help or useful information, we recommend you to check the official Minecraft web site.