How To Install Netdata Monitoring on Ubuntu 18.04 LTS

Install Netdata Monitoring on Ubuntu 18

Piwik is an open source web analytics application. It rivals Google Analytics and includes even more features and allows you to brand your brand and send out custom daily, weekly, and monthly reports to your clients.

This article assumes you have at least basic knowledge of Linux, know how to use the shell, and most importantly, you host your site on your own VPS. The installation is quite simple and assumes you are running in the root account, if not you may need to add ‘sudo’ to the commands to get root privileges. I will show you through the step by step installation Netdata Monitoring on an Ubuntu 18.04 Bionic Beaver server.

Install Netdata Monitoring on Ubuntu 18.04 LTS

Step 1. First make sure that all your system packages are up-to-date

sudo apt-get update
sudo apt-get upgrade

Step 2. Installing Netdata Monitoring on Ubuntu 18.04 LTS.

Install Netdata using following command:

sudo apt install netdata

Step 3. Configure Netdata Monitoring.

Run the following command to configuration file and bind the server IP address:

nano /etc/netdata/netdata.conf

Then change the line to bind to the IP address of the server and save the changes:

[global]
 run as user = netdata
 web files owner = root
 web files group = root
 # Netdata is not designed to be exposed to potentially hostile
 # networks.See https://github.com/firehol/netdata/issues/164
 bind socket to IP = 127.0.0.1

After restart NetData service to apply the changes:

systemctl restart netdata

Step 4. Accessing Netdata Monitoring.

Netdata Monitoring will be available on HTTP port 19999 by default. Open your favorite browser and navigate to http://yourdomain.com:19999 or http://server-ip:19999

netdata-monitoring

Congratulation’s! You have successfully installed Netdata. Thanks for using this tutorial for installing Netdata Monitoring on your Ubuntu 18.04 LTS Bionic Beaver. For additional help or useful information, we recommend you to check the official Netdata web site.

How to Install Asterisk (Usage Survey) on Ubuntu 18.04 LTS

Install Asterisk on Ubuntu 18

Asterisk is the most popular and widely adopted open source PBX platform that powers IP PBX systems, conference servers and VoIP gateways. It is used by individuals, small businesses, large enterprises and governments worldwide.

This article assumes you have at least basic knowledge of Linux, know how to use the shell, and most importantly, you host your site on your own VPS. The installation is quite simple and assumes you are running in the root account, if not you may need to add ‘sudo’ to the commands to get root privileges. I will show you through the step by step installation Asterisk on an Ubuntu 18.04 Bionic Beaver server.

Install Asterisk on Ubuntu 18.04 LTS

Step 1. First make sure that all your system packages are up-to-date

sudo apt-get update
sudo apt-get upgrade

Step 2. Installing Dependencies.

Install all required packages on your Asterisk with the following commands:

apt-get install build-essential
apt-get install git-core subversion libjansson-dev sqlite autoconf automake libxml2-dev libncurses5-dev libtool

Step 3. Installing Asterisk on Ubuntu 18.04 LTS.

First, download the latest version of Asterisk:

cd /usr/src/
wget http://downloads.asterisk.org/pub/telephony/asterisk/asterisk-15-current.tar.gz
tar zxf asterisk-15-current.tar.gz

Once the asterisk archive is extracted, change to the asterisk-15.5.0 directory with the following command:

cd asterisk-15.*/
./contrib/scripts/install_prereq install

The script will install all necessary packages and upon successful completion, it will print the following message:

#############################################
##    install completed successfully.      ##
#############################################

Next step is to run the ./configure script which will check your system for missing libraries and binaries and prepare the Asterisk source code for the build process:

./configure

Upon successful completion, you will see the following output:

configure: Menuselect build configuration successfully completed

               .$$$$$$$$$$$$$$$=..
            .$7$7..          .7$$7:.
          .$$:.                 ,$7.7
        .$7.     7$$$$           .$$77
     ..$$.       $$$$$            .$$$7
    ..7$   .?.   $$$$$   .?.       7$$$.
   $.$.   .$$$7. $$$$7 .7$$$.      .$$$.
 .777.   .$$$$$$77$$$77$$$$$7.      $$$,
 $$$~      .7$$$$$$$$$$$$$7.       .$$$.
.$$7          .7$$$$$$$7:          ?$$$.
$$$          ?7$$$$$$$$$$I        .$$$7
$$$       .7$$$$$$$$$$$$$$$$      :$$$.
$$$       $$$$$$7$$$$$$$$$$$$    .$$$.
$$$        $$$   7$$$7  .$$$    .$$$.
$$$$             $$$$7         .$$$.
7$$$7            7$$$$        7$$$
 $$$$$                        $$$
  $$$$7.                       $$  (TM)
   $$$$$$$.           .7$$$$$$  $$
     $$$$$$$$$$$$7$$$$$$$$$.$$$$$$
       $$$$$$$$$$$$$$$$.

configure: Package configured for:
configure: OS type  : linux-gnu
configure: Host CPU : x86_64
configure: build-cpu:vendor:os: x86_64 : pc : linux-gnu :
configure: host-cpu:vendor:os: x86_64 : pc : linux-gnu :

Now that the configuration is completed start the compilation process using the make command:

make

Once the build process is completed, you will be presented with the following message:

+--------- Asterisk Build Complete ---------+
+ Asterisk has successfully been built, and +
+ can be installed by running:              +
+                                           +
+             make install                  +
+-------------------------------------------+

As the message above says, the next step is to install Asterisk and its modules by typing:

make install

Once the installation is finished the script will display the following message:

+---- Asterisk Installation Complete -------+
 +                                           +
 +    YOU MUST READ THE SECURITY DOCUMENT    +
 +                                           +
 + Asterisk has successfully been installed. +
 + If you would like to install the sample   +
 + configuration files (overwriting any      +
 + existing config files), run:              +
 +                                           +
 + For generic reference documentation:      +
 +    make samples                           +
 +                                           +
 + For a sample basic PBX:                   +
 +    make basic-pbx                         +
 +                                           +
 +                                           +
 +-----------------  or ---------------------+
 +                                           +
 + You can go ahead and install the asterisk +
 + program documentation now or later run:   +
 +                                           +
 +               make progdocs               +
 +                                           +
 + **Note** This requires that you have      +
 + doxygen installed on your local system    +
 +-------------------------------------------+

Run the make samples command to install the Asterisk sample configuration files:

make samples
make config
make install-logrotate

You will see the following output indicating that the logrotation configuration has been successfully created:

if [ ! -d "/etc/asterisk/../logrotate.d" ]; then \
        /usr/bin/install -c -d "/etc/asterisk/../logrotate.d" ; \
fi
sed 's#__LOGDIR__#/var/log/asterisk#g' < contrib/scripts/asterisk.logrotate | sed 's#__SBINDIR__#/usr/sbin#g' > contrib/scripts/asterisk.logrotate.tmp
/usr/bin/install -c -m 0644 contrib/scripts/asterisk.logrotate.tmp "/etc/asterisk/../logrotate.d/asterisk"
rm -f contrib/scripts/asterisk.logrotate.

The last step is to enable Asterisk service to start on boot with:

systemctl start asterisk
systemctl enable asterisk
systemctl status asterisk

Congratulation’s! You have successfully installed Asterisk. Thanks for using this tutorial for installing Asterisk on your Ubuntu 18.04 LTS Bionic Beaver. For additional help or useful information, we recommend you to check the official Asterisk web site.

How To Install MyWebSQL on Ubuntu 18.04 LTS

Install MyWebSQL on Ubuntu 18

MyWebSQL is a free and open source web based WYSIWYG client for managing the databases on your server. It provides a simple and intuitive interface with the look and feel of a desktop application. This PHP based application offers rich features amd plenty of tools for database management and it can work with MySQL, PostgreSQL, and SQLite databases.

This article assumes you have at least basic knowledge of Linux, know how to use the shell, and most importantly, you host your site on your own VPS. The installation is quite simple and assumes you are running in the root account, if not you may need to add ‘sudo’ to the commands to get root privileges. I will show you through the step by step installation MyWebSQL on an Ubuntu 18.04 Bionic Beaver server.

MyWebSQL Features

  • Multiple Syntax highlighted SQL editors
  • WYSIWYG Table creator/editor
  • Quick Inplace multi-record editing
  • Desktop application look and feel
  • Excellent support for all major browsers
  • Zero configuration installation
  • Multilingual Interface with themes support
  • Supports MySQL 4 and 5, PostgreSQL 8 and 9 and SQLite databases
  • Import database script, export database, tables or results to multiple formats

Install MyWebSQL on Ubuntu 18.04 LTS

Step 1. First make sure that all your system packages are up-to-date

sudo apt-get update
sudo apt-get upgrade

Step 2. Install LAMP (Linux, Apache, MariaDB and PHP) server.

A Ubuntu 18.04 LAMP server is required. If you do not have LAMP installed, you can follow our guide here. Also install all required PHP modules:

apt-get install php7.1-cli php7.1-mbstring php7.1-gd php7.1-opcache php7.1-mysql php7.1-json php7.1-mcrypt php7.1-xml php7.1-curl

1
Step 3. Installing MyWebSQL on Ubuntu 18.04 LTS.

First, download a MyWebSQL package from the terminal using the wget command:

wget https://phoenixnap.dl.sourceforge.net/project/mywebsql/stable/mywebsql-3.7.zip

Unzip the archive file with to default web server document root directory:

unzip mywebsql-3.7.zip -d /var/www/html

Change ownership and permission of the as MyWebSQL CMS follows:

chown -R www-data:www-data /var/www/html/mywebsql/
chmod -R 775 /var/www/html/mywebsql/

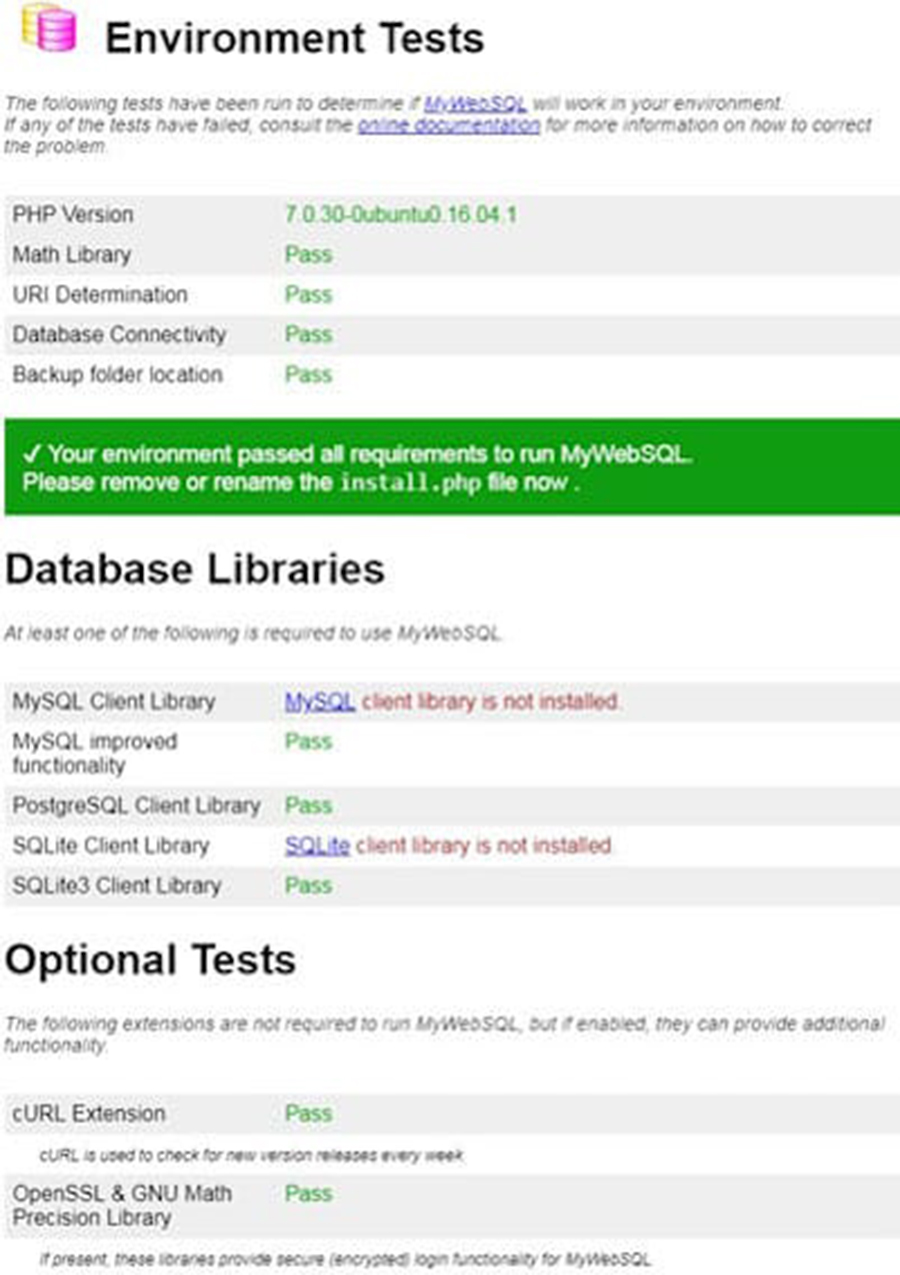
Then, You can now test and verify the installation by the typing the following in your browser (using your own server IP address): http://your-IP-address/mywebsql/install.php.

Install-MyWebSQL

Step 4. Accessing MyWebSQL.

MyWebSQL will be available on HTTP port 80 by default. Open your favorite browser and navigate to http://your-domain.com/mywebsql or http://server-ip/mywebsql and Login with your MariaDB root accoun. If you are using a firewall, please open port 80 to enable access to the control panel.

Congratulation’s! You have successfully installed MyWebSQL. Thanks for using this tutorial for installing MyWebSQL on your Ubuntu 18.04 LTS Bionic Beaver. For additional help or useful information, we recommend you to check the official MyWebSQL web site.

How To Install Google Earth on Ubuntu 18.04 LTS

Install Google Earth on Ubuntu 18

Google Earth is a virtual globe that lets you travel anywhere sitting right in front of your desk. You can explore any place on earth (even in 3D) and also beyond earth. You can explore the surface of the Moon and Mars, and explore the stars in the night sky.

This article assumes you have at least basic knowledge of Linux, know how to use the shell, and most importantly, you host your site on your own VPS. The installation is quite simple and assumes you are running in the root account, if not you may need to add ‘sudo’ to the commands to get root privileges. I will show you through the step by step installation Google Earth on an Ubuntu 18.04 Bionic Beaver server.

Install Google Earth on Ubuntu 18.04 LTS

Step 1. First make sure that all your system packages are up-to-date

sudo apt-get update
sudo apt-get upgrade

Step 2. Install Prerequisites Packages.

Before you install Google Earth, make sure install prerequisites packages:

apt install gdebi-core wget

Step 3. Installing Google Earth on Ubuntu 18.04 LTS.

First, download Google Earth installation package:

wget https://dl.google.com/dl/earth/client/current/google-earth-pro-stable_current_amd64.deb

Next, use the gdebi command to install Google Earth:

sudo gdebi google-earth-pro-stable_current_amd64.deb

After finishing installing Google Earth package, you can either run:

google-earth-pro

Congratulation’s! You have successfully installed Google Earth. Thanks for using this tutorial for installing Google Earth on your Ubuntu 18.04 LTS Bionic Beaver. For additional help or useful information, we recommend you to check the official Google Earth web site.

How To Install Backdrop CMS v1.12.6 on Ubuntu 18.04 LTS

Install Backdrop CMS on Ubuntu 18

Backdrop CMS is a full-featured content management system that allows non-technical users to manage a wide variety of content. It can be used to create all kinds of websites including blogs, image galleries, social networks, intranets, and more.

This article assumes you have at least basic knowledge of Linux, know how to use the shell, and most importantly, you host your site on your own VPS. The installation is quite simple and assumes you are running in the root account, if not you may need to add ‘sudo’ to the commands to get root privileges. I will show you through the step by step installation Backdrop CMS on an Ubuntu 18.04 Bionic Beaver server.

Install Backdrop CMS on Ubuntu 18.04 LTS

Step 1. First make sure that all your system packages are up-to-date

sudo apt-get update
sudo apt-get upgrade

Step 2. Install LAMP (Linux, Apache, MariaDB and PHP) server.

A Ubuntu 18.04 LAMP server is required. If you do not have LAMP installed, you can follow our guide here. Also install all required PHP modules:

apt-get install php7.1-cli php7.1-mbstring php7.1-gd php7.1-opcache php7.1-mysql php7.1-json php7.1-mcrypt php7.1-xml php7.1-curl

Step 3. Installing Backdrop CMS on Ubuntu 18.04 LTS.

First thing to do is to go to Backdrop CMS’s download page and download the latest stable version of Backdrop CMS, At the moment of writing this article it is version v1.10.1:

wget https://github.com/backdrop/backdrop/releases/download/1.10.1/backdrop.zip

Unpack the Backdrop archive to the document root directory on your server:

unzip backdrop.zip
mkdir -p /var/www/html
mv backdrop /var/www/html

We will need to change some folders permissions:

chown -R www-data:www-data /var/www/html/backdrop/

Step 4. Configuring MariaDB for Backdrop CMS.

By default, MariaDB is not hardened. You can secure MariaDB using the mysql_secure_installation script. You should read and below each steps carefully which will set root password, remove anonymous users, disallow remote root login, and remove the test database and access to secure MariaDB.

mysql_secure_installation

Configure it like this:

- Set root password? [Y/n] y
- Remove anonymous users? [Y/n] y
- Disallow root login remotely? [Y/n] y
- Remove test database and access to it? [Y/n] y
- Reload privilege tables now? [Y/n] y

Next we will need to log in to the MariaDB console and create a database for the Backdrop CMS. Run the following command:

mysql -u root -p

This will prompt you for a password, so enter your MariaDB root password and hit Enter. Once you are logged in to your database server you need to create a database for Backdrop CMS installation:

MariaDB [(none)]> CREATE DATABASE backdropdb character set UTF8;
MariaDB [(none)]> GRANT ALL PRIVILEGES ON mahara.* TO 'backdropuser'@'localhost' IDENTIFIED BY 'your-password';
MariaDB [(none)]> FLUSH PRIVILEGES;
MariaDB [(none)]> \q

Step 5. Configuring Apache web server for Backdrop CMS.

Create a new virtual host directive in Apache. For example, create a new Apache configuration file named ‘backdrop.conf’ on your virtual server:

touch /etc/apache2/sites-available/backdrop.conf
ln -s /etc/apache2/sites-available/backdrop.conf /etc/apache2/sites-enabled/backdrop.conf
nano /etc/apache2/sites-available/backdrop.conf

Add the following lines:

<VirtualHost *:80>
ServerAdmin [email protected]
DocumentRoot "/var/www/html/backdrop/"
ServerName your-domain.com
ServerAlias www.your-domain.com
<Directory "/var/www/html/backdrop/">
Options FollowSymLinks
AllowOverride All
Order allow,deny
allow from all
</Directory>
ErrorLog /var/log/apache2/your-domain.com-error_log
CustomLog /var/log/apache2/your-domain.com-access_log common
</VirtualHost>

Now, we can restart Apache web server so that the changes take place:

sudo a2enmod rewrite
a2ensite backdrop.conf
systemctl restart apache2.service

Step 6. Accessing Backdrop content management system.

Backdrop CMS will be available on HTTP port 80 by default. Open your favorite browser and navigate to http://yourdomain.com or http://server-ip and complete the required the steps to finish the installation. If you are using a firewall, please open port 80 to enable access to the control panel.

Congratulation’s! You have successfully installed Backdrop CMS. Thanks for using this tutorial for installing Backdrop CMS (content management system) on your Ubuntu 18.04 LTS (Bionic Beaver) system. For additional help or useful information, we recommend you to check the official Backdrop CMS Installation guide.

How To Install R on Ubuntu 18.04 LTS

Install R on Ubuntu 18

R is a popular open source programming language, often use for graphical and statistical computing. It is supported by the R Foundation for Statistical Computing and mainly used by statisticians and data miners for developing statistical software and performing data analysis.

This article assumes you have at least basic knowledge of Linux, know how to use the shell, and most importantly, you host your site on your own VPS. The installation is quite simple and assumes you are running in the root account, if not you may need to add ‘sudo’ to the commands to get root privileges. I will show you through the step by step installation R open source programming language on an Ubuntu 18.04 Bionic Beaver server.
Install R on Ubuntu 18.04 LTS Bionic Beaver

Step 1. First make sure that all your system packages are up-to-date

sudo apt-get update
sudo apt-get upgrade

Step 2. Installing R on Ubuntu 18.04 LTS.

First, add GPG Keys with following command. GPG Keys maintain package consistency and authenticity by requiring that distributors sign packages with GPG key:

sudo apt-key adv --keyserver keyserver.ubuntu.com --recv-keys E298A3A825C0D65DFD57CBB651716619E084DAB9

Next, add R official repository source:

sudo add-apt-repository 'deb https://cloud.r-project.org/bin/linux/ubuntu bionic-cran35/'

Now we can install R using command:

sudo apt-get update
sudo apt install r-base

To verify that the installation was successful run the following command which will print the R version:

R --version

Step 3. Installing R packages.

For installing a CRAN package in R we use install.pacakges() function. This command fetches package from specified repository and install on your computer:

### Example ###
install.packages("ggplot2")

You can check whether a particular package is installed or not by using packageVersion function:

packageVersion("ggplot2")

Congratulation’s! You have successfully installed R. Thanks for using this tutorial for installing R open source programming language on your Ubuntu 18.04 LTS Bionic Beaver. For additional help or useful information, we recommend you to check the official R web site.

How To Install LEMP on Ubuntu 18.04 LTS

Install LEMP on Ubuntu 18

A LEMP software stack is a group of open source software that is typically installed together to enable a server to host dynamic websites and web apps. This term is actually an acronym which represents the Linux operating system, with the Nginx web server (which replaces the Apache component of a LAMP stack). The site data is stored in a MySQL database (using MariaDB), and dynamic content is processed by PHP.

This article assumes you have at least basic knowledge of Linux, know how to use the shell, and most importantly, you host your site on your own VPS. The installation is quite simple and assumes you are running in the root account, if not you may need to add ‘sudo’ to the commands to get root privileges. I will show you through the step by step installation LEMP stack (Linux, Nginx, MariaDB and PHP) on an Ubuntu 18.04 Bionic Beaver server.

Install LEMP on Ubuntu 18.04 LTS

Step 1. First make sure that all your system packages are up-to-date

sudo apt-get update
sudo apt-get upgrade

Step 2. Installing Nginx on Ubuntu 18.04 LTS.

Install Nginx with apt, which is the default package manager for Ubuntu:

sudo apt install nginx

Once installed, start Nginx service using the following command:

sudo systemctl start nginx

Now if you have your UFW firewall running, you will need to allow connections to Nginx:

sudo ufw allow 'Nginx HTTP'

You can verify that Nginx is really running by opening your favorite web browser and entering the URL http://your-domain.com, if it is installed, then you will see this:Install LEMP on Ubuntu 18.04 LTS
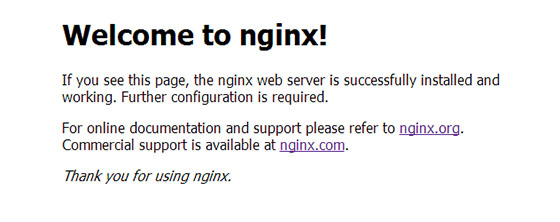
nginx-default-page

To get Nginx to work with PHP correctly, we need to make changes to the Nginx configuration file. This guide we will be using a simple Nginx config file:

sudo nano /etc/nginx/sites-available/default

Copy the following into your text editor:

    server {
            listen       80;
            server_name  your_domain_name.com;
            root /usr/share/nginx/html;
            index index.php index.html;
            location / {
                    try_files $uri $uri/ =404;
            }
            error_page 404 /404.html;
            error_page 500 502 503 504 /50x.html;
            location = /50x.html {
                    root /var/www/html;
            }
            location ~ \.php$ {
                    try_files $uri =404;
                    fastcgi_pass unix:/var/run/php7.2-fpm.sock;
                    fastcgi_index index.php;
                    fastcgi_param SCRIPT_FILENAME $document_root$fastcgi_script_name;
                    include fastcgi_params;
            }
    }

Once you have finished editing the file restart Nginx with:

sudo nginx -t
sudo systemctl restart nginx

Step 4. Installing MariaDB on Ubuntu 18.04 LTS.

To install MariaDB in Ubuntu 18.04 run the following command:

sudo apt install mariadb-server

Once complete, you can verify MariaDB is installed by running the below command:

sudo systemctl status mariadb

By default, MariaDB is not hardened. You can secure MariaDB using the mysql_secure_installation script. you should read and below each steps carefully which will set root password, remove anonymous users, disallow remote root login, and remove the test database and access to secure MariaDB:

mysql_secure_installation

Configure it like this:

- Set root password? [Y/n] y
- Remove anonymous users? [Y/n] y
- Disallow root login remotely? [Y/n] y
- Remove test database and access to it? [Y/n] y
- Reload privilege tables now? [Y/n] y

To log into MariaDB, use the following command (note that it’s the same command you would use to log into a MariaDB database):

mysql -u root -p

Step 5. Installing PHP and Configure PHP-FPM Settings.

Unlike Apache, Nginx does not contain native PHP processing. For that we have to install PHP-FPM (FastCGI Process Manager):

sudo apt install php-fpm php-mysql

Once installed, check the PHP version:

php --version

Now open the PHP-FPM default file to edit the following content:

### nano /etc/php/7.2/fpm/php.ini
cgi.fix_pathinfo=0
date.timezone = Africa/Douala

Save the file and restart php-fpm:

systemctl restart php7.2-fpm

To test PHP, create a test file named info.php with he content below. Save the file, then browse to it to see if PHP is working:

nano /usr/share/nginx/html/info.php

Copy the following into your text editor:

<?php
phpinfo();
?>

Try to access it at http://your_server_ip/info.php . If the PHP info page is rendered in your browser then everything looks good and you are ready to proceed further.
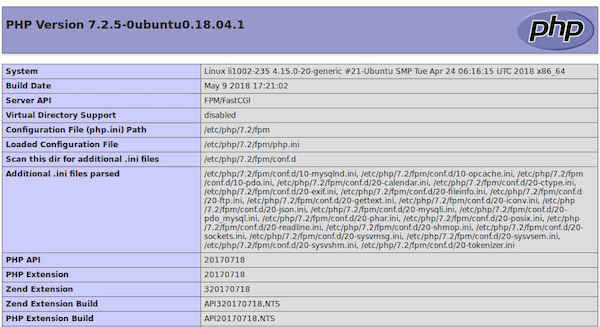
nginx-php7.2

Congratulation’s! You have successfully installed LEMP stack. Thanks for using this tutorial for installing LAMP (Linux, Nginx, MySQL and PHP) in Ubuntu 18.04 LTS system.