Cacti is an open-source, web-based network monitoring and graphing tool designed as a front-end application for the open-source, industry-standard data logging tool RRDtool. It is used by IT businesses and stores all of the necessary information about bandwidth, hard disk usage, CPU usage, load average, RAM statistics etc in a MySQL database. Cacti creates graphs and populates them with data. It offers SNMP support, 3rd party templates and plugins and has built in user authentications and user permission features.
Install Cacti Monitoring on Ubuntu 16.04 LTS
This article assumes you have at least basic knowledge of linux, know how to use the shell, and most importantly, you host your site on your own VPS. The installation is quite simple and assumes you are running in the root account, if not you may need to add ‘sudo’ to the commands to get root privileges. I will show you through the step by step installation Cacti Monitoring on a Ubuntu 16.04 (Xenial Xerus) server.
Step 1. First make sure that all your system packages are up-to-date by running these following apt-get commands in the terminal.
sudo apt-get update
sudo apt-get upgrade
Step 2. Install LAMP (Linux, Apache, MariaDB, PHP) server.
A Ubuntu 16.04 LAMP server is required. If you do not have LAMP installed, you can follow our guide here. Cacti only supports MySQL 5.6, whereas the current version in the Ubuntu default repository is MySQL 5.7. In order to install this older version of MYSQL, you will need to add this repository and grab it from there:
nano /etc/apt/sources.list
deb http://archive.ubuntu.com/ubuntu trusty universe
apt-get update
Now install the following packages for Cacti setup on your Ubuntu server with the help of given below command:
apt-get install apache2 mysql-server-5.6 php libapache2-mod-php -y
Start the web server and MySQL server. Set them to automatically start up on server boot:
systemctl start apache2.service
systemctl enable apache2.service
systemctl start mysql.service
systemctl enable mysql.service
Step 3. Installing the Cacti packages.
Install SNMP and SNMP and RRDtools:
apt-get install snmp snmpd rrdtool -y
Now use the following command to install Cacti:
apt-get install cacti cacti-spine -y
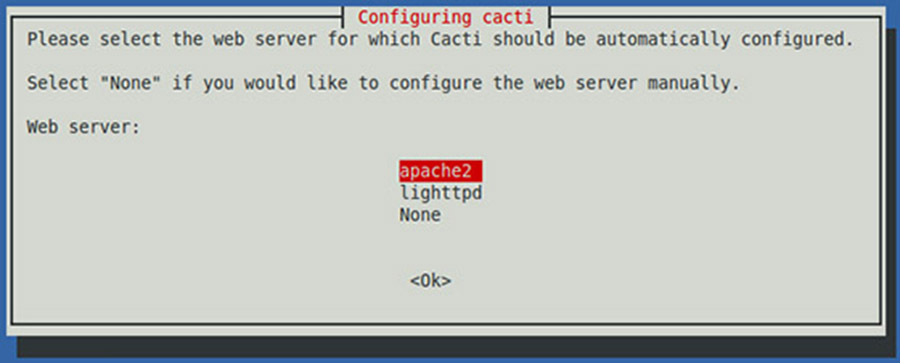
During the installation process you will be prompted to configure Cacti with few options to select from available options. First of all Choose the web server that you wish to use for configure with Cacti like we are using Apache and then press ‘OK’ key to continue:

Now it will ask you for a webserver that you will use it, we choose Apache2 since that’s what we installed in the dependencies.
Next it will ask to configure the Cacti database, select Yes

Now it will ask for your root password of MySQL/MariaDB database.

Once the installation process is complete, you will have to restart all services to reflect the changes made:
systemctl restart apache2.service
systemctl restart mysql.service
systemctl restart snmpd.service
Step 3. Accessing cacti.
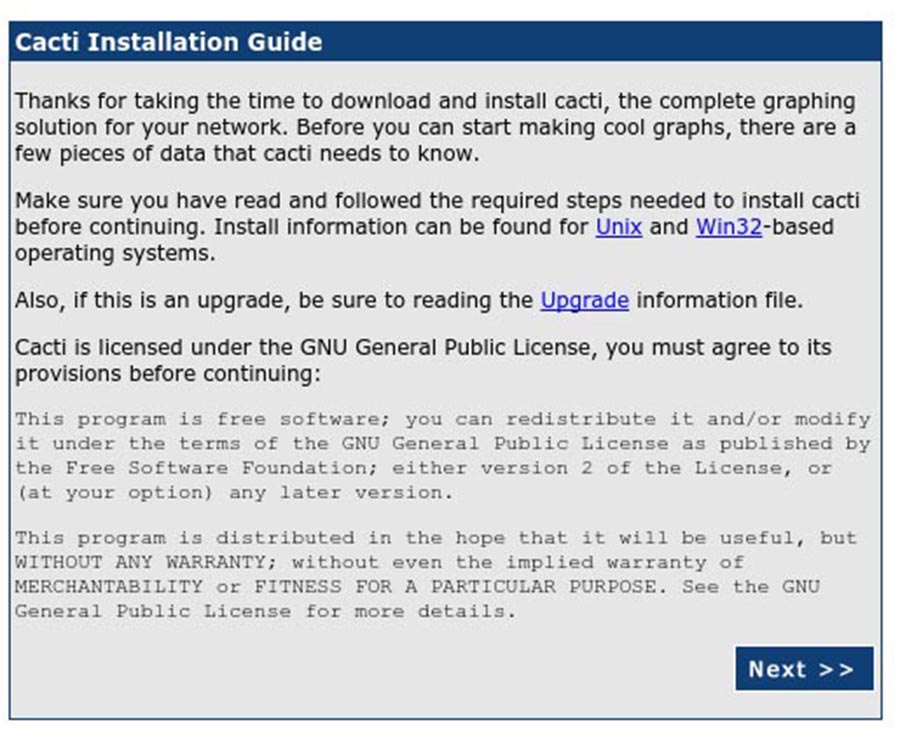
Cacti will be available on HTTP port 80 by default. Open your favorite browser and navigate to http://yourdomain.com/cacti or http://server-ip/cacti and complete the required the steps to finish the installation. You will get the “Cacti Installation Guide” on screen. Click on ‘Next’ button.
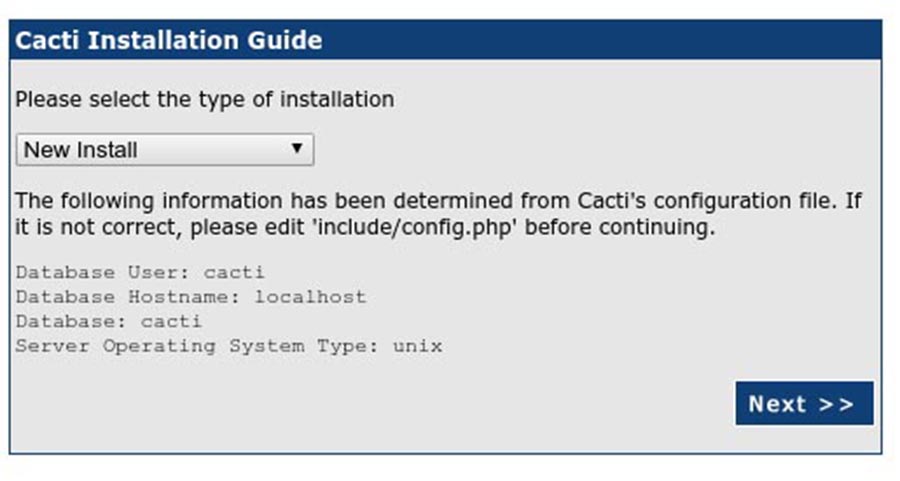
In next screen, you will get drop down button. Because this fresh installation select ‘New Install’ and click ‘Next’ button.
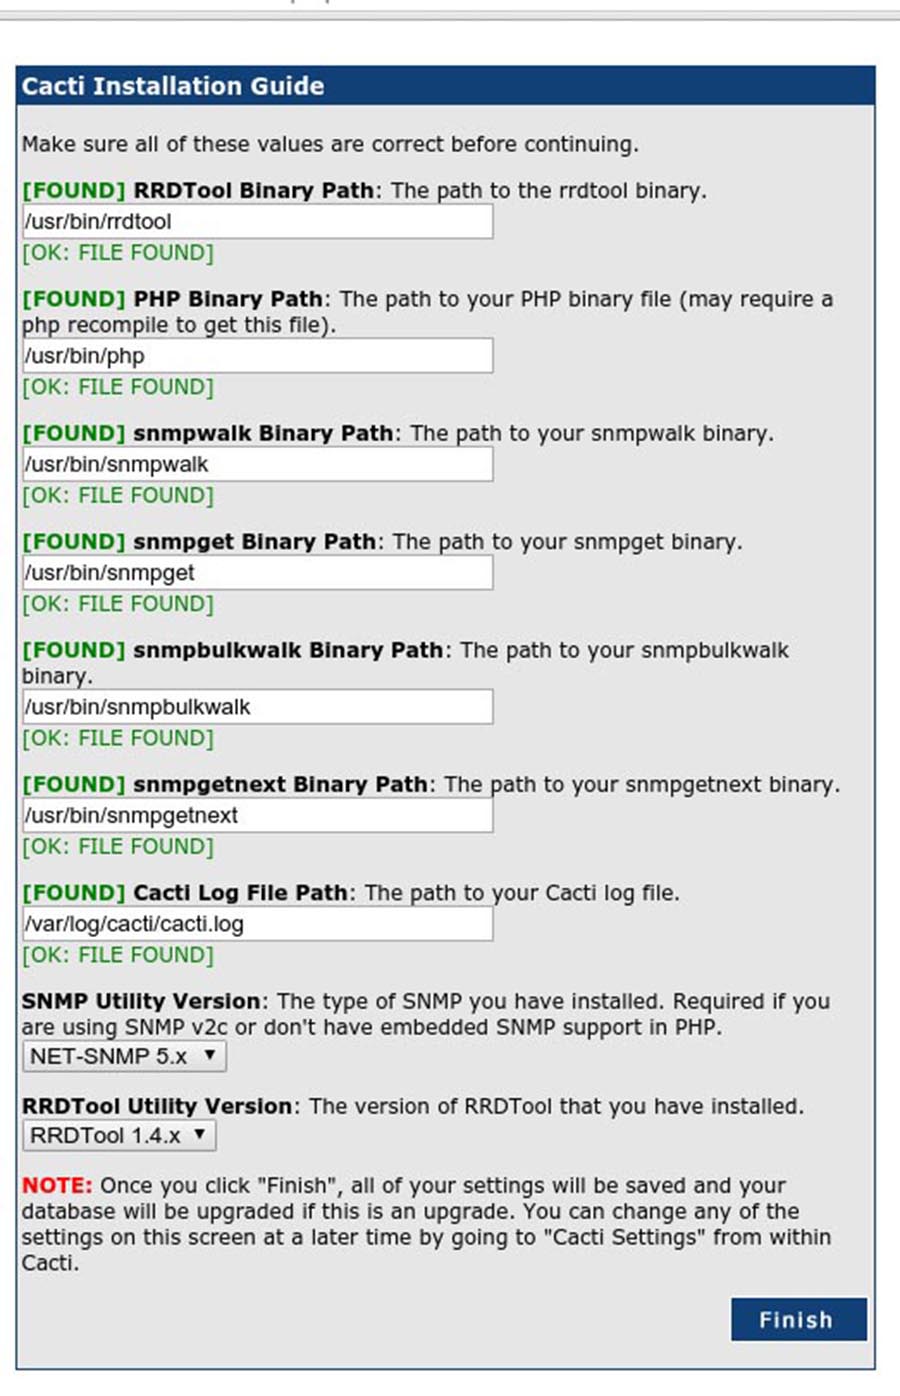
acti will now check for the packages it needs to run properly. Make sure all the checks appear with an “OK” status, and then click Finish.
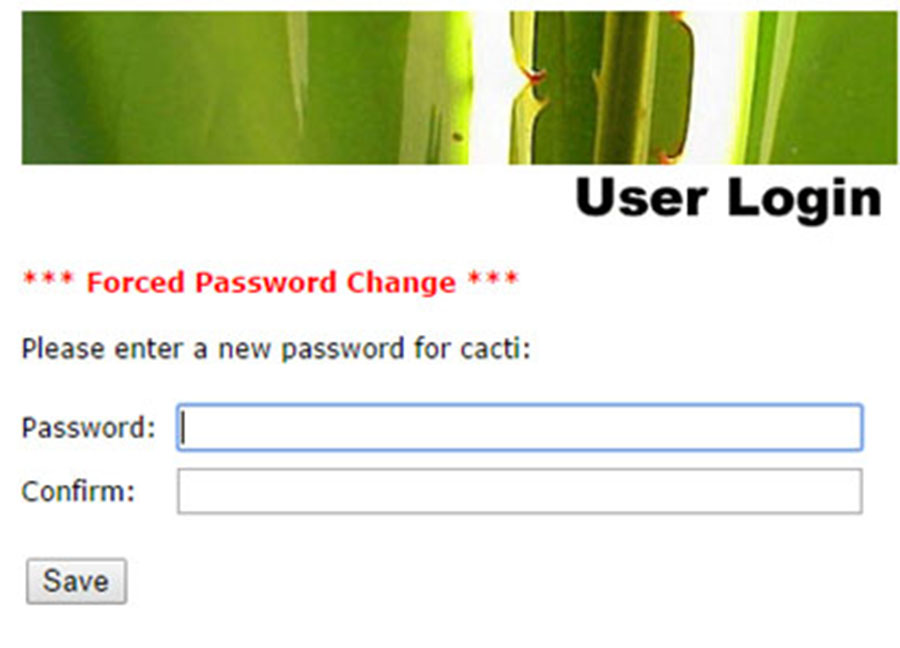
The next page is the login page. The first time you log into Cacti, use admin as username and password
Congratulation’s! You have successfully installed Cacti. Thanks for using this tutorial for installing Apache Cassandra on Ubuntu 16.04 LTS (Xenial Xerus) system. For additional help or useful information, we recommend you to check the official Cacti Monitoring web site.


