How To Install WildFly 16.0.0.Final on Ubuntu 18.04 LTS

Install WildFly on Ubuntu 18

The WildFly implements the Java Enterprise Edition (Java EE). It is among the most common source Java server applications. It offers you an administration dashboard to manage single or multiple domains efficiently.

This article assumes you have at least basic knowledge of Linux, know how to use the shell, and most importantly, you host your site on your own VPS. The installation is quite simple and assumes you are running in the root account, if not you may need to add ‘sudo’ to the commands to get root privileges. I will show you through the step by step installation WildFly on a Ubuntu 18.04 (Bionic Beaver) server.

Install WildFly on Ubuntu 18.04 LTS

Step 1. First, make sure that all your system packages are up-to-date

sudo apt update
sudo apt upgrade

Step 2. Download and install Java.

In order to run WildFly, Java has to be installed on the server so run the following command to install the Java Development Kit package (JDK):

sudo apt install default-jdk

Step 3. Create WildFly User.

We will create a new system user and group named wildfly with home directory /opt/wildfly that will run the WildFly service:

sudo groupadd -r wildfly
sudo useradd -r -g wildfly -d /opt/wildfly -s /sbin/nologin wildfly

Step 4. Download WildFly latest version

First, Download the latest version of WildFly on the server and extract it using the following commands:

wget https://download.jboss.org/wildfly/$WILDFLY_VERSION/wildfly-$WILDFLY_VERSION.tar.gz -P /tmp
sudo tar xf /tmp/wildfly-$WILDFLY_VERSION.tar.gz -C /opt/
[php]


Next, create a symbolic link wildfly which will point to the WildFly installation directory:
[php]
sudo ln -s /opt/wildfly-$WILDFLY_VERSION /opt/wildfly
sudo chown -RH wildfly: /opt/wildfly

Step 5. Configure Systemd WildFly.

Start by creating a directory which will hold the WildFly configuration file:
sudo mkdir -p /etc/wildfly
sudo cp /opt/wildfly/docs/contrib/scripts/systemd/wildfly.conf /etc/wildfly/

By default, WildFly will run in a standalone mode and will listen on all interfaces. You can edit the file according to your needs:

nano /etc/wildfly/wildfly.conf

# The configuration you want to run
WILDFLY_CONFIG=standalone.xml

# The mode you want to run
WILDFLY_MODE=standalone

# The address to bind to
WILDFLY_BIND=0.0.0.0

Next copy the WildFly launch.sh script to the /opt/wildfly/bin/ directory:

sudo cp /opt/wildfly/docs/contrib/scripts/systemd/launch.sh /opt/wildfly/bin/
sudo sh -c 'chmod +x /opt/wildfly/bin/*.sh'
sudo cp /opt/wildfly/docs/contrib/scripts/systemd/wildfly.service /etc/systemd/system/

Then, start the WildFly service by executing:

sudo systemctl daemon-reload
sudo systemctl start wildfly
sudo systemctl enable wildfly

Step 6. Configure the Firewall for WildFly.

Allow traffic on port 8080 type the following command:

sudo ufw allow 8080/tcp

Step 7. Accessing WildFly

WildFly will be available on HTTP port 8080 by default. Open your favorite browser and navigate to http://yourdomain.com:8080 or http://server-ip:8080 and complete the required the steps to finish the installation.

Congratulation’s! You have successfully installed WildFly. Thanks for using this tutorial for installing WildFly on your Ubuntu 18.04 system. For additional help or useful information, we recommend you to check the official WildFly website.

How To Install Kubernetes v1.14 on Ubuntu 18.04 LTS

Install Kubernetes on Ubuntu 18

Kubernetes is a free and open-source container management system that provides a platform for deployment automation, scaling, and operations of application containers across clusters of host computers. With Kubernetes, you can freely make use of the hybrid,on-premise, and public cloud infrastructure in order to run deployment tasks of your organization.

This article assumes you have at least basic knowledge of Linux, know how to use the shell, and most importantly, you host your site on your own VPS. The installation is quite simple and assumes you are running in the root account, if not you may need to add ‘sudo’ to the commands to get root privileges. I will show you through the step by step installation Kubernetes on a Ubuntu 18.04 (Bionic Beaver) server.

Install Kubernetes on Ubuntu 18.04 LTS

Step 1. First, make sure that all your system packages are up-to-date

sudo apt update
sudo apt upgrade

Step 2. Installing Docker.

Now we have to install Docker because Docker images will be used for managing the containers in the cluster. Run the following commands:

sudo apt install docker.io

Once the Docker is installed ensure that it is enabled to start after reboot:

sudo systemctl enable docker 
sudo systemctl start docker

Step 3. Installing Kubernetes on Ubuntu.

First, add the Kubernetes signing key on both the nodes:

curl -s https://packages.cloud.google.com/apt/doc/apt-key.gpg | sudo apt-key add

Next, add Xenial Kubernetes Repository on both the nodes:

sudo apt-add-repository "deb http://apt.kubernetes.io/ kubernetes-xenial main"

Step 4. Installing Kubeadm.

The final step in the installation process is to install Kubeadm on both the nodes through the following command:

sudo apt install kubeadm

Check the version number of Kubeadm and also verify the installation through the following command:

kubeadm version

Step 4. Kubernetes Deployment.

First, disable swap memory (if running) on both the nodes:

sudo swapoff -a

Next, give hostnames to each node:

sudo hostnamectl set-hostname master-node
sudo hostnamectl set-hostname slave-node

Initialize Kubernetes on the master node:


sudo kubeadm init --pod-network-cidr=10.244.0.0/16
mkdir -p $HOME/.kube
sudo cp -i /etc/kubernetes/admin.conf $HOME/.kube/config
sudo chown $(id -u):$(id -g) $HOME/.kube/config

You can check the status of the master node by running the following command:

kubectl get nodes

Deploy a Pod Network through the master node:

A pod network is a medium of communication between the nodes of a network:

sudo kubectl apply -f https://raw.githubusercontent.com/coreos/flannel/master/Documentation/kube-flannel.yml

Use the following command in order to view the status of the network:

kubectl get pods --all-namespaces

Now when you see the status of the nodes, you will see that the master-node is ready:

sudo kubectl get nodes

Next, add the slave node to the network in order to form a cluster:

sudo kubeadm join 192.168.100.6:6443 --token 06tl4c.oqn35jzecidg0r0m --discovery-token-ca-cert-hash sha256:c40f5fa0aba6ba311efcdb0e8cb637ae0eb8ce27b7a03d47be6d966142f2204c

Now when you run the following command on the master node, it will confirm that two nodes, the master node, and the server nodes are running on your system:

sudo kubectl get nodes

Congratulation’s! You have successfully installed Kubernetes. Thanks for using this tutorial for installing Kubernetes on Ubuntu 18.04 systems. For additional help or useful information, we recommend you to check the official Kubernetes website.

How To Install phpMyAdmin 4.8.5 with Nginx on Ubuntu 18.04 LTS

Install phpMyAdmin with Nginx on Ubuntu 18

phpMyAdmin is a web-based client written in php for managing MySQL and MariaDB databases. It provides a user friendly web interface to access and manage your databases. To ease usage to a wide range of people, phpMyAdmin is being translated into 72 languages and supports both LTR and RTL languages.

This article assumes you have at least basic knowledge of Linux, know how to use the shell, and most importantly, you host your site on your own VPS. The installation is quite simple and assumes you are running in the root account, if not you may need to add ‘sudo’ to the commands to get root privileges. I will show you through the step by step installation phpMyAdmin with Nginx on an Ubuntu 18.04 LTS (Bionic Beaver) server.

Install phpMyAdmin with Nginx on Ubuntu

Step 1. First, make sure that all your system packages are up-to-date

sudo apt-get update
sudo apt-get upgrade


<strong> Step 2. Installing phpMyAdmin on Ubuntu 18.04 LTS.
</strong>

Use this command to install phpmyadmin on Ubuntu 18.04:
[php]
sudo apt install phpmyadmin

The installer will ask you to choose the web server that should be automatically configured to run phpMyAdmin. There is no option to choose Nginx, press TAB to select OK and then Enter. We’ll configure Nginx in the next section.
configuring-phpmyadmin-web-server

Next, the installer will ask you whether you want to use dbconfig-common tool to set up the database. Select Yes and hit Enter.
configuring-phpmyadmin-database

Enter a password for phpMyAdmin to register with the database, select OK and press Enter.
configuring-phpmyadmin-password

You will be prompted to confirm the password, enter the same password, select OK and press Enter.
configuring-phpmyadmin-confirm-password

Step 3. Configure Administrative MySQL.

Start by logging in to the MySQL server as the root user:

sudo mysql

From within the MySQL shell execute the following commands which will create a new administrative user and grant appropriate permissions:

CREATE USER 'padmin'@'localhost' IDENTIFIED BY 'change-with-your-secure-password';GRANT ALL PRIVILEGES ON *.* TO 'padmin'@'localhost' WITH GRANT OPTION;

Step 4. Configure Nginx to serve phpMyAdmin.

 In Nginx, virtual host file can be found in etc/nginx/snippets directory. Let’s create a file called “phpmyadmin.conf”:
sudo nano /etc/nginx/snippets/phpmyadmin.conf 

Add the following content:

location /phpmyadmin {
    root /usr/share/;
    index index.php index.html index.htm;
    location ~ ^/phpmyadmin/(.+\.php)$ {
        try_files $uri =404;
        root /usr/share/;
        fastcgi_pass unix:/run/php/php7.2-fpm.sock;
        fastcgi_index index.php;
        fastcgi_param SCRIPT_FILENAME $document_root$fastcgi_script_name;
        include /etc/nginx/fastcgi_params;
    }

    location ~* ^/phpmyadmin/(.+\.(jpg|jpeg|gif|css|png|js|ico|html|xml|txt))$ {
        root /usr/share/;
    }
}

Then, add the following line to each domain’s server block where you want to access phpMyAdmin using: domain.com/phpmyadmin:

include snippets/phpmyadmin.conf;
### /etc/nginx/conf.d/domain.com.conf

server {

    # . . . other code

    include snippets/phpMyAdmin.conf;

    # . . . other code 

}

Step 5. Finally, test phpMyAdmin.

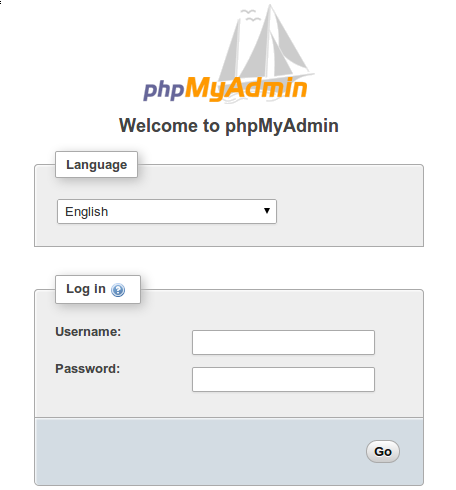
Now open your browser and surf to http://youripaddress/phpMyAdmin and your phpmyadmin will ask you for user and password of your mysql installation, you can use root as user and the root mysql password, or any other mysql user/password.


phpMyAdmin-login

Congratulation’s! You have successfully installed phpMyAdmin. Thanks for using this tutorial for installing phpMyAdmin with Nginx on Ubuntu 18.04 LTS system. For additional help or useful information, we recommend you to check the official phpMyAdmin web site.

How To Install Odoo 12 on Ubuntu 18.04 LTS

Install Odoo on Ubuntu 18

Odoo is one of the most popular and most powerful Open Source ERP business software based on the Python programming language. It is an web based fully featured application, and comes with Open Source CRM, Point of Sales, Human Resource Management, Point of Sales, Billing and Accounting, Event Management, Email Marketing, Order Tracking etc. This application is helpful to maintain the ERP in any business.

This article assumes you have at least basic knowledge of Linux, know how to use the shell, and most importantly, you host your site on your own VPS. The installation is quite simple and assumes you are running in the root account, if not you may need to add ‘sudo’ to the commands to get root privileges. I will show you through the step by step installation Odoo on a Ubuntu 18.04 (Bionic Beaver) server.

Odoo Features

  • Website Builder, which supports WYSIWYG editor, version control, form builder and Multi Website with an option to add blogs, forum and slide shows.
  • Multiple themes and inbuilt e-commerce software.
  • Odoo has contract management as well as subscription management features.
  • Customizable project management and timesheets options, it has inbuilt Invoicing and Project management features.
  • Full featured Accounting software which includes VoIP integration including an option to send mass mailis and links tracking.
  • Inbuilt CRM which does accurate forecasting and shows real time overview.

Install Odoo on Ubuntu 18.04 LTS

Step 1. First make sure that all your system packages are up-to-date

sudo apt-get update
sudo apt-get upgrade

Step 2. Installing and configure PostgreSQL.

Install the Postgres package from the Ubuntu’s default repositories:

sudo apt-get install postgresql

Once it is installed, enable the PostgreSQL server to start automatically upon server reboot:

systemctl enable postgresql
systemctl start postgresql

Step 3. Installing Odoo on Ubuntu 18.04 LTS.

The first step, add the Odoo repository to the server. In order to do it, run the following commands:

wget -O - https://nightly.odoo.com/odoo.key | apt-key add -
echo "deb http://nightly.odoo.com/11.0/nightly/deb/ ./" >> /etc/apt/sources.list.d/odoo.list

Next, install Odoo using the apt package manager:

apt install odoo

After the installation completes, you can check the status of the Odoo service:

systemctl status odoo

Then, edit Odoo’s configuration file and set the master admin password:

nano /etc/odoo/odoo.conf

Uncomment the ‘admin_passwd’ line, and set a password as shown below:

admin_passwd = MASTER_PASSWORD

Restart the Odoo instance for the changes to take effect:

systemctl restart odoo

Step 4. Accessing Odoo.

Odoo will be available on HTTP port 8069 by default. Open your favorite browser and navigate to http://yourdomain.com:8069 or http://server-ip:8069.

Congratulation’s! You have successfully installed Odoo. Thanks for using this tutorial for installing Odoo Open Source ERP on Ubuntu 18.04 LTS (Bionic Beaver) system. For additional help or useful information, we recommend you to check the official Odoo web site.

How To Install Webmin (V1.900.tar.gz )on Ubuntu 18.04 LTS

Install Webmin on Ubuntu 18

Webmin is a free control Panel for managing VPS. Webmin is a web based interface which is used to manage VPS web hosting server. With the help of webmin you can setup user account, apache, dns and file sharing and other actions. Webmin very suitable for beginners who do not know much about the unix or linux command line. In this tutorial we will show you how to install Webmin on Ubuntu 18.04 LTS. Continue reading “How To Install Webmin (V1.900.tar.gz )on Ubuntu 18.04 LTS”