How To Install Fail2Ban on Ubuntu

Install Fail2Ban on Ubuntu

Fail2Ban is a utility that is used to detect and prevent brute force intrusion. By scanning logs for certain actions, such as repeated failed login attempts, Fail2Ban is able to alter firewall configurations to halt further events. This article assumes you have at least basic knowledge of linux, know how to use the shell, and most importantly, you host your site on your own VPS. Follow guide how to install Fail2Ban on Ubuntu.

In this tutorial we will show you how to install and configuration of Fail2Ban on your Ubuntu server.

Install Fail2Ban on Ubuntu

Step 1. First log-in as root user and enter the following command to install Fail2ban.

 apt-get install fail2ban

Step 2. Once that has finished, go ahead and create your “local” jail (this is where you define your overrides of jail.conf). You can read more about jails here.

 cp /etc/fail2ban/jail.conf /etc/fail2ban/jail.local

Step 3. Setup Fail2ban default configuration.

 nano /etc/fail2ban/jail.local

Now, you will see default section with some basic rules that are followed by fail2ban itself. If you want to add some extra layer of protection to your server, then you can customize the each rule section as per your needs. There are few lines act as basic setup you can edit as necessary to suit your need including: ignoreip, bantime, findtime, and maxretry. You can read what each line means in the explanation available there.

[DEFAULT]

# "ignoreip" can be an IP address, a CIDR mask or a DNS host. Fail2ban will not
# ban a host which matches an address in this list. Several addresses can be
# defined using space separator.
ignoreip = 127.0.0.1/8

# "bantime" is the number of seconds that a host is banned.
bantime = 600

# A host is banned if it has generated "maxretry" during the last "findtime"
# seconds.
findtime = 600
maxretry = 3

# Destination email address used solely for the interpolations in
# jail.{conf,local} configuration files.
destemail = root@localhost

Step 4. Restarting Fail2Ban service.

 service fail2ban restart

Congratulation’s! You have successfully installed Fail2Ban. Thanks for using this tutorial for installing Fail2Ban on Linux ubuntu system. For additional help or useful information, we recommend you to check the official Fail2Ban web site.

How To Install Webmin on Ubuntu

Install Webmin on Ubuntu

Webmin is a free control Panel for managing VPS. Webmin is a web based interface which is used to manage VPS web hosting server. With the help of webmin you can setup user account, apache, dns & file sharing and other actions. Webmin very suitable for beginners who do not know much about the unix or linux command line. For future reference, I will show you a steps to setup on Webmin on Ubuntu server.

This article assumes you have at least basic knowledge of linux, know how to use the shell, and most importantly, you host your site on your own VPS. The installation is quite simple. I will show you through the step by step installation Webmin on Ubuntu server.

In this tutorial we will show you how to install and configuration of Webmin on your Ubuntu server.

Install Webmin on Ubuntu

Step 1. First add repository.

 nano /etc/apt/sources.list

Then, add the following lines:

deb http://download.webmin.com/download/repository sarge contrib
deb http://webmin.mirror.somersettechsolutions.co.uk/repository sarge contrib

Step 2. Fetch and install the GPG key:

sudo wget http://www.webmin.com/jcameron-key.asc
sudo apt-key add jcameron-key.asc

Step 3. Install Webmin.

Install Webmin on Ubuntu with the following command:

sudo apt-get update
sudo apt-get install webmin

Step 4. Start webmin.

 /etc/init.d/webmin start

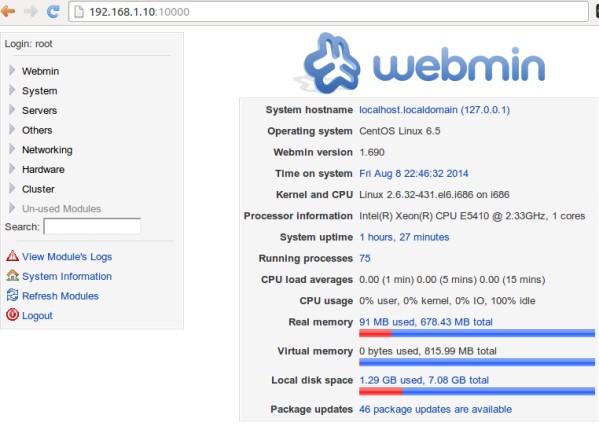
Step 5. Finaly, we can access the webmin panel using our web browser. Webmin use 10000 as its default port. Type this into our URL address web browser. https://ip-address:10000 then login as super user or root access priviliges. If you are using a firewall, please open port 80 and 10000 to enable access to the control panel.

webmin-ubuntu-server

Congratulation’s! You have successfully installed Webmin. Thanks for using this tutorial for installing Webmin control panel in Ubuntu system. For additional help or useful information, we recommend you to check the official Webmin web site.

You Might Also Like: How To Install Webmin on CentOS

How To Install phpMyAdmin on Nginx

Install phpMyAdmin on Nginx

PhpMyaAdmin is the web based administration tool for managing the MySQL, MariaDB and Drizzle servers, it helps in performing databases activities such as creating, deleting ,querying , tables, columns, relations, indexes, users, permissions, etc. This article assumes you have at least basic knowledge of linux, know how to use the shell, and most importantly, you host your site on your own VPS and asume and that you already have Nginx installed on the system. You will also need php-fpm to have phpmyadmin working on Nginx.

In this tutorial we will show you how to install and configuration of phpMyaAdmin on Nginx web server on your CentOS 6 server.

Install phpMyAdmin on Nginx

Step 1. First add EPEL yum repository your system.

CentOS 6:

 rpm -Uvh http://dl.fedoraproject.org/pub/epel/6/x86_64/epel-release-6-8.noarch.rpm

CentOS 7:

 rpm -Uvh http://dl.fedoraproject.org/pub/epel/7/x86_64/e/epel-release-7-1.noarch.rpm

Step 2. Install phpMyAdmin using the following command.

 yum -y install phpmyadmin php

Step 3. Configure nginx to serve phpMyAdmin.

In Nginx, virtual host file can be found in /etc/nginx/conf.d directory. Lets create file called “phpmyadmin.conf”.

#nano /etc/nginx/conf.d/phpmyadmin.wpcademy.com.conf

server {
listen   80;
server_name phpmyadmin.wpcademy.com;
root /var/www/html/phpMyAdmin;
 
location / {
index  index.php;
}
 
## Images and static content is treated different
location ~* ^.+.(jpg|jpeg|gif|css|png|js|ico|xml)$ {
access_log        off;
expires           30d;
}
 
location ~ /\.ht {
deny  all;
}
 
location ~ /(libraries|setup/frames|setup/libs) {
deny all;
return 404;
}
 
location ~ \.php$ {
include /etc/nginx/fastcgi_params;
fastcgi_pass 127.0.0.1:9000;
fastcgi_index index.php;
fastcgi_param SCRIPT_FILENAME /var/www/html/phpMyAdmin$fastcgi_script_name;
}
}

Create required directory and enable Nginx virtual host for phpmyadmin.

 mkdir -p /var/www/html/phpMyAdmin

Step 4. Restart the services.

service nginx restart
service php-fpm restart


Step 5. Finally, test phpMyAdmin.

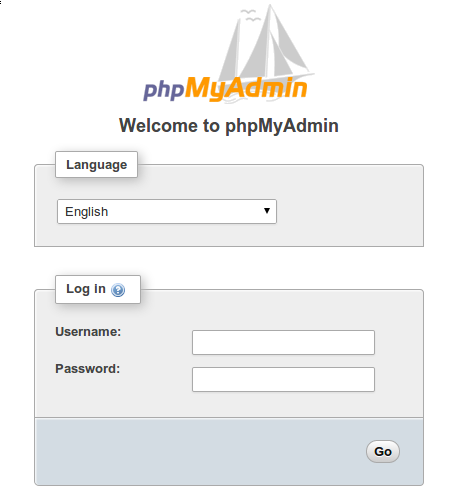
Now open your browser and surf to http://youripaddress/phpMyAdmin or http://yourdomin.com/phpMyAdmin and your phpmyadmin will ask you for user and password of your mysql installation, you can use root as user and the root mysql password, or any other mysql user/password.

phpMyAdmin-login

Congratulation’s! You have successfully installed phpMyaAdmin with Nginx. Thanks for using this tutorial for installing phpMyaAdmin on Nginx web server on Linux system. For additional help or useful information, we recommend you to check the official phpMyaAdmin web site.

How To Install Eclipse Luna on Ubuntu 14.04

Install Eclipse Luna on Ubuntu 14.04

Eclipse is an open source and free multi-language and multi-platform (Windows , Linux and Mac) software development program that used to build JAVA based web applications. It is written in Java program and can be used to develop Java based applications and other various plugins, including languages like C, C++, PHP, Perl, Python, Ruby and Rails framework and much more.

This article assumes you have at least basic knowledge of linux, know how to use the shell, and most importantly, you host your site on your own VPS. The installation is quite simple and assumes you are running in the root account, if not you may need to add ‘sudo’ to the commands to get root privileges. I will show you through the step by step installation Eclipse in Ubuntu 14.04 server.

Install Eclipse Luna on Ubuntu 14.04

Step 1. First, Install Java required packages.

sudo apt-get update
sudo apt-get install openjdk-7-jdk

Step 2. Download Eclipse Luna.

Download latest eclipse package. This guide uses Eclipse IDE for Java Developers version. Another popular versions are Eclipse IDE for Java EE Developers and Eclipse for PHP Developers. Select also 32-bit or 64-bit version depending on your system:

 tar -zxvf eclipse-java-luna-SR1-linux-gtk-x86_64.tar.gz -C /opt

Making a Symlink:

 sudo ln -s /opt/eclipse/eclipse /usr/local/bin/

Step 3. Create desktop launcher.

Create a new file eclipse.desktop in /usr/share/applications/ and add the below code:

[Desktop Entry]
Name=Eclipse
Type=Application
Exec=/opt/eclipse/eclipse
Terminal=false
Icon=/opt/eclipse/icon.xpm
Comment=Integrated Development Environment
NoDisplay=false
Categories=Development;IDE;
Name[en]=eclipse.desktop

Now install that desktop file using the below command:

 sudo desktop-file-install /usr/share/applications/eclipse.desktop

For Eclipse icon to be displayed in dash, run following command:

 sudo cp /opt/eclipse/icon.xpm /usr/share/pixmaps/eclipse.xpm

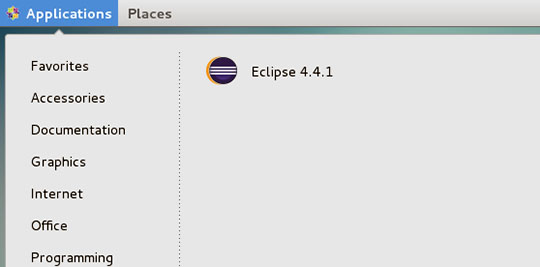
Install Eclipse Luna on Ubuntu 14.04

Congratulation’s! You have successfully installed Eclipse. Thanks for using this tutorial for installing Eclipse Luna on Ubuntu 14.04 system. For additional help or useful information, we recommend you to check the official Eclipse web site.

You Might Also Like: How To Install Eclipse Luna on CentOS 7

How To Install Seafile on Ubuntu 14.04

Install Seafile on Ubuntu 14

Seafile is a open source cloud storage software. It offers file sharing and syncing for individual users and groups, it provides client side encryption and easy access from mobile devices. Also easily integrated with local services such as LDAP and WebDAV or can be deployed using advanced network services and databases like MySQL, SQLite, PostgreSQL, Memcached, Nginx or Apache Web Server.

This article assumes you have at least basic knowledge of linux, know how to use the shell, and most importantly, you host your site on your own VPS. The installation is quite simple. We will show you through the step by step How To Install Seafile on Ubuntu 14.04.

Install Seafile on Ubuntu 14.04

Step 1. First, you need to update the system to ensure that we have all of the latest software installed.

 apt-get update

Step 2. Install required packages.

Install LAMP:

 sudo apt-get install apache2 mysql-server php5 libapache2-mod-php5

Install Python modules:

 sudo apt-get install python2.7 sqlite python-simplejson python-setuptools python-imaging python-mysqldb

Step 3. Download the Seafile components.

You need to download the last relase of Seafile:

 wget https://bitbucket.org/haiwen/seafile/downloads/seafile-server_4.0.6_x86-64.tar.gz

Extract the tarball into the current directory:

 
tar xzvf seafile-server*
cd seafile-server*

Step 4. Install Seafile server.

Run this script which will create the required databases and directories for the Seafile server and and answer all questions using the following configuration options, after the script verifies the existence of all Python required modules:

 ./setup-seafile-mysql.sh

After Seafile server successfully installs, it will generate some useful information such as what ports needs to be open on your Firewall to allow external connection and what scripts to handle in order to start the server.

Step 5. Starting the Seafile services.

Create startup script for the Seafile server like this:

 #nano /etc/init.d/seafile
#!/bin/bash
# Change the value of "user" to your linux user name
user=haiwen
# Change the value of "seafile_dir" to your path of seafile installation
seafile_dir=/data/haiwen
script_path=${seafile_dir}/seafile-server-latest
seafile_init_log=${seafile_dir}/logs/seafile.init.log
seahub_init_log=${seafile_dir}/logs/seahub.init.log
# Change the value of fastcgi to true if fastcgi is to be used
fastcgi=false
# Set the port of fastcgi, default is 8000. Change it if you need different.
fastcgi_port=8000
case "$1" in
        start)
                sudo -u ${user} ${script_path}/seafile.sh start >> ${seafile_init_log}
                if [  $fastcgi = true ];
                then
                        sudo -u ${user} ${script_path}/seahub.sh start-fastcgi ${fastcgi_port} >> ${seahub_init_log}
                else
                        sudo -u ${user} ${script_path}/seahub.sh start >> ${seahub_init_log}
                fi
        ;;
        restart)
                sudo -u ${user} ${script_path}/seafile.sh restart >> ${seafile_init_log}
                if [  $fastcgi = true ];
                then
                        sudo -u ${user} ${script_path}/seahub.sh restart-fastcgi ${fastcgi_port} >> ${seahub_init_log}
                else
                        sudo -u ${user} ${script_path}/seahub.sh restart >> ${seahub_init_log}
                fi
        ;;
        stop)
                sudo -u ${user} ${script_path}/seafile.sh $1 >> ${seafile_init_log}
                sudo -u ${user} ${script_path}/seahub.sh $1 >> ${seahub_init_log}
        ;;
        *)
                echo "Usage: /etc/init.d/seafile {start|stop|restart}"
                exit 1
        ;;
esac

Add directory for log files:

 mkdir /path/to/seafile/dir/logs

Create a file /etc/init/seafile.conf:

 #nano /etc/init/seafile.conf
start on (started mysql
and runlevel [2345])
stop on (runlevel [016])

pre-start script
/etc/init.d/seafile-server start
end script

post-stop script
/etc/init.d/seafile-server stop
end script,

Make the seafile-sever script executable:

 sudo chmod +x /etc/init.d/seafile

Now try using the service and command to start a new Seafile server instance:

 service seafile start

Step 6. Accessing Seafile.

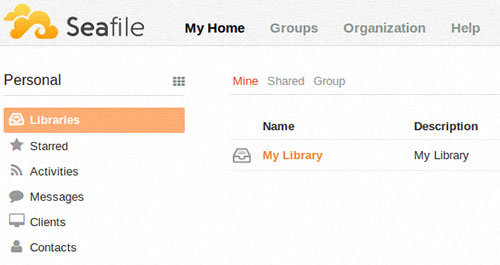
Seafile cloud storage will be available on HTTP port 8000 by default. Open your favorite browser and navigate to http://yourdomain.com:8000 or http://server-ip:8000. Enter the admin email id and password to login  which you have created at the time of installation. If you are using a firewall, please open port 8000 to enable access to the control panel.

Install Seafile on Ubuntu 14.04

Congratulation’s! You have successfully installed Seafile. Thanks for using this tutorial for installing Seafile open source cloud storage on Ubuntu 14.04 system.

You Might Also Like: How To Install Seafile on CentOS 6

How To Install Virtualmin on Ubuntu 14.04

install virtualmin on ubuntu

Virtualmin is an advanced web server management panel, and a very good alternative to cPanel, with the same administration structure based on root users, resellers, and clients. Once installed, you will be able to manage Apache, Nginx, PHP, DNS, MySQL, PostgreSQL, mailboxes, FTP, SSH, SSL, Subversion/Git repositories and many more.

This article assumes you have at least basic knowledge of linux, know how to use the shell, and most importantly, you host your site on your own VPS. The installation is quite simple. I will show you through the step by step installation virtualmin on Ubuntu 14.04.

Step 1. First, you need to update the system to ensure that we have all of the latest software installed.

 apt-get update

Step 2. Downloading and install Virtualmin script.

 wget http://software.virtualmin.com/gpl/scripts/install.sh

Once downloaded, do a chmod +x to make the script executable:

 chmod +x install.sh

Now it is time to running virtualmin install script. Installation will take approximately 5-15 minutes depends on your server speed and power. To do so, use the command below:

./install.sh
### During the installation it will ask you for the host name make sure you enter this correctly ###

Step 3. Accessing Virtualmin.

Virtualmin web based monitoring will be available on HTTPS port 10000 by default. Open your favorite browser and navigate to http://yourdomain.com:10000 or http://server-ip:10000. If you are using a firewall, please open port 10000 to enable access to the control panel.

Congratulation’s! You have successfully installed virtualmin. Thanks for using this tutorial for installing virtualmin web server management on Ubuntu 14.04 system. For additional help or useful information, we recommend you to check the official virtualmin web site.

You Might Also Like: How To Install Virtualmin on CentOS 6

How To Install Linux Dash on Ubuntu 14.04

Install Linux Dash on Ubuntu

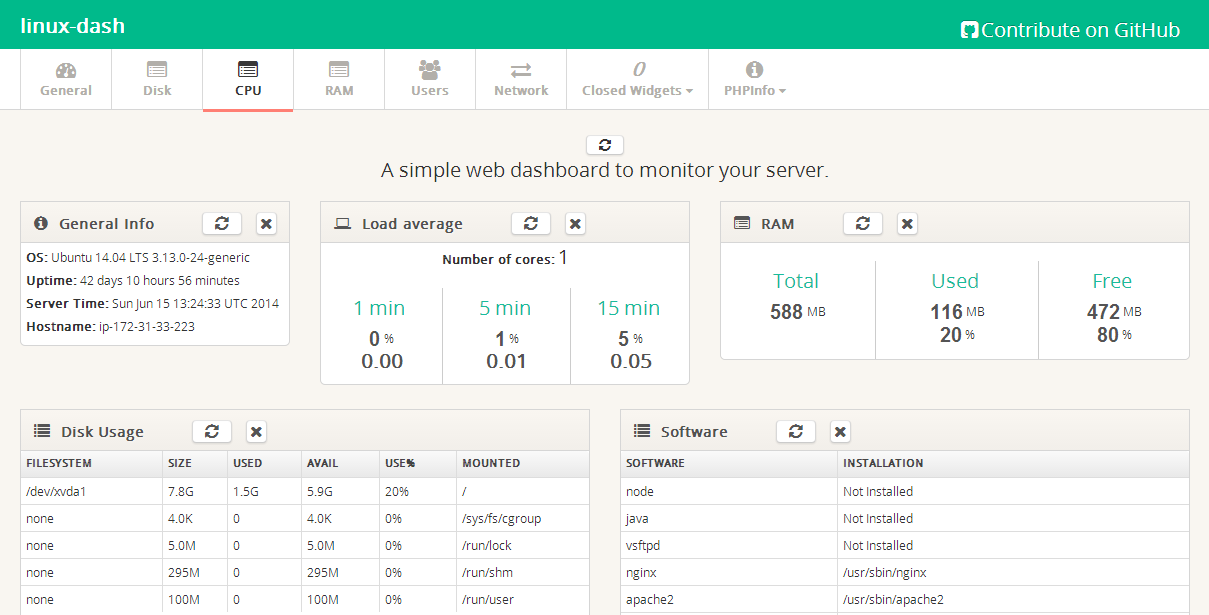
Linux-dash is a web-based lightweight monitoring dashboard for Linux machines, which can display, in real-time, various system properties, such as CPU load, RAM usage, disk usage, Internet speed, network connections, installed software’s, running processes and many more. The web statistics page allows you to drag and drop the various widgets and rearrange the display as you desire.

This article assumes you have at least basic knowledge of linux, know how to use the shell, and most importantly, you host your site on your own VPS. The installation is quite simple. I will show you through the step by step installation linux-dash on Ubuntu 14.04.

Step 1. First, install Nginx web server with php-fpm.

apt-get update
apt-get install git nginx php5-json php5-fpm php5-curl

Step 2. Configure Nginx web server.

Create Nginx virtual host for linux-dash.

 ##nano /etc/nginx/conf.d/your-domain.com
server {
   listen  80;
   server_name  your-domain.com www.your-domain.com;
 
   access_log  /var/www/your-domain.com/logs/access.log ;
   error_log    /var/www/your-domain.com/logs/error.log ;
 
   location / {
       root   /var/www/your-domain.com/public_html;
       index  index.php index.html index.htm;
 
   }
 
   error_page   500 502 503 504  /50x.html;
   location = /50x.html {
       root   /var/www/your-domain.com/public_html;
   }
 
  # pass the PHP scripts to FastCGI server listening on 127.0.0.1:9000
  location ~ .php$ {
  fastcgi_pass   127.0.0.1:9000;
  fastcgi_index  index.php;
  root    /var/www/your-domain.com/public_html;
  fastcgi_param  SCRIPT_FILENAME  /var/www/your-domain/public_html$fastcgi_script_name;
  include fastcgi_params;
  }
 
   location ~ /.ht {
       deny  all;
   }
}

Add virtual host on nginx.conf:

# nano /etc/nginx/nginx.conf
### add line like this on http section:
include /etc/nginx/conf.d/*.conf;

Configure php-fpm:

##nano /etc/php5/fpm/pool.d/www.conf 
. . .
listen = 127.0.0.1:9000
user = nginx
group = nginx
. . .

Step 3. Installing Linux Dash.

git clone https://github.com/afaqurk/linux-dash.git
cp -r linux-dash/ /var/www/your-domain.com/public_html
chown -R nginx:nginx /var/www/your-domain.com/public_htm


Step 4. Restart Nginx web server as well as php-fpm.

service php5-fpm restart
service nginx restart


Step 5. Access Linux Dash.

The linux-dash web based monitoring will be available on HTTP port 80 by default. Open your favorite browser and navigate to http://yourdomain.com or http://server-ip. Main page gives you all the information about system, memory, CPU and IO details. If you are using a firewall, please open port 80 to enable access to the control panel.

Linux-dash-web-interface

Congratulation’s! You have successfully installed Linux Dash. Thanks for using this tutorial for installing linux-dash web based monitoring on Ubuntu 14.04 system.