How To Install Atom Text Editor on Ubuntu 18.04 LTS

Install Atom Text Editor on Ubuntu 18

Atom is an open source, cross-platform code editor developed by GitHub. It has a built-in package manager, embedded Git control, smart autocompletion, syntax highlighting and multiple panes. Under the hood Atom is a desktop application built on Electron using HTML, JavaScript, CSS, and Node.js.

Atom is a desktop application built using web technologies. Most of the extending packages have free software licenses and are community-built and maintained. Atom is based on Electron (formerly known as Atom Shell), a framework that enables cross-platform desktop applications using Chromium and Node.js. It is written in CoffeeScript and Less. It can also be used as an integrated development environment (IDE).

This article assumes you have at least basic knowledge of Linux, know how to use the shell, and most importantly, you host your site on your own VPS. The installation is quite simple and assumes you are running in the root account, if not you may need to add ‘sudo’ to the commands to get root privileges. I will show you through the step by step installation Atom Text Editor on Ubuntu 18.04 (Bionic Beaver) server.

Install Atom Text Editor on Ubuntu 18.04 LTS

Step 1. First, make sure that all your system packages are up-to-date

sudo apt update
sudo apt upgrade
sudo apt install software-properties-common apt-transport-https wget

Step 2. Installing Atom Text Editor on Ubuntu 18.04.

First, download its debian (64bit) package from its official site. Open the terminal and use following wget command:

wget https://github.com/atom/atom/releases/download/v1.32.2/atom-amd64.deb

Install downloaded debian package along with its required dependencies:

dpkg -i atom-amd64.deb
apt-get install -f

Now that Atom is installed on your Ubuntu system you can launch it either from the command line by typing code or by clicking on the Atom icon (Activities -> Atom).

Congratulations! You have successfully installed Atom. Thanks for using this tutorial for installing Atom Text Editor in Ubuntu 18.04 Bionic Beaver systems. For additional help or useful information, we recommend you to check the official Atom Text Editor web site.

How To Install Minecraft Server on Ubuntu 18.04 LTS

Install Minecraft Server on Ubuntu 18

Minecraft is a game about breaking and placing blocks. The creative and building aspects of Minecraft allow players to build constructions out of textured cubes in a 3D procedurally generated world. Minecraft servers allow players to play online or via a local area network with other people. They may either be run on a hosted server, on local dedicated server hardware, a Virtual Private server on a home machine, or on your local gaming computer.

This article assumes you have at least basic knowledge of Linux, know how to use the shell, and most importantly, you host your site on your own VPS. The installation is quite simple and assumes you are running in the root account, if not you may need to add ‘sudo’ to the commands to get root privileges. I will show you through the step by step installation Minecraft Server on an Ubuntu 18.04 Bionic Beaver server.
Install Minecraft Server on Ubuntu 18.04 LTS Bionic Beaver

Step 1. First make sure that all your system packages are up-to-date by running these following apt-get commands in the terminal.

sudo apt-get update
sudo apt-get upgrade

Step 2. Installing Java-JDK.

Minecraft server setup requires Java to be installed on your system. To do this, follow these steps:

sudo apt-get install openjdk-8-jdk screen

Step 3. Installing Minecraft Server on Ubuntu 18.04 LTS.

First, create a new user for Minecraft to run as:

sudo useradd -m -r -d /opt/minecraft minecraft

Create a Minecraft directory:

mkdir minecraft
cd minecraft

Now download the java Minecraft server and install your own Minecraft server:

wget -O minecraft_server.jar https://s3.amazonaws.com/Minecraft.Download/versions/1.12.2/minecraft_server.1.12.2.jar

Accept Minecraft’s terms and conditions:

echo "eula=true" > eula.txt

Get screen up and running, so that the server can run in the background:

screen -S "Minecraft server 1"

Step 4. Running Minecraft Server.

Now you only need to run the installed server (you can edit the 1024M value to match your server’s RAM):

java -Xmx1024M -Xms1024M -jar minecraft_server.jar nogui

To get back to the normal screen, press these keys: Control+A+D, To get back to the screen where Minecraft is running:

screen -r

Congratulation’s! You have successfully installed Minecraft. Thanks for using this tutorial for installing Minecraft server on your Ubuntu 18.04 LTS system. For additional help or useful information, we recommend you to check the official Minecraft web site.

How To Install HandBrake 1.2.2 on Ubuntu 18.04 LTS

Install HandBrake on Ubuntu 18

HandBrake is a popular video transcoding tool that will convert video files into numerous different video and audio formats so they can be used on a number of supported devices.

This article assumes you have at least basic knowledge of Linux, know how to use the shell, and most importantly, you host your site on your own VPS. The installation is quite simple and assumes you are running in the root account, if not you may need to add ‘sudo’ to the commands to get root privileges. I will show you through the step by step installation HandBrake open source video transcoder on Ubuntu 18.04 Bionic Beaver server.
HandBrake Features

Convert Video from any format.
Built-in device presets e.g. iPhone, iPad, AppleTV, Android etc.
Ability to process DVD and BlueRay sources.
File Containers: .MP4(.M4V) and .MKV.
Video Encoders: H.264(x264), H.265(x265) MPEG-4 and MPEG-2 (libav), VP8 (libvpx) and Theora.
Audio Encoders: AAC, CoreAudio AAC/HE-AAC (OS X Only), MP3, Flac, AC3, or Vorbis.
Audio Pass-thru: AC-3, DTS, DTS-HD, AAC and MP3 tracks.
Title / Chapter selection.
Subtitles (VobSub, Closed Captions CEA-608, SSA, SRT).
Video Filters: Deinterlacing, Decomb, Denoise, Detelecine, Deblock, Grayscale, Cropping and scaling.

Install HandBrake on Ubuntu 18.04 LTS Bionic Beaver

Step 1. First make sure that all your system packages are up-to-date by running these following apt-get commands in the terminal.

sudo apt-get update
sudo apt-get upgrade

Step 2. Installing HandBrake.

First, you’ll need to add Handbrake’s PPA (personal package archive) to your system:

sudo add-apt-repository ppa:stebbins/handbrake-releases

Then run the commands below to update Ubuntu and install HandBrake:

sudo apt update
sudo apt install handbrake-gtk handbrake-cli

Once installed, next you can start HandBrake by searching for it Unity Dash. If the app icon doesn’t show up, try logging out and logging back in.

If you decide that you don’t want HandBrake apps installed anymore, run the commands below to remove the package:

sudo apt-get remove --autoremove handbrake-gtk handbrake-cli
sudo add-apt-repository --remove ppa:stebbins/handbrake-releases

Congratulations! You have successfully installed HandBrake. Thanks for using this tutorial for installing HandBrake open source video transcoder in Ubuntu 18.04 Bionic Beaver systems. For additional help or useful information, we recommend you to check the official HandBrake web site.

How To Install GlassFish 5.0 on Ubuntu 18.04 LTS

GlassFish

GlassFish is a popular app server that can run java based web applications for you. GlassFish 5 release supports the latest Java Platform: Enterprise Edition 7. It supports Enterprise JavaBeans, JPA, JavaServer Faces, JMS, RMI, JavaServer Pages, servlets, etc.

This article assumes you have at least basic knowledge of Linux, know how to use the shell, and most importantly, you host your site on your own VPS. The installation is quite simple and assumes you are running in the root account, if not you may need to add ‘sudo’ to the commands to get root privileges. I will show you through the step by step installation GlassFish on a Ubuntu 18.04 LTS (Bionic Beaver) server.

Install GlassFish on Ubuntu 18.04 LTS

Step 1. First make sure that all your system packages are up-to-date

sudo apt-get update
sudo apt-get upgrade

Step 2. Installing Java (JRE or JDK).

Run the following commands to install the Oracle JDK by Oracle:

apt install software-properties-common dirmngr
add-apt-repository ppa:webupd8team/java
apt-get update
apt-get install oracle-java8-installer

Please note that during the Java installation process, you will have to accept the Oracle License agreement in order to complete the installation.

Verify Installed Java version:

java -version
[php]


Result:

[php]
openjdk version "10.0.1" 2018-04-17
OpenJDK Runtime Environment (build 10.0.1+10-Ubuntu-3ubuntu1)
OpenJDK 64-Bit Server VM (build 10.0.1+10-Ubuntu-3ubuntu1, mixed mode)

Step 3. Install GlassFish on Ubuntu 18.04 LTS.

First thing to do is to go to GlassFish’s download page and download the latest stable version of GlassFish, At the moment of writing this article it is version 5:

wget http://download.oracle.com/glassfish/5.0/release/glassfish-5.0.zip

Once the Download completed successfully, extract the GlassFish archive to the document root directory on your server:

unzip glassfish-5.0.zip

Start the GlassFish server by using the following command as follows:

glassfish5/bin/asadmin start-domain

Step 4. Accessing GlassFish.

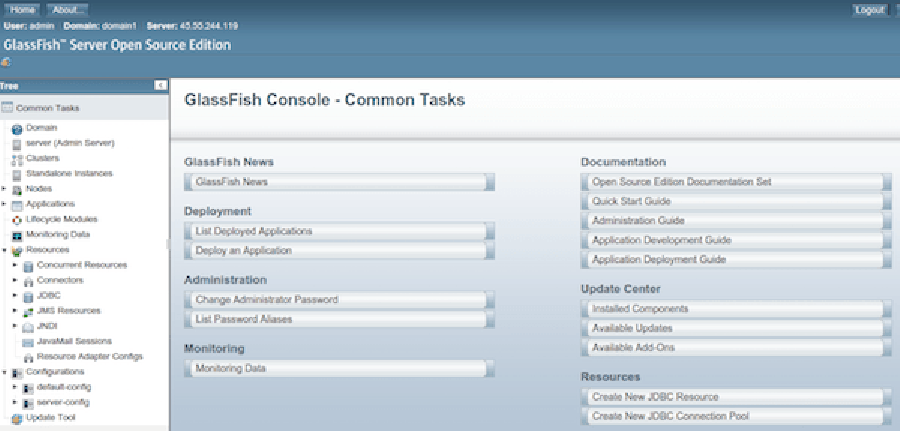
The default GlassFish Server’s port is 8080 and administration server’s port is 4848 with the administration user name as admin with no password. We can visit http://ip-address:8080/ to check the homepage of GlassFish Server and http://ip-address:4848/ to get the admin login page in our web browser and complete the required the steps to finish the installation. If you are using a firewall, please open port 4848 and 8080 to enable access to the control panel.

Install GlassFish on Ubuntu 18

Congratulation’s! You have successfully installed GlassFish. Thanks for using this tutorial for installing GlassFish on your Ubuntu 18.04 LTS (Bionic Beaver) system. For additional help or useful information, we recommend you to check the official GlassFish web site.

How To Install OwnCloud 2.5.4 on Ubuntu 18.04 LTS

Install OwnCloud on Ubuntu 18

OwnCloud is a free and open-source software which enables you to create a private “file-hosting” cloud. OwnCloud is similar to DropBox service with the diference of being free to download and install on your private server. Owncloud made by PHP and backend database MySQL (MariaDB), SQLLite or PostgreSQL. OwnCloud also enables you to easily view and sync address book, calendar events, tasks and bookmarks. You can access it via the good looking and easy to use web interface or install OwnCloud client on your Desktop or Laptop machine (supports Linux, Windows and MacOS).

This article assumes you have at least basic knowledge of Linux, know how to use the shell, and most importantly, you host your site on your own VPS. The installation is quite simple and assumes you are running in the root account, if not you may need to add ‘sudo’ to the commands to get root privileges. I will show you through the step by step installation OwnCloud on a Ubuntu 18.04 (Bionic Beaver) server.

Install OwnCloud on Ubuntu 18.04 LTS

Step 1. First make sure that all your system packages are up-to-date

sudo apt-get update
sudo apt-get upgrade

Step 2. Install LAMP (Linux, Apache, MariaDB and PHP) server.

A Ubuntu 18.04 LAMP server is required. If you do not have LAMP installed, you can follow our guide here. Also install all required PHP modules:

apt-get install php7.1-cli php7.1-gd php7.1-opcache php7.1-mysql php7.1-json php7.1-mcrypt php7.1-xml php7.1-curl

Step 3. Installing OwnCloud 10 on Ubuntu 18.04 LTS.

First thing to do is to go to OwnCloud’s download page and download the latest stable version of OwnCloud, At the moment of writing this article it is version 10:

wget https://download.owncloud.org/community/owncloud-10.0.9.zip
unzip owncloud-10.0.9.zip
sudo mv owncloud /var/www/html/owncloud/

We will need to change some folders permissions:

chown -R www-data:www-data /var/www/html/owncloud/
chmod -R 755 /var/www/html/owncloud/

Step 4. Configuring MariaDB for OwnCloud.

By default, MariaDB is not hardened. You can secure MariaDB using the mysql_secure_installation script. you should read and below each steps carefully which will set root password, remove anonymous users, disallow remote root login, and remove the test database and access to secure MariaDB:

mysql_secure_installation

Configure it like this:

- Set root password? [Y/n] y
- Remove anonymous users? [Y/n] y
- Disallow root login remotely? [Y/n] y
- Remove test database and access to it? [Y/n] y
- Reload privilege tables now? [Y/n] y

Next we will need to log in to the MariaDB console and create a database for the OwnCloud. Run the following command:

mysql -u root -p

This will prompt you for a password, so enter your MariaDB root password and hit Enter. Once you are logged in to your database server you need to create a database for OwnCloud installation:

CREATE DATABASE ownclouddb;
CREATE USER 'ownclouduser'@'localhost' IDENTIFIED BY 'YOURPASSWORD';
GRANT ALL ON ownclouddb.* TO 'ownclouduser'@'localhost';
FLUSH PRIVILEGES;
exit

Step 5. Configuring Apache web server for OwnCloud.

Create a new virtual host directive in Apache. For example, create a new Apache configuration file named ‘owncloud.conf’ on your virtual server:

touch /etc/apache2/sites-available/owncloud.conf
ln -s /etc/apache2/sites-available/owncloud.conf /etc/apache2/sites-enabled/owncloud.conf
nano /etc/apache2/sites-available/owncloud.conf

Add the following lines:

<VirtualHost *:80>
ServerAdmin [email protected]
DocumentRoot /var/www/html/owncloud/
ServerName your-domain.com
ServerAlias www.your-domain.com
<Directory /var/www/html/owncloud/>
Options FollowSymLinks
AllowOverride All
Order allow,deny
allow from all
</Directory>
ErrorLog /var/log/apache2/your-domain.com-error_log
CustomLog /var/log/apache2/your-domain.com-access_log common
</VirtualHost>

Now, we can restart Apache web server so that the changes take place:

a2ensite owncloud.conf
a2enmod rewrite
a2enmod headers
a2enmod env
a2enmod dir
a2enmod mime
systemctl restart apache2.service

Step 6. Accessing OwnCloud Configuration.

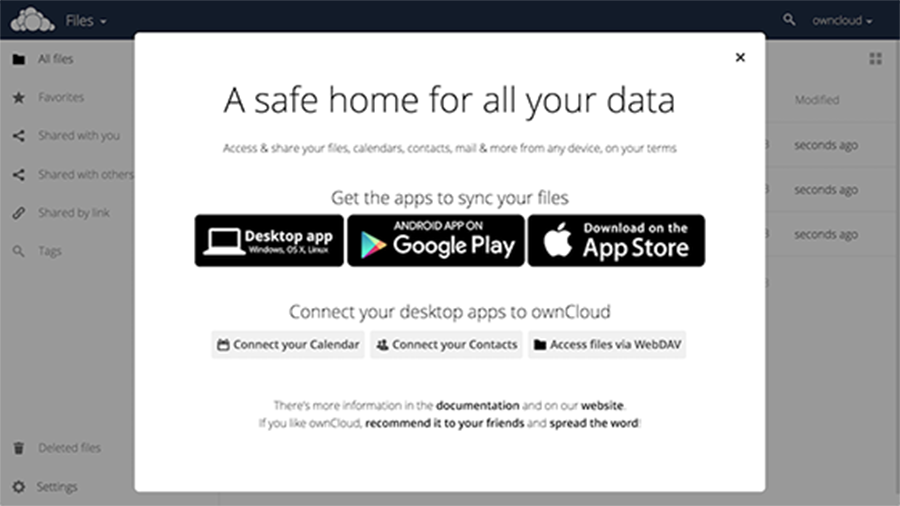
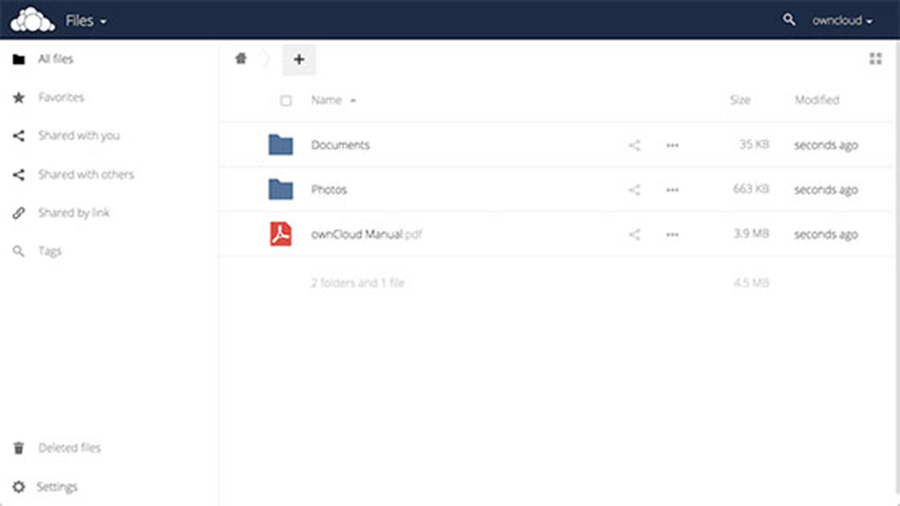
To configure ownCloud, we will use the web interface. So, go ahead and open up a web browser and point it to http://your-domain.com. You should see a web page like this. Enter username and password for the administrator user account, click on the ‘Advanced options’ hyperlink and enter the data directory (or leave the default setting), then enter database username, database password, database name, host (localhost) and click ‘Finish setup’.
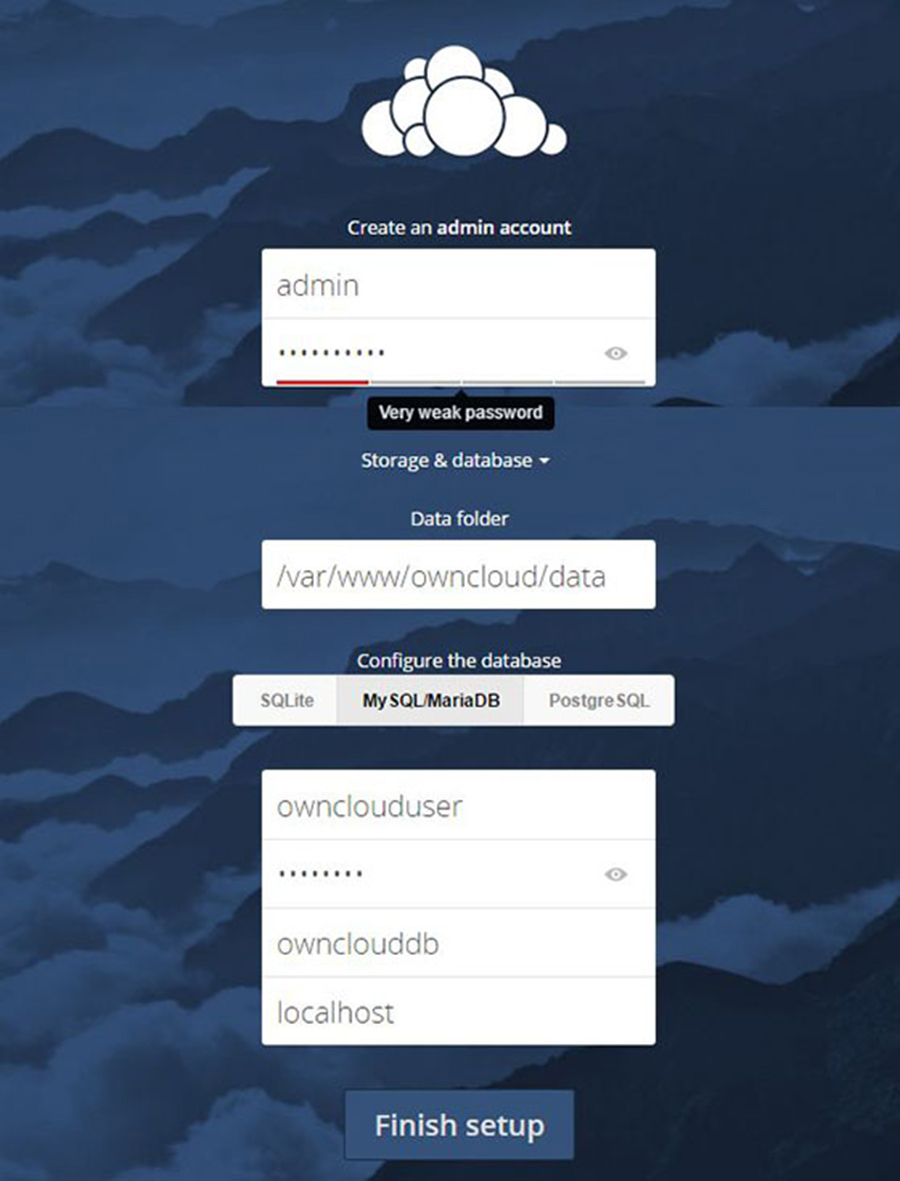
Install-OwnCloud-9-on-Ubuntu-16.04
Install-OwnCloud-9-Ubuntu-16.04
OwnCloud-9-Ubuntu-16.04-Upload
Congratulation’s! You have successfully installed OwnCloud. Thanks for using this tutorial for installing OwnCloud on Ubuntu 18.04 LTS (Bionic Beaver) system. For additional help or useful information, we recommend you to check the official OwnCloud web site.

How To Install Mattermost 5.10.0 on Ubuntu 18.04 LTS

Install Mattermost on Ubuntu 18

Mattermost is an open source, private cloud Slack-alternative. A workplace messaging system for web, PCs and phones, released under the MIT license.

This article assumes you have at least basic knowledge of Linux, know how to use the shell, and most importantly, you host your site on your own VPS. The installation is quite simple and assumes you are running in the root account, if not you may need to add ‘sudo’ to the commands to get root privileges. I will show you through the step by step installation Mattermost on a Ubuntu 18.04 LTS (Bionic Beaver) server.

Install Mattermost on Ubuntu 18.04

Step 1. First make sure that all your system packages are up-to-date

sudo apt-get update
sudo apt-get upgrade

Step 2. Install LAMP (Linux, Apache, MariaDB and PHP) server.

A Ubuntu 18.04 LAMP server is required. If you do not have LAMP installed, you can follow our guide here. Also install all required PHP modules:

apt-get install php7.1-cli php7.1-gd php7.1-opcache php7.1-mysql php7.1-json php7.1-mcrypt php7.1-xml php7.1-curl

Step 3. Installing Mattermost Server on Ubuntu 18.04 LTS.

First thing to do is to go to Mattermost’s download page and download the latest stable version of Mattermost, At the moment of writing this article it is version 5.1.0:

wget https://releases.mattermost.com/5.1.0/mattermost-5.1.0-linux-amd64.tar.gz

Unpack the Mattermost archive to the document root directory on your server:

tar -xvzf mattermost*.gz
sudo mv mattermost /opt

Next, create a storage directory for file:

sudo mkdir /opt/mattermost/data

Set up a system user and group called mattermost that will run this service, and set the ownership and permissions:

sudo useradd --system --user-group mattermost
sudo chown -R mattermost:mattermost /opt/mattermost
sudo chmod -R g+w /opt/mattermost

Set up the database driver through the /opt/mattermost/config/config.json file. In it, search for “DriverName” and “DataSource” lines and change as follows:

"DriverName": "mysql"
"DataSource": "mattermostuser:new_password_here@tcp(localhost:3306)/mattermost?charset=utf8mb4,utf8&readTimeout=30s&writeTimeout=$""

Step 4. Create a systemd unit for Mattermost.

Create a systemd file for Mattermost, /etc/systemd/system/mattermost.service and, in it, paste the following configuration:

nano /etc/systemd/system/mattermost.service

Add following content:

[Unit]
Description=Mattermost
After=network.target
After=mariadb.service
Requires=mariadb.service

[Service]
Type=notify
ExecStart=/opt/mattermost/bin/mattermost
TimeoutStartSec=3600
Restart=always
RestartSec=10
WorkingDirectory=/opt/mattermost
User=mattermost
Group=mattermost
LimitNOFILE=49152

[Install]
WantedBy=mariadb.service

Next, run the commands below to start Mattermost service:

systemctl daemon-reload
systemctl start mattermost.service
systemctl enable mattermost.service

Step 7. Accessing Mattermost.

Mattermost will be available on HTTP port 8065 by default. Open your favorite browser and navigate to http://your-domain.com:8065 or http://ip-address:8065 and continue to configure Mattermost by entering an email address and creating an account. If you are using a firewall, please open port 8065 to enable access to the control panel.

Congratulation’s! You have successfully installed Mattermost. Thanks for using this tutorial for installing Mattermost on your Ubuntu 18.04 LTS (Bionic Beaver) system. For additional help or useful information, we recommend you to check the official Mattermost web site.

How To Install Shopware 5.5.8 on Ubuntu 18.04 LTS

Install Shopware on Ubuntu 18

Shopware is the next generation of open source e-commerce software made in Germany. Based on bleeding edge technologies like Symfony 2, Doctrine 2 and Zend Framework Shopware comes as the perfect platform for your next e-commerce project. Furthermore Shopware provides an event-driven plugin system and an advanced hook system, giving you the ability to customize every part of the platform.

This article assumes you have at least basic knowledge of Linux, know how to use the shell, and most importantly, you host your site on your own VPS. The installation is quite simple and assumes you are running in the root account, if not you may need to add ‘sudo’ to the commands to get root privileges. I will show you through the step by step installation Shopware on a Ubuntu 18.04 LTS (Bionic Beaver) server.

Install Shopware on Ubuntu 18.04 LTS

Step 1. First make sure that all your system packages are up-to-date

sudo apt-get update
sudo apt-get upgrade

Step 2. Install LAMP (Linux, Apache, MariaDB and PHP) server.

A Ubuntu 18.04 LAMP server is required. If you do not have LAMP installed, you can follow our guide here. Also install all required PHP modules:

apt-get install php7.1-cli php7.1-gd php7.1-opcache php7.1-mysql php7.1-json php7.1-mcrypt php7.1-xml php7.1-curl

Step 3. Installing Shopware on Ubuntu 18.04 LTS.

First thing to do is to go to Shopware’s download page and download the latest stable version of Shopware, At the moment of writing this article it is version 5.4:

wget https://github.com/shopware/shopware/archive/v5.4.6.zip
unzip v5.4.6.zip -d /var/www/html
cd /var/www/html/shopware-5.4.6
cp -a * ..

We will need to change some folders permissions:

chown -R www-data:www-data /var/www/html/

Step 4. Configuring MariaDB for Shopware.

By default, MariaDB is not hardened. You can secure MariaDB using the mysql_secure_installation script. You should read and below each steps carefully which will set root password, remove anonymous users, disallow remote root login, and remove the test database and access to secure MariaDB.

mysql_secure_installation

Configure it like this:

- Set root password? [Y/n] y
- Remove anonymous users? [Y/n] y
- Disallow root login remotely? [Y/n] y
- Remove test database and access to it? [Y/n] y
- Reload privilege tables now? [Y/n] y

Next we will need to log in to the MariaDB console and create a database for the Shopware. Run the following command:

mysql -u root -p

This will prompt you for a password, so enter your MariaDB root password and hit Enter. Once you are logged in to your database server you need to create a database for Shopware installation:

CREATE DATABASE shopware;
GRANT ALL PRIVILEGES ON shopware.* TO 'shopware'@'localhost' IDENTIFIED BY 'strong_password';
FLUSH PRIVILEGES;
\q

Step 5. Configuring Apache web server for Shopware.

Create a new virtual host directive in Apache. For example, create a new Apache configuration file named ‘shopware.conf’ on your virtual server:

touch /etc/apache2/sites-available/shopware.conf
ln -s /etc/apache2/sites-available/shopware.conf /etc/apache2/sites-enabled/shopware.conf
nano /etc/apache2/sites-available/shopware.conf

Add the following lines:

<VirtualHost *:80>
ServerAdmin [email protected]
DocumentRoot "/var/www/html/"
ServerName your-domain.com
ServerAlias www.your-domain.com
<Directory "/var/www/html/">
Options FollowSymLinks
AllowOverride All
Order allow,deny
allow from all
</Directory>
ErrorLog /var/log/apache2/your-domain.com-error_log
CustomLog /var/log/apache2/your-domain.com-access_log common
</VirtualHost>

Now, we can restart Apache web server so that the changes take place:

a2ensite shopware.conf
a2enmod rewrite
systemctl restart apache2.service

Step 6. Accessing Shopware e-commerce.

Shopware will be available on HTTP port 80 by default. Open your favorite browser and navigate to http://yourdomain.com or http://server-ip and complete the required the steps to finish the installation. If you are using a firewall, please open port 80 to enable access to the control panel.

Congratulation’s! You have successfully installed Shopware. Thanks for using this tutorial for installing Shopware open source e-commerce on your Ubuntu 18.04 LTS (Bionic Beaver) system. For additional help or useful information, we recommend you to check the official Shopware web site.