How To Install OpenLiteSpeed on Ubuntu 16.04

Install OpenLiteSpeed on Ubuntu 16

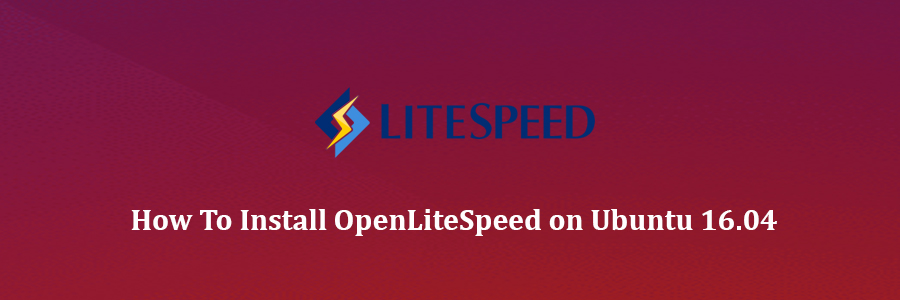
OpenLiteSpeed is an open source HTTP server developed by LiteSpeed Technologies. OpenLiteSpeed is a high performance and lightweight HTTP server which comes with a Web Gui administration interface. As far as Linux web servers are concerned, OpenLiteSpeed has some interesting features that make it a solid choice for many installations. It features Apache compatible rewrite rules, a web administration interface, and customized PHP processing optimized for the server.

Features:

Event-Driven Architecture
Fewer processes, less overhead, and enormous scalability. Keep your existing hardware.

Understands Apache Rewrite Rules
OpenLiteSpeed is mod_rewrite compatible, with no new syntax to learn. Continue to use your existing rewrite rules.

Friendly Admin Interfaces
OLS comes with a built-in WebAdmin GUI. Control panel support is available with CyberPanel.

Built for Speed and Security
Features Anti-DDoS connection and bandwidth throttling, ModSecurity v3 integration, and more.

Intelligent Cache Acceleration
Built-in full-page cache module is highly-customizable and efficient for an exceptional user experience.

PageSpeed Optimization
Automatically implement Google’s PageSpeed optimization system with the mod_pagespeed module.

PHP LiteSpeed SAPI
Native SAPI for PHP allows external applications written in PHP to run up to 50% faster.

One-Click Installation
Install OpenLiteSpeed, MariaDB and WordPress on various operating systems with just one click.

WordPress Acceleration
Experience a measurable performance boost with OpenLiteSpeed and LSCache for WordPress.


To complete this tutorial you will need an Ubuntu 16.04 server with a sudo-enabled, non-root user.

Install OpenLiteSpeed on Ubuntu 16.04

Step 1. First make sure that all your system packages are up-to-date by running these following apt-get commands in the terminal.

sudo apt-get update
sudo apt-get upgrade

Preparing your server, you need to install the following packages:

apt-get install build-essential libexpat1-dev libgeoip-dev libpng-dev libpcre3-dev libssl-dev libxml2-dev rcs zlib1g-dev

Step 2. Installing OpenLitespeed.

First thing to do is to go to OpenLitespeed’s download page and download the latest stable version of OpenLitespeed, At the moment of writing this article it is version 1.4.21:

wget http://open.litespeedtech.com/packages/openlitespeed-1.4.21.tgz

Unpack the OpenLitespeed archive to the document root directory on your server:

tar xzvf openlitespeed*
cd openlitespeed*

Then use the following command to configure the software and to compile it, This will install the entire OpenLiteSpeed system under the /usr/local/lsws location:

sudo ./configure
sudo make
sudo make install

Step 3. Configuring MariaDB for OpenLiteSpeed.

By default, MariaDB is not hardened. You can secure MariaDB using the mysql_secure_installation script. You should read and below each steps carefully which will set root password, remove anonymous users, disallow remote root login, and remove the test database and access to secure MariaDB.

mysql_secure_installation

Configure it like this:

- Set root password? [Y/n] y
- Remove anonymous users? [Y/n] y
- Disallow root login remotely? [Y/n] y
- Remove test database and access to it? [Y/n] y
- Reload privilege tables now? [Y/n] y

Step 4. Configure OpenLiteSpeed web server.

OpenLiteSpeed has an Admin Gui for management, so we will configure the admin password for the openLiteSpeed GUI, We will start by changing the administrative password using the following command:

sudo /usr/local/lsws/admin/misc/admpass.sh

You will be asked to optionally provide a username for the administrative user. If you just press ENTER, the username “admin” will be selected. Afterwards, you will be asked to select and confirm a new password for the account.

After changing the password and the username use the following command to start the web server:

sudo service lsws start

Step 5. Accessing OpenLiteSpeed.

OpenLiteSpeed will be available on HTTP port 8080 by default and admin login using port 7080. Open your favorite browser and navigate to http://yourdomain.com:8080 or https://server-ip:7080 and complete the required the steps to finish the installation. If you are using a firewall, please open port 7080 and 8080 to enable access to the control panel.

Congratulation’s! You have successfully installed OpenLiteSpeed. Thanks for using this tutorial for installing OpenLiteSpeed web server on your Ubuntu 16.04 (Xenial Xerus) system. For additional help or useful information, we recommend you to check the official OpenLiteSpeed web site.

How To Install Dokuwiki on Ubuntu 16.04

Install Dokuwiki on Ubuntu 16

DokuWiki is considered to be the most versatile open source Wiki software application which is proven to meet your demanding wiki needs. Using a very familiar interface, it allows you to easily scale and optimize using many advanced features. Utilizing files instead of a database, DokuWiki is extremely flexible with the type of system it will run on (no database server required).

This article assumes you have at least basic knowledge of linux, know how to use the shell, and most importantly, you host your site on your own VPS. The installation is quite simple and assumes you are running in the root account, if not you may need to add ‘sudo’ to the commands to get root privileges. I will show you through the step by step installation Dokuwiki on a Ubuntu 16.04 (Xenial Xerus) server.

Install Dokuwiki on Ubuntu 16.04

Step 1. First make sure that all your system packages are up-to-date by running these following apt-get commands in the terminal.

sudo apt-get update
sudo apt-get upgrade

Step 2. Install LAMP (Linux, Apache, MariaDB, PHP) server.

A Ubuntu 16.04 LAMP server is required. If you do not have LAMP installed, you can follow our guide here. Also install all required PHP modules:

apt-get install php7.0-curl php7.0-json php7.0-cgi php7.0 libapache2-mod-php7.0 php7.0-xml <code>php7.0-mcrypt php7.0-gd
</code>

Step 3. Installing Dokuwiki.

First thing to do is to go to DokuWiki’s download page and download the latest stable version of Dokuwiki:

wget http://download.dokuwiki.org/src/dokuwiki/dokuwiki-stable.tgz

Unpack the Dokuwiki archive to the document root directory on your server:

tar xvf dokuwiki-stable.tgz
mv dokuwiki-*/ /var/www/dokuwiki

We will need to change some folders permissions:

chown www-data:www-data -R /var/www/dokuwiki
chmod -R 707 /var/www/dokuwiki

Step 4. Configuring Apache web server for DokuWiki.

Create a new virtual host directive in Apache. For example, create a new Apache configuration file named ‘dokuwiki.conf’ on your virtual server:

sudo a2enmod rewrite
touch /etc/apache2/sites-available/dokuwiki.conf
ln -s /etc/apache2/sites-available/dokuwiki.conf /etc/apache2/sites-enabled/dokuwiki.conf
nano /etc/apache2/sites-available/dokuwiki.conf

Add the following lines:

ServerAdmin [email protected]
DocumentRoot /var/www/dokuwiki/
ServerName your-domain.com
ServerAlias www.your-domain.com

Options FollowSymLinks
AllowOverride All
Order allow,deny
allow from all

ErrorLog /var/log/apache2/your-domain.com-error_log
CustomLog /var/log/apache2/your-domain.com-access_log common

Now, we can restart Apache web server so that the changes take place:

systemctl restart apache2.service

Step 5. Accessing DokuWiki.

DokuWiki will be available on HTTP port 80 by default. Open your favorite browser and navigate to http://yourdomain.com/install.php or http://server-ip/install.php and complete the required the steps to finish the installation. If you are using a firewall, please open port 80 to enable access to the control panel.

Congratulation’s! You have successfully installed Dokuwiki. Thanks for using this tutorial for installing Dokuwiki on your Ubuntu 16.04 (Xenial Xerus) system. For additional help or useful information, we recommend you to check the official Dokuwiki web site.

How To Install Mate Desktop on Ubuntu 16.04

Install Mate Desktop on Ubuntu 16

The MATE Desktop Environment is the continuation of GNOME 2. It provides an intuitive and attractive desktop environment using traditional metaphors for Linux and other Unix-like operating systems. There are several Linux distributions that support the MATE desktop including of course Ubuntu, and there is a dedicated Ubuntu MATE edition for this elegant desktop environment as well.

This article assumes you have at least basic knowledge of linux, know how to use the shell, and most importantly, you host your site on your own VPS. The installation is quite simple and assumes you are running in the root account, if not you may need to add ‘sudo’ to the commands to get root privileges. I will show you through the step by step installation Mate Desktop on a Ubuntu 16.04 (Xenial Xerus) server.

Install Mate Desktop on Ubuntu 16.04

Step 1. First make sure that all your system packages are up-to-date by running these following apt-get commands in the terminal.

sudo apt-get update
sudo apt-get upgrade

Step 2. Installing Mate Desktop.

First add the community PPA and this PPA can be used only by Xenial users. And please make sure that idr00t doesn’t provide any guarantee and you understand that you install at your own risk:

sudo apt-add-repository ppa:ubuntu-mate-dev/xenial-mate
sudo apt-get update

Now, type the following command to finally install Mate Desktop:

sudo apt-get install mate

Wait for a few minutes, depending on your Internet connection speeds for the installation process to finish.

Step 3. Accessing Mate Desktop.

If everything goes OK, logout of your current session or restart your system and choose MATE desktop at the login interface as in the image below.
Mate-Desktop-at-Login

If you didn’t liked the Mate Desktop, you can remove it completely from your respective Linux distributions using following instructions:

add-apt-repository --remove ppa:ubuntu-mate-dev/xenial-mate
apt-get remove mate
apt-get autoremove

Congratulation’s! You have successfully installed Mate Desktop. Thanks for using this tutorial for installing MATE Desktop Environment on your Ubuntu 16.04 LTS system. For additional help or useful information, we recommend you to check the official Mate Desktop web site.

How To Install XWiki on Ubuntu 16.04

Install XWiki on Ubuntu 16

Xwiki is an open-source enterprise-ready wiki written in Java, runs on a servlet container like Tomcat, Jboss etc. which uses the relational database to store the information.

This article assumes you have at least basic knowledge of linux, know how to use the shell, and most importantly, you host your site on your own VPS. The installation is quite simple and assumes you are running in the root account, if not you may need to add ‘sudo’ to the commands to get root privileges. I will show you through the step by step installation XWiki on a Ubuntu 16.04 (Xenial Xerus) server.

Install XWiki on Ubuntu 16.04

Step 1. First make sure that all your system packages are up-to-date by running these following apt-get commands in the terminal.

sudo apt-get update
sudo apt-get upgrade

Step 2. Installing XWiki.

Run the following commands in Terminal to install XWiki on Ubuntu, via XWiki repository:

wget -q "http://maven.xwiki.org/public.gpg" -O- | sudo apt-key add -
wget "http://maven.xwiki.org/stable/xwiki-stable.list" -P /etc/apt/sources.list.d/

To can check all available packages in this repository using the following command:

apt-cache search xwiki

Result:

xwiki-common - XWiki is a free wiki software platform written in Java with a design emphasis
xwiki-enterprise-common - XWiki is a free wiki software platform written in Java with a design emphasis
xwiki-enterprise-mysql-common - XWiki is a free wiki software platform written in Java with a design emphasis
xwiki-enterprise-pgsql-common - XWiki is a free wiki software platform written in Java with a design emphasis
xwiki-enterprise-tomcat-common - XWiki is a free wiki software platform written in Java with a design emphasis
xwiki-enterprise-tomcat-mysql - XWiki enterprise Tomcat/MySQL based package
xwiki-enterprise-tomcat-pgsql - XWiki enterprise Tomcat/PostgreSQL
xwiki-enterprise-tomcat5-mysql - XWiki is a free wiki software platform written in Java with a design emphasis
xwiki-enterprise-tomcat5-pgsql - XWiki is a free wiki software platform written in Java with a design emphasis
xwiki-enterprise-tomcat6-mysql - XWiki is a free wiki software platform written in Java with a design emphasis
xwiki-enterprise-tomcat6-pgsql - XWiki is a free wiki software platform written in Java with a design emphasis
xwiki-enterprise-tomcat7-common - XWiki is a free wiki software platform written in Java with a design emphasis
xwiki-enterprise-tomcat7-mysql - XWiki is a free wiki software platform written in Java with a design emphasis
xwiki-enterprise-tomcat7-pgsql - XWiki is a free wiki software platform written in Java with a design emphasis
xwiki-enterprise-tomcat8-common - XWiki is a free wiki software platform written in Java with a design emphasis
xwiki-enterprise-tomcat8-mysql - XWiki is a free wiki software platform written in Java with a design emphasis
xwiki-enterprise-tomcat8-pgsql - XWiki is a free wiki software platform written in Java with a design emphasis
xwiki-mysql-common - XWiki is a free wiki software platform written in Java with a design emphasis
xwiki-pgsql-common - XWiki is a free wiki software platform written in Java with a design emphasis
xwiki-solr-data - XWiki is a free wiki software platform written in Java with a design emphasis
xwiki-tomcat7-common - XWiki is a free wiki software platform written in Java with a design emphasis
xwiki-tomcat7-mysql - XWiki is a free wiki software platform written in Java with a design emphasis
xwiki-tomcat7-pgsql - XWiki is a free wiki software platform written in Java with a design emphasis
xwiki-tomcat8-common - XWiki is a free wiki software platform written in Java with a design emphasis
xwiki-tomcat8-mysql - XWiki is a free wiki software platform written in Java with a design emphasis
xwiki-tomcat8-pgsql - XWiki is a free wiki software platform written in Java with a design emphasis

You can see on the list that the repo contains packages that can install XWiki with different versions of Tomcat, MySQL and PostgreSQL. We will install XWiki Enterprise with Tomcat 8 and PostgreSQL database server, but depending on your needs, you can select another package. Run the following command:

apt-get install xwiki-enterprise-tomcat8-pgsql

Since all dependencies have to be installed, the installation may take some time. During the installation, you will be prompted to enter a password for the postgresql ‘xwiki’ user.

Step 3. Accessing XWiki.

XWiki will be available on HTTP port 8080 by default. Open your favorite browser and navigate to http://yourdomain.com:8080/xwiki or http://server-ip:8080/xwiki and complete the required the steps to finish the installation. If you are using a firewall, please open port 80 to enable access to the control panel.

Congratulation’s! You have successfully installed XWiki. Thanks for using this tutorial for installing XWiki in Ubuntu 16.04 (Xenial Xerus) systems. For additional help or useful information, we recommend you to check the official XWiki web site.

How To Install Hiawatha Web Server on Ubuntu 16.04

Install Hiawatha Web Server on Ubuntu 16

Hiawatha is a web server built with the focus on security. It has built-in rules that can prevent cross-site scripting and forgery, SQL injections, and resource expenditure. Although its focus is on security, it also excels in performance due to its lightweight design. When combining the Hiawatha web server with PHP-FPM and MySQL, you can have a powerful web server that is both light-weight and secure.

This article assumes you have at least basic knowledge of linux, know how to use the shell, and most importantly, you host your site on your own VPS. The installation is quite simple and assumes you are running in the root account, if not you may need to add ‘sudo’ to the commands to get root privileges. I will show you through the step by step installation Hiawatha on a Ubuntu 16.04 (Xenial Xerus) server.

Hiawatha Features

CGI and load balancing FastCGI support
Large file support
Reverse proxy functionality
Chroot support
URL toolkit which supports URL rewriting
SSL and TLS support
Basic and digest HTTP authentication
Upload speed control by traffic shaping
Internal file caching
IPv6 support
HTTP compression using gzip
Virtual hosting
Support for WebDAV applications
Support for Server Name Indication included in v8.6

Install Hiawatha Web Server on Ubuntu 16.04

Step 1. First make sure that all your system packages are up-to-date by running these following apt-get commands in the terminal.

sudo apt-get update
sudo apt-get upgrade

Step 2. Installing Hiawatha Web Server.

First, get and install the repository’s public key:

apt-key adv --recv-keys --keyserver keys.gnupg.net 79AF54A9
nano /etc/apt/sources.list

Add the following to sources.list:

deb http://mirror.tuxhelp.org/debian/ squeeze main

Install Hiawatha with the following command:

apt-get update
apt-get install hiawatha

Start Hiawatha and add it to automatically start on your system start-up using:

systemctl enable hiawatha.service
systemctl start hiawatha.service

You can verify that Hiawatha web server is really running by opening your favorite web browser and entering the URL http://your-server’s-address, if it is installed, then you will see this:
hiawatha-installation-web-page
Using the default settings, you can put your web content in the following directory:

/var/www/hiawatha

For any configuration changes that you may want to make, you can go to the following directory:

/etc/hiawatha

Congratulation’s! You have successfully installed Hiawatha. Thanks for using this tutorial for installing Hiawatha web server in Ubuntu 16.04 (Xenial Xerus) LTS systems. For additional help or useful information, we recommend you to check the official Hiawatha web site.

How To Install Icinga 2 on Ubuntu 16.04

Install Icinga 2 on Ubuntu 16

Icinga 2 is an open source network monitoring system which checks the availability of your network resources, notifies users of outages, and generates performance data for reporting. Its Scalable and extensible, Icinga2 can monitor large, complex environments across multiple locations.

This article assumes you have at least basic knowledge of linux, know how to use the shell, and most importantly, you host your site on your own VPS. The installation is quite simple and assumes you are running in the root account, if not you may need to add ‘sudo’ to the commands to get root privileges. I will show you through the step by step installation Icinga network monitoring on a Ubuntu 16.04 (Xenial Xerus) server.

Icinga 2 Features:

Monitoring of network services (SMTP, POP3, HTTP, NNTP, ping, etc.)
Monitoring of host resources (CPU load, disk usage, etc.)
Monitoring of server components (switches, routers, temperature and humidity sensors, etc.)
Simple plug-in design that allows users to easily develop their own service checks,
Parallelized service checks.
Ability to define network host hierarchy using “parent” hosts, allowing detection of and distinction between hosts that are down and those that are unreachable.
Ability to define event handlers to be run during service or host events for proactive problem resolution.
Notification of contact persons when service or host problems occur and get resolved (via email, pager, or user-defined method).
Escalation of alerts to other users or communication channels.
Two optional user interfaces (Icinga Classic UI and Icinga Web) for visualization of host and service status, network maps, reports, logs, etc.
Icinga Reporting module based on open source Jasper Reports for both Icinga Classic and Icinga Web user interfaces
Capacity utilization reporting.
Performance graphing via add-ons such as PNP4Nagios, NagiosGrapher and InGraph.

Install Icinga 2 on Ubuntu 16.04

Step 1. First make sure that all your system packages are up-to-date by running these following apt-get commands in the terminal.

sudo apt-get update
sudo apt-get upgrade

Step 2. Install LAMP (Linux, Apache, MariaDB, PHP) server.

A Ubuntu 16.04 LAMP server is required. If you do not have LAMP installed, you can follow our guide here. Also install all required PHP modules:

apt-get install php7.0-mysql php7.0-curl php7.0-json php7.0-cgi php7.0 libapache2-mod-php7.0 &lt;code&gt;php7.0-mcrypt
&lt;/code&gt;

Step 3. Installing Icinga 2.

First, enable the add-repository feature and add the repository for Icinga with the below commands:

apt install software-properties-common
add-apt-repository ppa:formorer/icinga

Install Icinga 2 package:

apt update
apt install icinga2

Once the installation is complete. Make sure the service is up and running fine:

systemctl status icinga2.service
systemctl enable icinga2.service
systemctl start icinga2.service

By default, Icinga2 enables the following features. But we can confirm the enabled settings by running this command as below:

icinga2 feature list

Step 3. Installing Icinga2 plugin.

Icinga2 will collect the service information based on the monitoring plugins. So, we need to install nagios plugin using below command:

apt install nagios-plugins

Next, you need to install the IDO module which is crucial for the Icinga 2 web interface. It will export all configuration and status information into its database. Execute the following command:

apt install icinga2-ido-mysql

Then restart Icinga 2 for the changes to take effect:

systemctl restart icinga2.service

Once you enabled the IDO modules, Icinga 2 places the new configuration file at /etc/icinga2/features-enabled/ido-mysql.conf in which we need to update the database credentials manually:

cat /etc/icinga2/features-enabled/ido-mysql.conf

Update the above file shown like below:

root@:wpcademy.com~# nano /etc/icinga2/features-enabled/ido-mysql.conf
/**
* The db_ido_mysql library implements IDO functionality
* for MySQL.
*/
library "db_ido_mysql"
object IdoMysqlConnection "ido-mysql" {
user = "icinga2",
password = "icinga123",
host = "localhost",
database = "icinga2"
}

Step 4. Configuring MariaDB for Icinga 2.

By default, MariaDB is not hardened. You can secure MariaDB using the mysql_secure_installation script. You should read and below each steps carefully which will set root password, remove anonymous users, disallow remote root login, and remove the test database and access to secure MariaDB.

mysql_secure_installation

Configure it like this:

- Set root password? [Y/n] y
- Remove anonymous users? [Y/n] y
- Disallow root login remotely? [Y/n] y
- Remove test database and access to it? [Y/n] y
- Reload privilege tables now? [Y/n] y

Next we will need to log in to the MariaDB console and create a database for the Icinga 2. Run the following command:

mysql -u root -p

This will prompt you for a password, so enter your MariaDB root password and hit Enter. Once you are logged in to your database server you need to create a database for Icinga 2 installation:

MariaDB [(none)]&amp;gt; create database icinga2;
MariaDB [(none)]&amp;gt; grant all privileges on icingaweb.* to icinga2@localhost identified by 'icinga123';
MariaDB [(none)]&amp;gt; flush privileges;
MariaDB [(none)]&amp;gt; \q

Step 5. Installing Icinga 2 Web.

After creating the database, we can install the Web interface plugin and configure it one by one:

apt-get install icingaweb2

Step 6. Accessing Icinga 2.

Icinga2 will be available on HTTP port 80 by default. Open your favorite browser and navigate to http://yourdomain.com/icingaweb2/setup or http://server-ip/icingaweb2/setup and complete the required the steps to finish the installation. If you are using a firewall, please open port 80 to enable access to the control panel.
icingaweb2

Congratulation’s! You have successfully installed Icinga 2. Thanks for using this tutorial for installing Icinga 2 network monitoring on Ubuntu 16.04 LTS systems. For additional help or useful information, we recommend you to check the official Icinga 2 web site.

How To Install Sublime Text 3 on Ubuntu 16.04

Install Sublime Text 3 on Ubuntu 16

Sublime Text is a cross-platform text and source code editor with a Python API. It is a sophisticated text editor for code, markup and prose. Its functionality is extendable with plugins. Most of the extending packages have free-software licenses and are community-built and maintained.

This article assumes you have at least basic knowledge of linux, know how to use the shell, and most importantly, you host your site on your own VPS. The installation is quite simple and assumes you are running in the root account, if not you may need to add ‘sudo’ to the commands to get root privileges. I will show you through the step by step installation Sublime Text 3 on a Ubuntu 16.04 (Xenial Xerus) server.
Sublime Text 3 Features

“Goto Anything,” quick navigation to files, symbols, or lines
“Command palette” uses adaptive matching for quick keyboard invocation of arbitrary commands
Simultaneous editing: simultaneously make the same interactive changes to multiple selected areas
Python-based plugin API
Project-specific preferences
Extensive customizability via JSON settings files, including project-specific and platform-specific settings
Cross platform (Windows, OS X, Linux)
Compatible with many language grammars from Textmate.
proprietary software, may be downloaded and evaluated for free, however a license must be purchased for continued use.

Install Sublime Text 3 on Ubuntu 16.04

Step 1. First make sure that all your system packages are up-to-date by running these following apt-get commands in the terminal.

sudo apt-get update
sudo apt-get upgrade

Step 2. Installing Sublime Text 3.

The Sublime Text 3 is currently in beta. Webupd8 Team has made an installer script into PPA which automatically downloads the Sublime Text 3 archive from its website and installs it on Ubuntu. First, you have to add the PPA to your system, update the local repository index:

sudo add-apt-repository ppa:webupd8team/sublime-text-3
sudo apt-get update

After added the PPA, run commands to install the script:

sudo apt-get install sublime-text-installer

Once installed, open the editor from Unity Dash or Menu. To disable new version notifications, add the following to your User Preferences file (Preferences > Settings – User):

"update_check": false

Congratulation’s! You have successfully installed Sublime Text 3. Thanks for using this tutorial for installing Sublime Text editor on Ubuntu 16.04 LTS systems. For additional help or useful information, we recommend you to check the official Sublime Text web site.