How To Install Cassandra on Ubuntu 16.04 LTS

Install Cassandra on Ubuntu 16

Apache Cassandra is a NoSQL database intended for storing large amounts of data in a decentralized, highly available cluster. NoSQL refers to a database with a data model other than the tabular relations used in relational databases such as MySQL, PostgreSQL, and Microsoft SQL. The Apache Cassandra database is the right choice when you need scalability and high availability without compromising performance.

This article assumes you have at least basic knowledge of linux, know how to use the shell, and most importantly, you host your site on your own VPS. The installation is quite simple and assumes you are running in the root account, if not you may need to add ‘sudo’ to the commands to get root privileges. We will show you through the step by step installation Apache Cassandra on a Ubuntu 16.04 (Xenial Xerus) server.
Install Cassandra on Ubuntu 16.04 LTS

Step 1. First make sure that all your system packages are up-to-date by running these following apt-get commands in the terminal.

sudo apt-get update
sudo apt-get upgrade

Step 2. Installing Java.

Cassandra needs Java application to be running on your server, make sure you have installed latest Java version:

add-apt-repository ppa:webupd8team/java

After added the PPA, run commands below one by one to install Java:

apt-get update
apt-get install oracle-java8-set-default

Verify Installed Java Version:

# java -version
java version "1.8.0_101"
Java(TM) SE Runtime Environment (build 1.8.0_101-b13)
Java HotSpot(TM) 64-Bit Server VM (build 25.101-b13, mixed mode)

Step 2. Installing Cassandra.

We will install Cassandra using official package available on Apache Software Foundation, so add Cassandra repository to make the package available to your system:

echo "deb http://www.apache.org/dist/cassandra/debian 36x main" | sudo tee -a /etc/apt/sources.list.d/cassandra.list

Add the public key for Cassandra repo so that you won’t encounter GPG error:

gpg --keyserver pgp.mit.edu --recv-keys 749D6EEC0353B12C
gpg --export --armor 749D6EEC0353B12C | sudo apt-key add -

Install Cassandra:

apt-get update
apt-get install cassandra -y

Start Cassandra up and configure it to your liking. You’ll most likely want to enable it to start on boot. In case of a power outage or maintenance, you won’t forget to start it back up after a reboot:

systemctl start cassandra
systemctl enable cassandra

Cassandra uses a separate command line to be controlled, so we need to make sure to activate that:

[[email protected] ~]# cqlsh
Connected to Test Cluster at 127.0.0.1:9042.
[cqlsh 5.0.1 | Cassandra 3.0.9 | CQL spec 3.4.0 | Native protocol v4]
Use HELP for help.
cqlsh>

You may want to check information about the node and cluster to get an idea of how to fix various issues or update information:

[[email protected] ~] nodetool status
Datacenter: datacenter1
=======================
Status=Up/Down
|/ State=Normal/Leaving/Joining/Moving
-- Address Load Tokens Owns (effective) Host ID Rack
UN 127.0.0.1 216.14 KB 256 100.0% 2a0b7fa9-23c6-e46-83a4-e6c06e2f5736 rack1

Congratulation’s! You have successfully installed Cassandra. Thanks for using this tutorial for installing Apache Cassandra on Ubuntu 16.04 LTS (Xenial Xerus) system. For additional help or useful information, we recommend you to check the official Apache Cassandra web site.

How To Install Plank on Ubuntu 16.04 LTS

Install Plank on Ubuntu

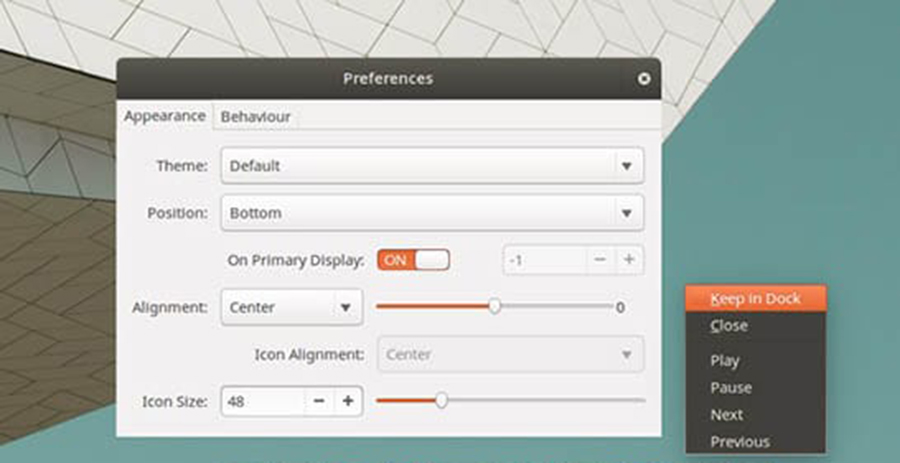
Plank is the default dock app on Elementary OS used for launching applications. It is easy to edit and rearrange the applications present on it without the need to edit its configuration file. It can be easily installed on other Ubuntu based systems.

This article assumes you have at least basic knowledge of linux, know how to use the shell, and most importantly, you host your site on your own VPS. The installation is quite simple and assumes you are running in the root account, if not you may need to add ‘sudo’ to the commands to get root privileges. I will show you through the step by step installation Plank dock on a Ubuntu 16.04 (Xenial Xerus) server.
Install Plank on Ubuntu 16.04 LTS

Step 1. First make sure that all your system packages are up-to-date by running these following apt-get commands in the terminal.

sudo apt-get update
sudo apt-get upgrade

Step 2. Installing Plank.

First, add the Plank PPA to Ubuntu 16.04:

add-apt-repository ppa:ricotz/docky
apt-get update

Finally, install Plank:

apt-get install plank

After installation is done, open the ‘Plank’ app from the Unity Dash (or equivalent App Menu in the desktop environment you’re using) and you’re away:
plank-dock

Or run “plank” command in Terminal. (without quotes):

plank

Congratulation’s! You have successfully installed Plank. Thanks for using this tutorial for installing Plank on Ubuntu 16.04 LTS (Xenial Xerus) system. For additional help or useful information, we recommend you to check the official Plank web site.

How To Install Plesk on Linux System

Install Plesk on Linux

Plesk is one of the widely used web hosting control panels in the web hosting business. It offers simple server and website management solutions with single-click mechanisms. Plesk consists of webserver suite (LAMP), Mail server, FTP Server, Name Server applications etc.

Plesk supports a wide range of Linux releases, including all of the commonly used distributions like CentOS, Ubuntu, Debian and Cloudlinux. Plesk is a an enterprise hosting control panel and it requires license to work effectively. They also offers 15 day trial license which is intended for testing purposes.

This article assumes you have at least basic knowledge of linux, know how to use the shell, and most importantly, you host your site on your own VPS. The installation is quite simple and assumes you are running in the root account, if not you may need to add ‘sudo’ to the commands to get root privileges. I will show you through the step by step installation Plesk web hosting control panels on a Linux system server.

Install Plesk on Linux System

Step 1. Download the autoinstaller from Plesk website:


wget http://autoinstall.plesk.com/plesk-installer

Add execute permissions to the autoinstaller:

chmod +x plesk-installer

Launch the autoinstaller:

./plesk-installer

Follow the script prompts and pick the options that best suits your use case.

Step 2. Accessing Plesk.

Once this is complete, you’ll be able to access your Plesk server via the web management interface. To do this, open a browser and point it to https://yourserverip:8443 and login to the control panel as root user.

Congratulation’s! You have successfully installed Plesk. Thanks for using this tutorial for installing Plesk web hosting control panels on a Linux system. For additional help or useful information, we recommend you to check the official Plesk web site.

How To Install LimeSurvey on Ubuntu 16.04 LTS

Install LimeSurvey on Ubuntu 16

LimeSurvey (formerly PHPSurveyor) is an open source online survey application. It has been widely used by many big industries to create the survey tasks. It has many powerful features like creating dynamic fields for survey. Supports multilingual, defines userroles, user groups and the more it has been integrated into various CMS. The limesurvey team provides the commercial for those who are seeking.As well as community support for its users.

This article assumes you have at least basic knowledge of linux, know how to use the shell, and most importantly, you host your site on your own VPS. The installation is quite simple and assumes you are running in the root account, if not you may need to add ‘sudo’ to the commands to get root privileges. I will show you through the step by step installation LimeSurvey on a Ubuntu 16.04 (Xenial Xerus) server.
Install LimeSurvey on Ubuntu 16.04 LTS

Step 1. First make sure that all your system packages are up-to-date by running these following apt-get commands in the terminal.

sudo apt-get update
sudo apt-get upgrade

Step 2. Install LAMP (Linux, Apache, MariaDB, PHP) server.

A Ubuntu 16.04 LAMP server is required. If you do not have LAMP installed, you can follow our guide here. Also install all required PHP modules:

apt-get install php7.0-curl php7.0-gd php7.0-mbstring php7.0-mysql libapache2-mod-php7.0 php7.0-mcrypt php7.0-zip

Step 3. Installing LimeSurvey.

Download the latest stable version of LimeSurvey, At the moment of writing this article it is version 2.64.1:

wget https://www.limesurvey.org/stable-release?download=2015:limesurvey2641%20170310zip
unzip "stable-release?download=2015:limesurvey2641 170310zip"
mv limesurvey/ /var/www/html/limesurvey/

We will need to change some folders permissions:

chown www-data:www-data -R /var/www/html/limesurvey

Step 4. Configuring MariaDB.

By default, MariaDB is not hardened. You can secure MariaDB using the mysql_secure_installation script. You should read and below each steps carefully which will set root password, remove anonymous users, disallow remote root login, and remove the test database and access to secure MariaDB.

mysql_secure_installation

Configure it like this:

- Set root password? [Y/n] y
- Remove anonymous users? [Y/n] y
- Disallow root login remotely? [Y/n] y
- Remove test database and access to it? [Y/n] y
- Reload privilege tables now? [Y/n] y

Next we will need to log in to the MariaDB console and create a database for the LimeSurvey. Run the following command:

mysql -u root -p

This will prompt you for a password, so enter your MariaDB root password and hit Enter. Once you are logged in to your database server you need to create a database for LimeSurvey installation:

CREATE DATABASE limesurvey;
GRANT ALL PRIVILEGES ON limesurvey.* TO 'limeuser'@'localhost' IDENTIFIED BY 'your-password';
FLUSH PRIVILEGES;
\q

Step 5. Configuring Apache web server for LimeSurvey.

Create a new virtual host directive in Apache. For example, create a new Apache configuration file named ‘limesurvey.conf’ on your virtual server:

touch /etc/apache2/sites-available/limesurvey.conf
ln -s /etc/apache2/sites-available/limesurvey.conf /etc/apache2/sites-enabled/limesurvey.conf
nano /etc/apache2/sites-available/limesurvey.conf

Add the following lines:


ServerAdmin [email protected]
DocumentRoot /var/www/html/limesurvey/
ServerName your-domain.com
ServerAlias www.your-domain.com

Options FollowSymLinks
AllowOverride All

ErrorLog /var/log/apache2/your-domain.com-error_log
CustomLog /var/log/apache2/your-domain.com-access_log common

Now, we can restart Apache web server so that the changes take place:

systemctl restart apache2.service

Step 6. Accessing LimeSurvey.

LimeSurvey will be available on HTTP port 80 by default. Open your favorite browser and navigate to http://yourdomain.com/admin or http://server-ip/admin and complete the required the steps to finish the installation. If you are using a firewall, please open port 80 to enable access to the control panel.

Congratulation’s! You have successfully installed LimeSurvey. Thanks for using this tutorial for installing LimeSurvey leading free online survey app on Ubuntu 16.04 LTS (Xenial Xerus) system. For additional help or useful information, we recommend you to check the official LimeSurvey web site.

How To Install Python 3 on Ubuntu 16.04 LTS

Install Python 3 on Ubuntu 16

Python is an open-source and beginner-friendly programming language. Ubuntu 16.04 and Ubuntu 16.10 come with two versions of Python, Python 2.7 and Python 3.5. At the time of this writing, the latest stable version of Python is 3.6, released on December 23rd, 2016. If you need to use python3 as part of Python application dependency, there are several ways to install python3 on Ubuntu 16.04 LTS.

This article assumes you have at least basic knowledge of linux, know how to use the shell, and most importantly, you host your site on your own VPS. The installation is quite simple and assumes you are running in the root account, if not you may need to add ‘sudo’ to the commands to get root privileges. I will show you through the step by step installation Python 3 on a Ubuntu 16.04 (Xenial Xerus) server.
Install Python 3 on Ubuntu 16.04 LTS

Step 1. First make sure that all your system packages are up-to-date by running these following apt-get commands in the terminal.

sudo apt-get update
sudo apt-get upgrade

Step 2. Installing Python 3.

Method 1. Install Python 3.6 on Ubuntu 16.04 from PPA.

You can install Python 3.6 on Ubuntu 16.04 using this PPA:

sudo add-apt-repository ppa:jonathonf/python-3.6
sudo apt update
sudo apt install python3.6

You can check python version on Ubuntu from command line:

python --version

Method 2. Installing Python 3.6 on Ubuntu 16.10 from Repository

Use the following command to install Python 3:

sudo apt update
sudo apt install python3.6

Then check the Python version:

python3.6 -V

Method 3. Compile and Install Python 3.6 on Ubuntu 16.04

First, we need to install some build dependencies using the commands below:

sudo apt install build-essential checkinstall
sudo apt install libreadline-gplv2-dev libncursesw5-dev libssl-dev libsqlite3-dev tk-dev libgdbm-dev libc6-dev libbz2-dev

Then, download Python 3.6 from source:

wget https://www.python.org/ftp/python/3.6.0/Python-3.6.0.tar.xz
tar xvf Python-3.6.0.tar.xz

Now cd into the source directory, configure the build environment and install:

cd Python-3.6.0/
./configure
sudo make altinstall

Once the process is complete, we can check the version of Python 3 that is installed in the system by typing:

python3.6

Congratulation’s! You have successfully installed Python. Thanks for using this tutorial for installing Python 3 on Ubuntu 16.04 LTS (Xenial Xerus) system. For additional help or useful information, we recommend you to check the official Python web site.

How To Install CachetHQ on Ubuntu 16.04 LTS

Install CachetHQ on Ubuntu 16

CachetHQ makes it simple to create a status page for your application, service or network and it’s based on Laravel framework.

This article assumes you have at least basic knowledge of linux, know how to use the shell, and most importantly, you host your site on your own VPS. The installation is quite simple and assumes you are running in the root account, if not you may need to add ‘sudo’ to the commands to get root privileges. I will show you through the step by step installation CachetHQ on a Ubuntu 16.04 (Xenial Xerus) server.
Install CachetHQ on Ubuntu 16.04 LTS

Step 1. First make sure that all your system packages are up-to-date by running these following apt-get commands in the terminal.

sudo apt-get update
sudo apt-get upgrade

Step 2. Install LAMP (Linux, Apache, MariaDB, PHP) server.

A Ubuntu 16.04 LAMP server is required. If you do not have LAMP installed, you can follow our guide here. Also install all required PHP modules:

sudo apt-get install php7.0 libapache2-mod-php7.0 php7.0-mbstring php7.0-curl php7.0-zip php7.0-gd php7.0-mysql php7.0-mcrypt curl

Step 3. Configuring MariaDB for CachetHQ.

By default, MariaDB is not hardened. You can secure MariaDB using the mysql_secure_installation script. you should read and below each steps carefully which will set root password, remove anonymous users, disallow remote root login, and remove the test database and access to secure MariaDB:

mysql_secure_installation

Configure it like this:

- Set root password? [Y/n] y
- Remove anonymous users? [Y/n] y
- Disallow root login remotely? [Y/n] y
- Remove test database and access to it? [Y/n] y
- Reload privilege tables now? [Y/n] y

Next we will need to log in to the MariaDB console and create a database for the CachetHQ. Run the following command:

mysql -u root -p

This will prompt you for a password, so enter your MariaDB root password and hit Enter. Once you are logged in to your database server you need to create a database for CachetHQ installation:

MariaDB [(none)]> CREATE DATABASE cachet;
MariaDB [(none)]> GRANT ALL PRIVILEGES ON cachet.* TO 'cachetuser'@'localhost' IDENTIFIED BY 'your-password';
MariaDB [(none)]> FLUSH PRIVILEGES;
MariaDB [(none)]> \q

Step 4. Installing CachetHQ.

First, download the source code with Git:

cd /var/www/html/
git clone https://github.com/cachethq/Cachet.git
cd Cachet
git checkout v2.3.9

We will need to change some folders permissions:

chown www-data:www-data -R /var/www/html/Cachet/

Configuring a database:

Rename the .env.example file to .env using the following command:


mv .env.example .env

Open the .env file and change the following lines:

### nano .env
APP_URL=http://localhost -> APP_URL=http://your-domain-name
DB_DATABASE=cachet -> DB_DATABASE=your-database-name
DB_USERNAME=homestead -> DB_USERNAME=your-database-username
DB_PASSWORD=secret -> DB_PASSWORD=your-database-password

Step 5. Installing Composer.

Composer is a dependency manager for PHP with which you can install packages. Composer will pull in all the required libraries and dependencies you need for your project:

curl -sS https://getcomposer.org/installer | sudo php -- --install-dir=/usr/local/bin --filename=composer
composer install --no-dev -o

Set the application key:
Before going any further, we need to set the APP_KEY config. This is used for all encryption used in Cachet:

php artisan key:generate

Cachet comes with an installation command that will:

Run migrations
Run seeders (of which there are none)


php artisan app:install

Step 6. Configuring Apache web server for CachetHQ.

Create a new virtual host directive in Apache. For example, create a new Apache configuration file named ‘cachet.conf’ on your virtual server:

touch /etc/apache2/sites-available/cachet.conf
ln -s /etc/apache2/sites-available/cachet.conf /etc/apache2/sites-enabled/cachet.conf
nano /etc/apache2/sites-available/cachet.conf
sudo a2enmod rewrite

Add the following lines:

<VirtualHost *:80>
ServerAdmin [email protected]
DocumentRoot /var/www/html/Cachet/public/
ServerName your-domain.com
ServerAlias www.your-domain.com
<Directory /var/www/html/Cachet/public/>
Options FollowSymLinks
AllowOverride All
</Directory>
ErrorLog /var/log/apache2/your-domain.com-error_log
CustomLog /var/log/apache2/your-domain.com-access_log common

Save and close the file. Restart the apache service for the changes to take effects:

systemctl restart apache2

Step 7. Accessing CachetHQ.

SugarCRM will be available on HTTP port 80 by default. Open your favorite browser and navigate to http://yourdomain.com/ or http://server-ip and complete the required the steps to finish the installation. If you are using a firewall, please open port 80 to enable access to the control panel.

Congratulation’s! You have successfully installed CachetHQ. Thanks for using this tutorial for installing CachetHQ on Ubuntu 16.04 LTS (Xenial Xerus) system. For additional help or useful information, we recommend you to check the official CachetHQ web site.

How To Install Tmux Terminal Multiplexer on Linux

Install Tmux Terminal Multiplexer on Linux

Tmux is a terminal multiplexer that lets you switch easily between several programs in one terminal, detach them (they keep running in the background) and reattach them to a different terminal.

This article assumes you have at least basic knowledge of linux, know how to use the shell, and most importantly, you host your site on your own VPS. The installation is quite simple and assumes you are running in the root account, if not you may need to add ‘sudo’ to the commands to get root privileges. I will show you through the step by step installation Tmux Terminal Multiplexer on a Linux server.
Install Tmux Terminal Multiplexer on Linux

Step 1. First make sure that all your system packages are up-to-date by running these following apt-get commands in the terminal.

sudo apt-get update
sudo apt-get upgrade

Step 2. Installing Tmux.

Installation is pretty straightforward if you have Ubuntu or CentOS distribution you can install tmux with:

### Debian / Ubuntu based ###
apt-get install tmux

### On RedHat / CentOS based ###
yum install tmux

After the installation is finish, then type tmux on your console to run tmux:

tmux

Step 3. Tmux Commands QuickStart.

Ctrl+b is the Tmux command prefix. Here below for the sake of Clarity the Ctrl+b will be repeated for every command:

To List the Available Commands:

Ctrl+b ?

To Create a New Pane:

Ctrl+b "

To Change Panes Layouts:

Ctrl+b Space

To Rotate Panes into Layout:

Ctrl+b Ctrl+o

To Switch into another Pane:

Ctrl+b ;

Congratulation’s! You have successfully installed Tmux. Thanks for using this tutorial for installing Tmux Terminal Multiplexer on Linux server. For additional help or useful information, we recommend you to check the official Tmux web site.