Skip to content

WPcademy

Linux & Wordpress Tutorials

  • Home
  • WordPress
    • WordPress Login
    • WordPress Hosting
    • WordPress Plugins
    • WordPress SEO
    • WordPress Themes
    • WordPress Tutorials
  • Linux Tutorials
    • Centos
    • Ubuntu
  • Tutorials
    • How to
    • Programming
  • Security
  • About Us
  • Contact Us

Category: Wordpress Tutorials

Posted on October 17, 2019October 17, 2019

Easy Guide to Remove the Login Shake Effect in WordPress

If you ever enter a wrong username or password when logging into WordPress, then you probably noticed that the login box shakes along with showing you the error that username or password is incorrect. In this tutorial, we will learn how to remove the login shake effect in WordPress.

remove wordpress login shake effect

The login shake feature is added with a JavaScript file that WordPress adds on every login page. All we need to do is remove that JavaScript.

Simply add the following code in your theme’s functions.php file or in a site-specific plugin:

function wpb_remove_loginshake() {
    remove_action('login_head', 'wp_shake_js', 12);
}
add_action('login_head', 'wpb_remove_loginshake');

Removing the login shake effect is an aesthetic decision and should be made completely based on your personal preference. In our opinion, it helps get user’s attention and let them know that there is an error. On our sites, we do not remove the login shake effect.

We hope this tutorial helped you remove the login shake effect in WordPress.

You Might Also Like: Fix WordPress Login Page Redirecting Issue

Posted on October 17, 2019October 17, 2019

How to Fix WordPress Login Page Redirecting Issue : Easy Steps

Login issues can be caused by various different errors such as error establishing database connection, internal server error or white screen of death. Another type of login error is when your login page keeps refreshing and redirecting it back to the login screen. In this article we will learn how to fix the WordPress login page refreshing and redirecting issue.

Follow a step and check if the issue resolved, if not follow the next step.

Step-1: Clear Cookies to Resolve Login Issues

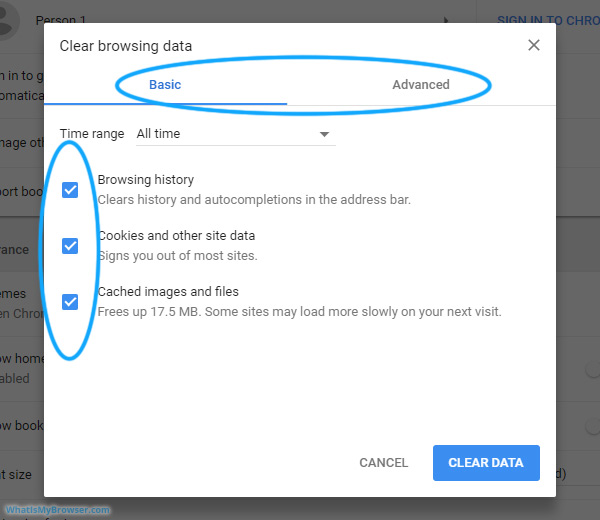
WordPress uses cookies for login authentication, so the first step in troubleshooting WordPress login issues is the simplest one. Clear your browser cookies and cache. Also make sure that your browser has cookies enabled. After doing that restart your browser and then try to login. This should fix the issue for most folks.

how to clear cookies from browser

Step-2: Deactivate All Plugins Installed in Your WordPress Site

Sometimes WordPress plugins can cause this issue specially if there is a conflict between two plugins. To deactivate all your WordPress plugins, connect to your web hosting using an FTP client. Rename /wp-content/plugins/ directory to plugins_backup. This will deactivate all WordPress plugins installed on your website. We also have a detailed tutorial on how to deactivate all WordPress plugins when unable to access WP-Admin. Once you have deactivated all plugins, try to logging in to your WordPress site. If you succeed, then this means that one of your plugins was causing the issue.

Step-3: Revert Back to the Default Theme

WordPress themes can also cause conflicts after upgrading to a newer version of WordPress or the theme itself. To find out whether the problem is being caused by your theme, you need to deactivate your theme. The process is similar to deactivating the plugins. Connect to your website using an FTP client. Go to /wp-content/themes/ directory and rename your current theme directory to anything. WordPress will look for your current theme and will fall back to the default theme. Once you have done that, then try logging in again. If you succeed, then this means your theme was causing the issue.

If you are already using the default theme as your current theme, then you can still rename it and try to login. If you are able to successfully login then this means that your default theme may have been corrupted. Download a fresh copy of the default theme from WordPress theme repository and upload it to your website.

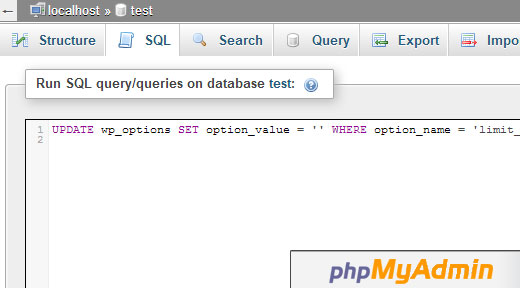
Step-4: Delete .htaccess File

Sometimes .htaccess file can get corrupted which can result in internal server errors or login page refreshing error. Simply access your website through FTP. Backup the .htaccess file in your computer and then delete it from your website’s root directory. You may want to delete .htaccess file in wp-admin directory as well if it exist. Try logging in again. If you succeed, then this means that your .htaccess file were stopping you from logging into WordPress. Once you are logged in, simply go to Settings » Permalinks and click Save. This will generate a new .htaccess file.

Step-4: Update Your website site URL

In some cases defining the site URL seems to fix the issue. To do this, you need to login to your site using FTP and edit the wp-config.php file. Simply add these two lines of code in your wp-config.php file and don’t forget to replace the example.com with your own URL. Also if your site have www. then make sure you add that.

1 define('WP_HOME','http://example.com');
2 define('WP_SITEURL','http://example.com');

Save changes, and hopefully that will fix the login page refreshing issue.

We hope this article helped you resolve WordPress login page refreshing and redirecting issues.

Posted on October 17, 2019

How To Unblock Limit Login Attempts in WordPress

Limit Login Attempt may lock you out too, if you entered the wrong password a few times. In this article, we will show you how to unblock limit login attempts plugin in WordPress.

Delete via FTP or File Manager

The easiest solution for beginners is to delete Limit Login Attempts plugin using FTP and then re-install it later once you can login.

You need to login to your site via FTP and then go to /wp-content/plugins/.

=> Once you’re there, you can simply delete the limit-login-attempts plugin folder.

You can also do this using your web host’s cPanel File Manager.

=> Simply browse to /wp-content/plugins/ and delete the limit-login-attempts folder.

Limit WordPress Login MySQL Query via phpMyAdmin

unblock limit login attempts mysql query

For advanced users who are familiar with MySQL and phpMyAdmin, you can easily run the following SQL query, and it will clear all lockouts.

UPDATE wp_options SET option_value = '' WHERE option_name = 'limit_login_lockouts' LIMIT 1;

If you want to unblock your specific IP e.g. 111.222.111.222, then run a query like this:

UPDATE wp_options SET option_value = REPLACE(option_value, '111.222.111.222', '') WHERE option_name = 'limit_login_lockouts' LIMIT 1;

Make sure to update your IP address and also the database table prefix if you changed your database prefix.

We hope this article helped you unblock limit login attempts in WordPress.

You Might Also Like: How to Limit Access by IP in WordPress

Posted on October 17, 2019

How to Limit Access by IP in WordPress

As a security measure, we decided to limit access by IP to our wp-login.php file in WordPress. We already have our WP Admin directory on limited access by IP. In this article, we will show you how to limit access by IP to your wp-login.php file in WordPress.

Note: This tutorial is for advance user.

Open your main .htaccess file and put this code towards the top of the file before everything else.

<Files wp-login.php>
        order deny,allow
        Deny from all
# whitelist the following IP address
allow from xx.xxx.xx.xx
#whitelist Gainesvile IP Address
allow from xx.xxx.xx.xx
</Files>

Don’t forget to replace the IP addresses with your own. The only real downside to this is if you have dynamic IPs, then it can be a problem. Otherwise, this works like charm. Also, the wp-login.php styling breaks, but that is not a priority at this moment. We just wanted to prevent the failed login attempts.

You Might Also Like: Optimize Your WordPress Robots.txt for SEO

Posted on October 17, 2019

How to Create Simple Login URL in WordPress

When working with a non-technical client, you often end up telling them well the login url is yourdomain.com/wp-login.php. Some folks suggest /wp-admin/ instead of the wp-login.php url. Wouldn’t it be so much better if you can just tell your clients to go to yoursite.com/login/. Well, in this article, we will show you how to create simpler login URL in WordPress for your clients.

Open the .htaccess file and paste the following code above the WordPress rewrite rule

 RewriteRule ^login$ http://yoursite.com/wp-login.php [NC,L]

Don’t forget to replace the domain name to your site’s domain. That’s it. Now you can suggest your clients to go to yourname.com/login/ rather than wp-login.php

You Might Also Like: How to fix WordPress Login issues

Posted on October 17, 2019October 17, 2019

How to Change the Login Logo URL in WordPress

By default the login logo url points to WordPress.org. If you have a custom WordPress login logo, or a completely custom WordPress login page design, then you should probably change the login logo url to your main site or anything that you think is more relevant.

All you have to do is simply paste the codes below in your theme’s functions.php file:

<?php
add_filter( 'login_headerurl', 'custom_loginlogo_url' );
function custom_loginlogo_url($url) {
    return 'http://www.yourdomain.com';
}
?>

Don’t forget to change the URL to your own site otherwise users will be directed to our site.

You Might Also like:
Fix WordPress Login issues
Change the Login Logo in WordPress

Posted on October 17, 2019

How to Change the Login Logo in WordPress

why not give your wordpress website a custom login logo to match the branding and keep the users from feeling alienated. In this article, we will learn how to change the login logo in WordPress.

First you need to open your theme’s functions.php file and then paste the following code:

function custom_loginlogo() {
echo '&lt;style type="text/css"&gt;
h1 a {background-image: url('.get_bloginfo('template_directory').'/images/login_logo.png) !important; }
&lt;/style&gt;';
}
add_action('login_head', 'custom_loginlogo');

Don’t forget to keep a transparent logo file in your theme’s images folder either. It should be named login_logo.png or anything else if you decide to change the image path.

You might also like: How to fix WordPress Login issues

Posts pagination

Page 1 Page 2 … Page 20 Next page
100 dollar free credit on digitalocean cloud server

Latest Tutorials

  • How to install and configure shadowsocks in ubuntu machine
  • Initial Server Setup with Ubuntu
  • How to connect to a remote MySQL database using Linux terminal
  • How To Install OpenEMR on Ubuntu 20.04 with a LAMP Stack (Apache, MySQL, PHP)
  • How to Install WordPress with LEMP on Ubuntu 20.04
  • How To Use Traefik v2 as a Reverse Proxy for Docker Containers on Ubuntu 20.04
  • How To Set Up Physical Streaming Replication with PostgreSQL 12 on Ubuntu 20.04
  • How To Install PostgreSQL on Ubuntu 20.04 [Quickstart]
  • How To Serve Flask Applications with Gunicorn and Nginx on Ubuntu 20.04
  • How To Serve Flask Applications with uWSGI and Nginx on Ubuntu 20.04
  • Facebook
  • YouTube
Privacy Policy Proudly powered by WordPress