Easy Guide to Add the Official Twitter Follow Button in WordPress

In this article we will cover what is the twitter follow button, and how you can add it in your WordPress site.

What is the Twitter Follow Button

Twitter follow button is a small widget which allows users to easily follow your twitter account (or any twitter account) from any website. The follow button uses the same implementation model as the official tweet button, and it is really simple to integrate. You can see the demo of the follow button on the top left corner of the image below. When you click on the follow button, a window opens with more information about the user.


You are probably wondering how it is different from the Smart Follow button below?

Well the smart follow button requires you to do the whole Twitter Anywhere integration. It also doesn’t allow you to show your follower count or do any customization. Whereas the Twitter follow button lets you show the count, and it is very easy to integrate. Check out the live example below (don’t forget to click follow to see what it does):

How to Add the Official Twitter Follow Button in WordPress

You can go to the Follow Button page and generate a code for you. Or you can simply copy the code below:

1
2
<a href="http://twitter.com/wpbeginner" class="twitter-follow-button" data-show-count="true">Follow @wpbeginner</a>

P.S. Make sure to change the username with your own.

If you are using the official tweet button, then you do not need to paste the script twice. So your code will look like this:

1
<a href="http://twitter.com/wpcademy" class="twitter-follow-button" data-show-count="true">Follow @wpcademy</a>

Now you can paste the code anywhere you like in your WordPress theme. Most folks will put such code in their sidebar.php file. However, if you don’t feel comfortable editing a theme file, then you can utilize WordPress theme widgets as well. All good themes come with widget-ready sidebars. So all you would have to do is go to Appearence » Widgets tab. Then add a text widget to your appropriate sidebar. Lastly, paste the code above, and you are done. Look in the screenshot below for the example:
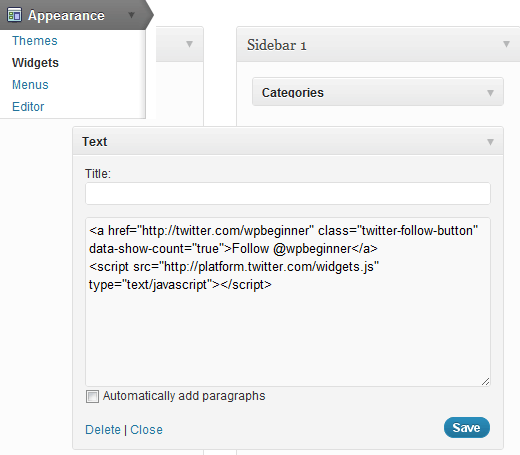
There is really no need to add a plugin to do something as simple as this.

Advanced Customization

This section is for designers and developers who want to customize this button further to match their site’s color scheme etc. Twitter lets you customize the button color, text color, link color, language, widget, and alignment of the plugin.

Available variables in the JavaScript version that we are using:

  • data-show-count (true or false)
  • data-button (blue or grey)
  • data-text-color (hex code)
  • data-link-color (hex code)
  • data-lang (en, fr, de, es) – uses the two letter ISO-639-1 language code
  • data-width – (300px)
  • data-align – (right)

If you want to specify it in the a code it would look something like this:

1
<a href="http://twitter.com/wpbeginner" class="twitter-follow-button" data-button="grey" data-text-color="#FFFFFF" data-link-color="#ffa24f" data-show-count="true">Follow @wpbeginner</a>

Resources:

Follow Button Documentation
Follow Button Generator

Easy Guide to Change WordPress Theme via phpMyAdmin

Change WordPress Theme via phpMyAdmin

In this tutorial we are going to learn how to change WordPress theme from the database. WordPress makes it extremely easy to manage themes from the admin area. However, if you are unable to access your WordPress admin area, then you will need to find other ways to change your WordPress theme.

Why and When You Need to Use phpMyAdmin?

Normally, the easiest way to change your WordPress theme is by visiting the Appearance » Themes page in WordPress admin area. However, sometimes a WordPress error can make your website admin area inaccessible.

In that case, the safest way to recover your website is by restoring it from backup. Another way is to troubleshoot the WordPress error causing the problem. In troubleshooting, the easiest way to switch themes is to make a backup of your existing theme via FTP, and then remove all theme folders from /wp-content/themes/ except for the default theme. WordPress will automatically revert to the default theme.

Both of the above methods will give you access to the WordPress admin area, and you will be able to change the theme.

However if you don’t have a backup, and you don’t want to revert to a default theme, then you can change to a custom WordPress theme from your database by using phpMyAdmin.

That being said, let’s take a look at how to change your WordPress theme via phpMyAdmin.

Changing Your WordPress Theme via phpMyAdmin

This method allows you to tell WordPress which theme to use by changing the information in the database. For this method to work, the theme you want to switch to must already be installed on your website.

You will need to connect to your website using a FTP client and go to the /wp-content/themes/ folder. There you will be able to see all the themes that are currently installed on your website.

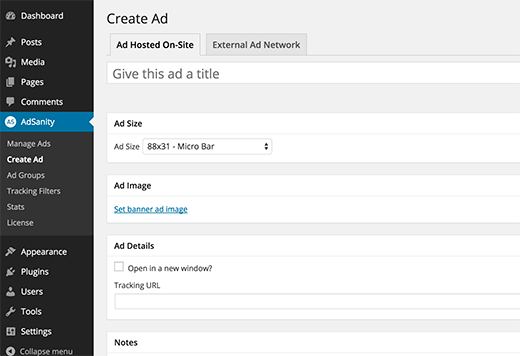
create ad with wordpress blog

Note: Write down the theme folder name that you want to switch to. You will need it in the next step.

If the theme you want to switch to isn’t installed on your website, then you can manually install a WordPress theme via FTP.

After making sure that theme you want is installed on your website, you can now go ahead and change the theme via phpMyAdmin.

Step 01. you need to go to cPanel dashboard of your WordPress hosting account. Next, scroll down to the databases section and then click on phpMyAdmin.

Once you are in phpMyAdmin, you’ll see a list of databases on the left side of the screen. Simply click on the database that you are using for your WordPress site.

If you are not using cPanel but using phpMyadmin, go to yourdomain.com/phpmyadmin or yourip/phpmyadmin.

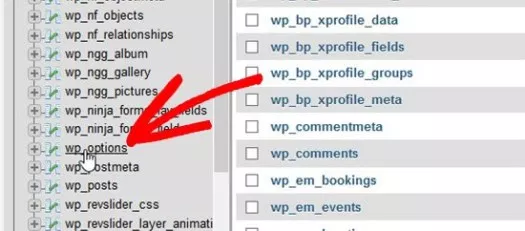
Step 02. it will show you the list of tables in this database. You need to click on the ‘wp_options’ table to open it.

Note: By default, WordPress database tables use wp_ as the prefix for table names. However, it is possible to see a different database prefix if you or an administrator on your site had changed the WordPress database prefix.

select table from database

Step 03. Upon opening the table, you need to scroll down and locate ‘template’ and ‘stylesheet’ rows. Next, click on the Edit button next to the template row.

Step 04. This will open the row editor where you need to change the value for the option_value field to the theme you want to use. It is usually the same as the folder name in /wp-content/themes/ folder.

Step 05. After that click on the ‘Go’ button below to save your changes. Now, repeat the process for stylesheet row as well.

Once you have saved your changes, you can go to your website to see the new theme in action.

Congratulations! You have changed your WordPress theme via phpMyAdmin successfully. You may also want to see how to install phpMyAdmin.