How to Scan & Detect Malware in WordPress Themes – Easy Guide

scan and detect malware in wordpress theme

WordPress Themes are ready-made layouts created for WordPress — one of the most popular content management systems used for blogging, news websites and e-commerce projects. These templates are custom solutions for building an online resource from scratch or easily revamping an existing one.

Need To Make Sure That WordPress Theme Is Free From Malware? In this blog, we will help you scan your WordPress website theme for hidden malware or malicious code along-with best plugins you can use to scan your WordPress theme for potentially malicious code.

What is A Nulled WordPress Theme?

Nulled means Cracked or Hacked Version of a WordPress Theme. Basically,its a Premium WordPress Theme which is available for free (or illegally). These themes mostly come up with the back door hack for entering your website which loosens the website security and makes it prone to hacking.

Why WordPress Themes Are infected By Malware?

WordPress is featuring premium themes in its latest versions which are highly secure and malware insusceptible. Unfortunately when it comes to free themes, they are the most easily targeted preys for web attackers. The reason behind is that downloading a free theme from an unknown source or pirated websites may affect the security of your websites.

Such themes are poorly coded and lead to create unauthorized access to websites through loopholes. An unknown source of theme may be created by a hacker who tweaks it for their own profits. There are several reasons behind the exploitation of such themes.

Some of the common reasons are:

  • ​To get a back link from the blog posts on your websites
  • For redirecting your website to spam links
  • To add adverts.
  • To create a backdoor to your website

Look For Presence Of Malicious Code in WordPress Themes

Before discussing the steps to How to Detect Malicious Code or Malware on WordPress Themes, let us hammer out the locations where the malicious code is generally inserted by the hackers. The two common locations on target of smart hackers are the footer.php file and the style.css file.

Apart from this, you should manually check all the files within the theme. The WordPress themes might include some basic files for its functioning. But, if you find additional files that are called without the .php function then your themes are injected with serious malware.

Signs that suspect your WordPress themes are infected with malicious content:

  1. Google Warning Messages: Your website will be displayed with a malware warning message with either an entirely blocked website or partially blocked website.
  2. WordPress White Screen of Death: When your website suddenly starts showing white screen of death, it means that your site is probably exploited with malware infection.
  1. .htaccess pirate: If your .htaccess file is corrupted, it keep redirecting your website to other spam links which you can’t understand.
  2. Popups: When there are several popup ads running on your website start redirecting towards malicious links or other popups if you tend to close, this means your website is a victim of malware exploitation.

Detect Malicious code in  WordPress Themes?

Performing a Google search is a good way to check if there’s a malicious code in a particular WordPress theme. If someone out there has found a malicious code in a theme they got from the same location, such a person must have sounded out a warning to others.

Initial step in discovering hidden malware or malicious code in your WordPress theme is to check if the files contained in the theme are all required

  • Scan WordPress Theme before Installation

The most frequent technique to detect malware on your installed themes is to scan your entire website. This will scan all the files on your website. You can do so in several ways:

  • Ask Google:

Google Safe Browsing is a tool that alerts the webmasters when their websites are compromised with unsafe content or malicious files.  You can use this tool to diagnose your website for surreptitious malware and resolve it.

https://www.google.com/safebrowsing/diagnostic?site=

Insert your website url in the above mentioned link and press ENTER. For example –

https://www.google.com/safebrowsing/diagnostic?site=example.com

When you press ENTER, it will provide you the Safe Browsing status of the website with the unsafe content found on your website.

  • Search Files

Make a cross file search for eval. If you find this one then the author (or someone who ripped it) has something to hide. Read more about eval(base64_decode hack.


  • Tools & Scanners to Detect Malware and Malicious in WordPress Themes

You can also use free malware scanners for scanning your website. A short overview of such scanners:

  • PCRisk: It is a free online tool that can be utilized to can any website for malicious codes, vulnerability exploits, infected files and other suspicious activities.
  • SiteGuarding.Com: Another popular online tool to check your website for malware and security issues.
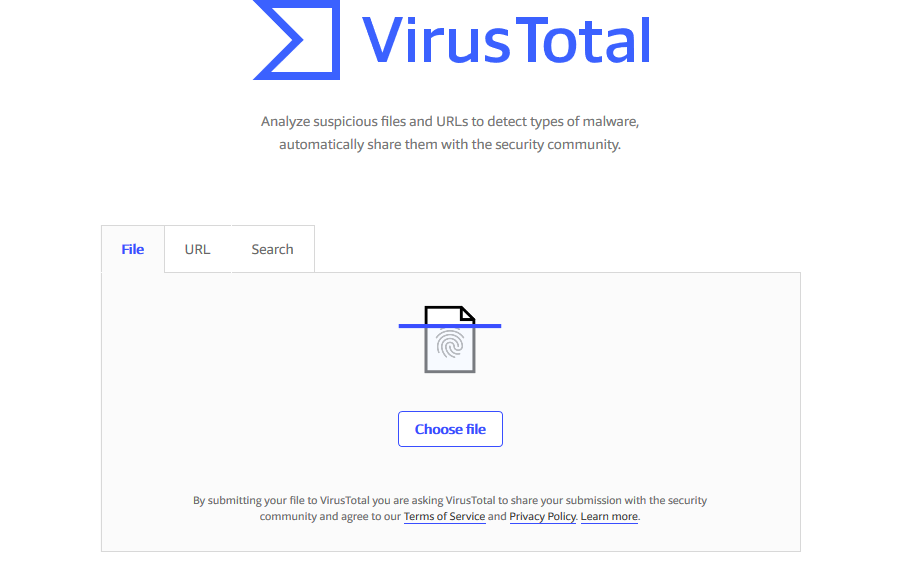
  • After downloading the plugin or theme, The first thing you should do is to check for virus, trojans and other worms using Virus Total.

scan wp theme with virus total

  • WP Hacked Help: A free online wordpress malware scanner tool. You can scan your website for potential malware with this tool.


WordPress Theme Checker Plugins To Detect Malicious Code

Sometimes people download free themes from anywhere other the author’s page. The themes installed this way are poorly coded which makes it easier for hackers to insert back links to their websites.

Another effective way to deal with malicious code disguised in your free WordPress themes is to install best plugins that are designed for this purpose only.


​1. Theme Authenticity Checker (TAC)

tac plugin for wp theme check

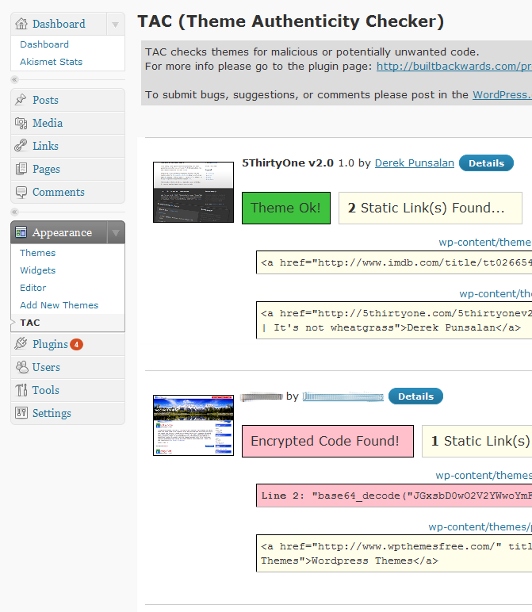
TAC scans the source files of all the WordPress themes installed on your website. It takes you to the particular theme, the line number and a small piece of the distrusted code​ where the suspected malware is found. You can analyze the code and hence, easily​ remove the malware. To download this plugin, click here.

2. Quttera Web Malware Scanner​

quttera web malware scanner for wordpress

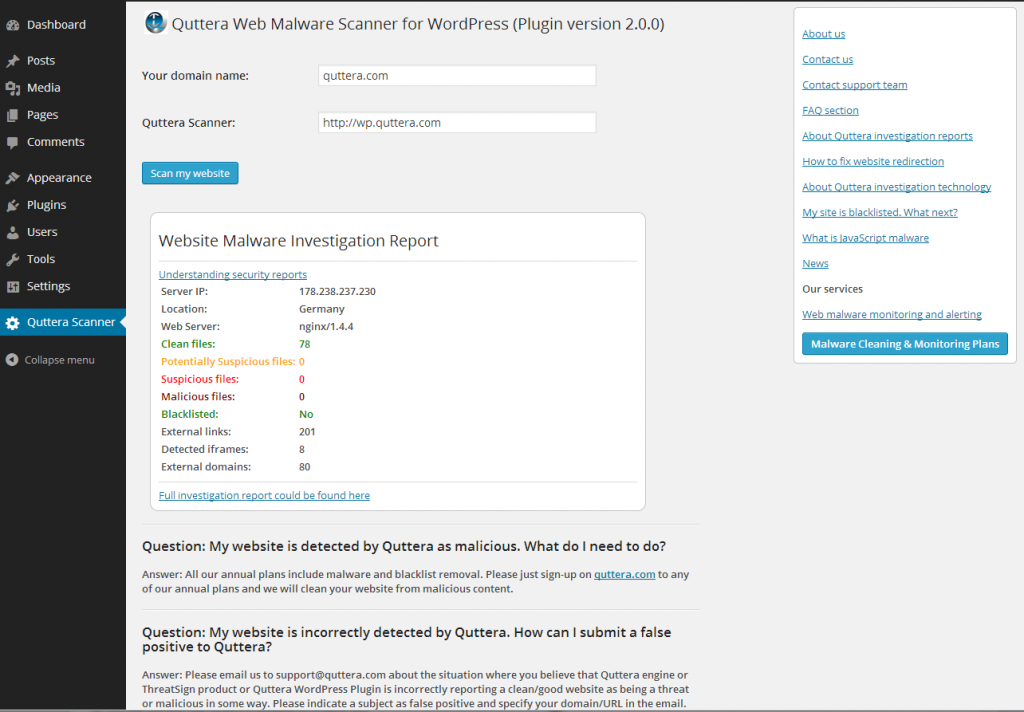
This plugin is specialised in detecting hidden malware, viruses malicious codes, spam links, blacklisting status and much more. So, you can use this tool to scan your website for free by installing this plugin. Quttera​ offers different malware cleanup plans for websites. To check these plans, you can visit the website.

​3. BulletProof Security:

BulletProof Security is one of the best wordpress security plugins of 2018, it comes with a number of salient features for WordPress security protection. This plugin has MS Malware scanner to scan each and every file present on your WordPress website. It also offers .htaccess Website Security Protection (Firewalls). Other features are login security. database backups, anti-spam and regular monitoring of website for website protection.

4. Anti-Malware​:

gotmls plugin for wp theme

Anti Malware is one of he popular plugins used to scan and detect malware from WordPress websites. Free version of WordPress offers detection of malware whereas you can also choose premium version for additional features. A premium Anti Malware plugin checks the website for brute-force attacks and DDos Attacks. You can get it here for free.

Best Tips To Make Sure That WordPress Theme is Safe.

  • Never download any free theme from other than author’s website. It can make your website vulnerable.
  • Scan your website regularly with reputable WP scanner.  It checks your website for WordPress infections like Malicious Redirects, Malware Injections, Backdoors, Google Blacklisting. We start cleaning up your website once your request is submitted.
  • Use Tools to Check Your Themes such as Themecheck.infoTheme Check & Exploit Scanner
  • Keep backup of your website at hand.
  • Make sure you have a highly secure hosting service.
  • Always use the latest version of WordPress.
  • Keep the plugins and themes up-to-date with the latest versions.

WordPress Editor Keyboard Shortcuts

In the WordPress visual editor you can use a combination of keys to do things that normally need a mouse, trackpad or other input device. Rather than reaching for your mouse to click on the toolbar, you can use the following keyboard shortcuts:

Windows and Linux use “Ctrl + letter”, Mac uses “Command (⌘) + letter”.

Contents

1 Editor Shortcuts
1.1 Ctrl + key
1.2 Alt + Shift + key
1.3 Formatting Shortcuts
2 Keyboard Shortcuts for Comments
2.1 Activating Keyboard Shortcuts
2.2 The Meaning of Selected
2.3 Using Keyboard Shortcuts to Navigate Comments
2.4 Using Keyboard Shortcuts to Perform Actions on Comments
2.5 Bulk Actions

Ctrl + key

Letter Action
c Copy
v Paste
a Select all
x Cut
z Undo
y Redo
b Bold
i Italic
u Underline
k Insert/edit link

Alt + Shift + key

The following shortcuts use a different key combination: Windows/Linux: “Alt + Shift (⇧) + letter”. Mac: “Ctrl + Option (alt ⌥) + letter”. (Macs running any WordPress version below 4.2 use “Alt + Shift (⇧) + letter”).

Letter Action
n Check Spelling (This requires a plugin.)
l Align Left
j Justify Text
c Align Center
d Strikethrough
r Align Right
u • List
a Insert link
o 1. List
s Remove link
q Quote
m Insert Image
w Distraction Free Writing mode
t Insert More Tag
p Insert Page Break tag
h Help
x Add/remove code tag
1 Heading 1
2 Heading 2
3 Heading 3
4 Heading 4
5 Heading 5
6 Heading 6
9 Address

Formatting Shortcuts

Formatting Shortcuts while using visual editor (Since Version 4.3)

Letter Action
* Start an unordered list
Start an unordered list
1. Start an ordered list
1) Start an ordered list
## H2
### H3
#### H4
##### H5
###### H6
> transform text into blockquote
horizontal line
`..` transform text into code block

Keyboard Shortcuts for Comments

Beginning with WordPress Version 2.7, the ability to use keyboard shortcuts to browse and moderate comments was introduced. These keyboard shortcuts are designed to save time by allowing you to rapidly navigate and perform actions on comments. If your blog gets a large number of comments, you will find these shortcuts especially useful.

Activating Keyboard Shortcuts

Keyboard shortcuts are enabled on a per-user setting, and can be turned on by visiting the Profile panel in Administration > Users > Your Profile. Check the Keyboard Shortcuts checkbox to enable keyboard shortcuts for comment moderation.

Please note, the keyboard shortcuts are designed to use both hands, simultaneously, on a QWERTY style keyboard layout.

The Meaning of Selected

The keyboard shortcuts are used for navigation and for actions. For any action to affect a comment, that comment must be first selected. The comment that is considered selected is indicated with a light-blue background. By default, no comment is selected, so, you will need to press either the letter j key, or letter k key, to start navigating.

Using Keyboard Shortcuts to Navigate Comments

Navigating comments is accomplished with the j and k keys. When you first visit the Comments page, no comments is selected, so, first press the letter j, or the letter k, to select the first comment. After that, just press the letter j to move the select to the next comment.

  • Pressing j moves the current selection (light-blue background) down.
  • Pressing k moves the current selection (light-blue background) up.

Note that if you come to the bottom of a page of comments and press j again, you will be taken to the next page and the first comment of that next page will be selected. Likewise, pressing k at the top of a comment page will zoom you to the previous page, selecting the comment at the bottom of that previous page. This makes it very easy to navigate through a long list of comments to perform the necessary actions.

Using Keyboard Shortcuts to Perform Actions on Comments

For one of these actions to affect a comment, make sure the comment is first selected (see above).

  • Pressing a approves the currently selected comment.
  • Pressing s marks the current comment as spam.
  • Pressing d moves the comment to the trash (WordPress 2.9) or deletes the current comment.
  • Pressing z restores the current comment from the trash or activates the Undo when that row is selected.
  • Pressing u unapproves the currently selected comment, placing it back into moderation.
  • Pressing r initiates an inline reply to the current comment (you can press Esc to cancel the reply).
  • Pressing q activates “Quick Edit” which allows for rapid inline editing of the current comment.
  • Pressing e navigates to the edit screen for the current comment.

Bulk Actions

You can also perform an action on multiple comments at once. First, you’ll need to select the comments for the bulk action, using the x key to check the checkbox for the currently selected comment. Shift-x can be used to toggle the checkboxes, inverting their state. Once you have some comments checked:

  • Pressing Shift-a approves the checked comments.
  • Pressing Shift-s marks the checked comments as spam.
  • Pressing Shift-d deletes the checked comments.
  • Pressing Shift-u unapproves the checked comments.
  • Pressing Shift-t moves the checked comments to the Trash.
  • Pressing Shift-z restores the checked comments from the Trash.

How to set correct file permission for your WordPress website

file permission wordpress

There a number of ways to accomplish this change. There are also a number of variations to these permissions that include changing them to be more restrictive. These however are the default recommendations. Check with your host before making permissions changes as they can have adverse affects on the performance and availability of your site.

Avoid having any file or directory set to 777. The default permission scheme should be:

Folders – 750
Files – 640

understanding file permission in wp

When you setup WP you (the webserver) may need write access to the files. So the access rights may need to be loose.

chown www-data:www-data  -R * # Let Apache be owner
find . -type d -exec chmod 755 {} \;  # Change directory permissions rwxr-xr-x
find . -type f -exec chmod 644 {} \;  # Change file permissions rw-r--r--

After the setup you should tighten the access rights, according to Hardening WordPress all files except for wp-content should be writable by your user account only. wp-content must be writable by www-data too.


chown :  -R * # Let your useraccount be owner
chown www-data:www-data wp-content # Let apache be owner of wp-content

Maybe you want to change the contents in wp-content later on. In this case you could

  • Temporarily change to the user to www-data with su,
  • Give wp-content group write access 775 and join the group www-data or
  • Give your user the access rights to the folder using ACLs.

Whatever you do, make sure the files have rw permissions for www-data.

For a detailed explanation of unix file permissions, see File system permissions – on Wikipedia

How to Install Cinnamon on Ubuntu 16.04

Install Cinnamon on Ubuntu 16

Cinnamon is an open source project that provides users with a full featured desktop environment for GNU/Linux operating systems. It is a fork of the GNOME Shell user interface distributed with the GNOME project. It has been designed from the ground up to provide users with a traditional, yet advanced and modern graphical session for their Linux-based operating systems. It’s usually deployed on the Linux Mint distribution.

This article assumes you have at least basic knowledge of linux, know how to use the shell, and most importantly, you host your site on your own VPS. The installation is quite simple and assumes you are running in the root account, if not you may need to add ‘sudo’ to the commands to get root privileges. I will show you through the step by step installation Cinnamon on a Ubuntu 16.04 server.

Install Cinnamon on Ubuntu 16.04

Step 1. First make sure that all your system packages are up-to-date by running these following apt-get commands in the terminal.

sudo apt-get update
sudo apt-get upgrade

Step 2. Installing Cinnamon.

First add the community PPA and this PPA can be used only by Xenial users. And please make sure that idr00t doesn’t provide any guarantee and you understand that you install at your own risk. But the following community PPA has been un-officially given the go ahead by Moorkai, one of the developers behind the popular Cinnamon PPA:

sudo add-apt-repository ppa:embrosyn/cinnamon

Now, type the following command to finally install Cinnamon:

sudo apt-get install cinnamon

To check the installed version of Cinnamon, please issue the below command on your terminal to check whether Cinnamon is installed or not:

cinnamon --version

Step 3. Accessing Cinnamon.

If everything goes OK, log out and select log in with Cinnamon session or Cinnamon (Software Rendering) session if you want it use software rendering to do more of the graphical work):
install-cinnamon
Congratulation’s! You have successfully installed Cinnamon. Thanks for using this tutorial for installing Cinnamon on your Ubuntu 16.04 system. For additional help or useful information, we recommend you to check the official Cinnamon web site.

Easy Guide To Install Skype on Ubuntu 16.04

Install Skype on Ubuntu 16

Skype is a very popular communication software. Skype can be used for audio and video communication as well as text. You can also call land line with small cost via skype. Skype also offers some rich features like voice mail, video chat, instant messaging, call forwarding, conference calling and many more.

Install Skype on Ubuntu 16.04

This article assumes you have at least basic knowledge of linux, know how to use the shell, and most importantly, you host your site on your own VPS. The installation is quite simple and assumes you are running in the root account, if not you may need to add ‘sudo’ to the commands to get root privileges. I will show you through the step by step installation Skype on a Ubuntu 16.04 (Xenial Xerus) server.

Step 1. First, you need to enable Canonical partner repository on your system with the below command.

sudo add-apt-repository "deb http://archive.canonical.com/ $(lsb_release -sc) partner"
sudo dpkg --add-architecture i386
sudo apt-get update

Step 2. Installing Skype.

If you have the partner repositories enabled you can simply install with the below command:

sudo apt-get install skype

Step 3. Accessing Skype.

Skype should now be installed on you Ubuntu 16.04 system. Use Ubuntu’s application menu to start Skype or start Skype directly from your terminal:

skype

Congratulation’s! You have successfully installed Skype. Thanks for using this tutorial for installing Skype on your CentOS 7 system. For additional help or useful information, we recommend you to check the official Skype web site.

How To Install WordPress with Docker on Ubuntu 16.04 LTS

Install WordPress with Docker on Ubuntu 16

Docker is an open-source project that automates the deployment of application inside the software container. The container allows the developer to package up all project resources such as libraries, dependencies, assets etc. Docker is written in Go Programming language and is developed by Dotcloud. It is basically a container engine which uses the Linux Kernel features like namespaces and control groups to create containers on top of an operating system and automates the application deployment on the container.

This article assumes you have at least basic knowledge of Linux, know how to use the shell, and most importantly, you host your site on your own VPS. The installation is quite simple and assumes you are running in the root account, if not you may need to add ‘sudo’ to the commands to get root privileges. I will show you through the step by step installation WordPress content management systems on an Ubuntu 16.04 Xenial Xerus server.

Install WordPress with Docker on Ubuntu 16.04 LTS

Step 1. First make sure that all your system packages are up-to-date by running these following apt-get commands in the terminal.

sudo apt-get update
sudo apt-get upgrade

Step 2. Installing Docker.

A Ubuntu 16.04 Docker server is required. If you do not have Docker installed, you can follow our guide here.

Step 3. Installing MariaDB Container.

Before installing WordPress with Docker you will need to have somewhere to store the data. MariaDB is a community-developed relational database management system and a drop-in replacement for MySQL:

mkdir ~/wordpress && cd ~/wordpress

Next we create the MariaDB container with the command:

docker run -e MYSQL_ROOT_PASSWORD=<password> -e MYSQL_DATABASE=wordpress --name wordpressdb -v "$PWD/database":/var/lib/mysql -d mariadb:latest

If Docker was successful at creating the container, you should see a code at the end of the output similar to the example below:

...
Status: Downloaded newer image for mariadb:latest
23df0ec2e48beb1fb8704ba612e9eb083f4193BMWe4611102bc91232955cccc54

You can confirm that the MariaDB container is running by using the following command:

docker ps

Step 4. Installing WordPress Container.

WordPress is made officially available on Docker Hub, pull the image using with the command below:

docker pull wordpress

Run the command below while replacing the and as appropriate to your cloud server:

docker run -e WORDPRESS_DB_PASSWORD=<password> --name wordpress --link wordpressdb:mysql -p <server public IP>:80:80 -v "$PWD/html":/var/www/html -d wordpress

Finally step, restart Docker and the database container, also make sure no other service is already bound to the port 80:

sudo service docker restart
docker start wordpressdb

*Note: Full command-line documentation is also available over at Docker support page.

Step 5. Accessing WordPress Installation.

WordPress will be available on HTTP port 80 by default. Open your favorite browser and navigate to http://yourdomain.com/wp-admin/install.php or http://server-ip/wp-admin/install.php and complete the required the steps to finish the installation. If you are using a firewall, please open port 80 to enable access to the control panel.

Congratulation’s! You have successfully installed WordPress with Docker. Thanks for using this tutorial for installing WordPress with Docker on your Ubuntu 16.04. For additional help or useful information, we recommend you to check the official Docker web site.

You Might Also Like: How To Install WordPress with OpenLiteSpeed on Ubuntu 16.04 LTS

How To Install WordPress with OpenLiteSpeed on Ubuntu 16.04 LTS

Install WordPress with OpenLiteSpeed on Ubuntu

WordPress is an online, open source website creation tool written in PHP. But in non-geek speak, it’s probably the easiest and most powerful blogging and website content management system (or CMS) in existence today.

This article assumes you have at least basic knowledge of Linux, know how to use the shell, and most importantly, you host your site on your own VPS. The installation is quite simple and assumes you are running in the root account, if not you may need to add ‘sudo’ to the commands to get root privileges. I will show you through the step by step installation WordPress content management systems on an Ubuntu 16.04 Xenial Xerus server.
Install WordPress with OpenLiteSpeed on Ubuntu 16.04 LTS

Step 1. First make sure that all your system packages are up-to-date by running these following apt-get commands in the terminal.

sudo apt-get update
sudo apt-get upgrade

Step 2. Installing OpenLiteSpeed.

First, download the OpenLiteSpeed 1-click script on your server:

wget https://raw.githubusercontent.com/litespeedtech/ols1clk/master/ols1clk.sh

Make the file executable with the following command:

chmod +x ols1clk.sh

Step 3. Install PHP 7 on OpenLiteSpeed.

To install PHP 7, run the following command:

./ols1clk.sh --lsphp 70

When the installation is complete, configure an administrative username and password for the OpenLiteSpeed’s web interface by running the following command:

/usr/local/lsws/admin/misc/admpass.sh

Step 4. Installing MariaDB.

To install MariaDB, run the following command:

apt-get install -y mariadb-server

Configuring MariaDB for WordPress.

By default, MariaDB is not hardened. You can secure MariaDB using the mysql_secure_installation script. you should read and below each steps carefully which will set root password, remove anonymous users, disallow remote root login, and remove the test database and access to secure MariaDB:

mysql_secure_installation

Configure it like this:

- Set root password? [Y/n] y
- Remove anonymous users? [Y/n] y
- Disallow root login remotely? [Y/n] y
- Remove test database and access to it? [Y/n] y
- Reload privilege tables now? [Y/n] y

Next we will need to log in to the MariaDB console and create a database for the WordPress. Run the following command:

mysql -u root -p

This will prompt you for a password, so enter your MariaDB root password and hit Enter. Once you are logged in to your database server you need to create a database for WordPress installation:

CREATE DATABASE wordpress character set utf8 collate utf8_bin;
GRANT ALL PRIVILEGES on wordpress.* to 'wpuser'@'localhost' identified by 'your_password';
FLUSH PRIVILEGES;

Step 5. Installing WordPress.

First thing to do is to go to WordPress’s download page and download the latest stable version of WordPress, At the moment of writing this article it is version 4.8.1:

cd /usr/local/lsws/example
wget http://wordpress.org/latest.zip

Unpack the WordPress archive to the document root directory on your server:

unzip latest.zip

We will need to change some folders permissions:

chown -R nobody:nogroup /usr/local/lsws/example/wordpress/

Configuring WordPress

In this step we will configure the main configuration file of WordPress, where we need to configure it’s basic parameters so that it can be connected with the database and user:

cd wordpress
mv wp-config-sample.php wp-config.php

Now open it using any of your favourite editor, to make any changes in the WordPress configuration file:

nano wp-config.php

Here are the values that we need to update according to our previous database and user’s setup:

// ** MySQL settings - You can get this info from your web host ** //
/** The name of the database for WordPress */
define('DB_NAME', 'wordpress');

/** MySQL database username */
define('DB_USER', 'wpuser');

/** MySQL database password */
define('DB_PASSWORD', 'your_password');

/** MySQL hostname */
define('DB_HOST', 'localhost');

Step 6. Configure OpenLiteSpeed.

First, modifying the default virtual host that is already present in the OpenLiteSpeed configuration so that we can use it for our WordPress installation. First, login to the OpenLiteSpeed WebAdmin panel at https://your-ip-address:7080.

Once logged into the OLS WebAdmin Pick “Virtual Hosts” in the menu bar and click on the “View” link:

This will let you edit the configuration of your virtual server.

First, we will change the Document origin of this Virtual Host to tip into our WordPress directory.

Click on the “General” tab to the virtual host and then click on the “Edit” button to the “General” table:

In the “Document Root” field, change the value from $VH_ROOT/html/ to $VH_ROOT/wordpress/:

Click “Save” when you’re finished.

Then, We’ll allow index.php files so They Can be used to Process requests that are not handled by static documents. This will allow the primary logic of WordPress to operate properly.

Click the “Edit” button for the “Index Files” table:

From the field for valid “Index Files”, add index.php before index.html to let PHP index files to take precedence:

Click “Save” when you are finished.

Configure WordPress Rewrites to Enable Permalink Support:

Next, we will install the compilation instructions in order that we could use permalinks inside our WordPress installation.

To do so, click on the “Rewrite” tab to the virtual host. From the Second screen, click on the “Edit” button to the “Rewrite Control” table:

Select “Yes” under the “Enable Rewrite” alternative:

Click “Save” to return to the primary display menu. Click on the “Edit” button for the “Rewrite Rules” table:

Remove the rules that are currently present and add the following rules to enable rewrites for WordPress:

Click on the “Save” button to execute your new rewrite rules.

The second thing that we have to do would be to change the default listening port from 8088 to 80.

Select “Listeners” in the menu bar and click on the “View” link:

Next, click on the “Edit” button for the “Address Settings” table:

In the Port area, change the port number from 8088 to 80:

Click “Save” when you are finished.

Restart the Server to Implement the Change

With All the aforementioned configuration out of the way, we can now Gently restart the OpenLiteSpeed host to enable our modifications.

Step 7. Accessing WordPress.

WordPress will be available on HTTP port 80 by default. Open your favorite browser and navigate to http://yourdomain.com or http://server-ip/ and complete the required the steps to finish the installation.

Congratulation’s! You have successfully installed WordPress with Docker. Thanks for using this tutorial for installing WordPress with OpenLiteSpeed on your Ubuntu 16.04. For additional help or useful information, we recommend you to check the official OpenLiteSpeed web site.

You Might Also Like: How To Install WordPress with Docker on Ubuntu 16.04 LTS